Matanikau River (Guadalcanal)

Matanikau River

scenario_Matanikau_start

The battle near the Matanikau River in 1942 was a key engagement during the Guadalcanal Campaign in the Pacific Theater of World War II. It involved several clashes between the United States Marines and Imperial Japanese forces as the Marines sought to secure their perimeter around Henderson Field, a critical airstrip on Guadalcanal.

Listen up. September to November ’42, the Matanikau was the hinge of Guadalcanal. The enemy tried to shove our Marines into the sea; our answer was simple—cross the river, hit hard, and keep hitting. We used infantry up front, artillery and naval guns on call, and fighters overhead to hammer every position that dared resist. Result: their strength bled away, our foothold stiffened, and the initiative swung to us. Lesson—seize the crossing, smash the flank, keep air on the target, and don’t stop until the island is yours.

~~ General Howitzer

5 VP’s

Card Balance:

Allies – 6

Japanese – 6

Complexity:

3

Conditions

Location:

Guadalcanal

Year:

1942

Theater:

Pacific Theater

Campaign

Summary:

This scenario is pretty much an infantry battle with a bit of artillery support.

Objectives:

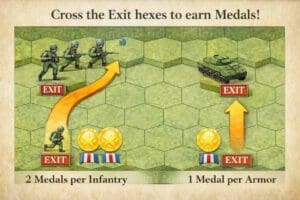
Five VP’s, plus Exit hexes
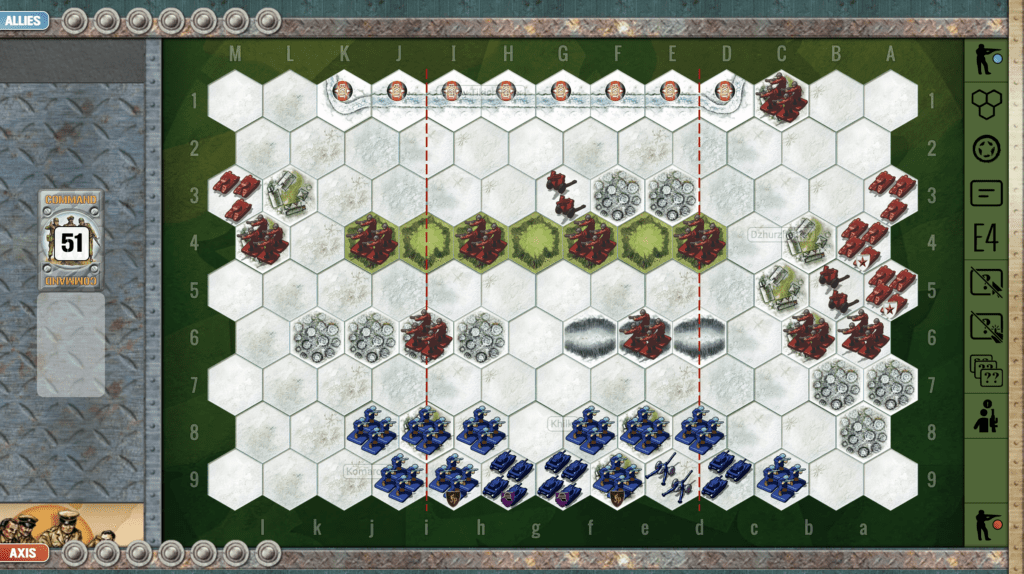
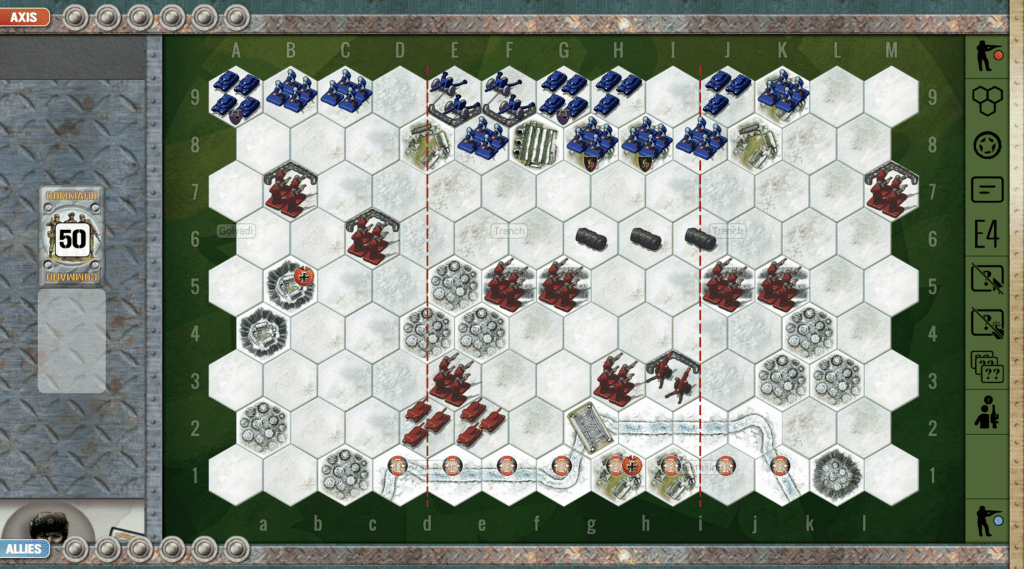
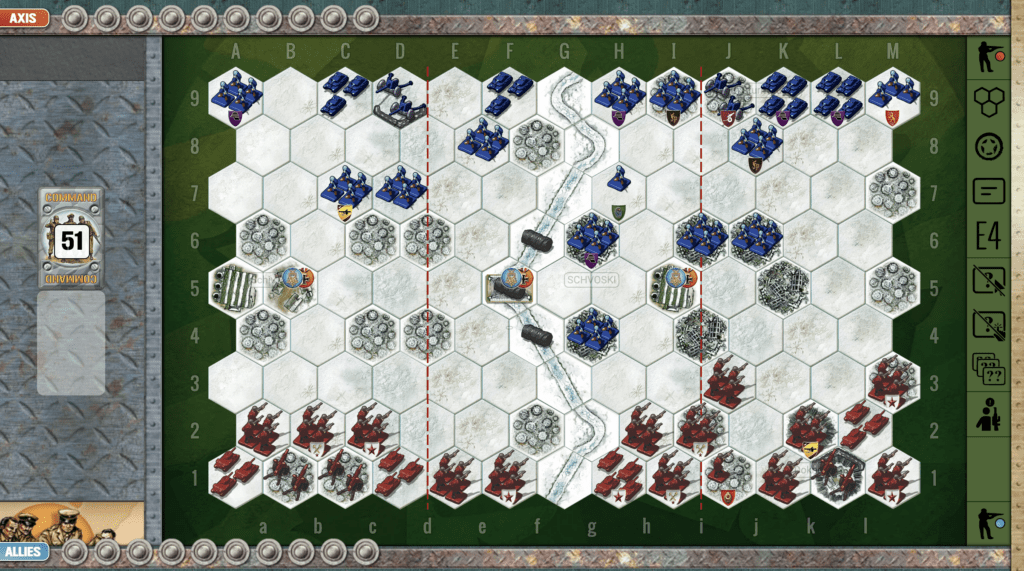
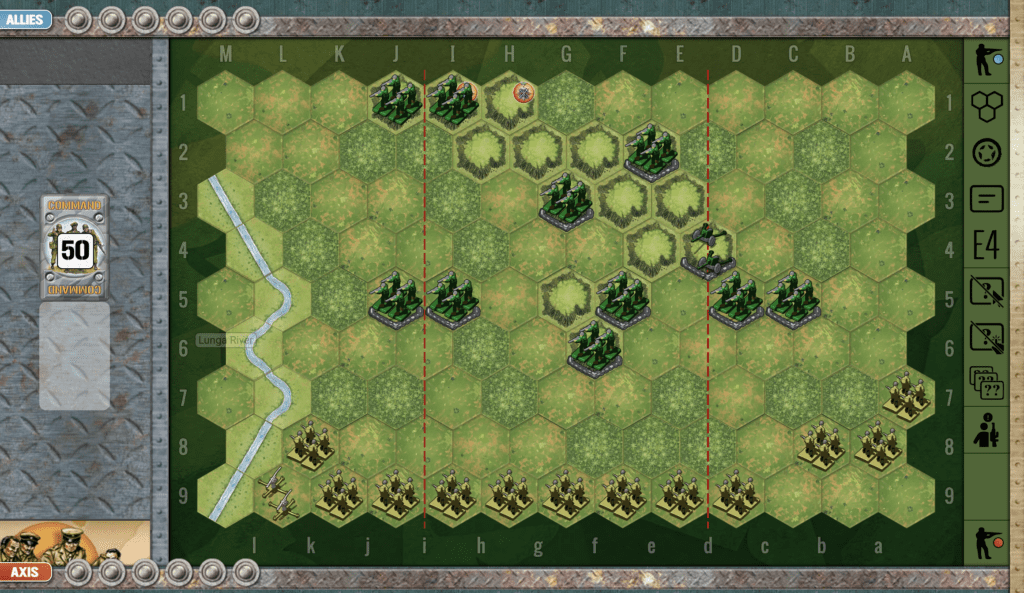
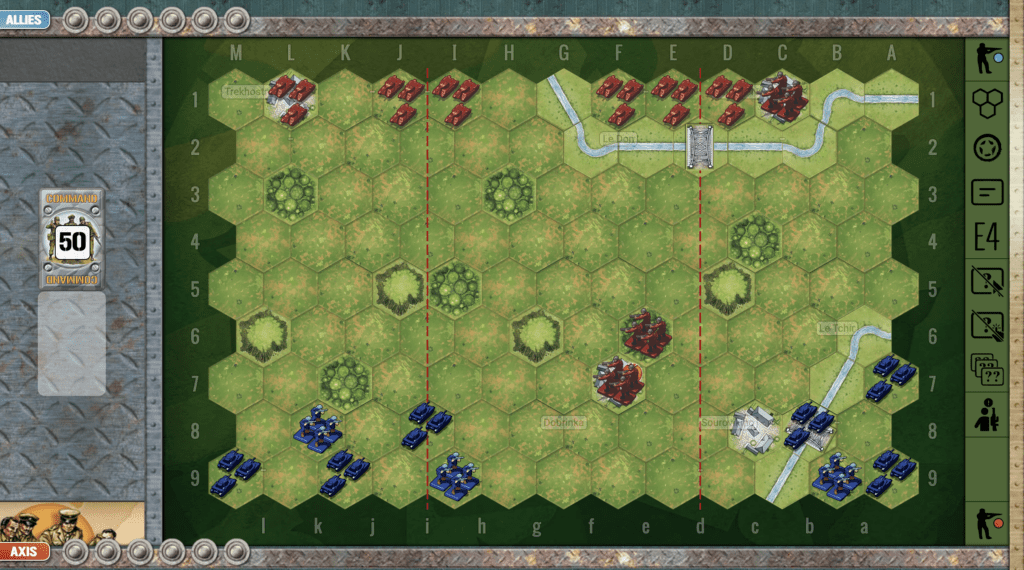
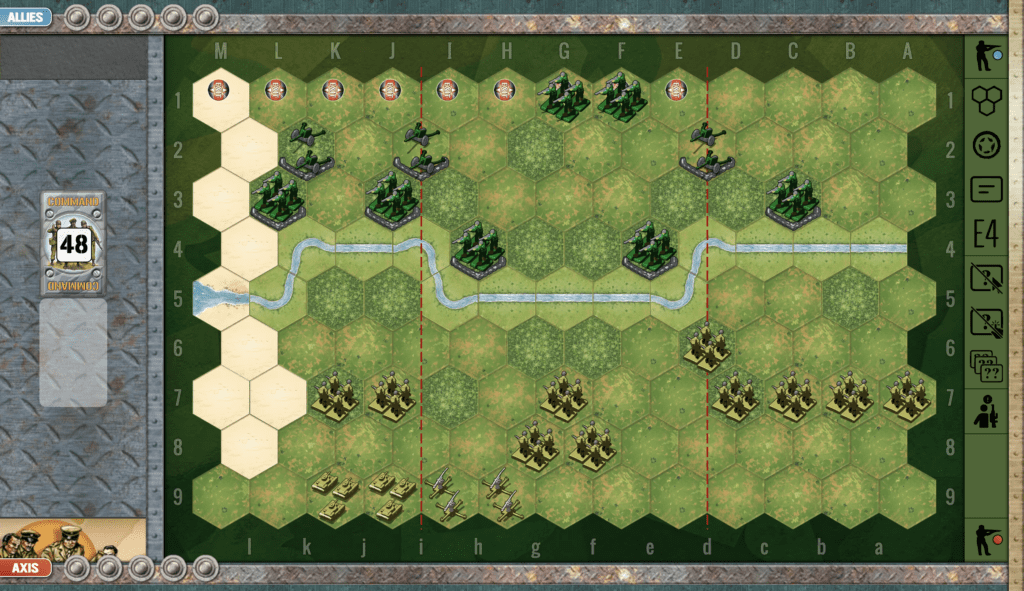
Battlefield:

The Matanikau River cuts across the battlefield and presents a challenge for both forces as they try to maneuver and attack one another. And there are series of beach hexes along one flank which provides a rapid transit path for attacks.

Troops:

Allies – Infantry 7, Artillery 3

Axis – 10 Infantry, 2 Armor, 2 Artillery

Allied Strategy:

1.  Your forces are outnumbered by the Japanese, so unless you have the cards for it, stay behind the sandbags.

2.  You have three artillery, so use them whenever you can.

3.  Protect the backrow from any Japanese forces that may try to escape.

4.  Remember that as Marines, you get the ‘Gung Ho’ advantage, so every section card allows you to move one extra unit than the card states. Remember that advantage, and use it – you will need it.

Axis Strategy:

1.  You have a strong presence on the right flank. If you get the cards, you should push forward and take control.

2.  If you are able to advance all the way across the battlefield, you may be able to help some troops escape.

3.  You have armor and the Allies do not, so move them in and make them feel your firepower!  Armor are good candidates for escape across the back line. So if you move in close, you may be able to attack and then escape.

4.  You also have two artillery, so if you can move them forward,  you will be able to throw 2D attacks across the river.

Battle Reports (percentage of Allied victories):

67%

19
BR - Matankau

Author:

Days of Wonder

Link:

Breakout to Lisyanka

Breakout to Lisyanka

The Breakout to Lisyanka was a key engagement during World War II, fought in early 1944 on the Eastern Front. The battle saw Soviet forces encircling a large German force. The Germans attempted to break out from the encirclement to link up with their reinforcements near Lisyanka, with fierce fighting as they sought to escape Soviet attacks.

While some German units managed to break through, the escape was costly, with heavy losses in men and equipment. The Soviet success significantly weakened German capabilities in Ukraine, contributing to the broader Soviet advance in the region. The battle is often highlighted as a key moment in the Soviet efforts to liberate occupied Ukraine.

General Howizer summarizes it this way:

The Breakout to Lisyanka was a blood-soaked slugfest where the Soviets slammed the trap shut, and while some of the doomed Germans clawed their way out, they left behind a graveyard of men and machines—crippling their grip on Ukraine and fueling the Red steamroller westward.

7 VP’s

Card Balance:

Allies – 4

Axis – 5

Complexity:

3

Conditions:

Winter

Location:

Ukraine

Year:

1944

Theater:

Eastern Front

Campaign

Codename

Summary:

The goal for the Axis is to breakthrough, as the name implies, over the hilly ridge and across the river exits. For Allies, the goal is to of course prevent this. The forces begin in a non-symmetrical dispersion, which makes for a fun scenario.

Objectives:

7 VP’s, plus the Axis have Exit Medals they can try for.

Battlefield:

There is a ridge of hills going across the center, plus some ravines to provide a bit of cover to infantry.

Troops:

Allies – 10 Infantry, 4 Armor, 2 Artillery

Axis – 9 Infantry, 3 Armor, 1 Artillery

Allied Strategy:

1.  As the Allies you must defend against three objective medal locations, the two-hex towns of Golyadi, and Nekrasino, each worth one VP, there is also the frozen river exits along the bottom of the battlefield. Your objectives however, are simply to destroy six enemy units. There are seven enemy infantry units to target and some armor and artillery, if they give you the chance.

2. Be aware that the Axis have Combat Engineers who can attack your infantry in the trenches at close range – with no combat restrictions. So make it one of your early goals to finish them off.

3. Make good use of your artillery in the middle section to defend your troops in the trenches.

Axis Strategy:

1.  Attack with your frontline infantry right away, to create some movement space for your armor, and also to neutralize the nearby enemy who will quickly attack from close range.

2. Try to avoid your right flank which is packed with enemy forces ready to pounce with both armor, infantry, and artillery. You may have better luck on your left flank which has less enemy artillery power. 

3. You can also quickly overwhelm the enemy infantry at i6, to provide a proving ground for your forces to prepare for the breakout.

4.  Remember that if you get any of your Infantry across the Exit hexes, you will earn two! Medals per Infantry (and one for Armor).  So if you get a Behind Enemy Lines, this will provide you with the distance to move in, attack the enemy, and then quickly escape out the back row for an easy two medals.

Classic Battle Reports:

(percentage of Allied victories)

52%

Battle Reports:
18
BR - Lisyanka

Author:

Link:

Breakout at Klin

Breakout at Klin

  • When & Where:
    December 1941, near the town of Klin, northwest of Moscow, during the Soviet counteroffensive in the Battle of Moscow.

  • Context:
    After months of German advances toward Moscow, Soviet forces launched a major counterattack. German troops, particularly from Army Group Center, found themselves overextended and at risk of encirclement near Klin.

  • The Battle:
    Soviet forces attacked from multiple directions, threatening to trap German units in the Klin salient. The Germans, under pressure and facing severe winter conditions, conducted a fighting withdrawal, breaking out of the encirclement and retreating westward.

  • Outcome:
    The Soviet Red Army recaptured Klin, dealing a blow to German morale and momentum. The breakout marked a turning point in the Moscow campaign, with German forces now on the defensive for the first time in the war.

Lessons from General Howitzer:

“The Breakout at Klin wasn’t just a German retreat—it was the moment the Red Army showed the world it could counterpunch. And it was the first time the German war machine started to cough and stall. Learn from it, gentlemen: never overreach, never underprepare, and never, ever give your enemy a second chance to swing.

6 VP’s

Card Balance:

Allies – 3

Axis – 6

Complexity:

3

Conditions:

Winter

Location:

Russia

Year:

1941

Theater:

Eastern Front

Campaign:

Battle of Moscow

Codename

Summary:
At the start, the Axis are line up mostly against the lower border, while the Russians have control of much of the board. The objective for the Axis is to either destroy the forces, or as the name implies breakout past them to the exit hexes at the top of the battlefield. If the Axis can effect rapid movement (and Blitz rules are in effect to help with this ) they can make it past the Russian troops blocking their path in excellent defensive positions, and achieve victory.

Objectives:
It is a long 6 VP game, fought at, often, close quarters, while they Axis seek two objectives, to destroy the enemy and to escape the enemy.

Battlefield:
This is a winter war with a mix of urban and countryside, making for an intersting battlefield deployment and field of play.

Troops:
The Axis –  7 infantry, 4 armor, 2 artillery.
The Russians –  9 infantry, 2 armor, 1 artillery.

Allies:

 1.  You are positioned very closely to the enemy  on your left flank, and in the center at the trenches.  Attack as much as you can before the enemy breaks out from their center section congestion.

2. You also have a well-placed center section artillery which you can use to decimate the enemy forces. Use it!

3. Your best opportunity for some significant kills is on your left flank.  You will need to get your armor up there to assist your forward infantry. But you need to do it quickly before they are wiped out by the nearby enemy.  And because of winter conditions, you can only move your armor two hex per turn, so don’t waste any time and get them moving!

Axis:

1. Axis, note that on your right flank the Russians are nearly on top of you, with a sandbagged infantry only two hexes away from your backwall, and another one three hexes away. Since you have two infantry hexes pressed against your back border, with no retreats, an early attack against you is going to result in several hits. If you can move on your right flank right away with a decisive attack, you can begin the breakout successfully.

2. The next immediate objective for the Axis forces is to get some mobility for your armored forces. Get them out from behind the town and factory hexes with which they begin the battle.

3. Note that you have two artillery units at your disposal in the center section. At the start of the battle, there are four enemy hexes within your full power two-hex attack. Use those artillery at every chance.

Class Battle Reports:

(percentage of Allied victories)

19%

20
BR - Klin

Author

URL

Braskir Offensive

Braskir Offensive

scenario_BraskirOffensive_start

Here is General Howitzer’s summary of this fictious battle:

The Braskir Offensive was a brutal winter clash between Axis and Allied forces fought amid snow-covered city ruins. The battlefield centered on three key objective territories, each representing vital control points.

The Allies began congested, bottled up in the eastern ruins, struggling to break out under heavy Axis fire. The Axis initially dominated the field, and using fortified positions to hammer any Allied advance.

Through grinding urban combat, flanking maneuvers, and coordinated assaults, the Allies sought to push past the chokepoints, seize the objectives, and turn the tide. The frozen, rubble-strewn city made every advance costly, turning the Braskir Offensive into a battle of attrition where each medal marked blood, grit, and survival.

~~ General Howitzer

VP’s

10

card

Card Balance:

Allies – 5

Axis – 4

Complexity:

4

Conditions:

Winter

winter

Context:

Fictional

Location:

The Baltics

Year:

1944

Summary:

Victory Points:

10, including some objective medals for the church, the Schiv, and the bridge.

Terrain:

There is a lot of complexity to this scenario, with city ruins, factory complexes, a navigable river, and forests. With 10 VP’s needed to win, each side must plan out a long, strategic campaign to degrade enemy forces until victory is achieved.

Troops:

Allies – 14 Infantry including 1 Sniper, 4 Armor, 3 Artillery

Axis – 13 Infantry including 1 Sniper, 4 Armor, 2 Artillery

medal allies

Allies:

1.  Your forces begin in a very congested configuration in the left and right corners. You need to get them mobile ASAP, to be prepared for the coming enemy attack.

 2.  The key to winning this battle is to soften the targets near the medal objectives, and then to position your infantry to take control of the targets in a final push. This will require you to save one card in reserve which allows for multi-sectional attacks, such as a Recon in Force, or Move Out!, or Direct from HQ.

medal axis

Axis:

1. The three Objective hexes in the center, can be quickly gained with some rapid infantry movements. Once gained the Allies will have to fight hard to take them from Axis control, resulting in many losses for them. This can start the Axis at as much as a 3 VP advantage from the first turn.

2. But do not take them too early. If you do not have the support forces around you, any advance forces that grab Objective hexes will get pummeled. This scenario is really about bringing all of your forces to bear upon your attack objectives.

15
BR - Braskir

Author.

URL

Bloody Ridge

Bloody Ridge

scenario_BloodyRidge_start

September 1942—Guadalcanal. The place? A godforsaken jungle. The mission? Hold Henderson Field—or lose the whole damn island.

The Japanese came in hard, full of fire and fury, dead set on taking back that airstrip. And standing in their way? A thin line of Marine Raiders and the 1st Marine Division, led by Colonel Merritt Edson—a man who knew how to fight.

They dug in on that ridge near the field, and when the sun went down, hell lit up. The enemy came in waves, screaming, charging, trying to break our line with steel and guts. But Edson’s boys? They didn’t break. They held, bled, and threw everything back in the enemy’s face.

For three nights it was chaos—bayonets, grenades, bullets in the dark. But when the smoke cleared, Henderson was still ours, and the ridge was soaked in blood—American and Japanese alike. That hill earned a new name—“Bloody Ridge”—and it damned well deserved it.

That stand turned the tide on Guadalcanal. It proved that the Japanese could be stopped. It proved that when the enemy thinks we’ll break—we dig in deeper.

That’s the kind of fight I respect—outnumbered, outgunned, and still coming out on top.

~~ General Howitzer

6 VP’s

Card Balance:

5 – 5 

Complexity:

2

Conditions:

Jungle

Context:

Historical

Location:

Guadalcanal

Year:

1942

Theater:

Pacific Theater

Campaign

Summary
Bloody Ridge has a large series of hills in the center of the battlefield, occupied by the Marines who are defending against a vast hoard of Japanese attackers.

Objectives:
6 VP’s, plus the Japanese can target two hexes at the top of the battlefield representing Henderson field as Objective Medals.

Battlefield:
Jungle with a series of bluffs in the center, controlled by the Marines.

Troops:
Marines, 10 infantry, 1 artillery
Japanese, 12 infantry, 1 artillery

Allies:

1.  One advantage you have as Allies is your artillery which is placed in the center of the battlefield, straddling the left and center sections.

2. Because the Marines are out-numbered, and behind sandbags, they have a primarily in a defensive role in this game, unless the cards cooperate. So do not rush out of your protection unless given a good reason by the cards and circumstances. And that’s an order!

3.  Because of the Seishin Kyoiku Doctrine, and the Banzai War Cry, you positively need to hit every full-power enemy hex unit at least once.  This will reduce their attack from the super-powered 4D attack.  If not, they will overwhelm your forces.

Axis:

1. The Japanese have a numerical advantage. This fact, combined with the principles of Seishin Kyoiku, and the Banzai War Cry mean that you should rush forward as quickly as possible while your infantry units are still fully intact to get the extra attack dice provided.

2. You have an advantage on your left flank with your artillery and infantry. That is your probably best forward option. Watch out for the Marine artillery on your right flank.  

13
BR - Bloody Ridge

Author.

URL

Battle of Kalatch

Battle of Kalatch

scenario_Battle_of_Kalatch_start

The Battle of Kalach (August 8–11, 1942) was a significant engagement on the Eastern Front during Operation Blue, the German summer offensive aimed at capturing the oil-rich Caucasus and Stalingrad. The battle occurred near the town of Kalach (now Kalach-na-Donu), located west of Stalingrad.

German forces, primarily from the 6th Army, clashed with Soviet troops in an attempt to secure critical crossings over the Don River. The Germans aimed to encircle Soviet forces defending the area and advance toward Stalingrad. Despite stiff resistance, the Soviets were forced to retreat across the river after suffering heavy casualties. The German victory at Kalach cleared the way for their advance on Stalingrad, where the subsequent battle would become a turning point of the war.

While a tactical success for the Germans, the battle highlighted the growing determination of Soviet forces and set the stage for the eventual encirclement of the 6th Army during the Battle of Stalingrad later in 1942.

General Howitzer summarizes this battle’s significance:
The Germans may have won the ground, but they missed the bigger picture—those Soviet boys weren’t breaking, they were digging in. This fight lit the fuse that would blow the 6th Army to hell at Stalingrad. You can win a battle and still lose the war if you don’t see what’s coming.

~~ General Howitzer

6 VP’s

card

Card Balance:

Allies – 4

Axis – 5

Complexity:

3

Conditions:

Countryside

countryside

Location:

Russia

Year: 

1942

Theater:

Eastern Front

Campaign:

Codename:

Operation Blue

Summary:

This scenario begins with half of the Russian forces stuck behind an impassable river with only a single bridge from which to advance. At the same time, one third of the German forces are stuck in the corner.

Objectives: 6 Medals, including the town of Dobrinka as a temporary territorial medal for the Axis

Terrain:

Mostly open countryside with a few forests and hills. There are two rivers with bridges behind which many forces for each side are stuck.

Troops:

Allies – 3 Infantry, 6 Armor

Axis – 3 Infantry, 6 Armor

medal allies

Allies:

1.  If you want to defend your units around the town of Dobrinka and the accompanying medal, you will need to get your forces moved forward very quickly. Many of them are stuck behind the Le Don river, so you will need to cross the bridge with your armor quickly.

2.  Move your armor on your right flank into the center, to defend your other center section armor which is behind the Le Don River and will need some protection until they do so.

 3.  About the only way to win this scenario is to get your armored forces out from behind the Le Don river.  Make it your first priority, before attacking the enemy, no matter how tempting, to get your forces into play. You each of six Armor units, but with three of yours stuck behind the river, and backed up against the border wall, they are as good as sitting ducks.  Get them across the bridge ASAP!


medal axis

Axis:

1. Historically, the Axis executed a pincer move from both sides. You will have to get your forces across the bridge of the Le Tchir River as rapidly as possible. 

2.  The natural focus for your first attack is of course the two Allied infantry units defending the town of Dobrinka.

3.  The Allies have two Armor units up against the border at columns J and I.  If you can get your Armor up there in time, you can smash them against the wall. Six dice on average will give you an extra hit for each flag.  It is a very quick way to take out that half of the battle forces. 


22
BR - Kalatch

Author.

URL