Juno Beach

Juno Beach

The invasion of Juno Beach was part of the Allied D-Day landings on June 6, 1944, during World War II. Juno Beach, one of the five beaches targeted in the Normandy invasion, was assigned to Canadian forces from the 3rd Canadian Infantry Division and the 2nd Canadian Armoured Brigade. Their mission was to secure a beachhead, push inland, and capture key objectives such as the town of Caen.

Juno Beach was no picnic—it was hell from the start. The Canadians hit the shore under rough seas, late and scattered, with German guns pouring lead and shells across the sand. Machine guns, artillery, mines—everything the enemy could throw at them was waiting.

But those Canadians didn’t back off. They regrouped fast, pushed inland with infantry and armor working shoulder to shoulder, and smashed through the fortifications. By nightfall, they hadn’t just taken Juno—they’d driven farther inland than any other Allied unit on D-Day.

They paid dearly in blood, but their victory cracked open Hitler’s wall, anchored the Allied foothold in France, and lit the road that led to the liberation of Europe. Juno Beach proved it plain: Canadian steel and courage could punch just as hard as any force in the world.

~~ General Howitzer

6 VP’s

Card Balance: 

Allies – 6

Axis – 4

Complexity:

2

Conditions:

Beach

Location:

Normandy

Year:

1944

Theater:

Western Front

Campaign:

D-Day

Codename

Summary:

Objectives:

6 Victory Points, including the possibility of four! Objective Medals for the Allies.

Battlefield:

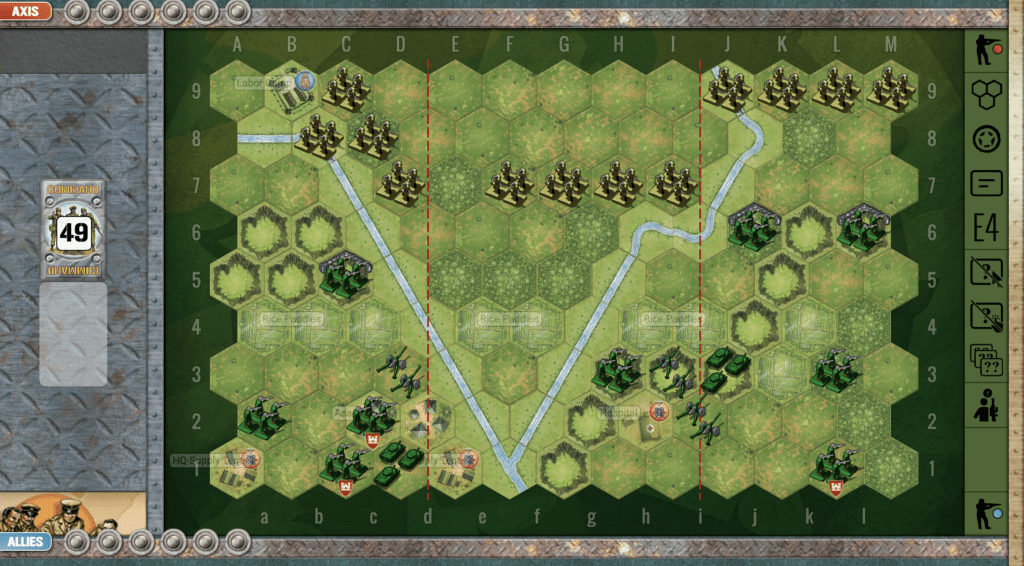
With the River Seulles going through the center of the battlefield, the Juno Beach scenario is almost two different battles taking place at once. There is no beach ridge to slow down the advance of the Allies.

Troops:

Allies – 10 Infantry, 3 Armor

Axis – 7 Infantry, 1 Artillery

🔥 Winning as Allies

1. The Allies need to be aware of the VP goal of six points, and then count up the number of medals and forces on the right side of the map: three Objective Medals (two towns and one bridge) and three infantry. This means, that with the “right” set of cards, an Allied player could win the battle completely just by focusing on the right flank. Now it will rarely happen that such a single-minded focus can occur based on the luck of the cards. But keeping the enemy off-balance by occasional forays on the left flank is a good strategy also. But this scenario reminds us of an important principle, to always keep your overall objectives and plan in mind throughout the battle. And do not deviate unless cards, or circumstances dictate otherwise.

2.  Of course, the left flank is a little more secure, as it is outside the range of the artillery.

3.  With the River Seulles splitting your center section, you will need to make a determination of which direction your troops will head to. This will need to be determined by the cards in your hand.

4.  As you move off the beach, the two Medal Objectives on the bridges look very tempting. But they are quite close to the enemy artillery, so you will not want to take those bridges until near the end of the game, so they cannot be chased away.

🔥 Winning as Axis

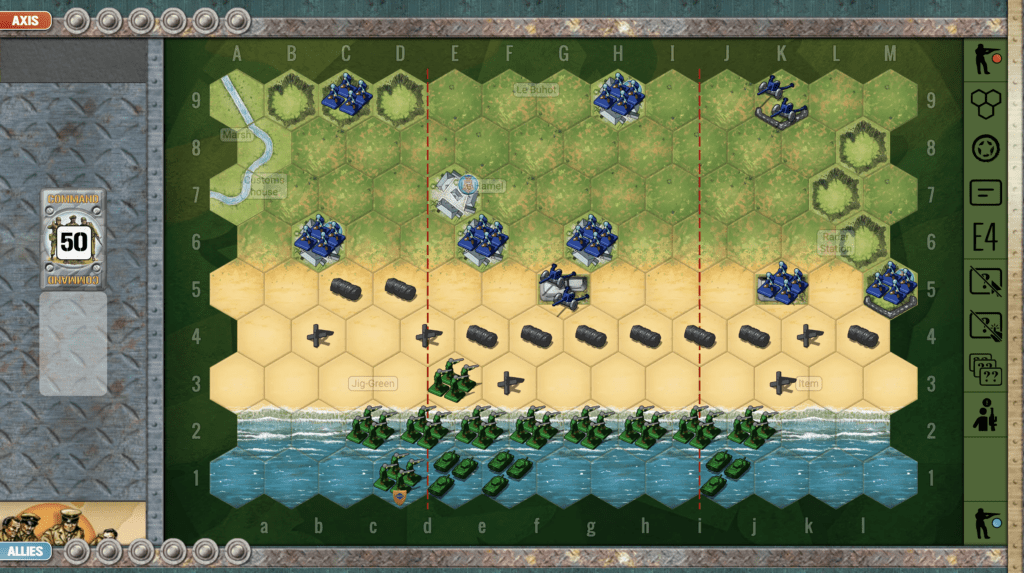
1. Your Infantry in the bunker at ‘I5’ is in a great location to make some early hits on the enemy while they are still in the water, or backed up against it.

2. Stay in your bunkers and towns.  Do not come out, as there are Armor in the area which will make you pay for that mistake.

Battle Reports (percentage of Allied victories):
64%

22
BR - Juno Beach

Author:

Days of Wonder

Link:


Japanese Counterattack

Japanese Counterattack

The “Japanese Counter-Attack” phase refers to the counteroffensives launched by Japanese forces in the Pacific Theater.  One notable example occurred during the Battle of Guadalcanal, from August 1942 to February 1943. After U.S. Marines secured a critical airfield on Guadalcanal, known as Henderson Field, the Japanese launched multiple counterattacks to reclaim it. These counteroffensives, involving intense jungle fighting and night assaults, aimed to dislodge the U.S. forces from their foothold. The Japanese committed significant naval and infantry resources, but despite their efforts, they struggled to overcome the U.S. defenses and secure sustained supply lines.

The Japs threw in ships, men, and everything they could float or march—but it didn’t matter. Our defenses held like a steel wall, and without solid supply lines, their fight was doomed from the start. They came in hard, but we broke them harder.

~~ General Howitzer

6 VP’s

Card Balance:

Allies – 6

Axis – 5

Complexity:

4

Conditions:

Jungle

Location:

Guam

Year:

1944

Theater:

Pacific Theater

Campaign

Codename

Summary

The Japanese Counterattack takes place on the same battlefield as the Guam Landings, but the game mechanics are pretty much reversed.

Objectives:
Six VP’s, plus each side has a permanent Objective Medal hex which they can seek.

Battlefield:
Jungle with a V-shaped river cutting right through the map.

Troops:
Marines – 9 Infantry, 2 Armor, 2 Artillery.
Japanese – 12 Infantry.

🔥 Winning as Allies

1.  With three artillery, and one armor, the Marines have more firepower than the Japanese. But the artillery is limited for much of the game by night visibility rules, which slowly improve throughout the game.  So take your time to get your troops arranged, and your card management under control, to allow more daylight to help your attack and defense.

2. Your tank is stuck back in the left corner of the fight, so take advantage of the early turns to get it into play.

3.  Remember that the Japanese practice the Seishin Kyoiku Doctrine. If they have all four units and are fighting at close combat, they role four! dice, not three.  So during the game, one of the objectives the Marines need to practice is to take off at least one figure per hex. This will actually count as two in terms of reducing the Japanese firepower for subsequent attacks. 

🔥 Winning as Axis

1.  Big picture strategy for the Japanese forces is to quickly overwhelm a flank with infantry forces who are still fully intact so that you can use the Seishin Kyoiku Doctrine against the Marines.  Because of the four! Allied artillery, the center section is kind of a kill box.  So the best hope is to move down one of flanks as the cards dictate.

2.  Night-time conditions are to your advantage because the Allies have so much firepower.  Therefore your best attacks will be immediately, before the dice rolls enough stars to bring out the full ranged artillery attacks.

3.  There are three Permanent Medal Objectives (HQ-Supply & Hospital hexes).  These are deep in enemy territory, but should you get your hands on either Behind Enemy Lines or Infantry Assault cards, there is a possibility you could force your way in to them.

Battle Reports (percentage of Allied victories):

66%

(These are the historical records. For new stats, record your games in the poll to the right.)

Scales-Allies-Weighted
31
BR - Japanese-Counter

Author:

Days of Wonder

Link:

Hill 112

Hill 112

In early July 1944, during the Normandy campaign, British forces launched Operation Jupiter to seize Hill 112, a dominant height southwest of Caen. Control of this hill was crucial: whoever held it could observe and direct fire across much of the surrounding countryside, making it a strategically vital position.

On 10 July 1944, the British 43rd (Wessex) Infantry Division, supported by armored units including Churchills of the 31st Tank Brigade, attacked German defenses held mostly by elements of the Waffen-SS, including the 9th SS Panzer Division “Hohenstaufen” and 10th SS Panzer Division “Frundsberg.” The fighting was brutal, confused, and close-quarters, with British infantry repeatedly advancing into heavy machine-gun, mortar, and tank fire.

General Howitzer:
Hill 112 wasn’t conquered—but it served its purpose.
It tied down Germany’s best, burned away their strength, and cracked open the German shield around Caen. A brutal ridge that changed the course of the Normandy campaign by simply refusing to be ignored.

6 VP’s

Card Balance:

5 – 5

Complexity:

3

Conditions:

Countryside

Location:

France

Year:

1944

Theater:

Western Front

Campaign

Codename:

Operation Jupiter

Summary:

Objectives

This is a six VP game, so it calls for good positioning, strategic planning, and consistent attack with a goal towards long-term degradation of the enemy.

Battlefield:

The battlefield has a ridge of hills on one flank, moving into the center.  There is also a set of hedgerows and a town hex right in the middle of the field. The Axis controls much of the board at the beginning of the round, while the Allies are pressed up against the back wall.

Troops:

Allies – 9 Infantry, 6 Armor, 1 Artillery

Axis – 7 Infantry, 3 Armor,  1 Artillery

🔥 Winning as Allies

1. The Allies have a significant armor advantage with six armor units vs. three for the Axis. Since you do have an armor advantage, make use of it, by getting your units out into the open field for battle where the long distance firepower of your tanks may prevail.

2. Watch out for the Axis artillery in the upper right flank. Although it is locked behind the Guigne River, its range controls much of the flank and part of the center flank.

3. Note that Hill 112 is an Allied medal objective. It is within range of a one-hex artillery attack. So if you grab the objective too early, the enemy will have time to chase you away. But if you time it right, it can be a late-game objective, to perhaps clinch the win.

🔥 Winning as Axis

1. The Axis begin with control of much of the battlefield. If you can get your armor out into the middle of the field, you may perhaps be able to attack some of the Allied units while they are still up against the wall, and thus take advantage of their no-retreat situation.

2. You have an artillery unit trapped in the lower left flank behind the Guigne River. Use it whenever the enemy gets near the medal objective at h6.

16
BR - Hill 112

Author:

Days of Wonder

URL

Hellfire Pass

Hellfire Pass

Hellfire Pass was the kind of battleground that earns its name the hard way. In June 1941, on that blasted strip of desert between Egypt and Libya, British and Commonwealth troops dug in on the heights while Rommel’s Afrika Korps came at them like wolves scenting blood. That pass wasn’t just a notch in the ridgeline — it was the key to the whole frontier, a gate that controlled who moved and who stalled in the desert war.

The Germans hit fast, hit hard, and kept hitting, using tanks, guns, and every trick they had to crack the British line. And the men holding that ridge fought with grit, firing until their barrels burned and their positions were blown apart around them. They didn’t stop the Axis forever, but they made the enemy pay for every yard and bought precious time for the larger fight ahead.

Hellfire Pass proved a simple truth: when you stand your ground on the high ground, and you fight like you mean it, even the best the enemy has can’t roll over you without bleeding for it.

~~ General Howitzer

6 VP’s

Card Balance:

Allies – 4

Axis – 6

Complexity:

3

Conditions:

Desert

Context:

Historical

Location:

Egyptian – Libyan border

Year:

1941

Theater:

North Africa

Campaign

Codename:

Operation Battleaxe

Summary:

Hellfire Pass begins with the Axis dominating over two-thirds of the battlefield. The challenge for the Allies is to break through to the exit hexes, if they can make it through Hellfire Pass.

Objectives:
Six VP’s, plus the Allies have exit hexes for additional Objective Medals

Battlefield:
Desert with the Halfaya Pass through which the battle takes place. Much of the battlefield is lined with Axis mines, which will slow the advance of the Allies.

Troops:
Allies have 9 Infantry, and 5 Armor.

Axis have 8 Infantry (including two Anti-tank units), 2 Armor, 2 Artillery

🔥 Winning as Allies

1.  Allies have a numerical advantage in the center, of 3 Infantry, and 5 Armor. However, the Axis have a row of mines, and two artillery defending the section.  So Allies will need a good set of cards which provide for rapid advance, and a Barrage or Airpower card to attack the artillery would definitely help.

2. Because this scenario has an escape option for the British, speed is paramount. So remember that units which begin on the road are able to travel one extra hex.

3.  The Allies have a significant armor advantage of 5 – 2.  Use their attack and mobility to your advantage.  Some of them begin the scenario trapped behind infantry, so you need to get them out and into the game.

🔥 Winning as Axis

1.  Initial plan for the Axis is defensive. Stay behind the sandbags and mines which you have set up.

2.  There are two Infantry units on your left flank which have no retreat.  Some lucky one-shot dice hits can quickly cut their firepower in half.

3. Your Armor has mobility, and are at the ready to defend against a flank attack on either side, or do a quick run up the road to defend the center section.

4. Your Artillery is well-positioned, but the enemy starts at the one-dice hit range.  It may be wise to wait a turn or two until they advance forward one row and then come within range of two-dice hits.

Battle Reports

(percentage of Allied victories):

48%

18
BR - Hellfire

Author:

Link:

Guam Landings

Guam Landings

“Alright, listen up, boys! The Guam Landings in the summer of ‘44 were a hell of an operation—an amphibious smash right into the gut of the Japanese defenses in the Marianas. The island was crawling with enemy troops, but that didn’t stop our boys from hitting the beaches on July 21st and driving straight inland.

They fought through thick jungles, coral ridges, and all the damn bunkers the enemy could build, pushing those defenders back inch by inch until Guam was ours by August 10th. We didn’t just take an island—we seized a launchpad for bigger things, setting the stage for bombing Japan into rubble.

That’s how you take the fight to the enemy, boys—you land, you fight, and you don’t stop until the flag is flying over every square inch!

~~ General Howitzer

6 VP’s

Card Balance:

Allies – 6

Axis – 5

Complexity:

4

Conditions:

Historical

Location:

Guam

Year:

1944

Theater:

Pacific Theater

Campaign:

Pacific Campaign

Codename

Summary:

There is a massive invasion force of Marines coming on shore with infantry, armor and artillery.

Objectives:

6 VP’s and one Objective Medal for the Marines.

Battlefield:

The battlefield is marked by a v-shaped river flanked on one side by a series of hills, and on the other by rice paddies. 

Troops:

Allies – 10 Infantry, 8 Armor, 3 Artillery

Axis – 11 Infantry

🔥 Winning as Allies

1.  You have an overwhelming force to assist you. You have a lot of armor. Start with that and attack the sandbagged enemy from a distance. You will be able to wipe out several front-line units very quickly using your armor.

2.  There is a Medal Objective on your right flank. You can target it, but will need to deal with the enemy infantry unit close to the beach at hex M3.

3.  Deal with the two enemy infantry units right on the beach first, or they will be able to score a hit on every retreat flag they throw against your forces.

4.  Remember that the any full-force Japanese Infantry units practice the Seishin Kyoiku Doctrine  (SKD), so that they attack with one extra dice when they attack.  So deal with that by knocking out each of the Infantry figures by one figure each before they decide to rush you with an overwhelming Infantry assault.

🔥 Winning as Axis

 1. The Japanese are well-protected behind sandbags, and would need a pretty good reason to break cover, while they wait for the Marines to attack.

2.  You have a forward unit in the village of Asan, which you can use to take out some figures, maybe a full unit before you are destroyed.

3. And you have a forward unit in the jungle and sandbagged at M3, which you can also use for some quick hits against the enemy.

Battle Reports (percentage of Allied victories):

67%

Scales-Allies-Weighted
32
BR - Guam Landings

Author:
Days of Wonder

URL:

Gold Beach

Gold Beach

The Invasion of Gold Beach was one of the five beachheads landed by Allied forces during the D-Day invasion of Normandy, France, on June 6, 1944, during World War II. The invasion was part of Operation Overlord, the Allied effort to liberate Nazi-occupied Western Europe and begin the push toward Germany. Gold Beach was the landing zone assigned to British forces, primarily the 50th (Northumbrian) Infantry Division and supporting units from the Royal Marines and Canadian forces.

General Howitzer summarizes its impact:
Gold Beach—June 6, 1944—wasn’t just sand and sea, it was a damned doorway to Germany. The British 50th Northumbrian boys, backed by Royal Marines and tough Canadian allies, slammed ashore under fire as part of the grandest show on earth—Operation Overlord. Their job? Bust through Nazi defenses, plant the Union Jack on French soil, and start the long march east to drive a knife straight into Hitler’s gut.

6 VP’s

Card Balance:

Allies – 6

Axis – 4

Complexity:

2

Conditions:

Beach

Location:

France

Year:

1944

Theater:

Western Front

Campaign:

D-Day

Codename:

Operation Overlord

Summary:

Unlike many other beach scenarios, Gold Beach does not have a hill or ridge slowing down the Allied advance. Therefore the Allies are able to very rapidly move up the beach. But Axis forces are protected in bunkers and cities, allowing them more time to attack the unprotected Allies.

Objectives:

This is a six VP scenario, so rather long, with one Objective Medal for the Allies in the town of LeBuhot.

Battlefield:

Beach scenarious are all about getting the Allies off the beach as fast as possible, while the Axis try to push them back and slow them down to allow more time for attack.

Troops:

Allies – 10 Infantry, 3 Armor

Axis –  7 Infantry, 2 Artillery       

🔥 Winning as Allies

1. You must eliminate the Axis artillery as rapidly as possible, or it will decimate your forces.

2.  Because there is no enemy artillery on the left flank, it generally poses the best chance of advancement, should the cards allow it.  Once you get off the beach on the left side, you can proceed with your forces toward the right until you capture all the VP’s you need.

3. You have three Armor. Get them out of the water and into the action quickly. But they must coordinate their attack with the infantry. It is very difficult to win this scenario, unless you quickly get your artillery off the beach and into the back ranks where you can attack the enemy from behind. 

🔥 Winning as Axis

1. Axis has two artillery, which compensate for the overwhelming Allied forces coming at them. The one in the center section near the beach is a powerful force. Every single beach hex in the central section is within the range of full two-dice artillery attacks. This is a very powerful weapon in the Axis arsenal. Use it at every opportunity you have.

2.  If you can move the artillery on your left flank forward to a more central position, it will improve your ability to attack the enemy coming up the center section. Of course, you will lose your sandbags when you move, so this move forward is safest if you have a Dig In card at the ready.

32
BR - Gold Beach

Author:

Days of Wonder

Link: