General Howitzer’s Field Guide to Memoir 44

A Memoir 44 Strategy & Tactics Community

GENERAL HOWITZER

Scenarios

Explore Memoir ’44 battlefields, maps, and player statistics.

GENERAL HOWITZER

Campaigns

Relive historic campaigns through linked Memoir ’44 battles.

GENERAL HOWITZER

Strategy Tips

Sharpen your tactics and take command of the battlefield.

GENERAL HOWITZER

Field Manuals

Explore field guides and manuals for your next battle.

GENERAL HOWITZER

Tournaments

Find Memoir ’44 tournaments, events, and fellow commanders.

GENERAL HOWITZER

My War Room

Track your battles, campaigns, achievements, and next mission.

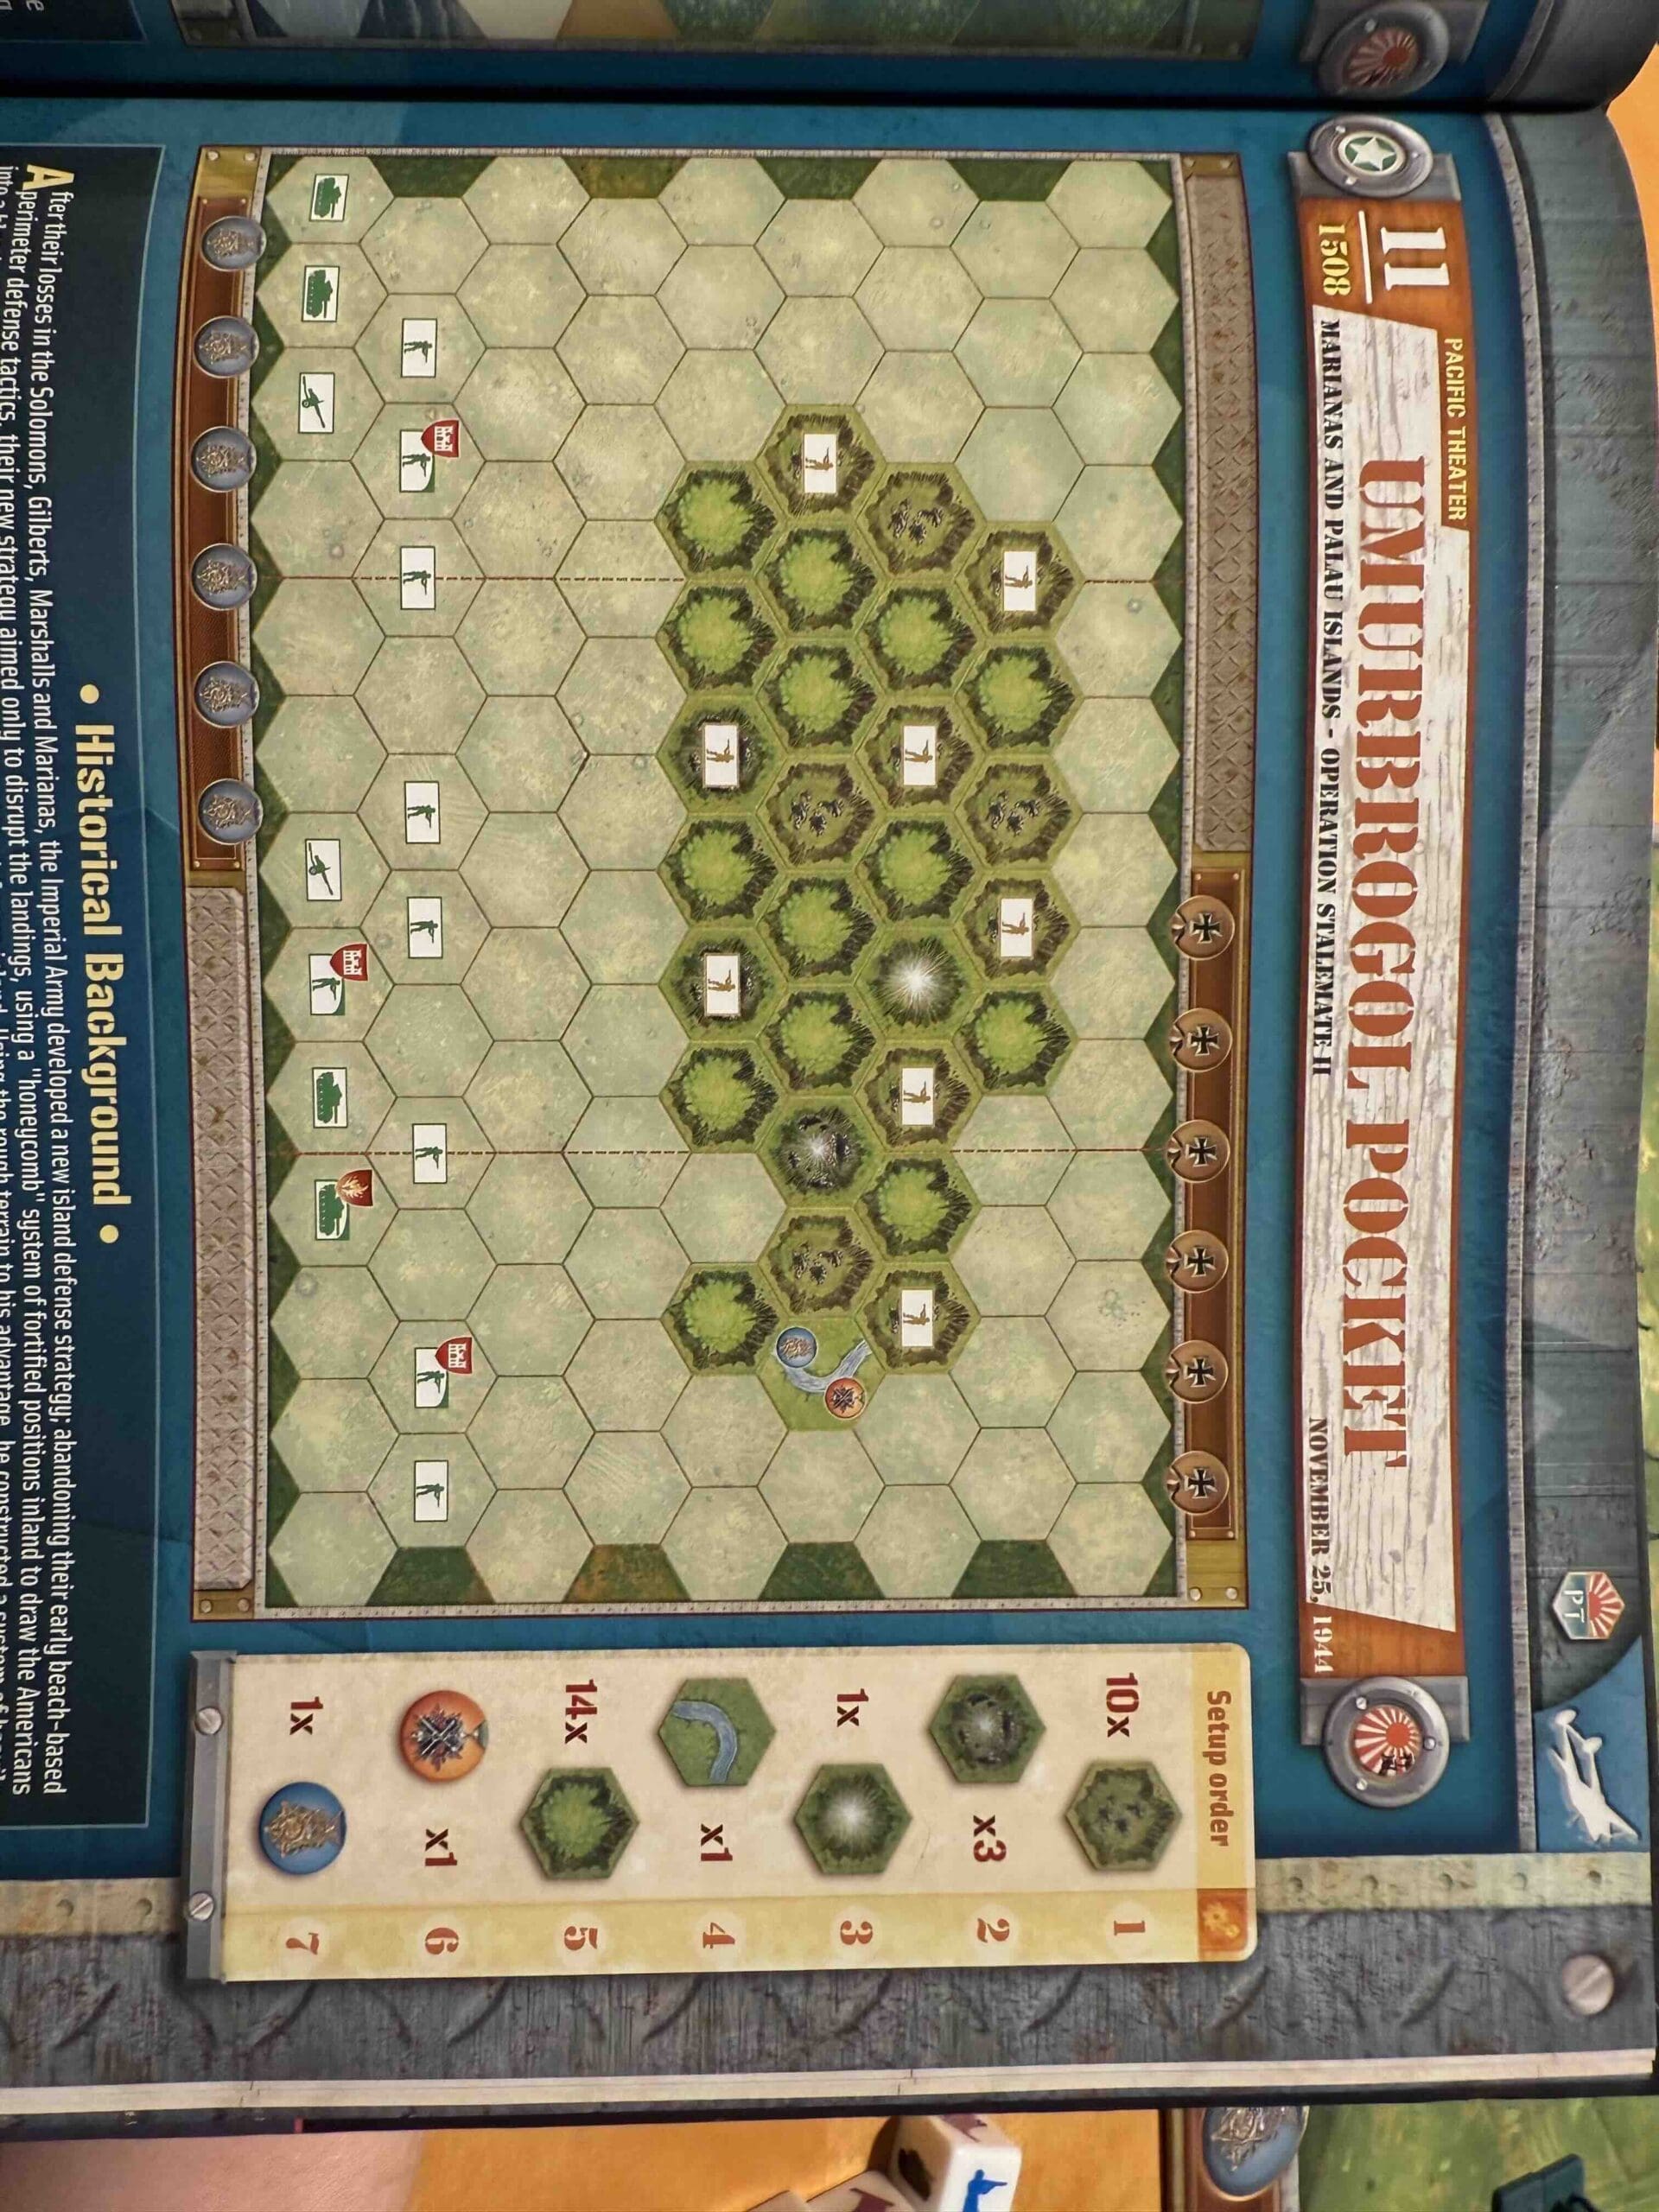
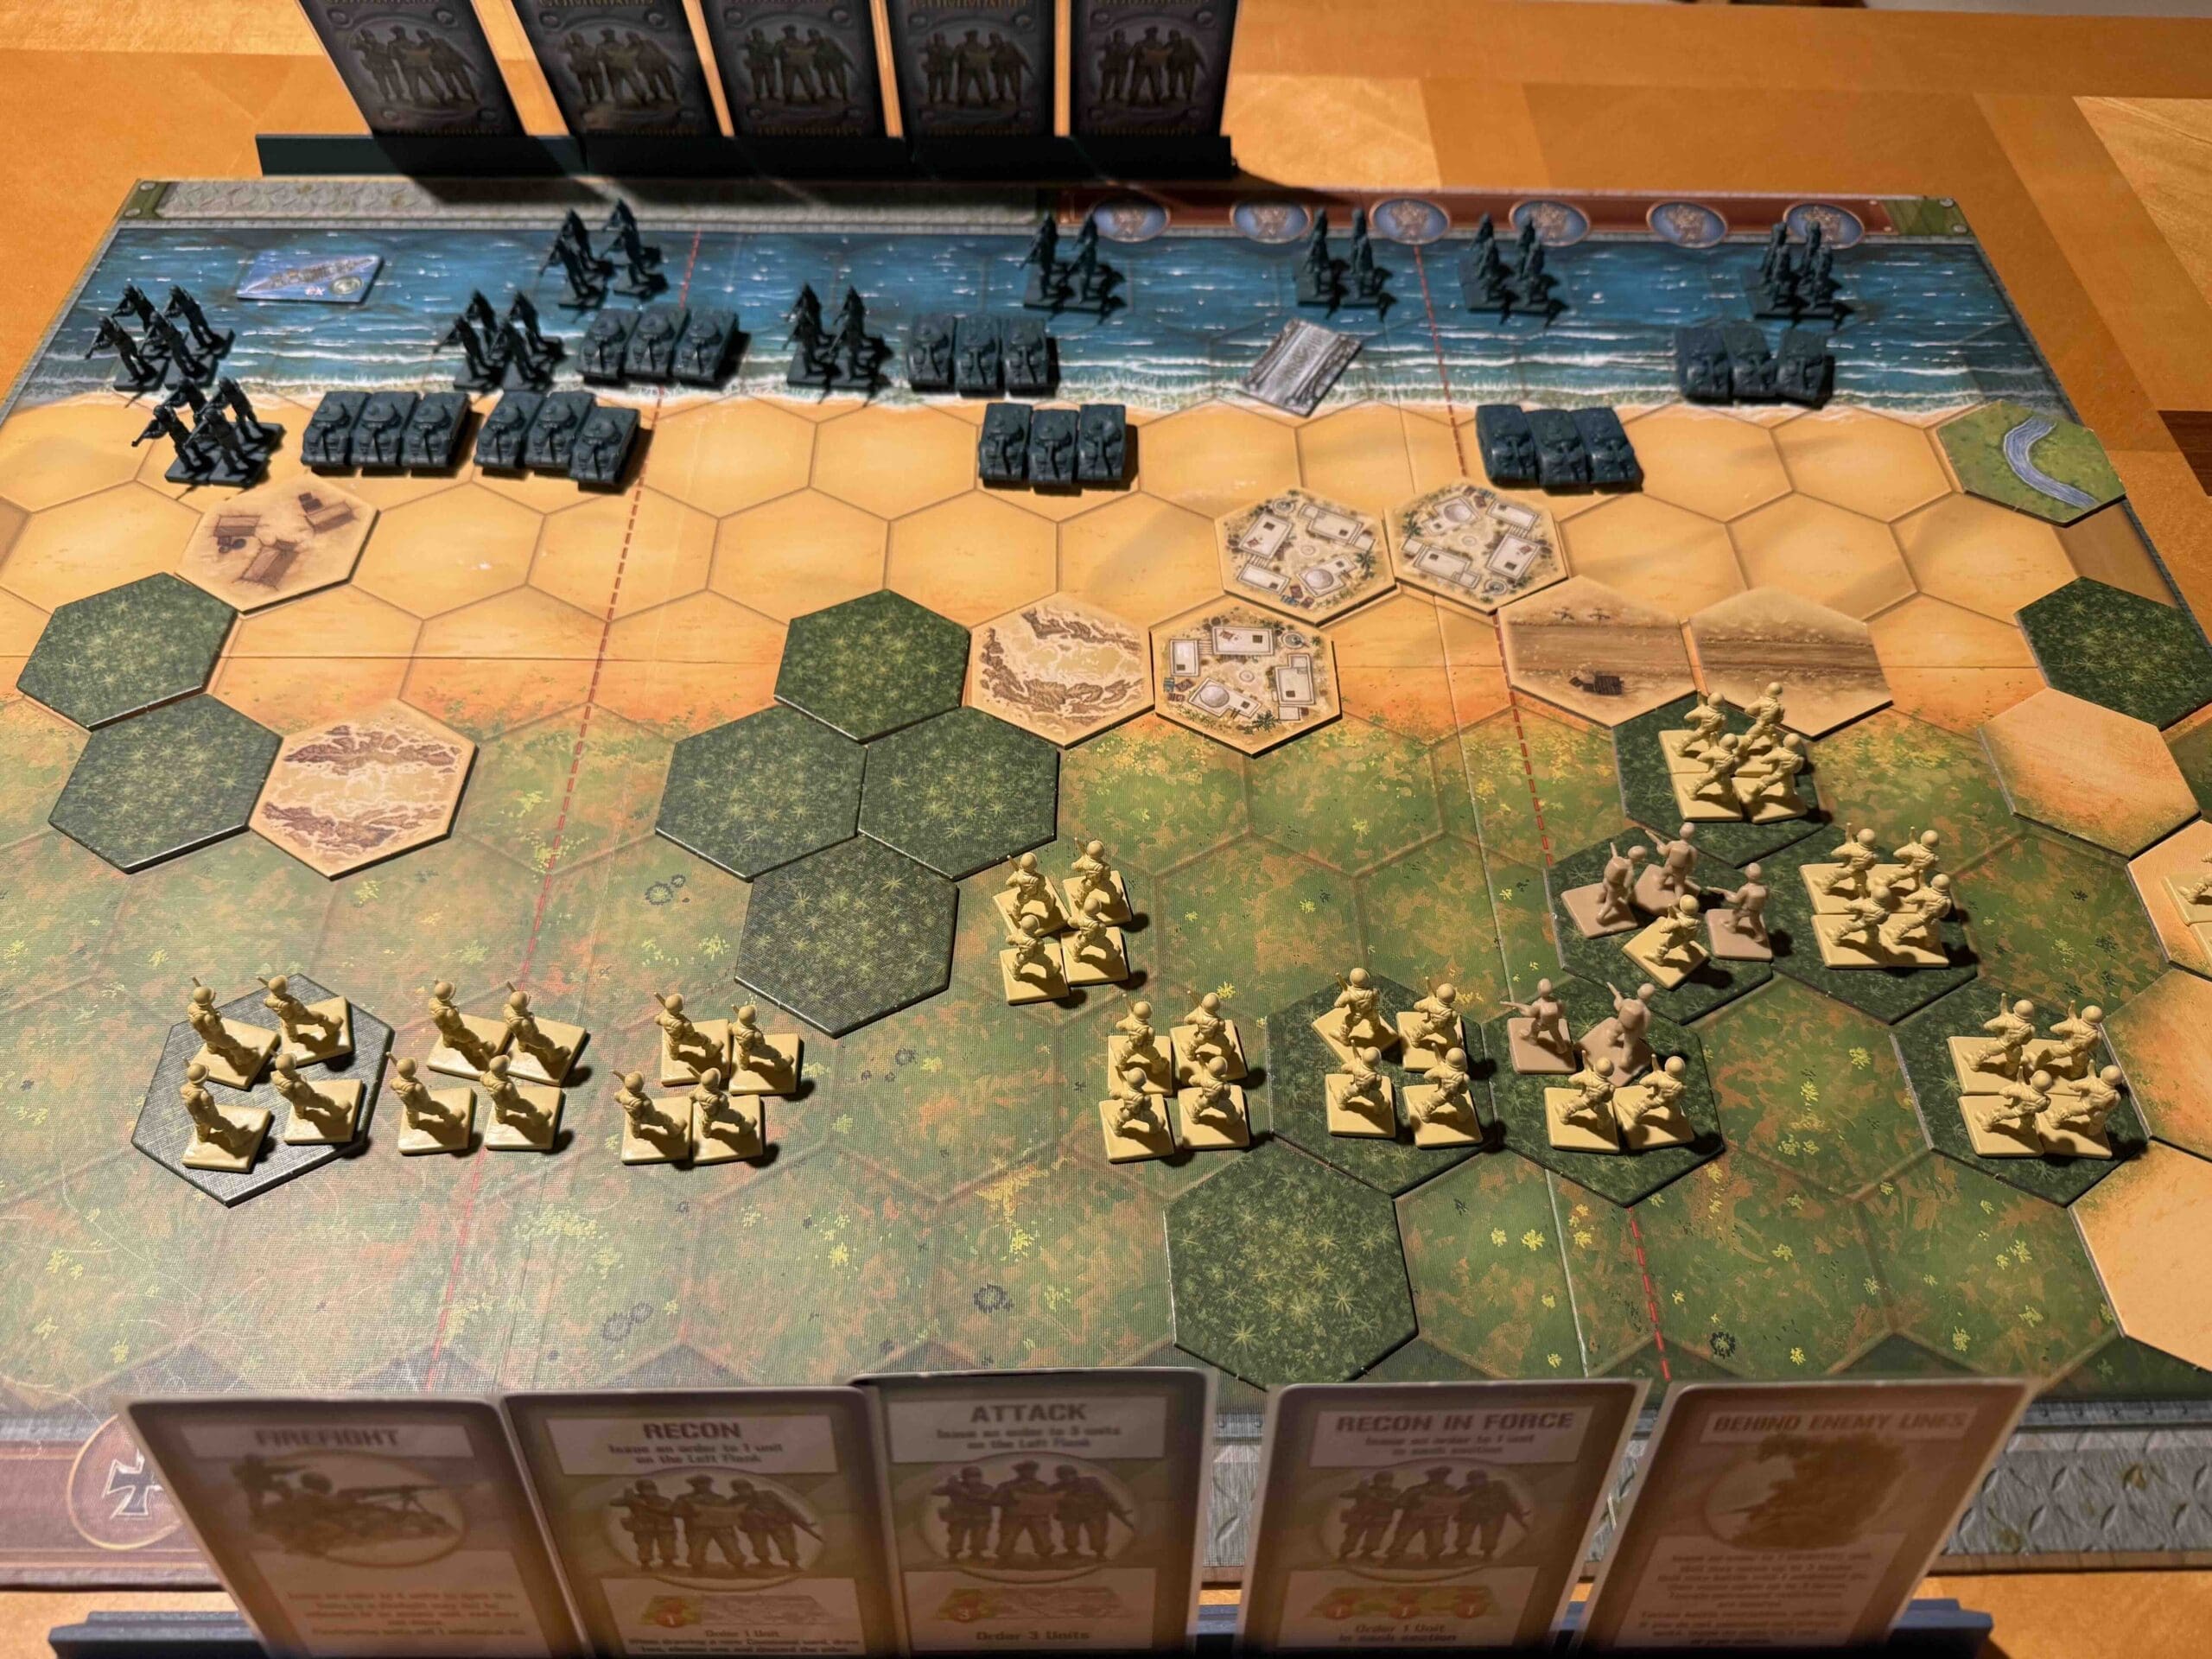
Umurbrogol Pocket

Umurbrogol Pocket
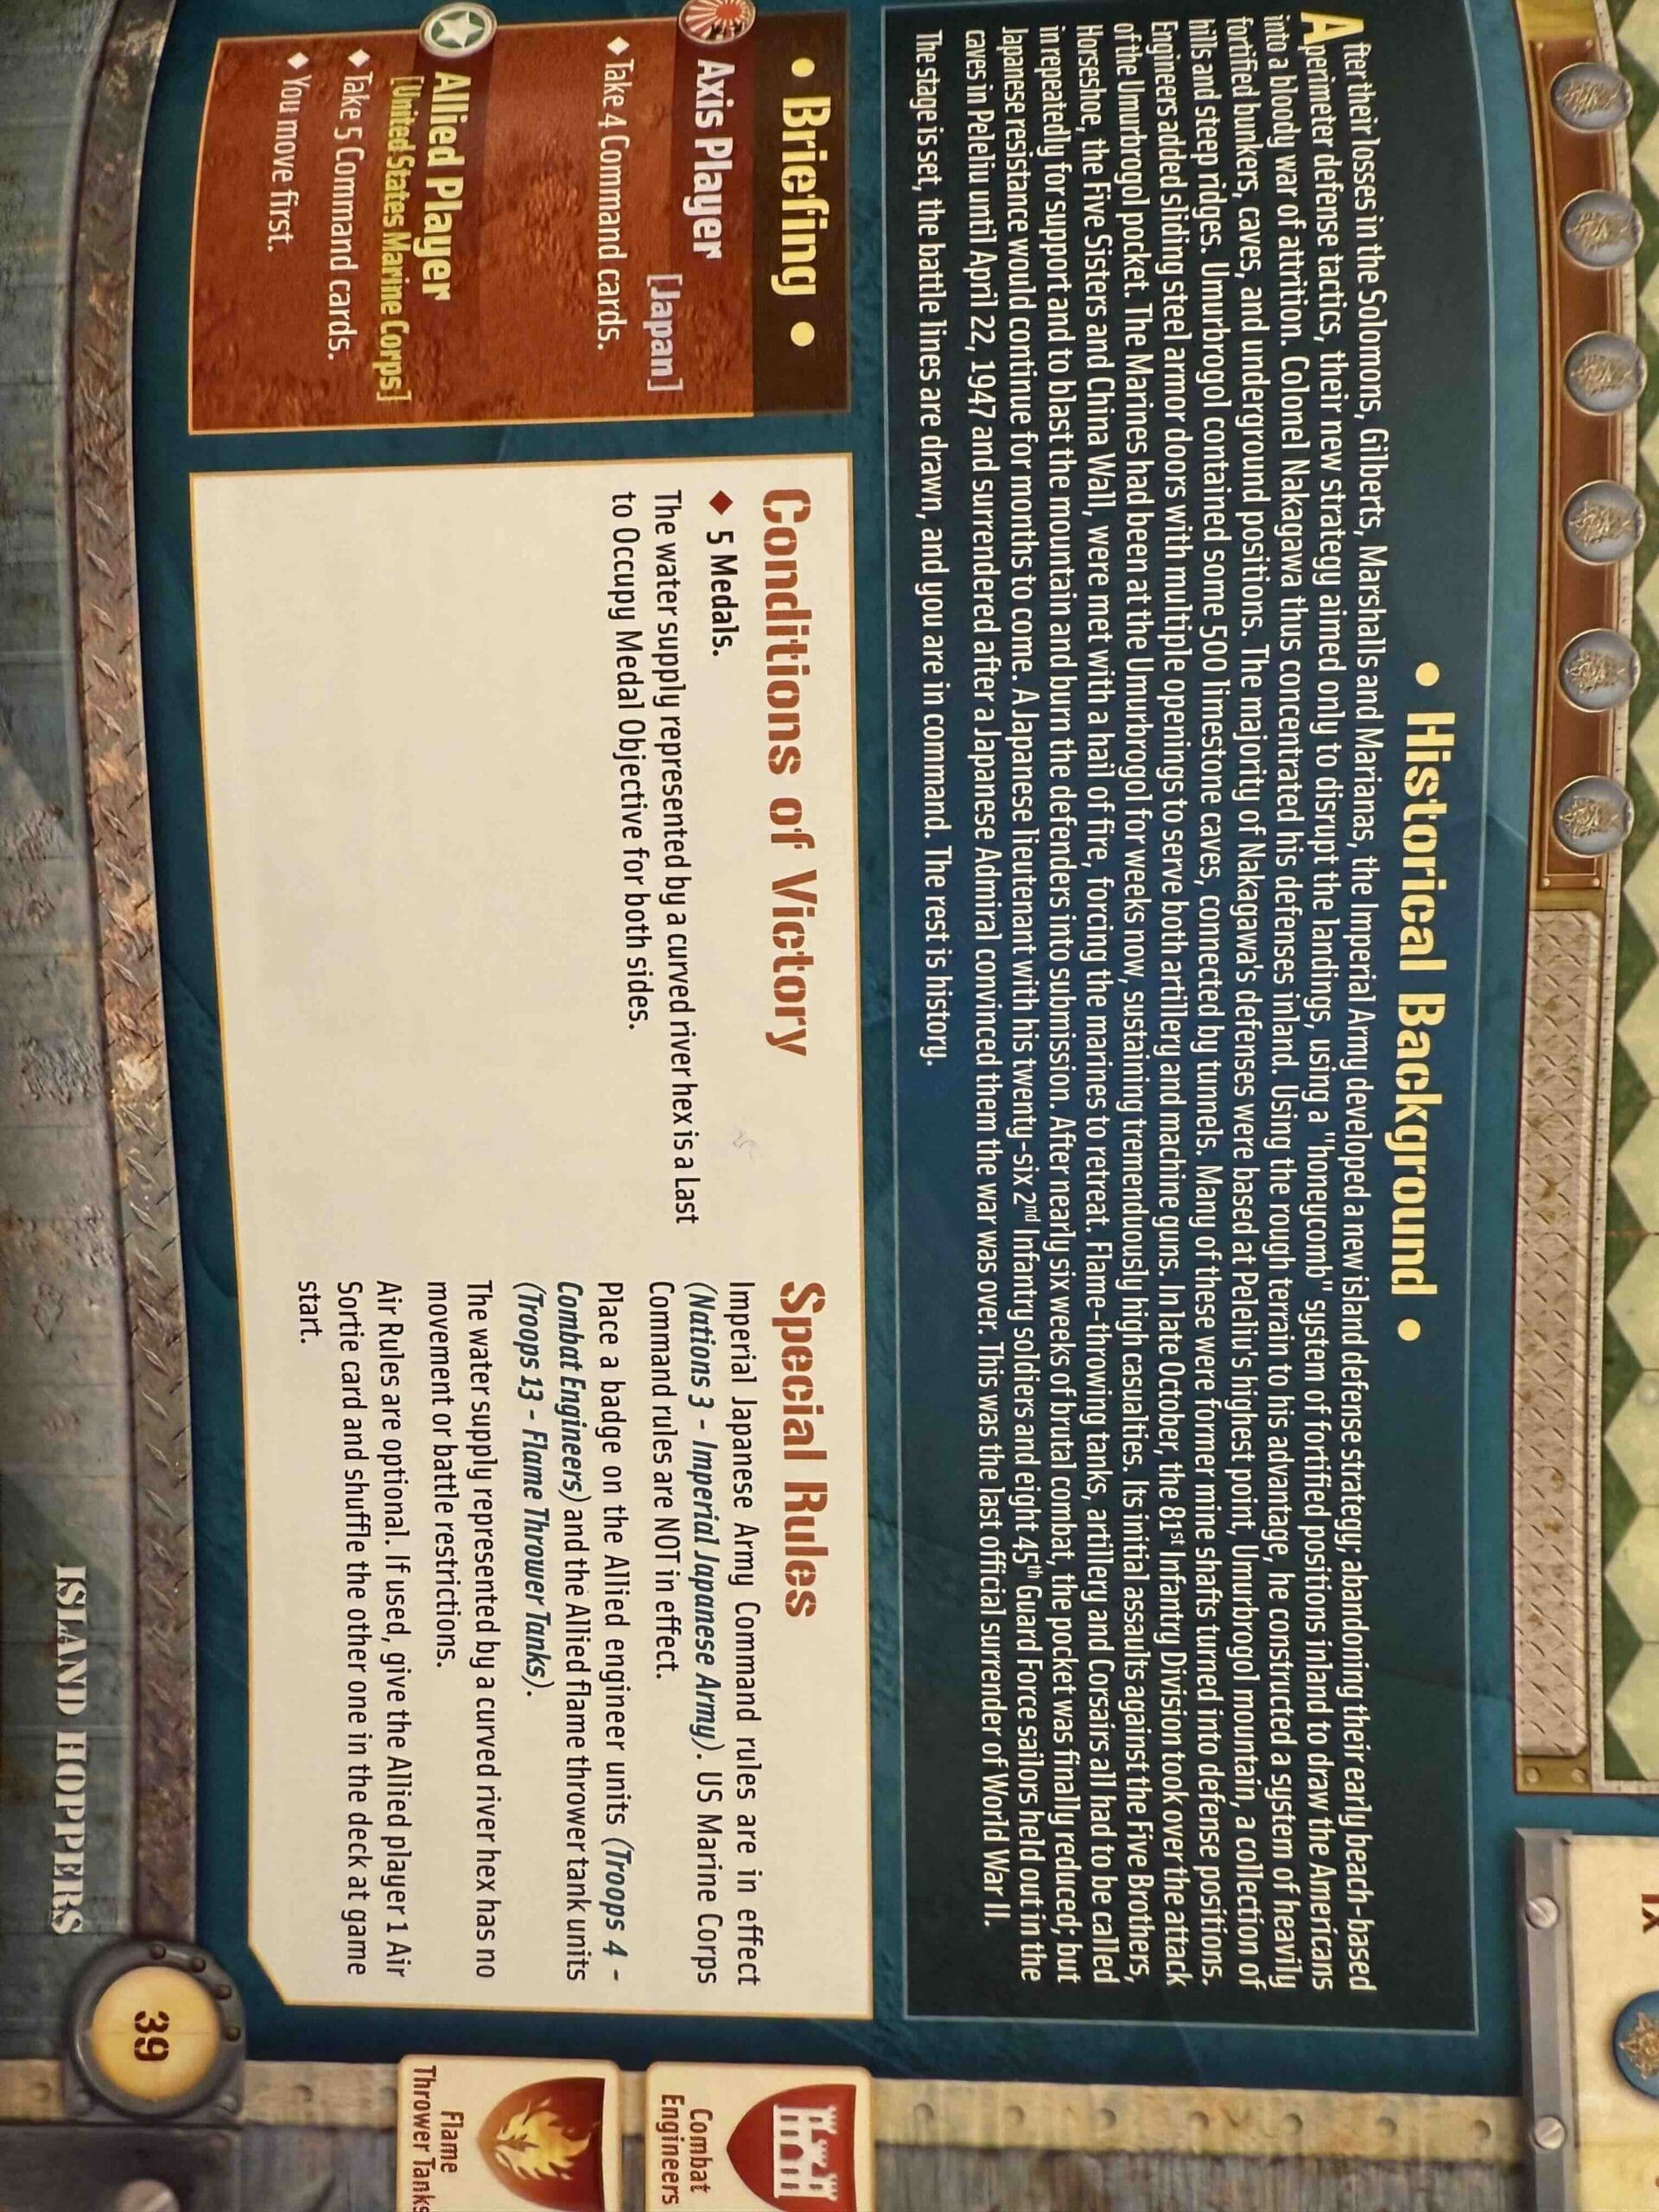
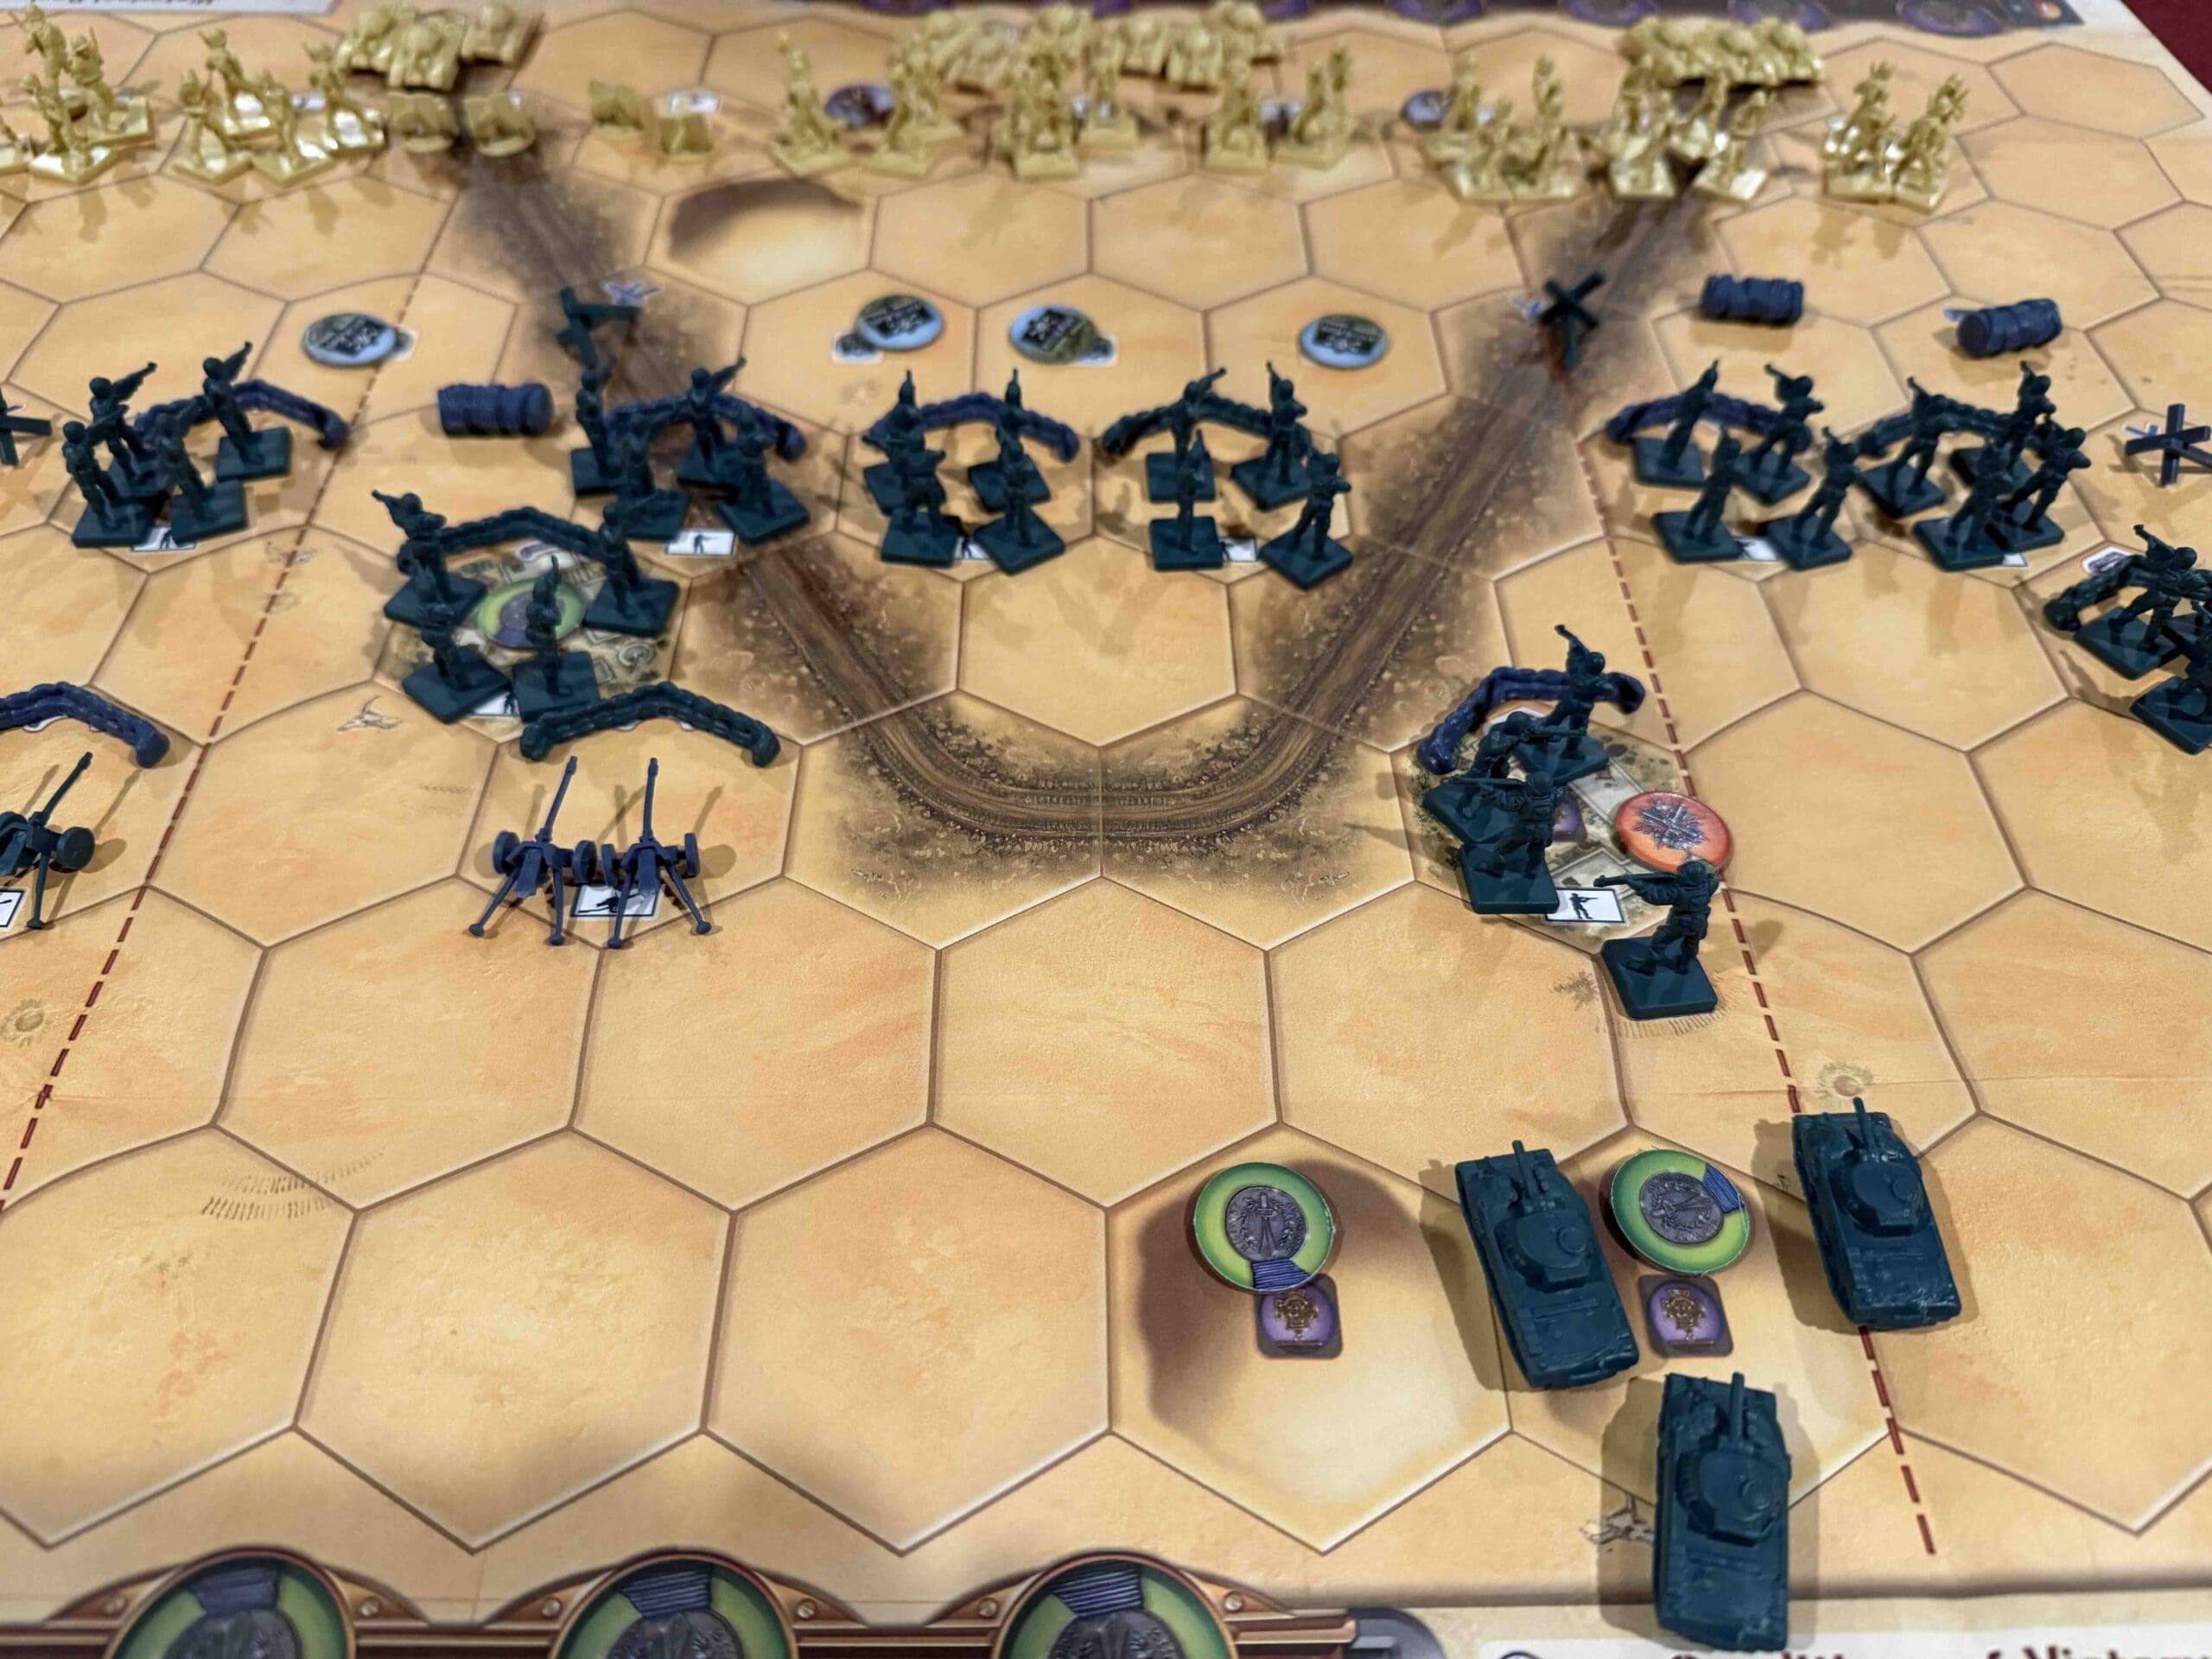
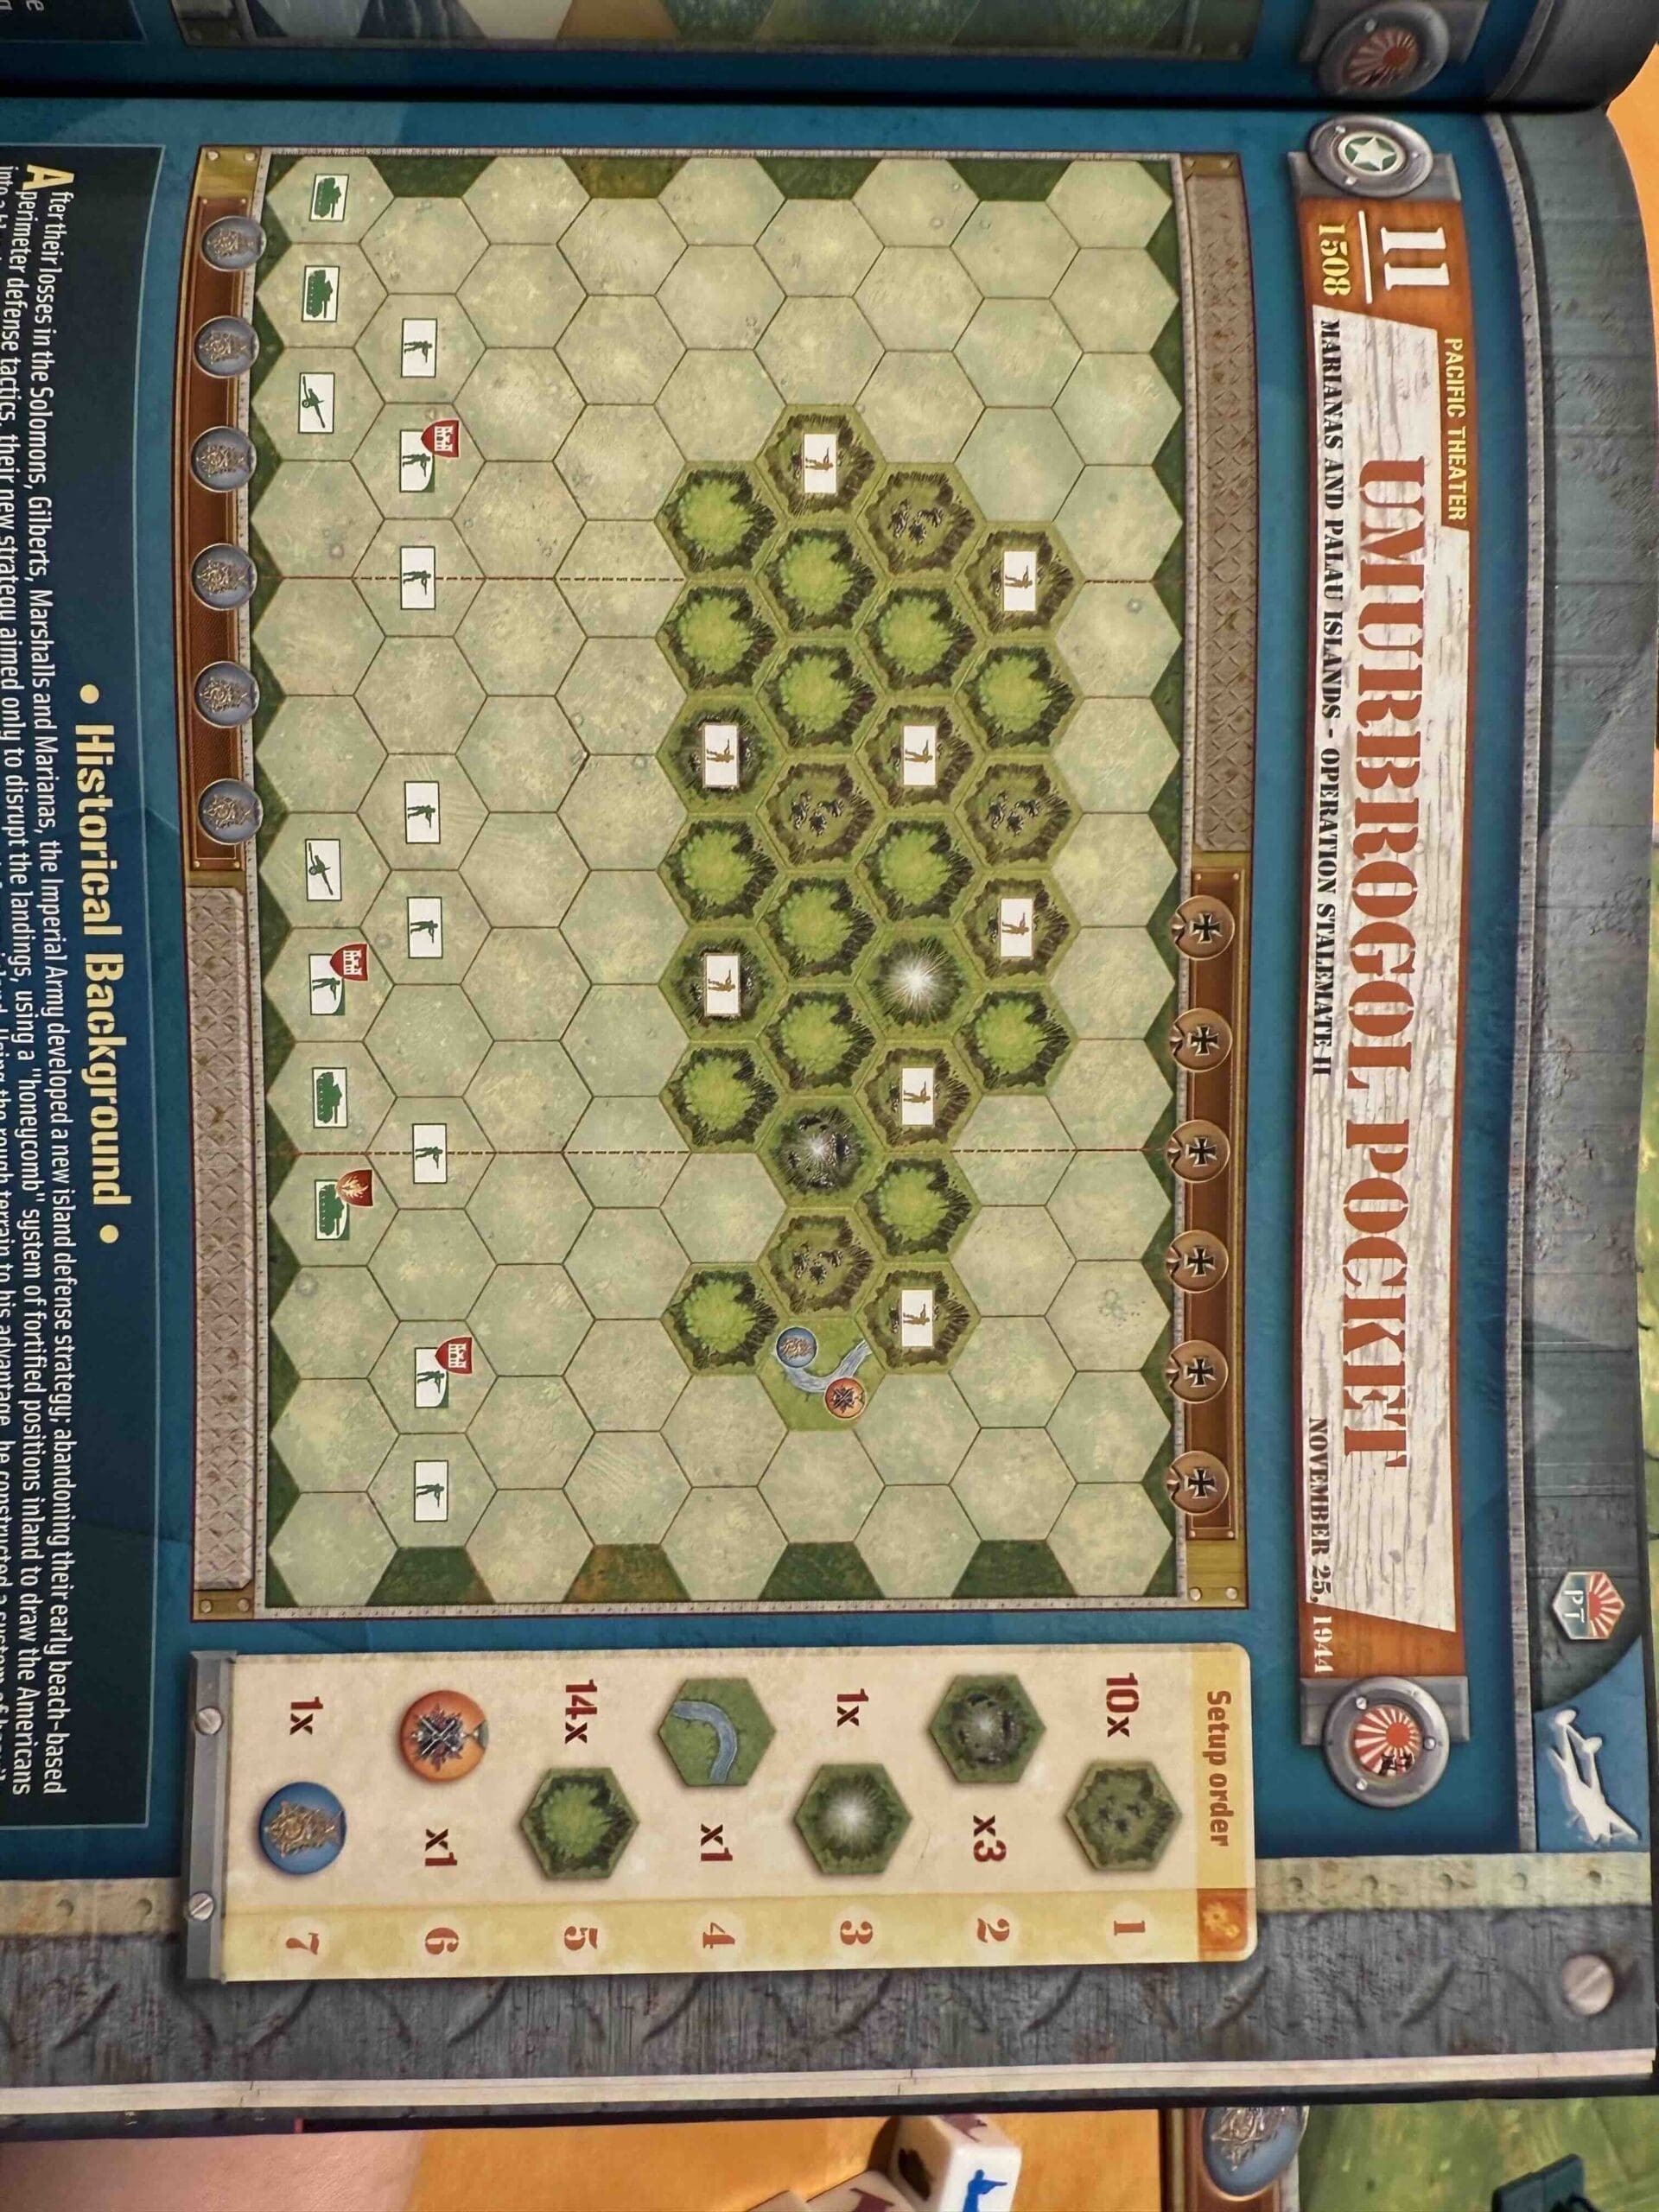
Umurbrogol Pocket

The Battle of the Umurbrogol Pocket in November 1944 was one of the fiercest and most grueling phases of the Battle of Peleliu during World War II. U.S. Marines faced deeply entrenched Japanese defenders in a mountainous, cave-ridden area known as “Bloody Nose Ridge.”

General Howitzer’s summary:

The Umurbrogol Pocket was a nightmare carved into rock—our Marines went up against die-hard defenders holed up in caves. The Japanese were dug in deep, fighting to the last man, and made us pay for every inch in blood. Flamethrowers, grenades, and guts—that’s what it took to root them out. It was slow, savage, and costly, but in the end, we crushed them. That ridge showed just how far the enemy would go—and how much farther we were willing to go to win.

5 VP’s

card

Card Balance:

Allies (US Marines) – 5

Axis – 4

Complexity:

3

Conditions:

Jungle Beach

Context:

Historical

Location:

Marianas & Palau Islands

Year:

1944

Theater:

Pacific

Campaign:

The Battle of Peleliu

Codename:

Operation Stalemate II

Summary:

Objectives:

5 VP’s plus a Last to Occupy Medal Objective

Battlefield:

Combination of hills and hills with caves .

Troops:

Allies – 9 Infantry, 4 Armor, and 2 Artillery

Axis – 8 Infantry


medal allies

Allied Strategy:

1.  Use your Artillery and Armor as much as you can to attack the Japanese defenders at a distance.  When they are sufficiently weakened, you can move in your infantry, beginning with your Engineers to finish up the forward units.

2.  The fresh water river is a victory medal which goes to the  Last to Occupy.  Keep some forces on hand to grab it as a final victory point.

medal axis

Axis Strategy

1.  You have a very strong defensive position which allows you to quickly move between caves and hide your weak units when necessary.

2.  Take advantage of your Seishin Kyoiku powers and attack any enemy troops using the Banzai War Cry which come within two hexes of your Infantry.

3.  Guard the fresh water source, and keep the enemy away from it, as they will attempt to grab it on their final move. 

Battle Reports

Author:

Days of Wonder

Resource:

Campaign Book, Volume 2

Place Battle Reports on a scenario page, or specify its scenario name in the shortcode.
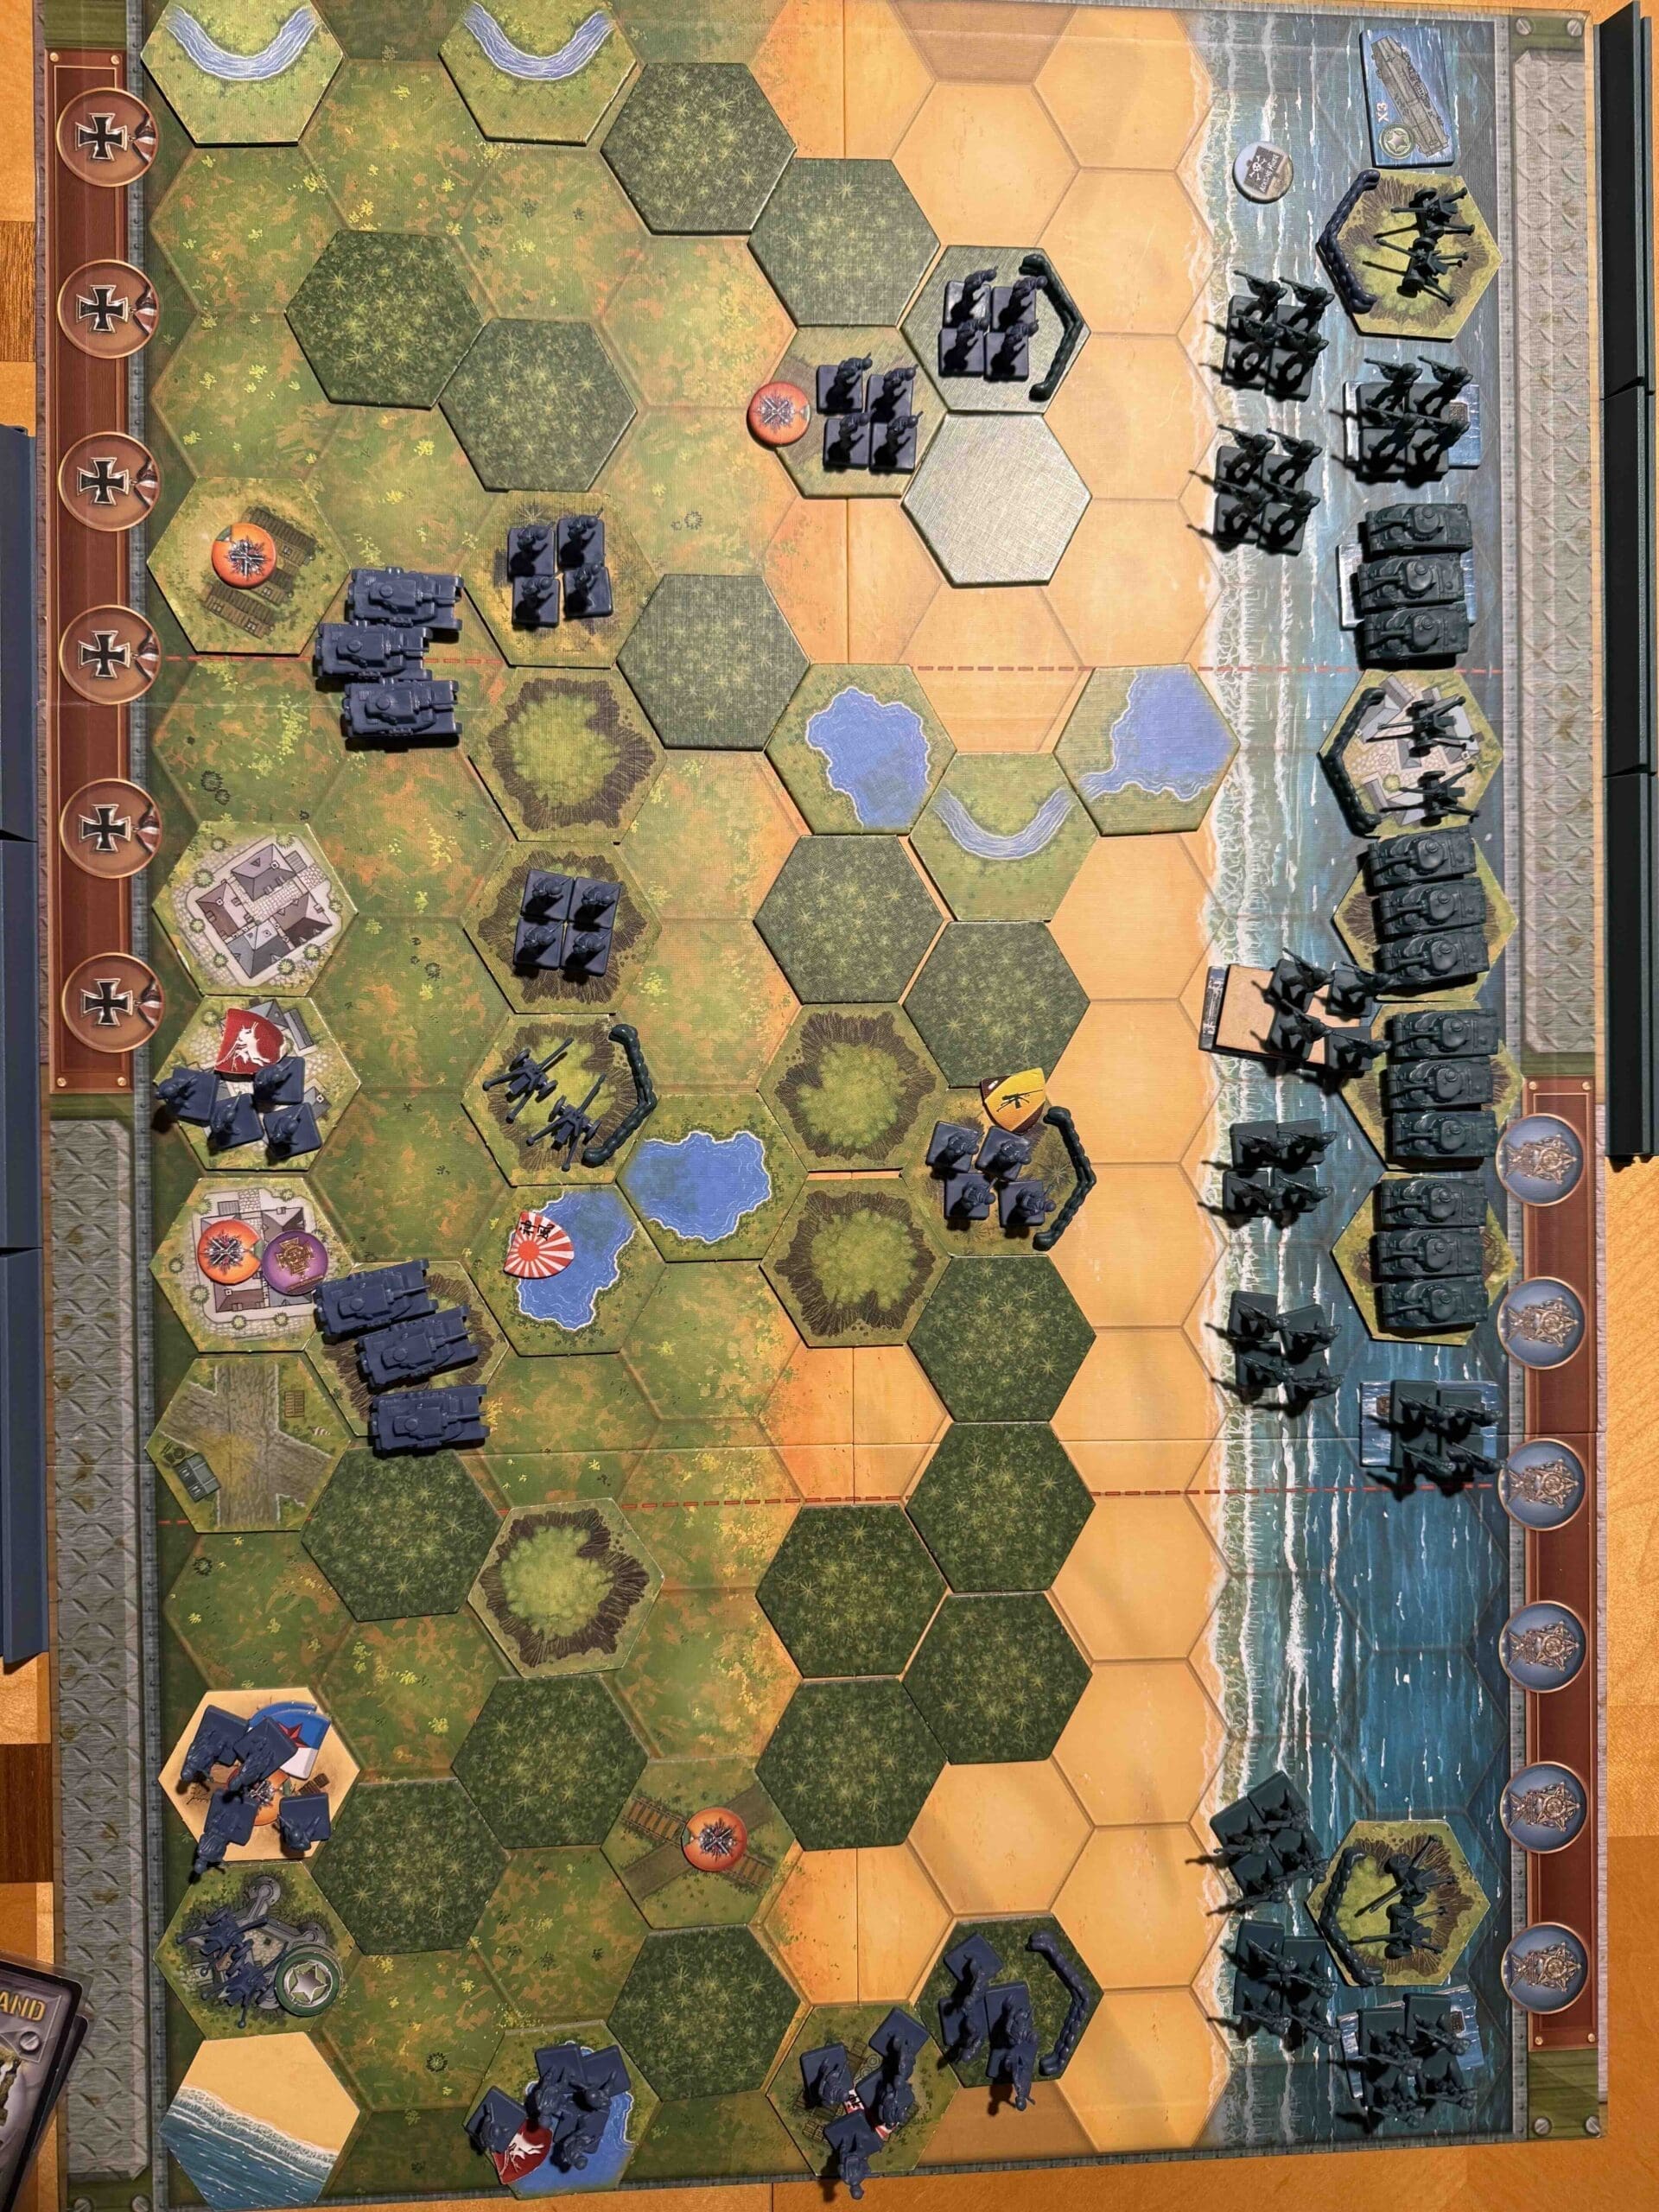
Singapore

Singapore

Singapore

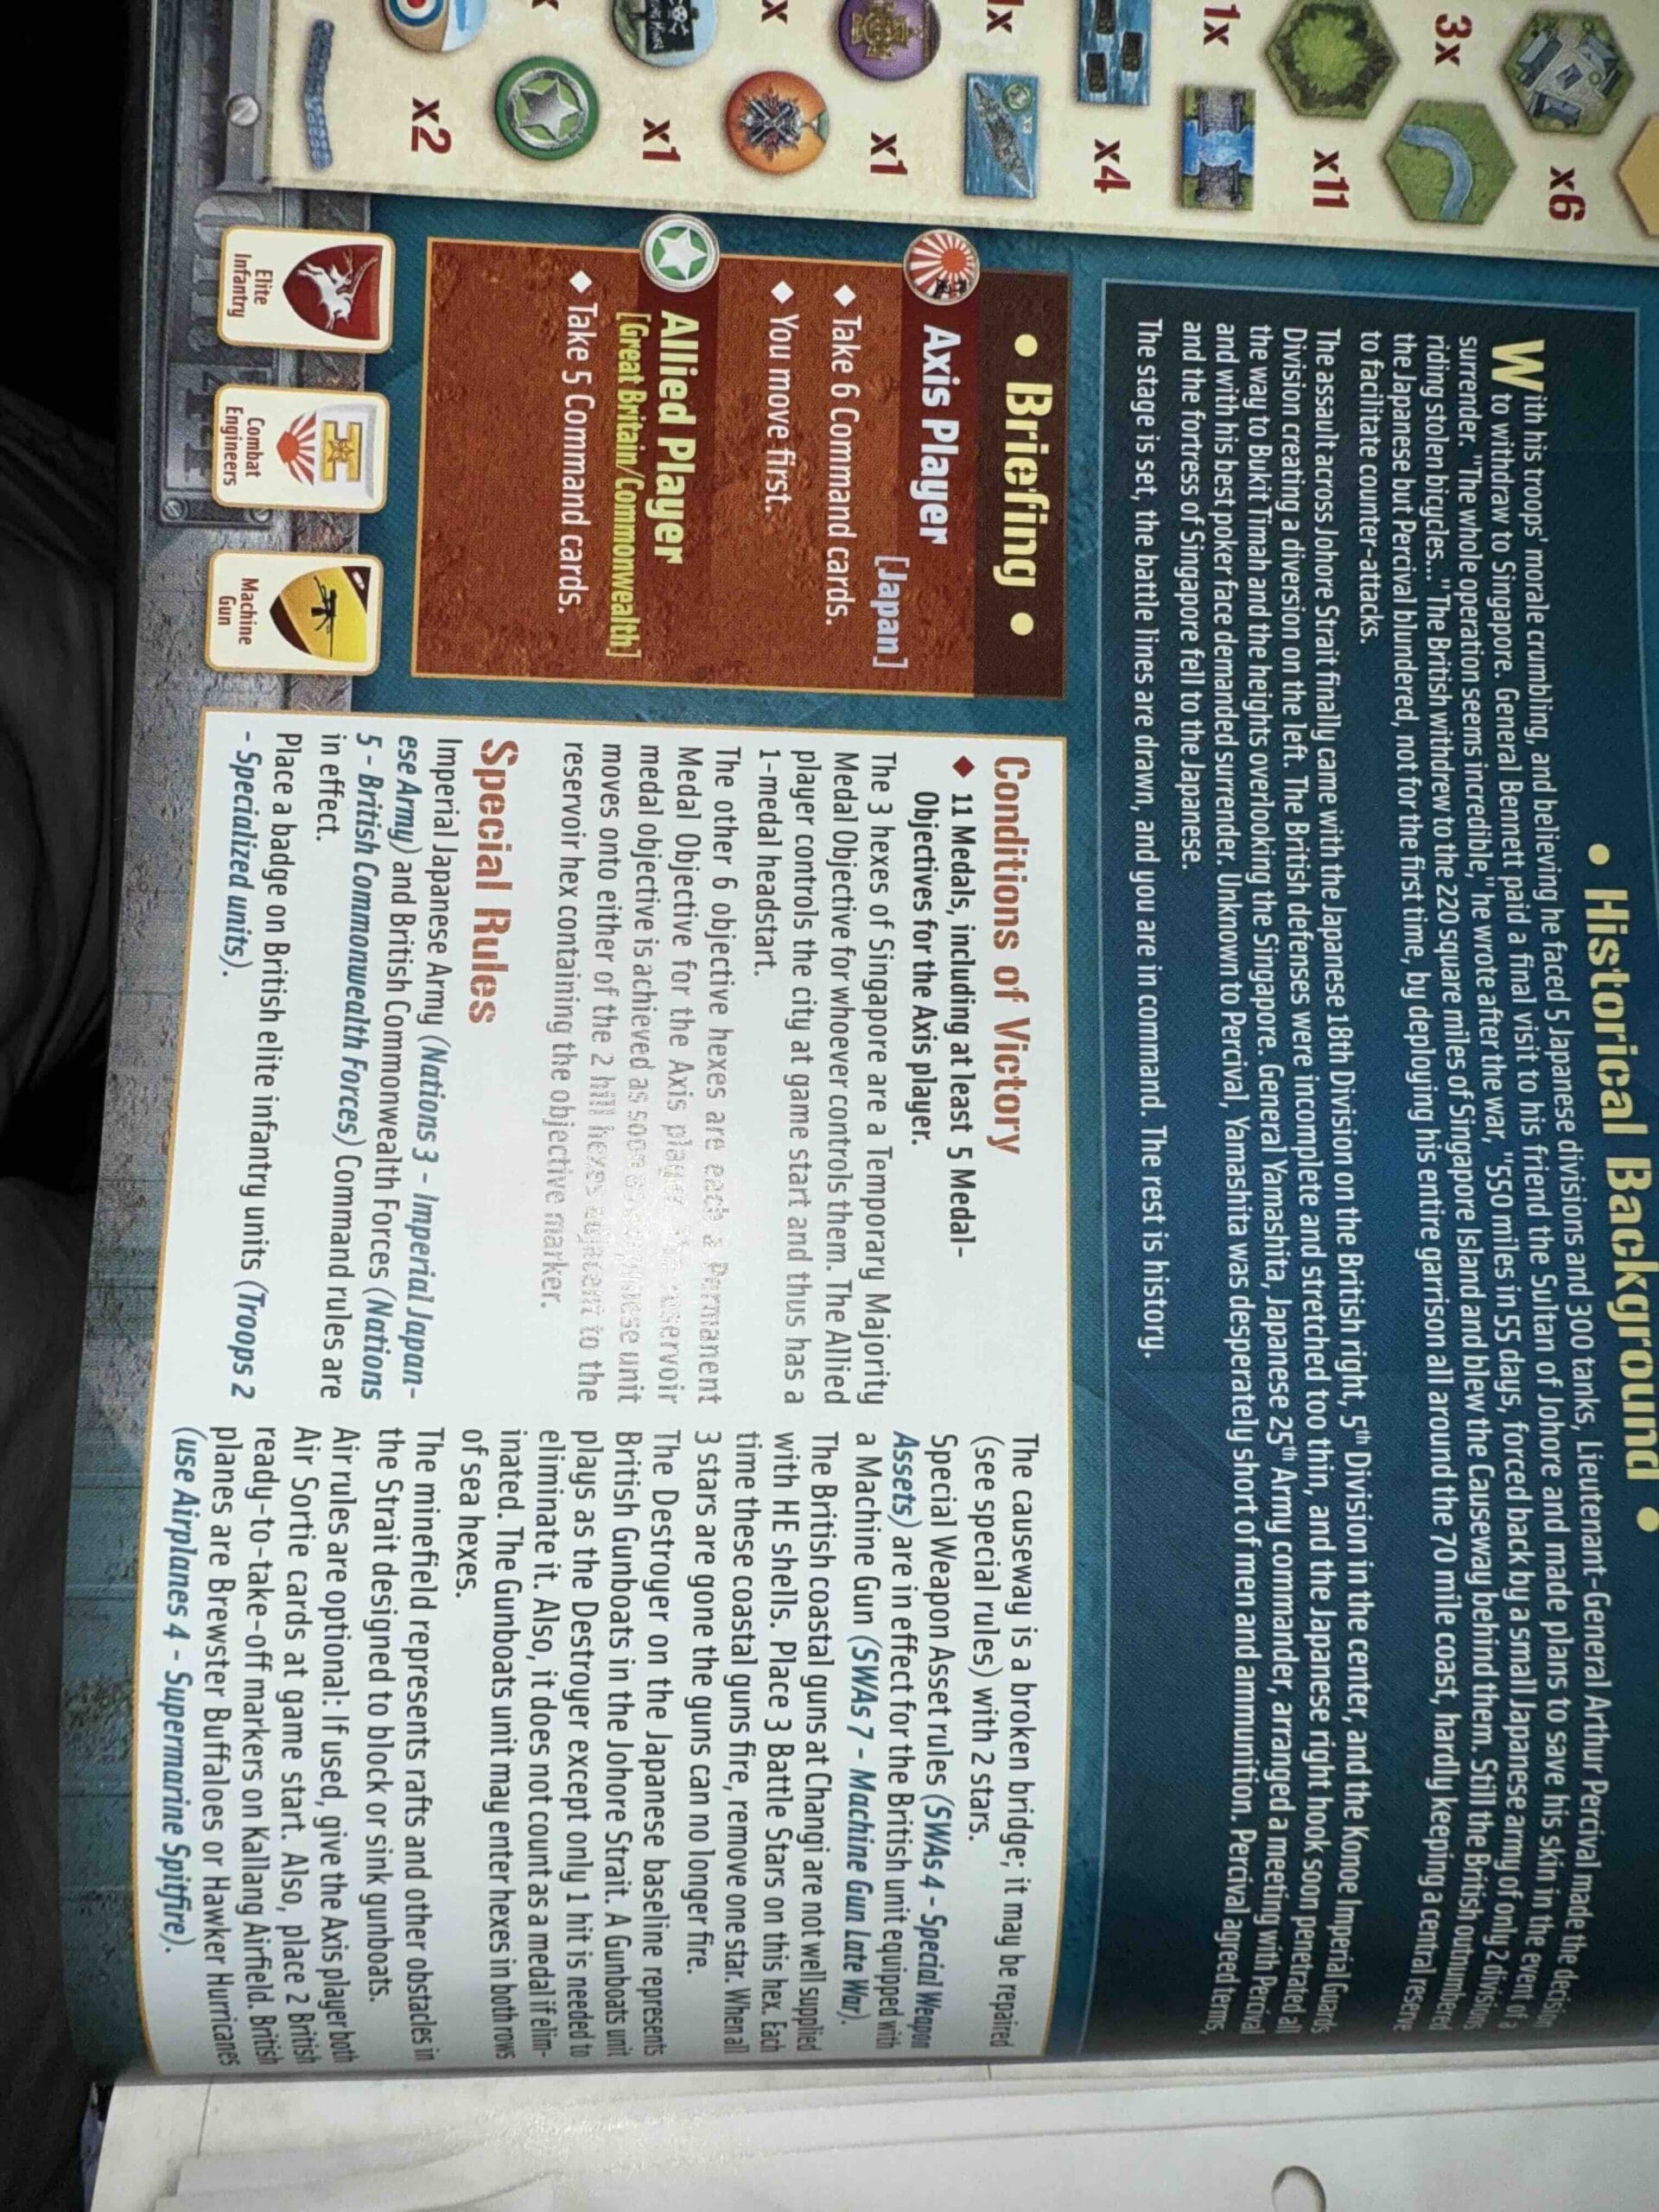
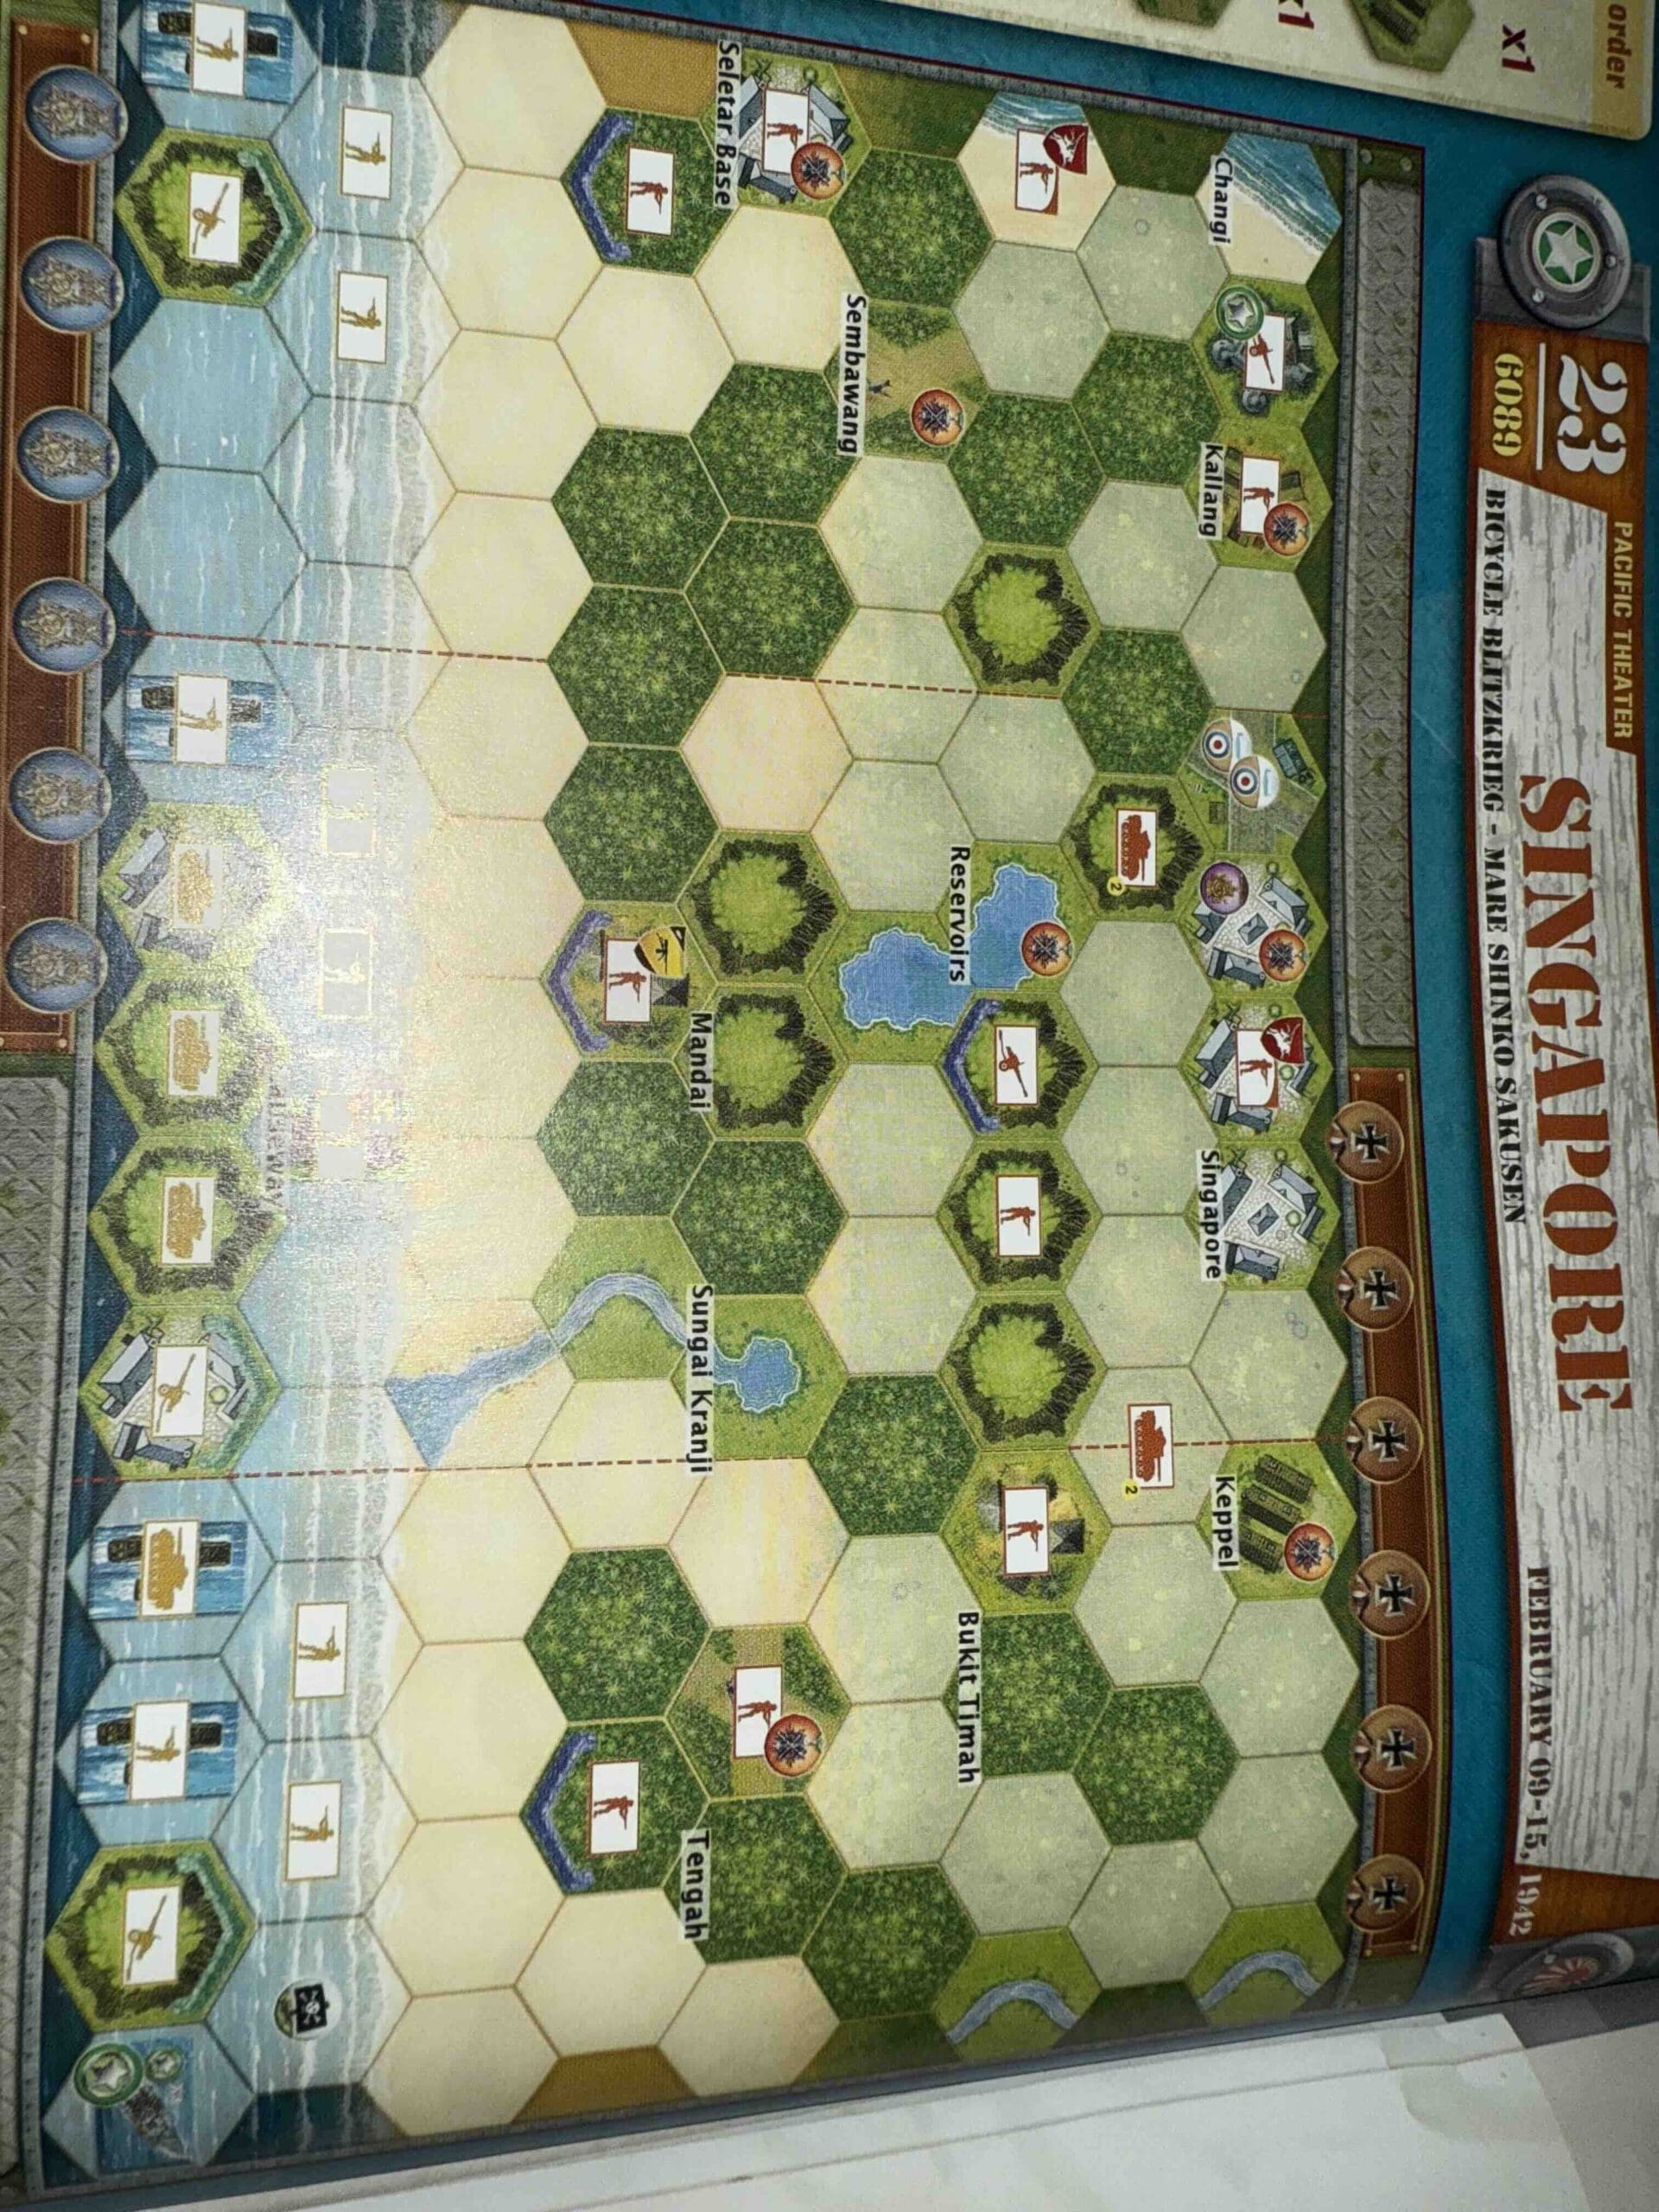
The Battle of Singapore in February 1942 was the climactic phase of Japan’s “Bicycle Blitzkrieg” during the Mare Shinko Sakusen (Greater East Asia Co-Prosperity Sphere offensive). Japanese forces, using speed, surprise, and bicycles to maneuver swiftly through Malaya, overwhelmed British Commonwealth defenses and pushed them back to Singapore.

Despite its strong coastal defenses, Singapore fell after a week of land-based attacks and psychological warfare. General Percival surrendered on February 15, 1942, in one of Britain’s worst military defeats, with over 80,000 Allied troops taken prisoner. The fall of Singapore stunned the Allies and gave Japan control over a key strategic stronghold in Southeast Asia.

General Howitzer sums it up in one sentence:
The Japanese rolled through Malaya on – can you believe it! – bicycles, outmaneuvered the Brits, and took Singapore without breaking stride—proof that arrogance and poor leadership lose wars faster than bullets.

11 VP’s, including at least 5 Medal Objectives for the Axis player.

card

Card Balance:

Allies – 5

Axis – 6

Complexity:

4

Conditions:

Jungle Beach

Context:

Historical

Location:

Singapore

Year:

1942

Theater:

Pacific

Campaign:

Bicycle Blitzkreig

Codename:

Summary:

Objectives:

11 VP’s including Permanent Medal and Temporary Majority Medal Objectives

Battlefield:

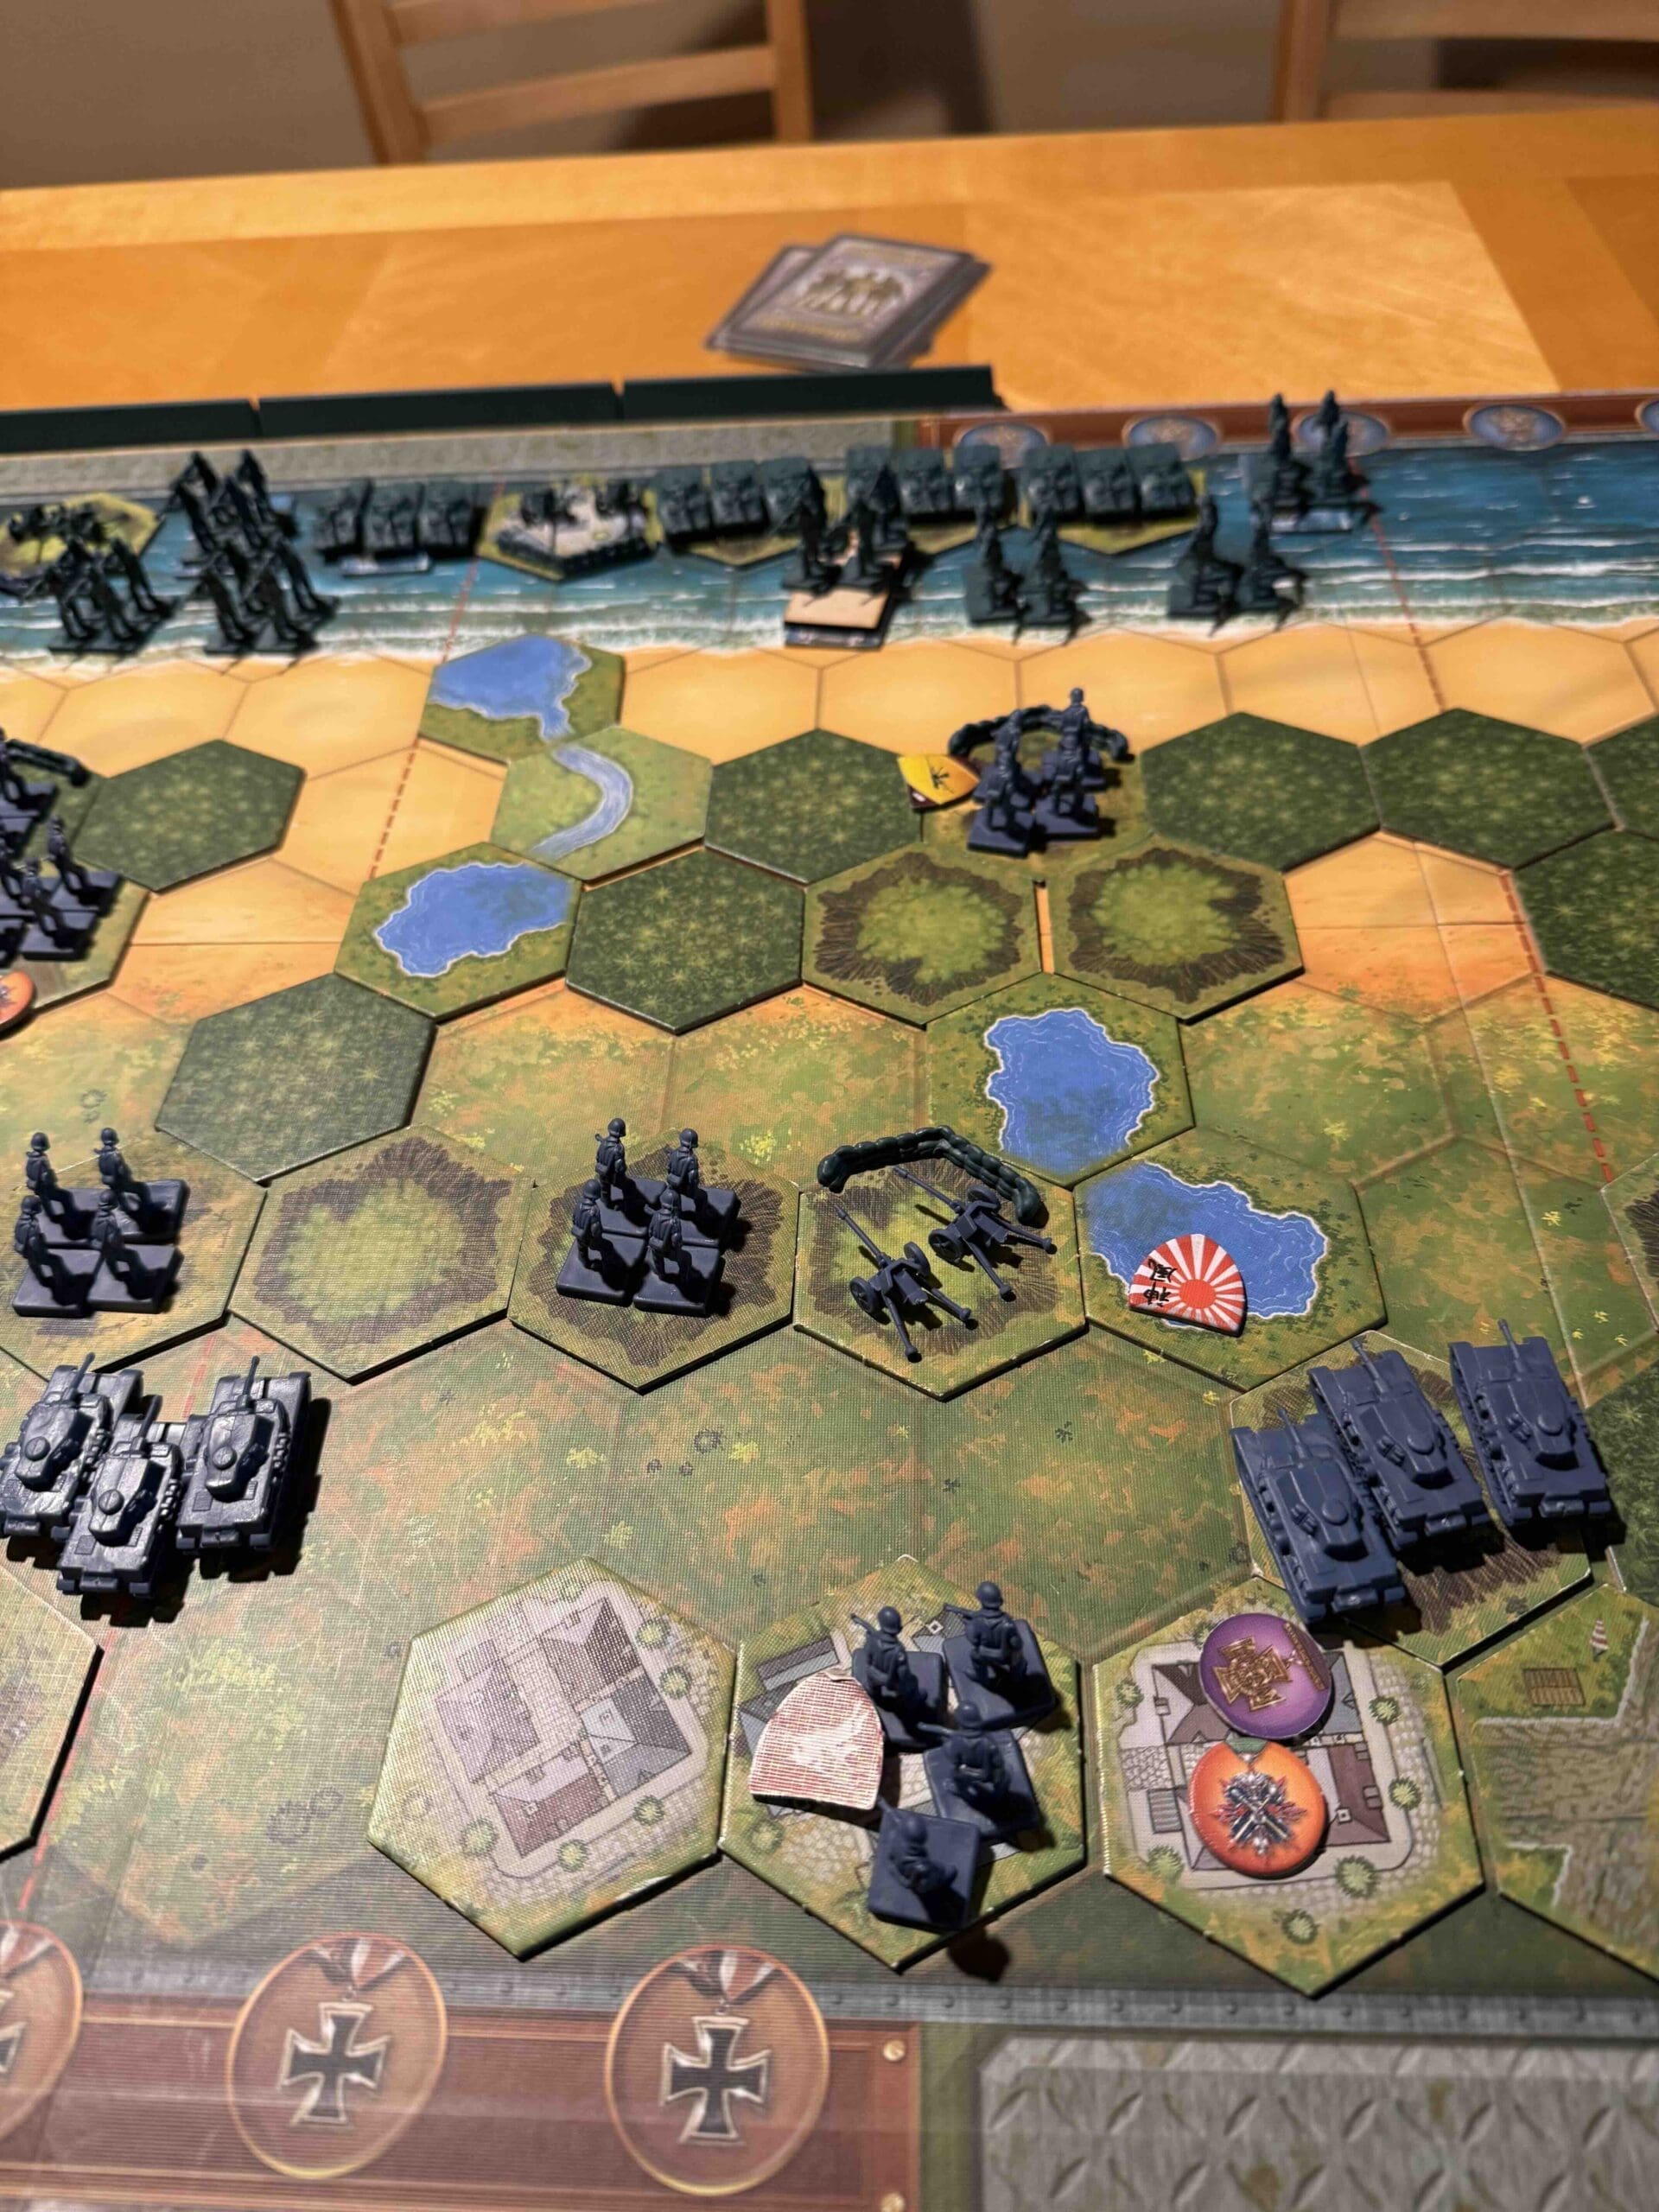
Combination of beach assault and jungle terrain and the city of Singapore.

Troops:

Allies – 10 Infantry including Machine Gun, 2 Artillery, a gun boat, and optional British Hawker Hurricanes

Axis – 10 Infantry, 4 Armor, 3 Artillery


medal allies

🔥 Winning as Allies

1.  You have a gun boat in the corner right next to the enemy. Use it as many times as you can before they take it out.

2.  You have a couple of Artillery. Use them well, but note that the unit at Changi only has enough ammo for three hits. 

3. You have many Permanent Medal Objectives to guard, so in most cases you will need to keep your forces in a defensive position.

4.  Air rules are optional. It is important for British defenses to make use of them as you have two Hawker Hurricanes at your disposal.

medal axis

🔥 Winning as Axis

1.  You have many forces which can be brought to bear but you will need to use your landing craft to get them ashore.

2.  You need to take out the enemy gun boat in the corner of your right flank ASAP. That will only take one Grenade.

3.  Once you have dealt with immediate threats near the beach, you can take some time to repair the causeway, which will take two Stars.  Then you can advance your three Armor units into battle.

4.  Your right flank is your strongest. Once you get your forces ashore with the landing craft, you can advance against Tengah and capture your first Medal Objective. Then you can continue deep into enemy territory.

Battle Reports

Author:

Days of Wonder

Resource:

Campaign Book, Volume 2


Place Battle Reports on a scenario page, or specify its scenario name in the shortcode.

Namur

Namur

Namur

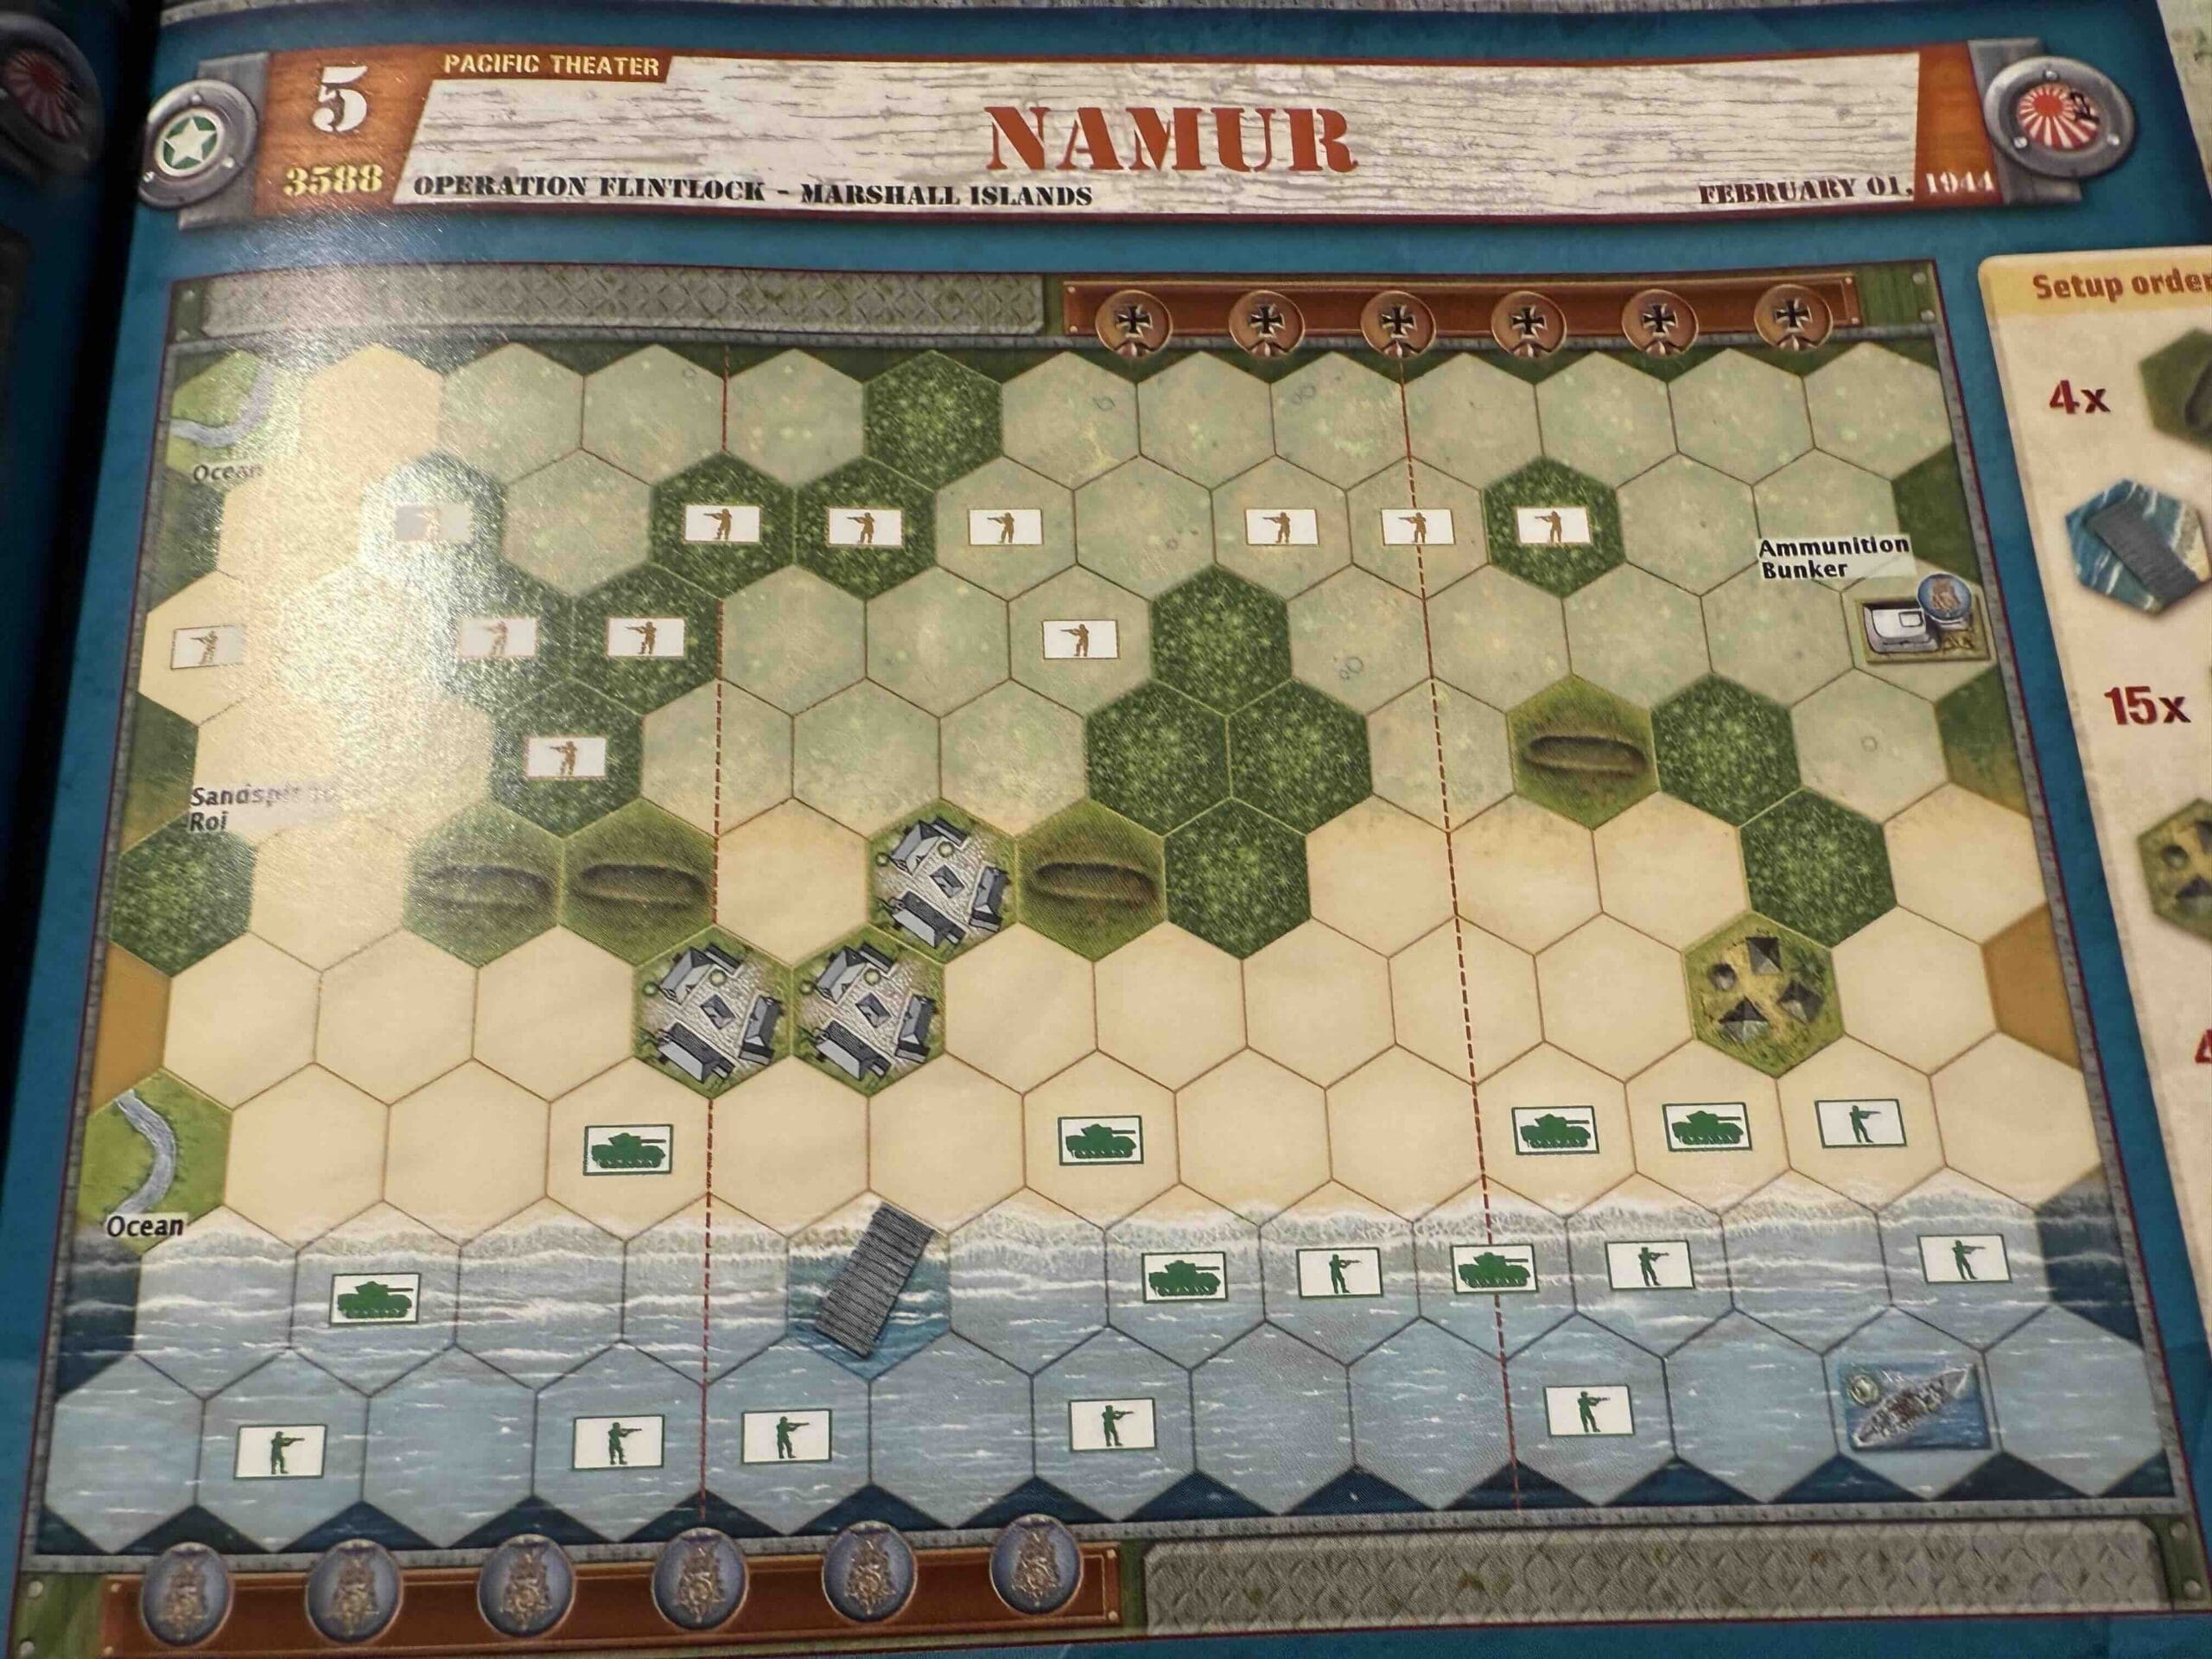
The Battle of Namur took place on February 1–2, 1944, as part of the U.S. assault on the Marshall Islands during World War II. U.S. 2nd Marine Division forces landed on Namur Island, part of the Kwajalein Atoll, facing fierce resistance from well-entrenched Japanese defenders. The battle saw intense close-quarters combat, complicated by Japanese bunkers, sniper fire, and booby traps. A massive explosion at a Japanese ammunition dump—triggered by American fire—caused heavy U.S. casualties but also disrupted enemy defenses. After two days of brutal fighting, the Marines secured the island. Namur’s capture was a key step in the U.S. island-hopping campaign, giving the Allies a critical foothold in the central Pacific and weakening Japan’s outer defensive ring.

General Howitzer’s summary:

Namur was a two-day slugfest—our 2nd Marines hit the beach and ran headfirst into bunkers, snipers, and traps laid by fanatical Japanese soldiers dug in like ticks. One hell of a blast tore through their ammo dump—and some of our boys with it—but it cracked their line wide open. When the smoke cleared, Namur was ours, and we had a solid damn grip in the Marshalls. Another island down, and one step closer to Tokyo.

5 VP’s

card

Card Balance:

Allies – 5

Axis – 5

Complexity:

3

Conditions:

Jungle Beach

Context:

Historical

Location:

Marshall Islands

Year:

1944

Theater:

Pacific

Campaign:

Codename:

Operation Flintlock

Summary:

Objectives:

5 VP’s plus the Ammunition Bunker Permanent Medal Objective

Battlefield:

Combination of beach assault and jungle terrain with some small villages.

Troops:

Allies – 9 Infantry, 7 Armor, and a Destroyer ship

Axis – 12 Infantry


medal allies

🔥 Winning as Allies

1.  Like all beach scenarios, the first objective is to get off of the beach as quickly as possible and assemble all of your forces into a cohesive fighting unit. 

2.  You have a Destroyer which has an attack range and power of 3,3,2,2,1,1,1,1; so 8 hexes deep!  Plus with a successful hit you gain a targetting reticule upon the hex, which increases the dice by one until the hex is destroyed or vacated.   Use it!

3.  Use your Armor to soften up the enemy at a distance, should any of them venture near the shore.  Remember that because of the Seishin Kyoiku principle, and full-force Japanese units attack with four dice at Close Range.  So hit each one at least once before venturing near them.

4.  The Ammunition Bunker is a Permanent Medal Objective(!) – if you can blow it up.  So occupy it and roll two dice, and hope for a star; but a grenade will kill one of your Marine figures, so be careful!

medal axis

🔥 Winning as Axis

1.  You have superior numbers on your right flank and central section.  So move your forces into the jungles and town hexes to hold off the enemy forces.

2.  Get close and then by combining the Banzai two-hex Close Assault attack with any full-force units, you can hit them with the Seishin Kyoiku princple and roll four-dice with each attack.

3.  Guard the ammunition bunker so that the enemy does not get an easy Permanent Medal Objective.

4.  With all of the enemy tanks in the area, do not get any of your forces caught in the open.

Battle Reports

Author:

Days of Wonder

Resource:

Campaign Book, Volume 2

Place Battle Reports on a scenario page, or specify its scenario name in the shortcode.
Taukkyan Roadblock

Taukkyan Roadblock

Taukkyan Roadblock

Taukkyan-Roadblock

The Battle of the Taukkyan Roadblock? That was a brutal wake-up call in the jungles of Burma.

It was April 1942, and the British were pulling out of Rangoon, trying to stay one step ahead of a fast and ruthless Japanese advance. But they weren’t sitting back—they were moving like ghosts through the jungle, and they slammed a roadblock right down at Taukkyan, a vital choke point on the only damn road out.

It was a classic ambush—sliced right through the retreating columns. Trucks jammed, units scattered, and bullets flying like hellfire. The 17th Indian Division fought like lions to break through, but the jungle was tight, the fire was heavy, and the enemy was dug in and deadly.

A lot of brave men didn’t make it. That roadblock caused chaos, real chaos. It wasn’t just a firefight—it was the kind of sharp, surgical move that the Japanese were damn good at: fast, quiet, deadly. It wasn’t just a fight—it was a message.

The collapse at Taukkyan was a key reason why southern Burma slipped right through our fingers. It forced the Allies to fall back all the way into India. But mark my words—every inch we lost, we learned from. And when we came back, we came back with fire in our guts and iron in our fists.

~~ General Howitzer

5 VP’s

Card Balance:

Allies – 5 + 2 Combat Cards

Axis – 5 + 2 Combat Cards

Complexity:

3

Conditions:

Jungle

Context:

Historical

Location:

Burma

Year:

1939

Theater:

Pacific

Campaign:

Burma Campaign

Codename:

Summary:

Objectives:

5 VP’s

Battlefield:

Jungle with two intersecting roads, a roadblock, a village, and some hills.

Troops:

Allies  – 8 Infantry, 4 Armor

Axis (Japan) – 9 Infantry with some machine guns and anti-tank special weapons.


Allied Strategy:

1.  Big Picture: while you do not have to get through the roadblock, it does present a challenge for the British as a rallying point for the enemy.

2.  Before you attempt an Infantry attack, use your Armor units to attack the Japanese units at a distance, and reduce each unit by at least one figure, in order to eliminate their Seishin Kyoiku Doctrine power. 

3.  You have some powerful forces on your right section.  Get the Infantry moved forward and into the nearby jungle, so that the roadway is clear to allow your Armor to advance and get into the attack.

 Axis Strategy

1.  Big Picture Strategy:  with their special weapons of machine guns and anti-tank guns, plus the roadblock present a significant opportunity for the Japanese to hold off the Brits.

2.  Because of the British tanks, you cannot just stay behind your sandbags the whole time. They will slowly pick you off, and degrade your attack ability.  You will have to deal with the tanks, perhaps through specialized cards such as Barrage, Air Power, Behind Enemy Lines, or the Combat Card ‘Giretsu’, the Japanese BEL card. 

3.  With the right set of cards, and as long as most all of your forces are still at full ‘Seishin Kyoiku Doctrine’ strength, a full scale assault on your right flank could prove successful.   

Battle Reports

Author:

Days of Wonder

Link:

Place Battle Reports on a scenario page, or specify its scenario name in the shortcode.
Bardia

Bardia

Bardia

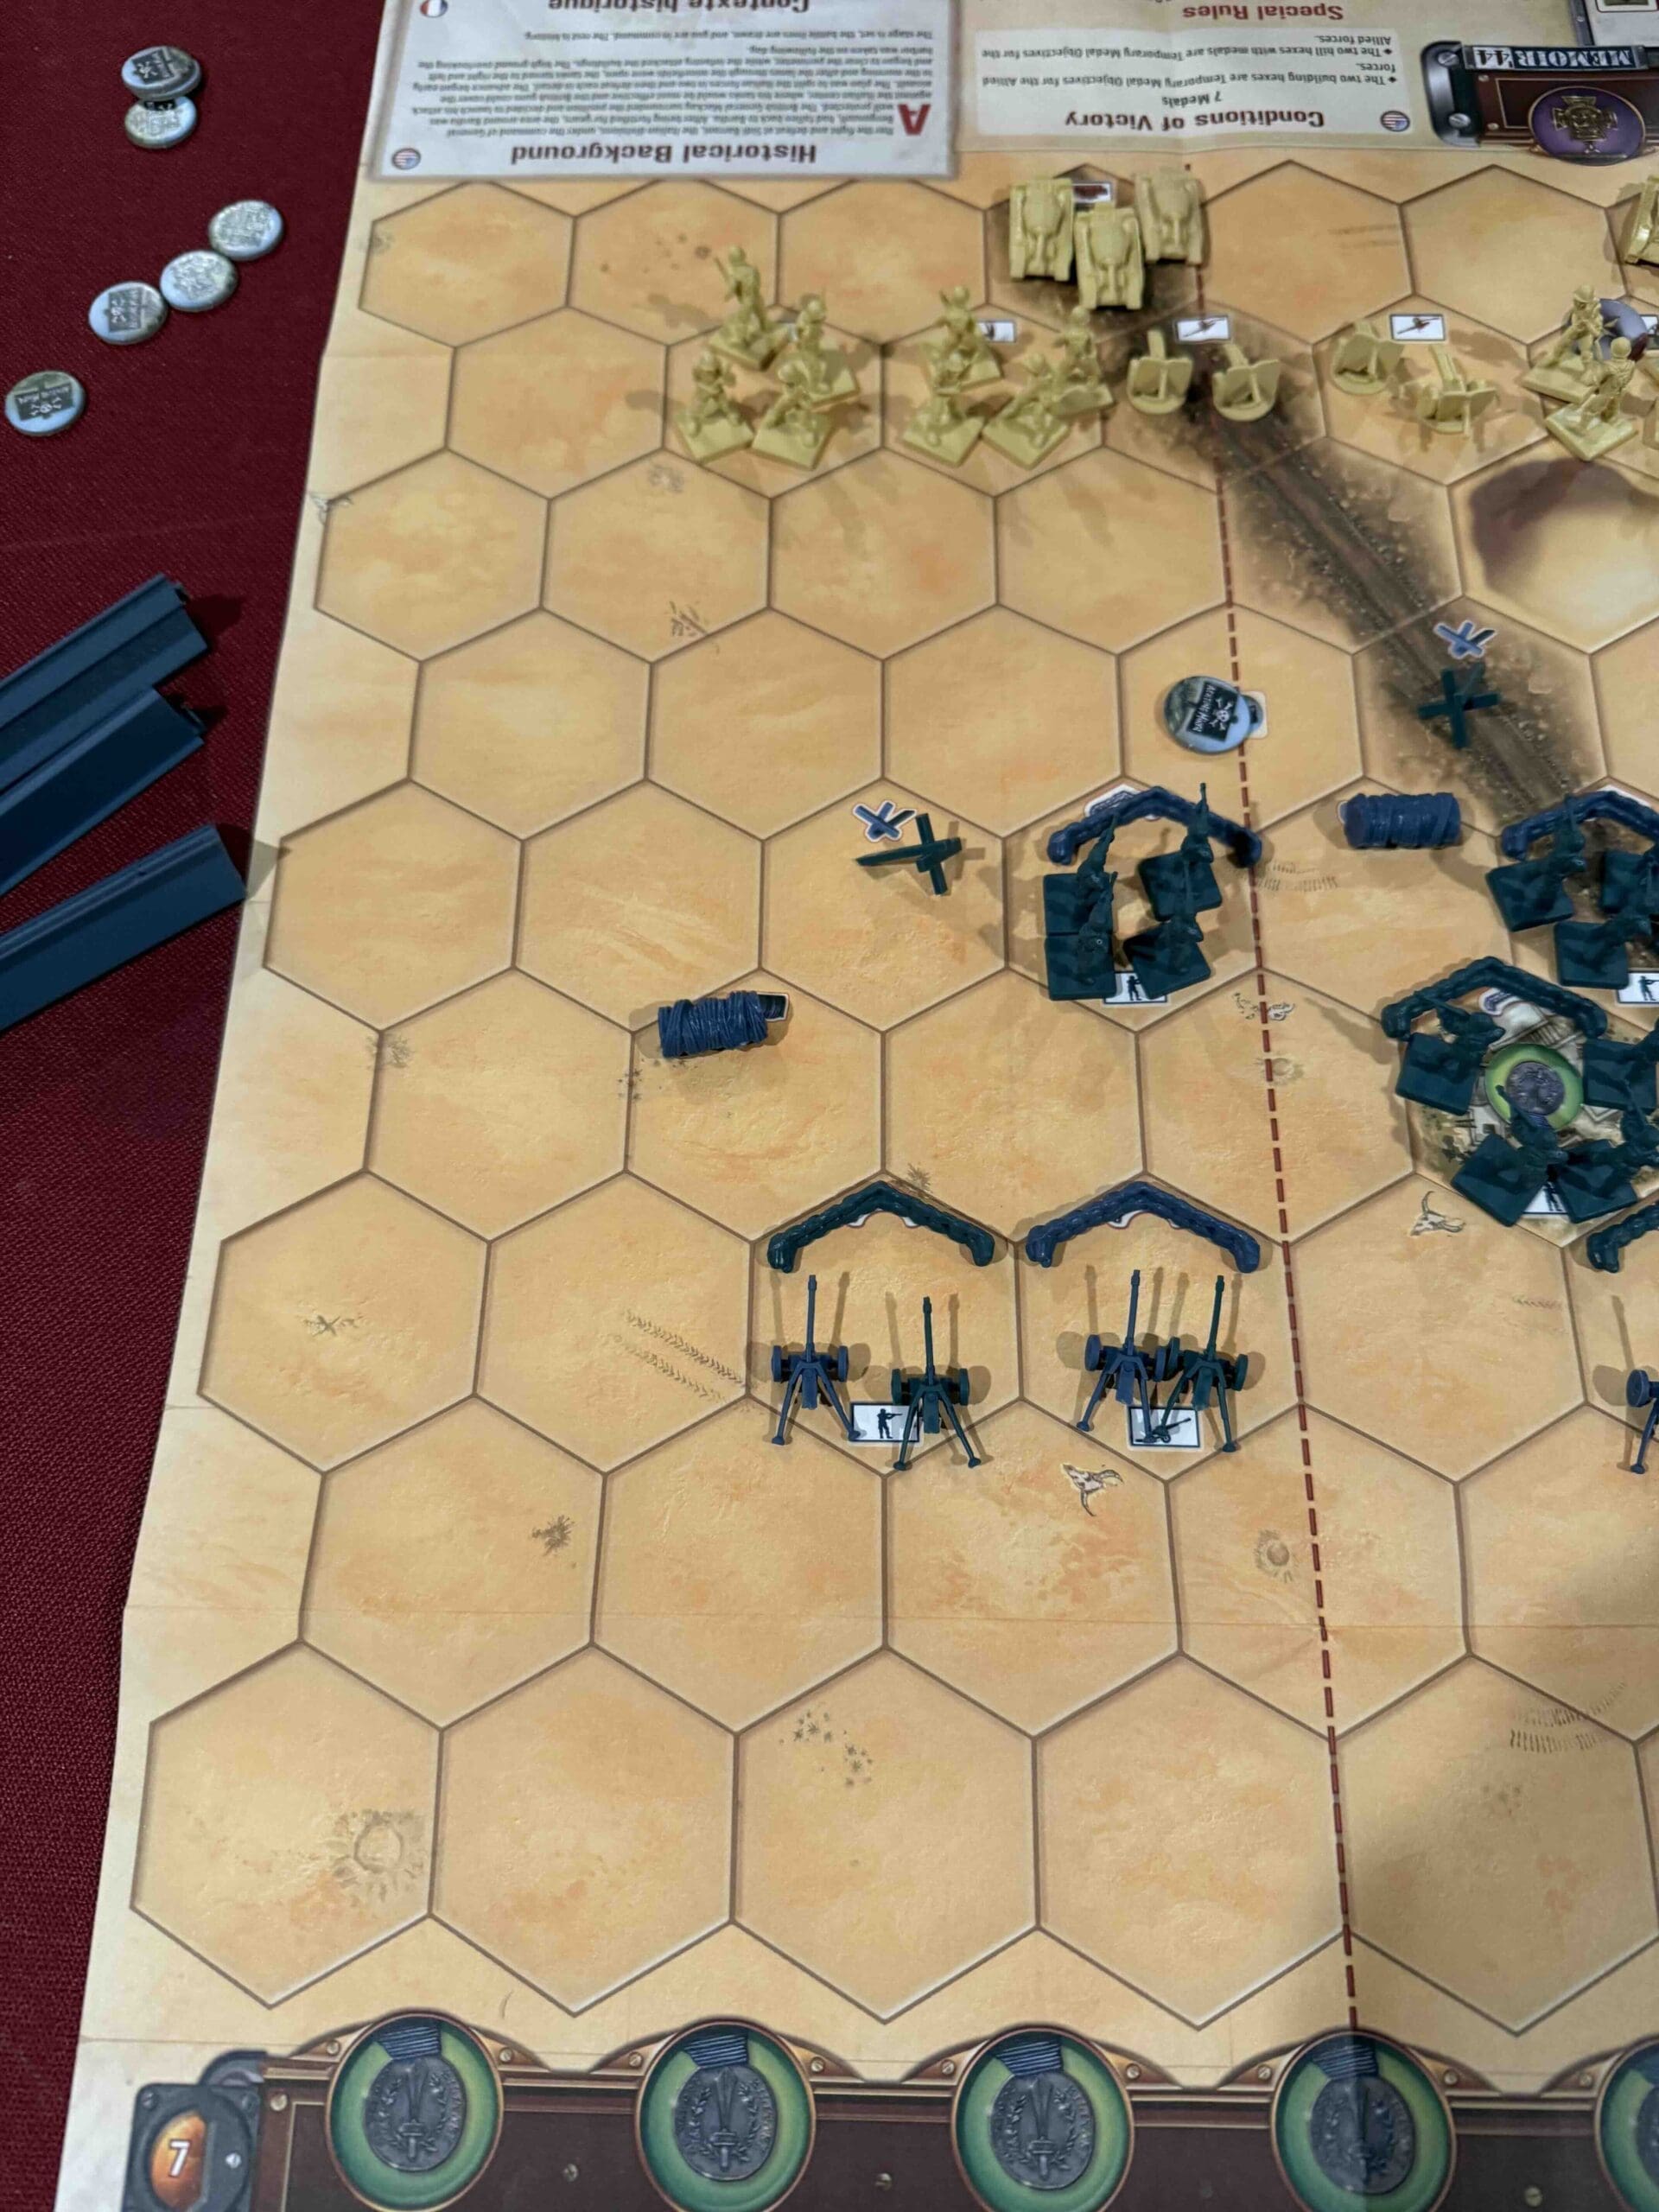
Bardia, January 1941—now that was a proper kick in the teeth for the Italians, and the Aussies delivered it with style.

This was the first big ground fight cooked up and led by an Australian outfit—6th Australian Division, under General Mackay—and let me tell you, those boys weren’t there to play games. Their target? Bardia, a heavily fortified Italian stronghold in Libya. Italians thought they were sitting pretty behind wire, guns, and concrete. Big mistake.

The 16th Brigade hit ’em from the west—smart move, weakest spot in the line. The engineers crawled through hell, cut through barbed wire, filled anti-tank ditches, and cleared a path like pros. Then came the punch: Matilda II tanks from the Brits’ 7th Royal Tank Regiment rolled in with the infantry. After that, it was a hammer-and-anvil job—17th and 19th Brigades came crashing in to finish the job.

By the end, Bardia was ours. Thousands of Italians surrendered, and the whole damn front cracked wide open. That victory let the Allies charge deeper into Libya and gave Rommel a reason to pack his bags for North Africa.

The Aussies proved two things at Bardia: one, they could plan and fight like hell; and two, when you combine tanks, grit, and coordination—you win. That’s the kind of war I like: fast, bold, and overwhelming.

~~ General Howitzer

7 VP’s

card

Card Balance:

Allies – 6 + 2 Combat Cards

Axis – 6 + 2 Combat Cards
(Note that Italian rules call for a loss of one Command Card for every Italian unit/hex lost, until 3 remain.)

Complexity:

2

Conditions:

Desert

Context:

Historical

Location:

Libya

Year:

1943

Theater:

Mediterranean

Campaign:

Western Desert Campaign

Codename:

It was part of Operation Compass

Summary:

Objectives:

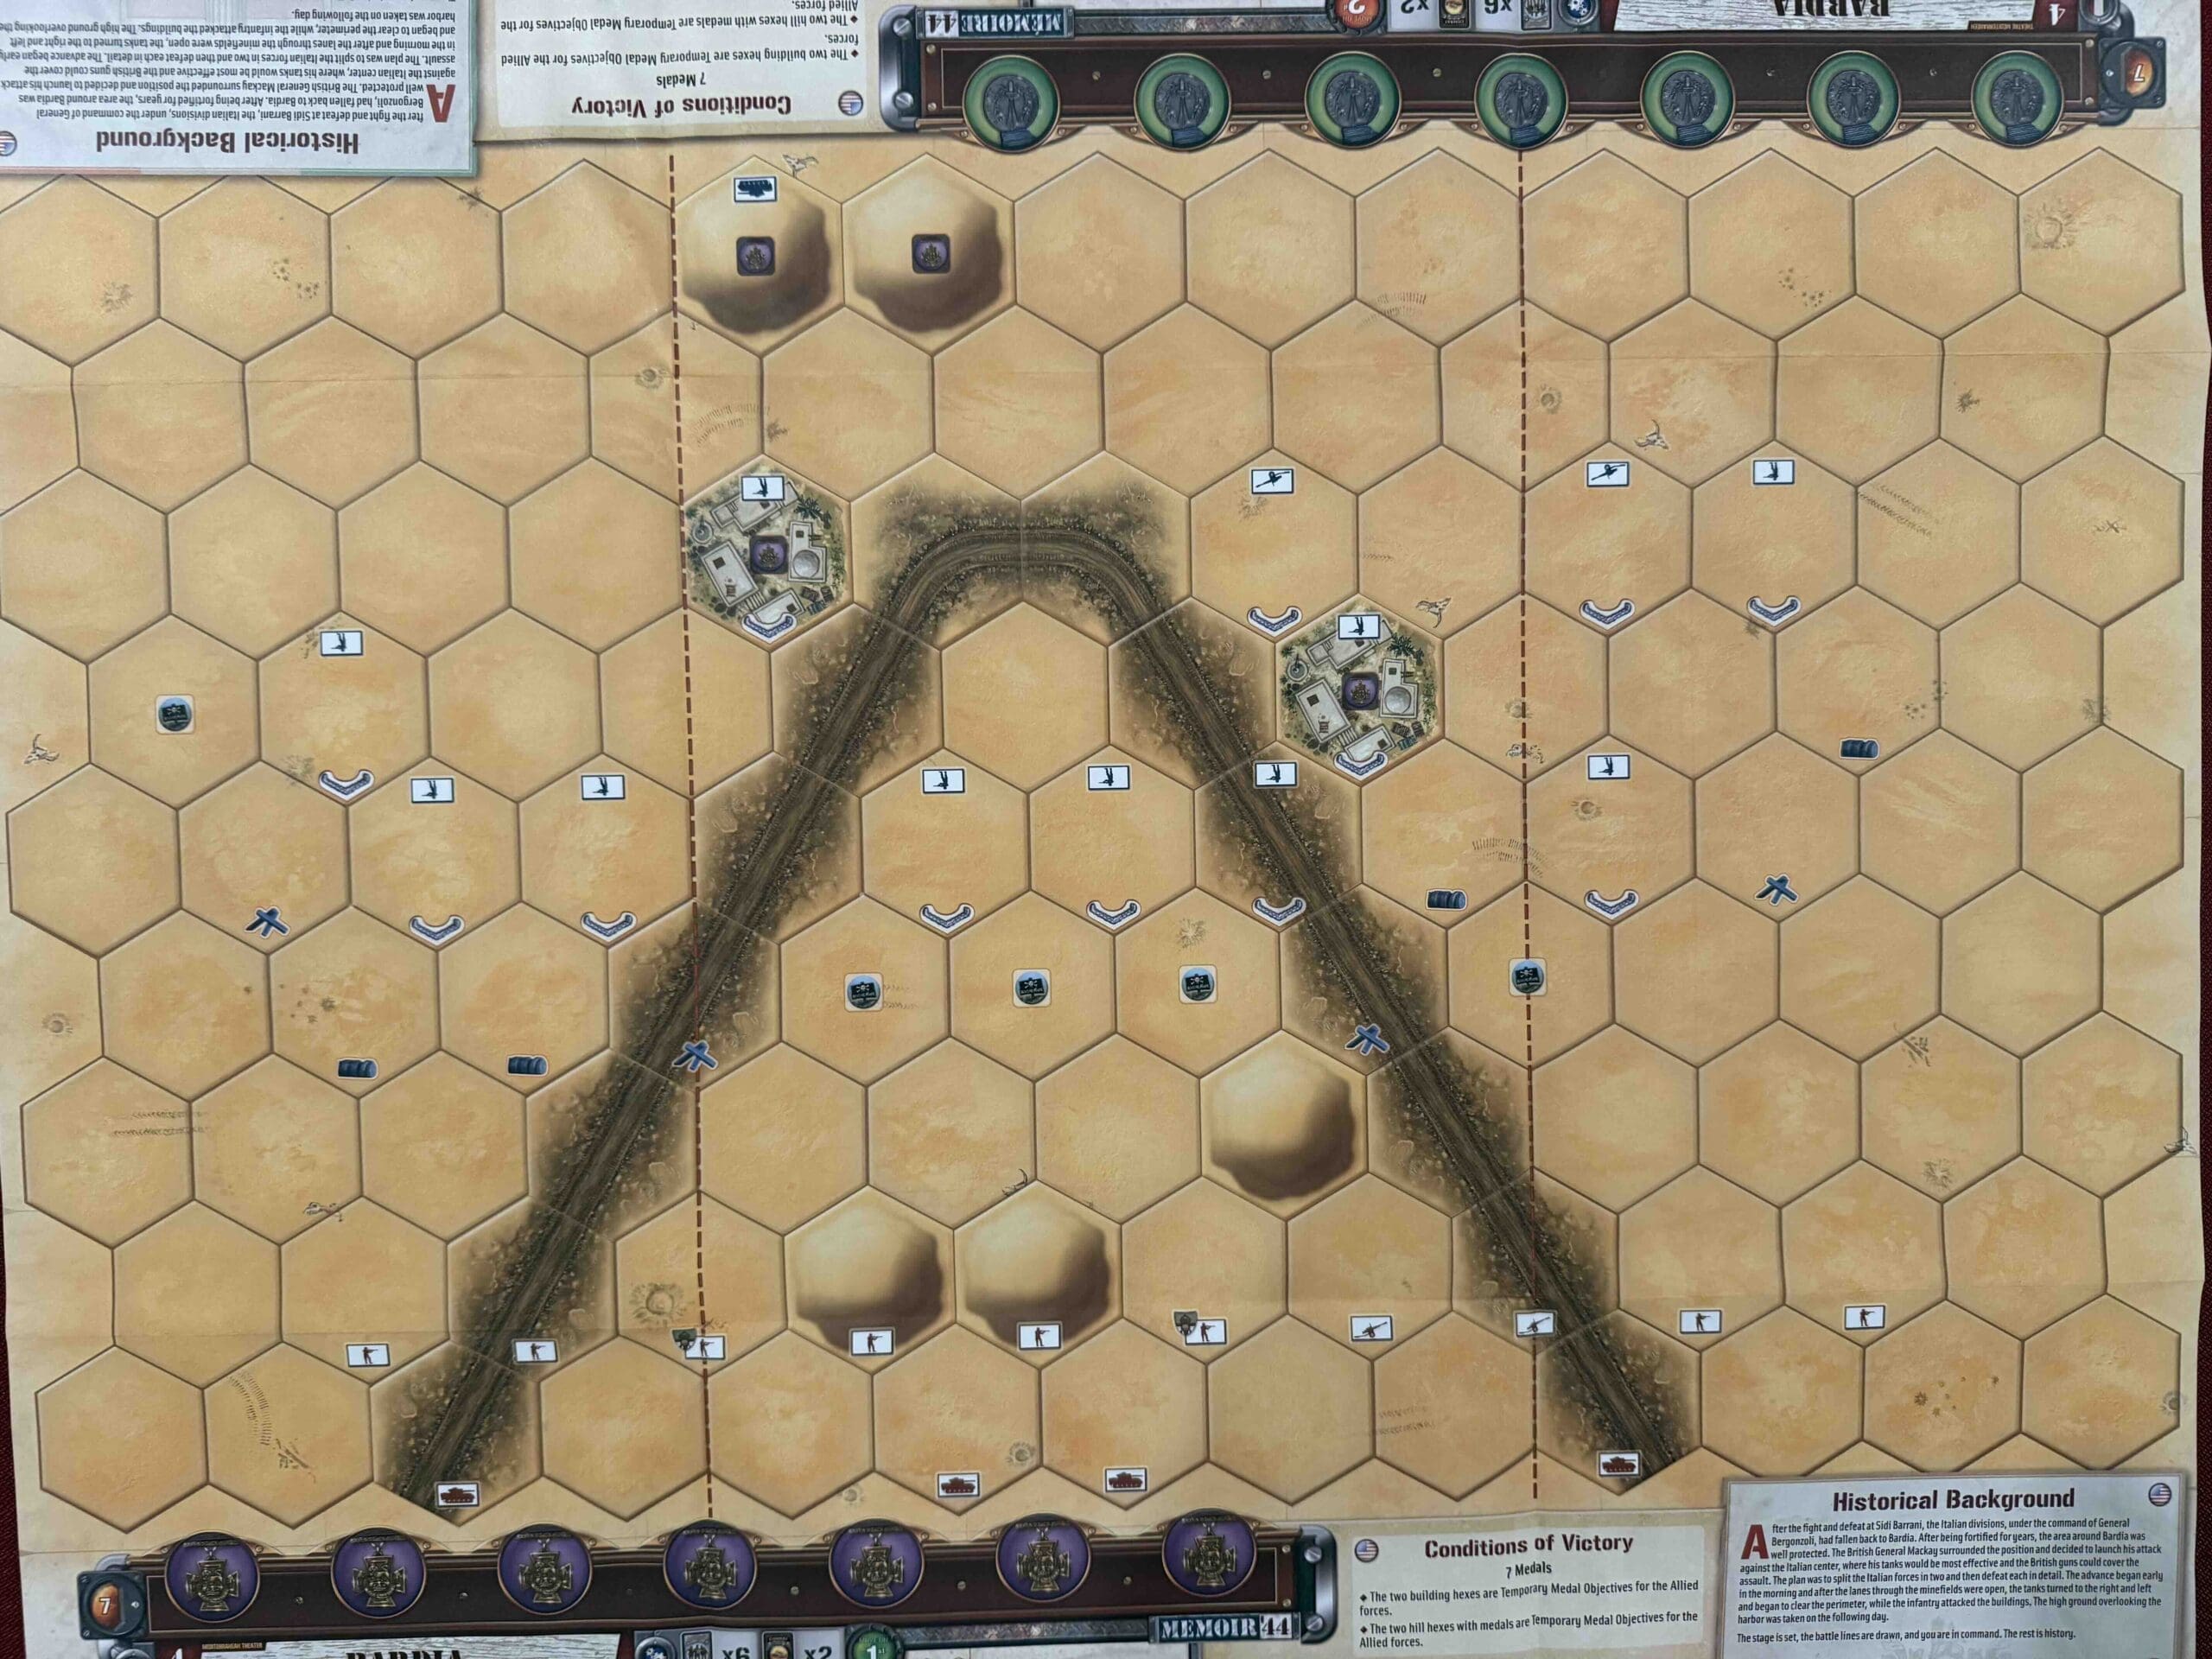
7 VP’s, including two building territorial objectives and two hill territorial objectives for the Allies

Battlefield:

Desert terrain with a branching roads running through it, and some dunes.

Troops:

Allies – 8 Infantry, 4 Armor, 2 Artillery

Axis – 10 Infantry, 1 Armor, 2 Artillery


medal allies

🔥 Winning as Allies

1.  Big Picture Strategy:  follow the roads that points like an arrow to your targets in the center section, which contains four territorial medals awaiting you at the two towns and two hills.

2.  Watch out for your right half of the battlefield which is dominated by the Italian artillery.  

medal axis

🔥 Winning as Axis

1.  Big Picture Strategy: stay behind the sandbags!  The Italians are in a defensive posture, and tactical wins are not worth the cost to your forces should you venture forth from your sandbags.

2.  Be aware that the rules of engagement for the Italian nation is that for every unit/hex which gets destroyed, you lose one command card, down to three cards in your hand.  This makes the loss of any unit devastating to your offensive capabilities.

3.  You have a strong set of Artillery on the left side of the battlefield. Use them at every opportunity.

Battle Reports

Author:

Days of Wonder

Link:

Place Battle Reports on a scenario page, or specify its scenario name in the shortcode.

Sbeitla Tunisia

Sbeitla Tunisia

Sbeitla Tunisia

Sbeitla Tunisia

Operation Frühlingswind—February 1943. The Krauts thought they had us dead to rights in central Tunisia. They were wrong.

Rommel’s boys hit us hard at Sidi Bou Zid, busted through, and kept pushing west toward Sbeitla. On February 17, they grabbed the town—but that’s where the party stopped.

Because in rolled the 1st U.S. Armored Division—Combat Command B—and they didn’t come to retreat. They dug in, fought smart, and hit the Germans with a counterattack they didn’t see coming. It wasn’t perfect, but it was bold—and it threw a wrench into the Nazi gears. They didn’t push any farther.

Sure, we took our lumps. Our tactics were green, our command still learning the ropes. But what matters is we learned. Fast. That fight at Sbeitla was a baptism by fire—and it forged better soldiers, better leadership, and a better army.

The message was clear: the Americans might get hit, but by God, we hit back—and next time, we’d be coming out swinging.

~~ General Howitzer

6 VP’s

Card Balance:

Allies – 5 + 2 Combat Cards

Axis – 5 + 2 Combat Cards

Complexity:

2

Conditions:

Desert

Context:

Historical

Location:

Tunisia

Year:

1943

Theater:

Mediterranean

Campaign:

Tunisia Campaign

Codename:

Operation Frühlingswind (Spring Wind)

Summary:

Objectives:

6 VP’s, including territorial objectives, and exit hexes.

Battlefield:

Desert terrain with a branching roads running through it, and dunes everywhere.

Troops:

Allies – 7 Infantry, 4 Armor, 1 Artillery

Axis – 8 Infantry, 5 Armor


Allied Strategy:

1.  

Axis Strategy

1. 

Battle Reports

Author:

Days of Wonder

Link:

Place Battle Reports on a scenario page, or specify its scenario name in the shortcode.
Secret Link