General Howitzer’s Field Guide to Memoir 44

A Memoir 44 Strategy & Tactics Community

GENERAL HOWITZER

Scenarios

Explore Memoir ’44 battlefields, maps, and player statistics.

GENERAL HOWITZER

Campaigns

Relive historic campaigns through linked Memoir ’44 battles.

GENERAL HOWITZER

Strategy Tips

Sharpen your tactics and take command of the battlefield.

GENERAL HOWITZER

Field Manuals

Explore field guides and manuals for your next battle.

GENERAL HOWITZER

Tournaments

Find Memoir ’44 tournaments, events, and fellow commanders.

GENERAL HOWITZER

My War Room

Track your battles, campaigns, achievements, and next mission.

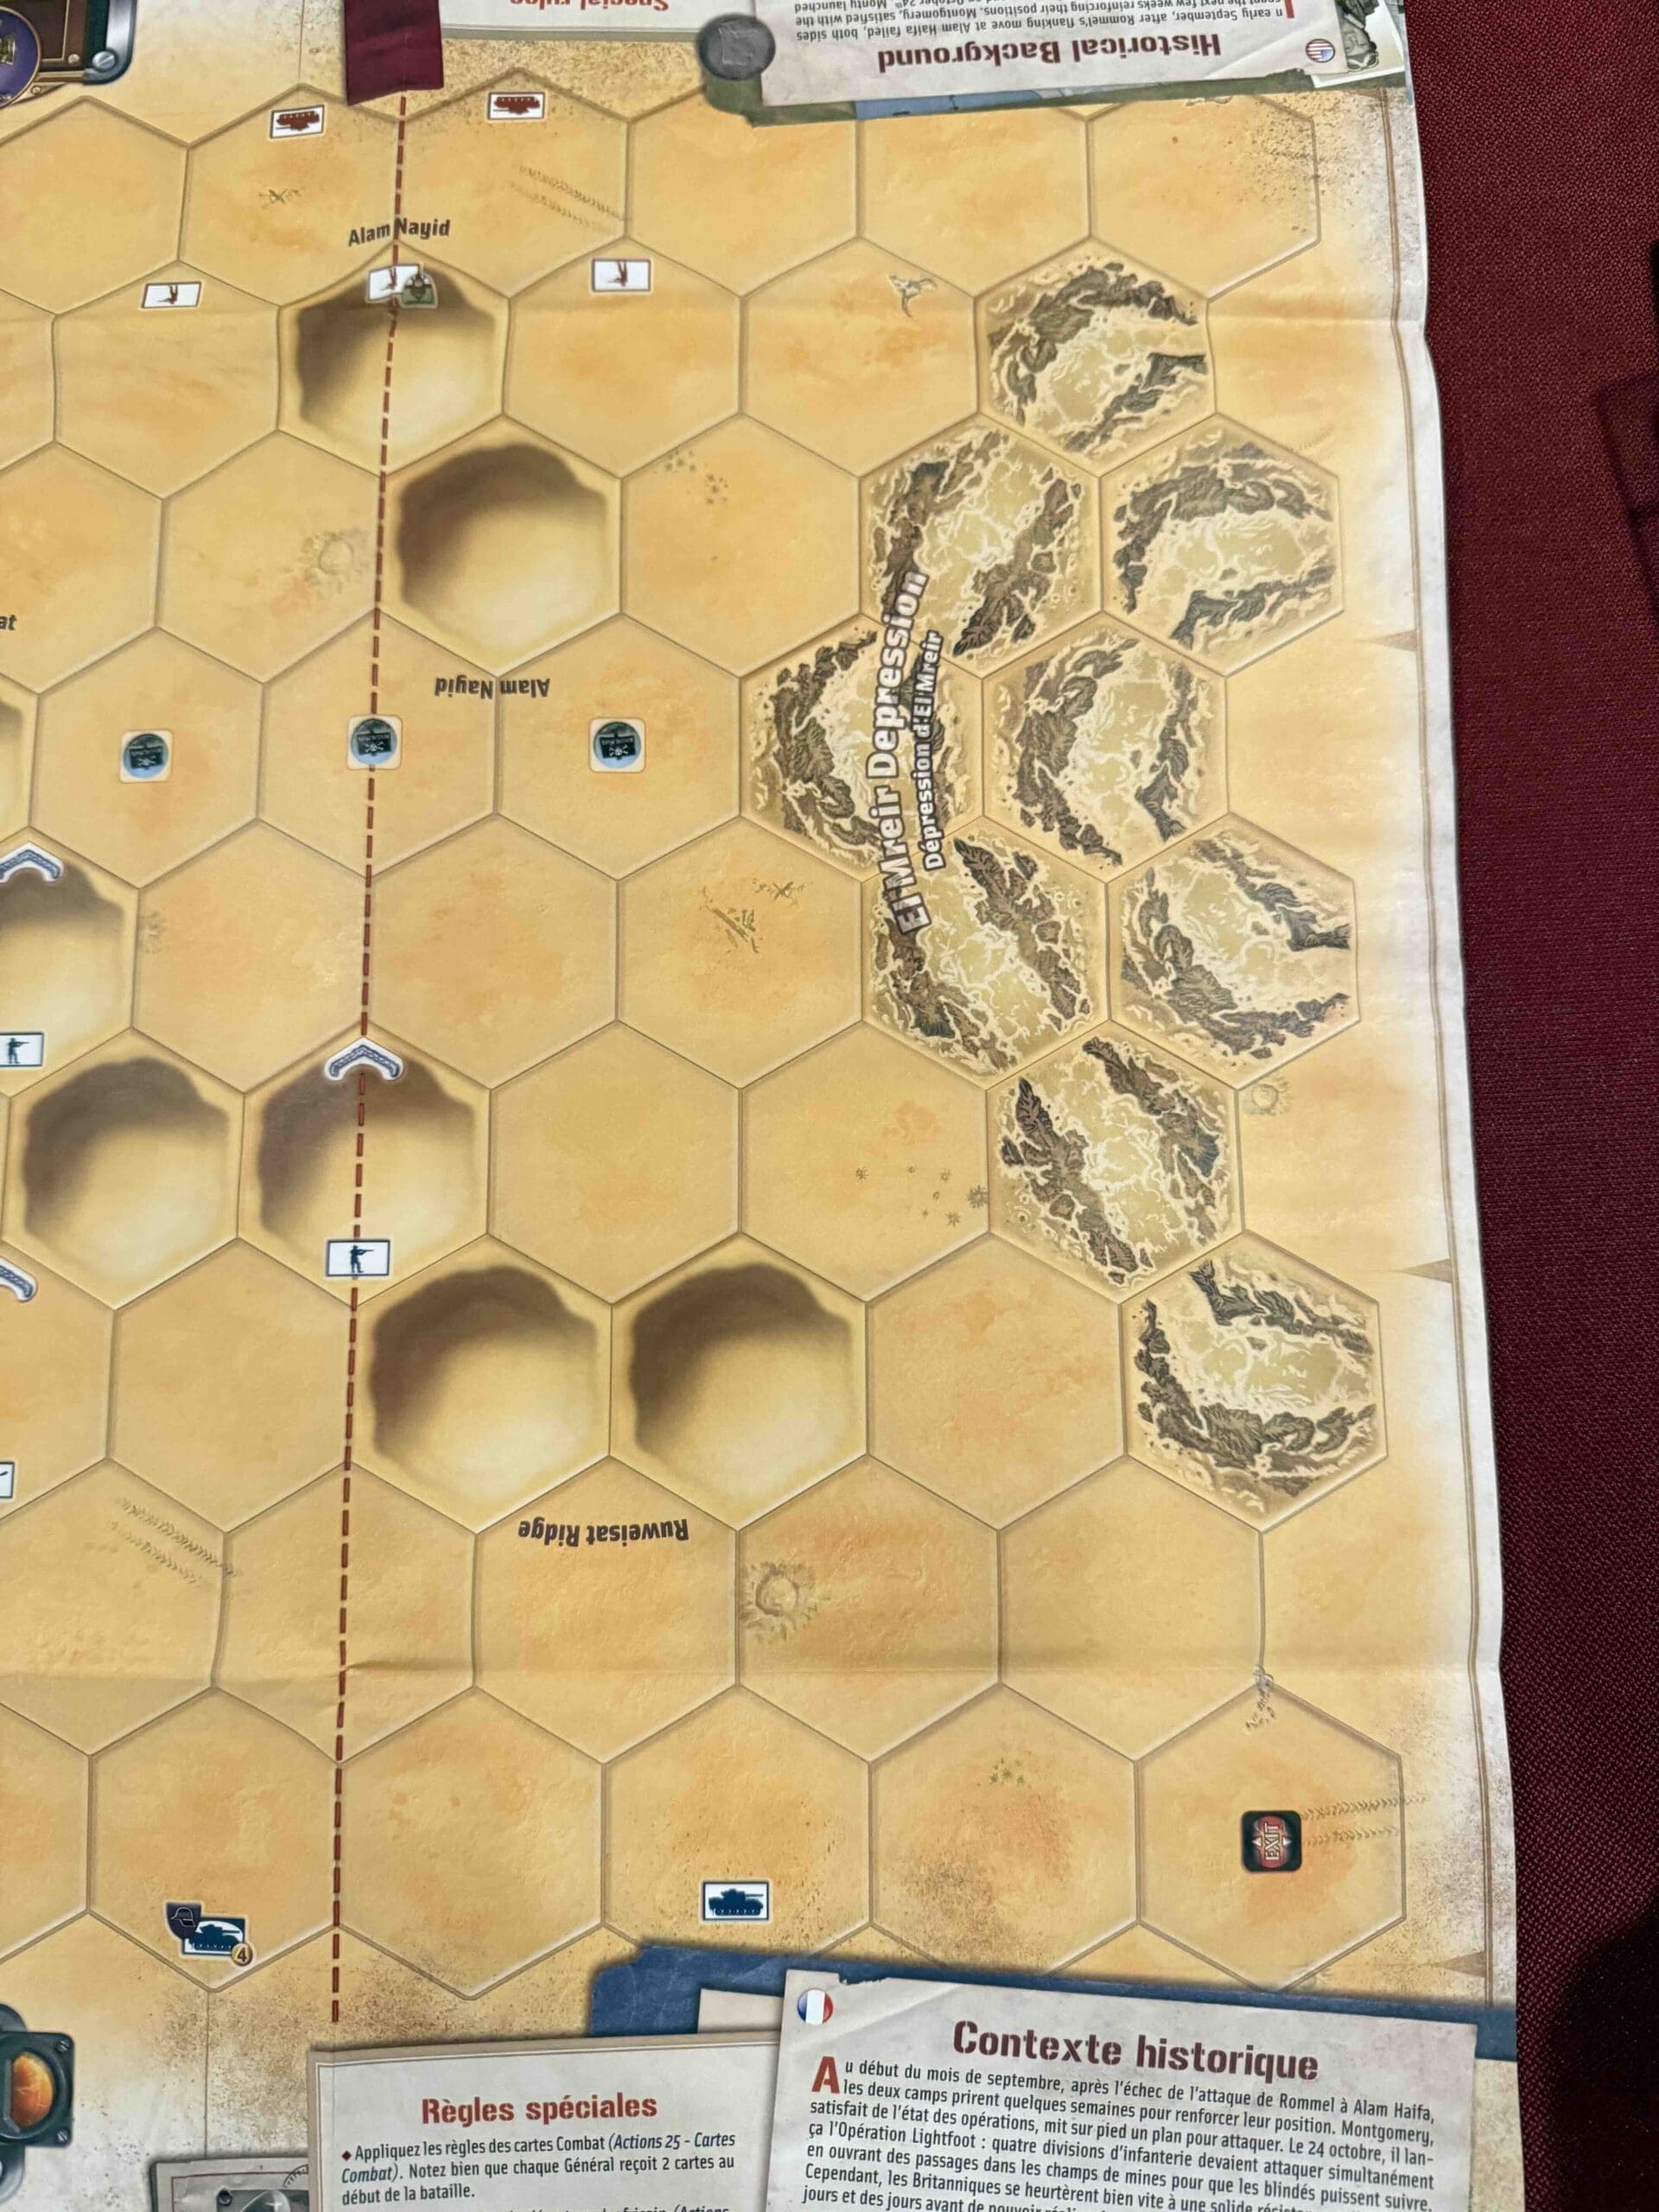
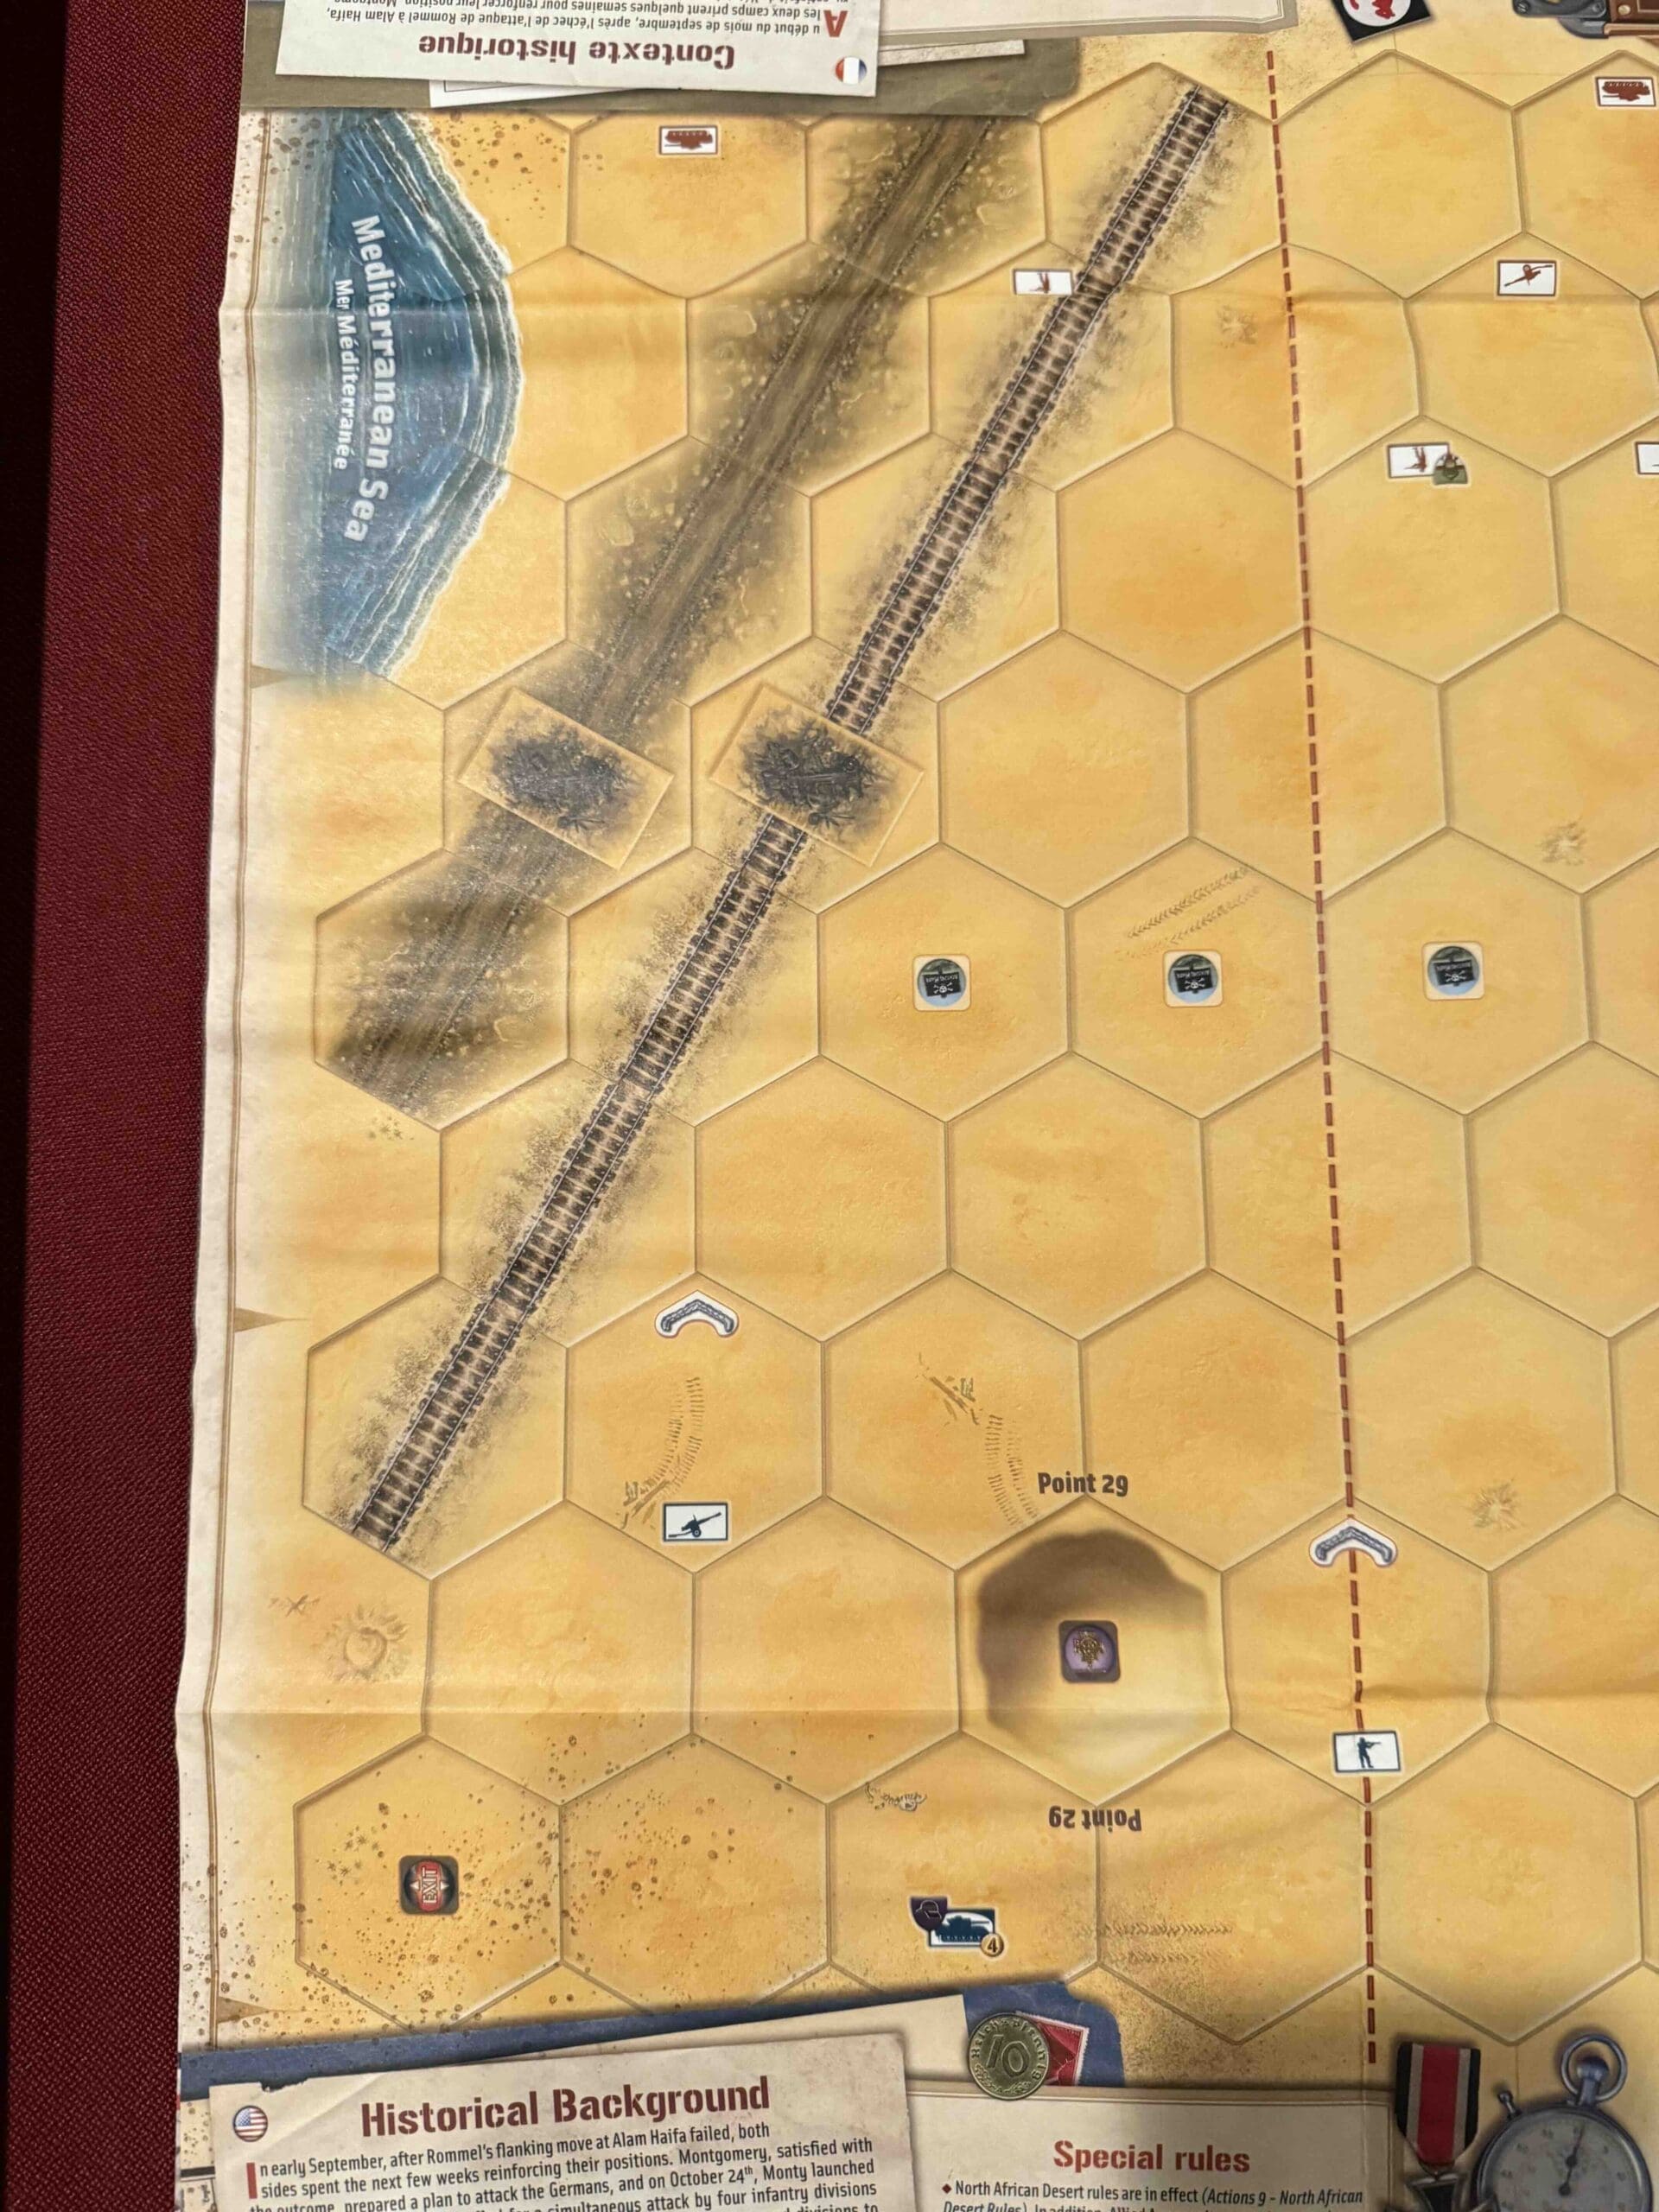
Operation Lightfoot

Operation Lightfoot

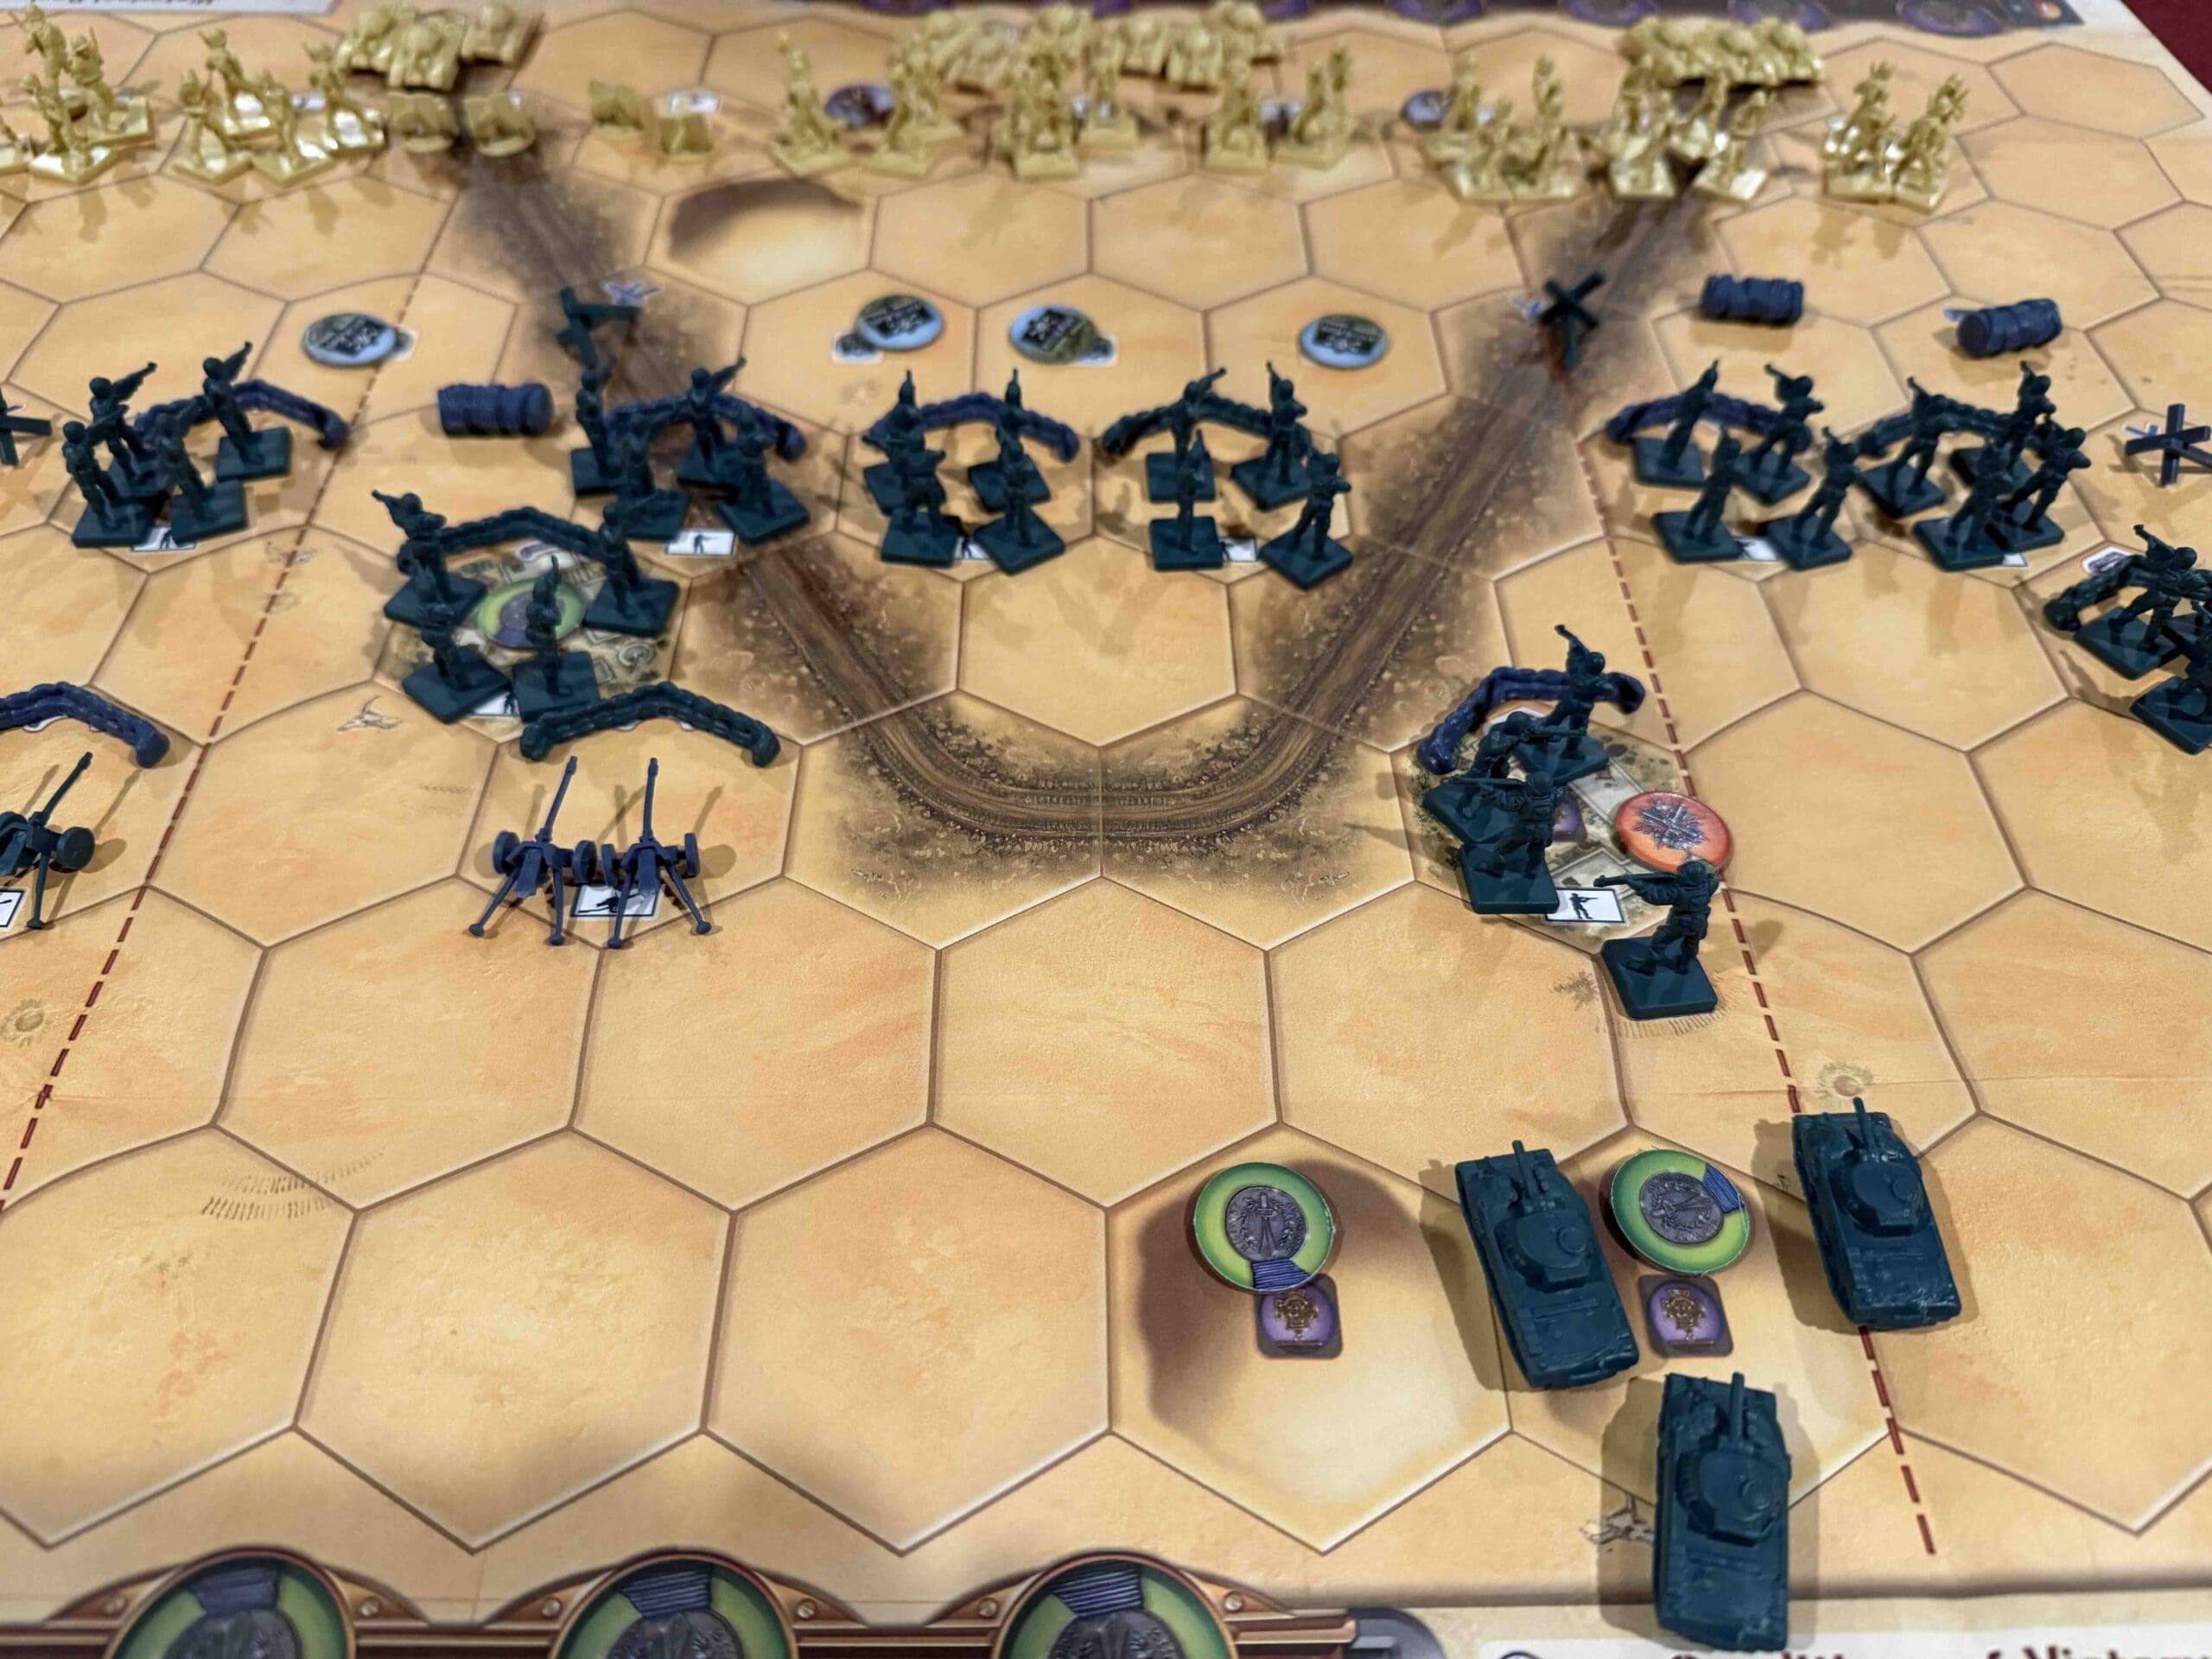
Operation Lightfoot (Overlord Map)

October 23, 1942—Montgomery kicks off Operation Lightfoot, and the desert explodes.

This wasn’t some quiet probe. This was a full-throttle offensive to smash through Rommel’s fortified line at El Alamein and break the damn deadlock in North Africa. The Axis had dug in deep—minefields, wire, concrete, artillery—the works. But Monty had a plan.

“Lightfoot” meant just that: infantry going in first, on foot, to thread through the minefields—because tanks would’ve blown themselves to hell if they led the way. So the boys marched straight into the Devil’s Gardens, clearing paths under fire, step by bloody step.

We laid down massive artillery barrages—the kind that rattled your teeth and turned the sand into glass. Then the Eighth Army pushed forward, slogging through everything the enemy threw at them. It was slow, it was costly, but it was relentless. And that’s how you win.

After days of grinding combat, Montgomery’s men punched through, and Rommel’s forces had no choice but to fall back. That was the turning point. That was the moment the tide shifted in the desert.

Operation Lightfoot wasn’t just a victory—it was proof that preparation, power, and persistence crush even the most dug-in enemy. From there, it was only a matter of time before the Axis was out of Africa for good.

15 VP’s

Card Balance:

Allies – 10 + 2 Combat Cards

Axis – 10 + 2 Combat Cards

Complexity:

3

Conditions:

Desert

Context:

Historical

Location:

North Africa

Year:

1942

Theater:

Mediterranean

Campaign:

Codename:

Operation Lightfoot

1Summary:

Objectives:

15 VP’s with Temporary Medal Objectives for control of hills and Exit Rows.

Battlefield:

A beach with towns, ridges, and a river cutting through the center.

Troops:

Allies  – 18 Infantry with some special weapons, 11 Armor, 3 Artillery

Axis  – 11 Infantry with some special weapons, 8 Armor, 3 Artillery


Allied Strategy:

1.  

Axis Strategy

1.  

Battle Reports

Author:

Days of Wonder

Link:

Place Battle Reports on a scenario page, or specify its scenario name in the shortcode.

Taukkyan Roadblock

Taukkyan Roadblock

Taukkyan Roadblock

Taukkyan-Roadblock

The Battle of the Taukkyan Roadblock? That was a brutal wake-up call in the jungles of Burma.

It was April 1942, and the British were pulling out of Rangoon, trying to stay one step ahead of a fast and ruthless Japanese advance. But they weren’t sitting back—they were moving like ghosts through the jungle, and they slammed a roadblock right down at Taukkyan, a vital choke point on the only damn road out.

It was a classic ambush—sliced right through the retreating columns. Trucks jammed, units scattered, and bullets flying like hellfire. The 17th Indian Division fought like lions to break through, but the jungle was tight, the fire was heavy, and the enemy was dug in and deadly.

A lot of brave men didn’t make it. That roadblock caused chaos, real chaos. It wasn’t just a firefight—it was the kind of sharp, surgical move that the Japanese were damn good at: fast, quiet, deadly. It wasn’t just a fight—it was a message.

The collapse at Taukkyan was a key reason why southern Burma slipped right through our fingers. It forced the Allies to fall back all the way into India. But mark my words—every inch we lost, we learned from. And when we came back, we came back with fire in our guts and iron in our fists.

~~ General Howitzer

5 VP’s

Card Balance:

Allies – 5 + 2 Combat Cards

Axis – 5 + 2 Combat Cards

Complexity:

3

Conditions:

Jungle

Context:

Historical

Location:

Burma

Year:

1939

Theater:

Pacific

Campaign:

Burma Campaign

Codename:

Summary:

Objectives:

5 VP’s

Battlefield:

Jungle with two intersecting roads, a roadblock, a village, and some hills.

Troops:

Allies  – 8 Infantry, 4 Armor

Axis (Japan) – 9 Infantry with some machine guns and anti-tank special weapons.


Allied Strategy:

1.  Big Picture: while you do not have to get through the roadblock, it does present a challenge for the British as a rallying point for the enemy.

2.  Before you attempt an Infantry attack, use your Armor units to attack the Japanese units at a distance, and reduce each unit by at least one figure, in order to eliminate their Seishin Kyoiku Doctrine power. 

3.  You have some powerful forces on your right section.  Get the Infantry moved forward and into the nearby jungle, so that the roadway is clear to allow your Armor to advance and get into the attack.

 Axis Strategy

1.  Big Picture Strategy:  with their special weapons of machine guns and anti-tank guns, plus the roadblock present a significant opportunity for the Japanese to hold off the Brits.

2.  Because of the British tanks, you cannot just stay behind your sandbags the whole time. They will slowly pick you off, and degrade your attack ability.  You will have to deal with the tanks, perhaps through specialized cards such as Barrage, Air Power, Behind Enemy Lines, or the Combat Card ‘Giretsu’, the Japanese BEL card. 

3.  With the right set of cards, and as long as most all of your forces are still at full ‘Seishin Kyoiku Doctrine’ strength, a full scale assault on your right flank could prove successful.   

Battle Reports

Author:

Days of Wonder

Link:

Place Battle Reports on a scenario page, or specify its scenario name in the shortcode.

Bardia

Bardia

Bardia

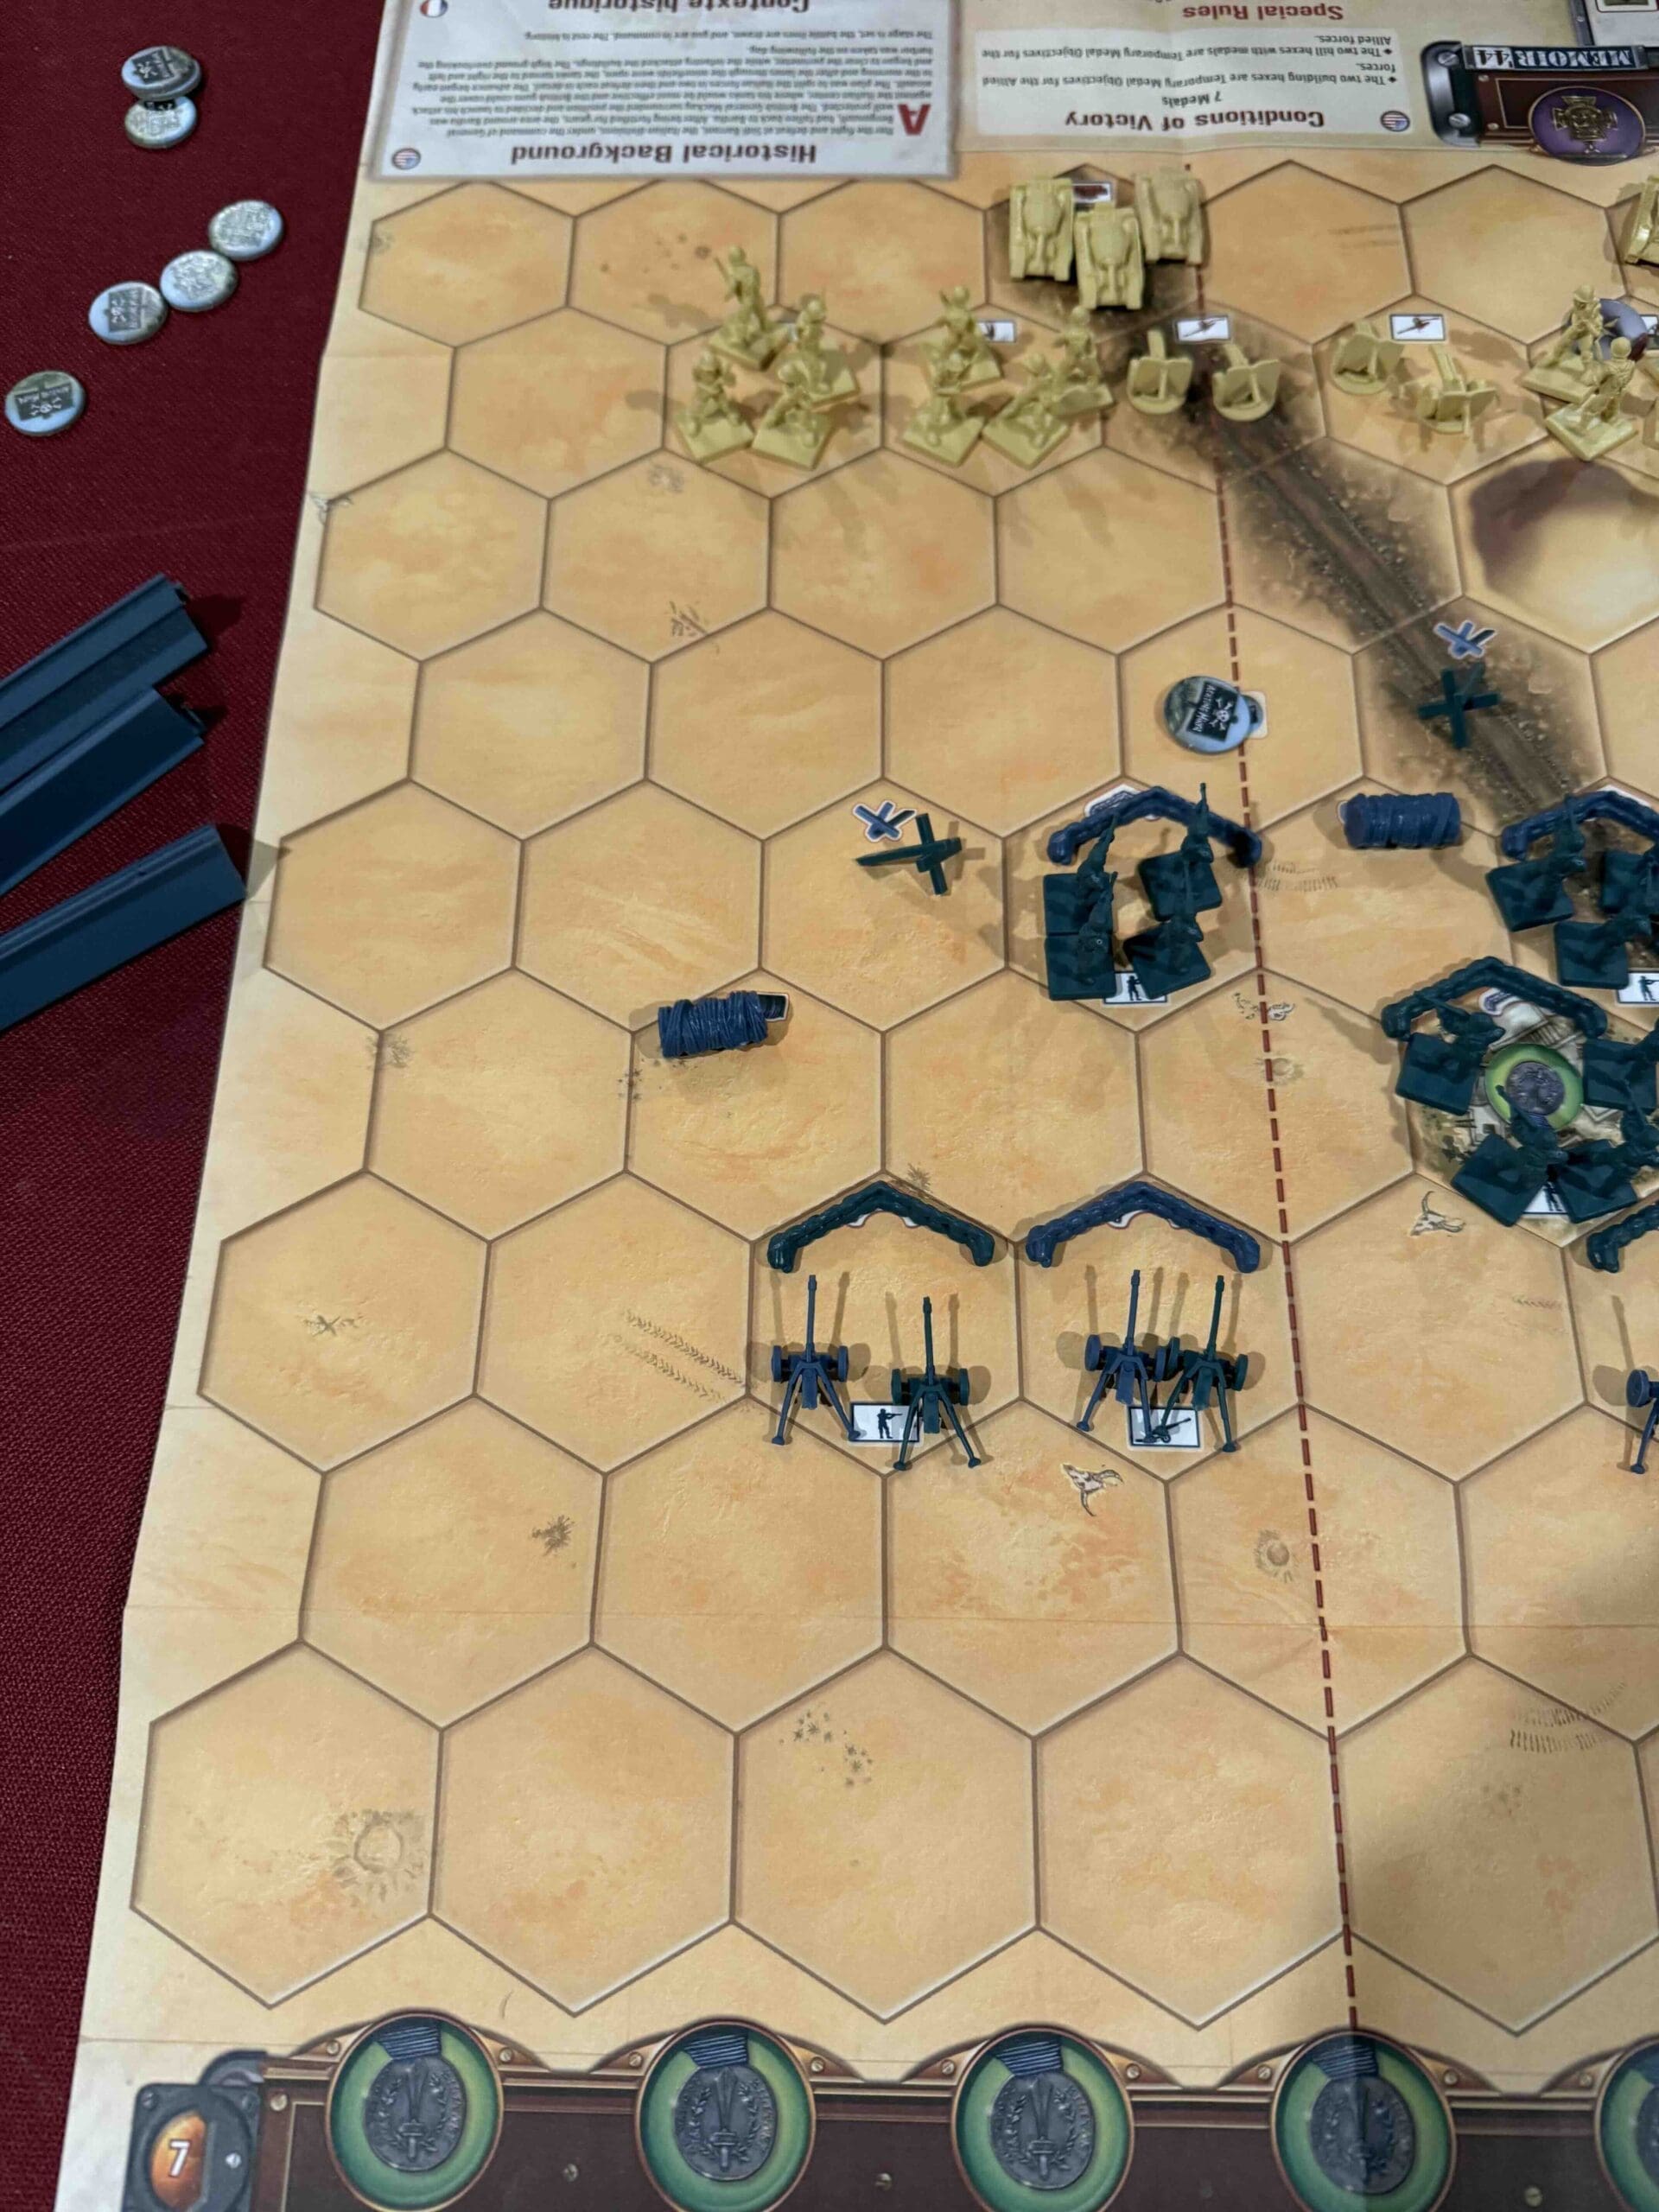
Bardia, January 1941—now that was a proper kick in the teeth for the Italians, and the Aussies delivered it with style.

This was the first big ground fight cooked up and led by an Australian outfit—6th Australian Division, under General Mackay—and let me tell you, those boys weren’t there to play games. Their target? Bardia, a heavily fortified Italian stronghold in Libya. Italians thought they were sitting pretty behind wire, guns, and concrete. Big mistake.

The 16th Brigade hit ’em from the west—smart move, weakest spot in the line. The engineers crawled through hell, cut through barbed wire, filled anti-tank ditches, and cleared a path like pros. Then came the punch: Matilda II tanks from the Brits’ 7th Royal Tank Regiment rolled in with the infantry. After that, it was a hammer-and-anvil job—17th and 19th Brigades came crashing in to finish the job.

By the end, Bardia was ours. Thousands of Italians surrendered, and the whole damn front cracked wide open. That victory let the Allies charge deeper into Libya and gave Rommel a reason to pack his bags for North Africa.

The Aussies proved two things at Bardia: one, they could plan and fight like hell; and two, when you combine tanks, grit, and coordination—you win. That’s the kind of war I like: fast, bold, and overwhelming.

~~ General Howitzer

7 VP’s

card

Card Balance:

Allies – 6 + 2 Combat Cards

Axis – 6 + 2 Combat Cards
(Note that Italian rules call for a loss of one Command Card for every Italian unit/hex lost, until 3 remain.)

Complexity:

2

Conditions:

Desert

Context:

Historical

Location:

Libya

Year:

1943

Theater:

Mediterranean

Campaign:

Western Desert Campaign

Codename:

It was part of Operation Compass

Summary:

Objectives:

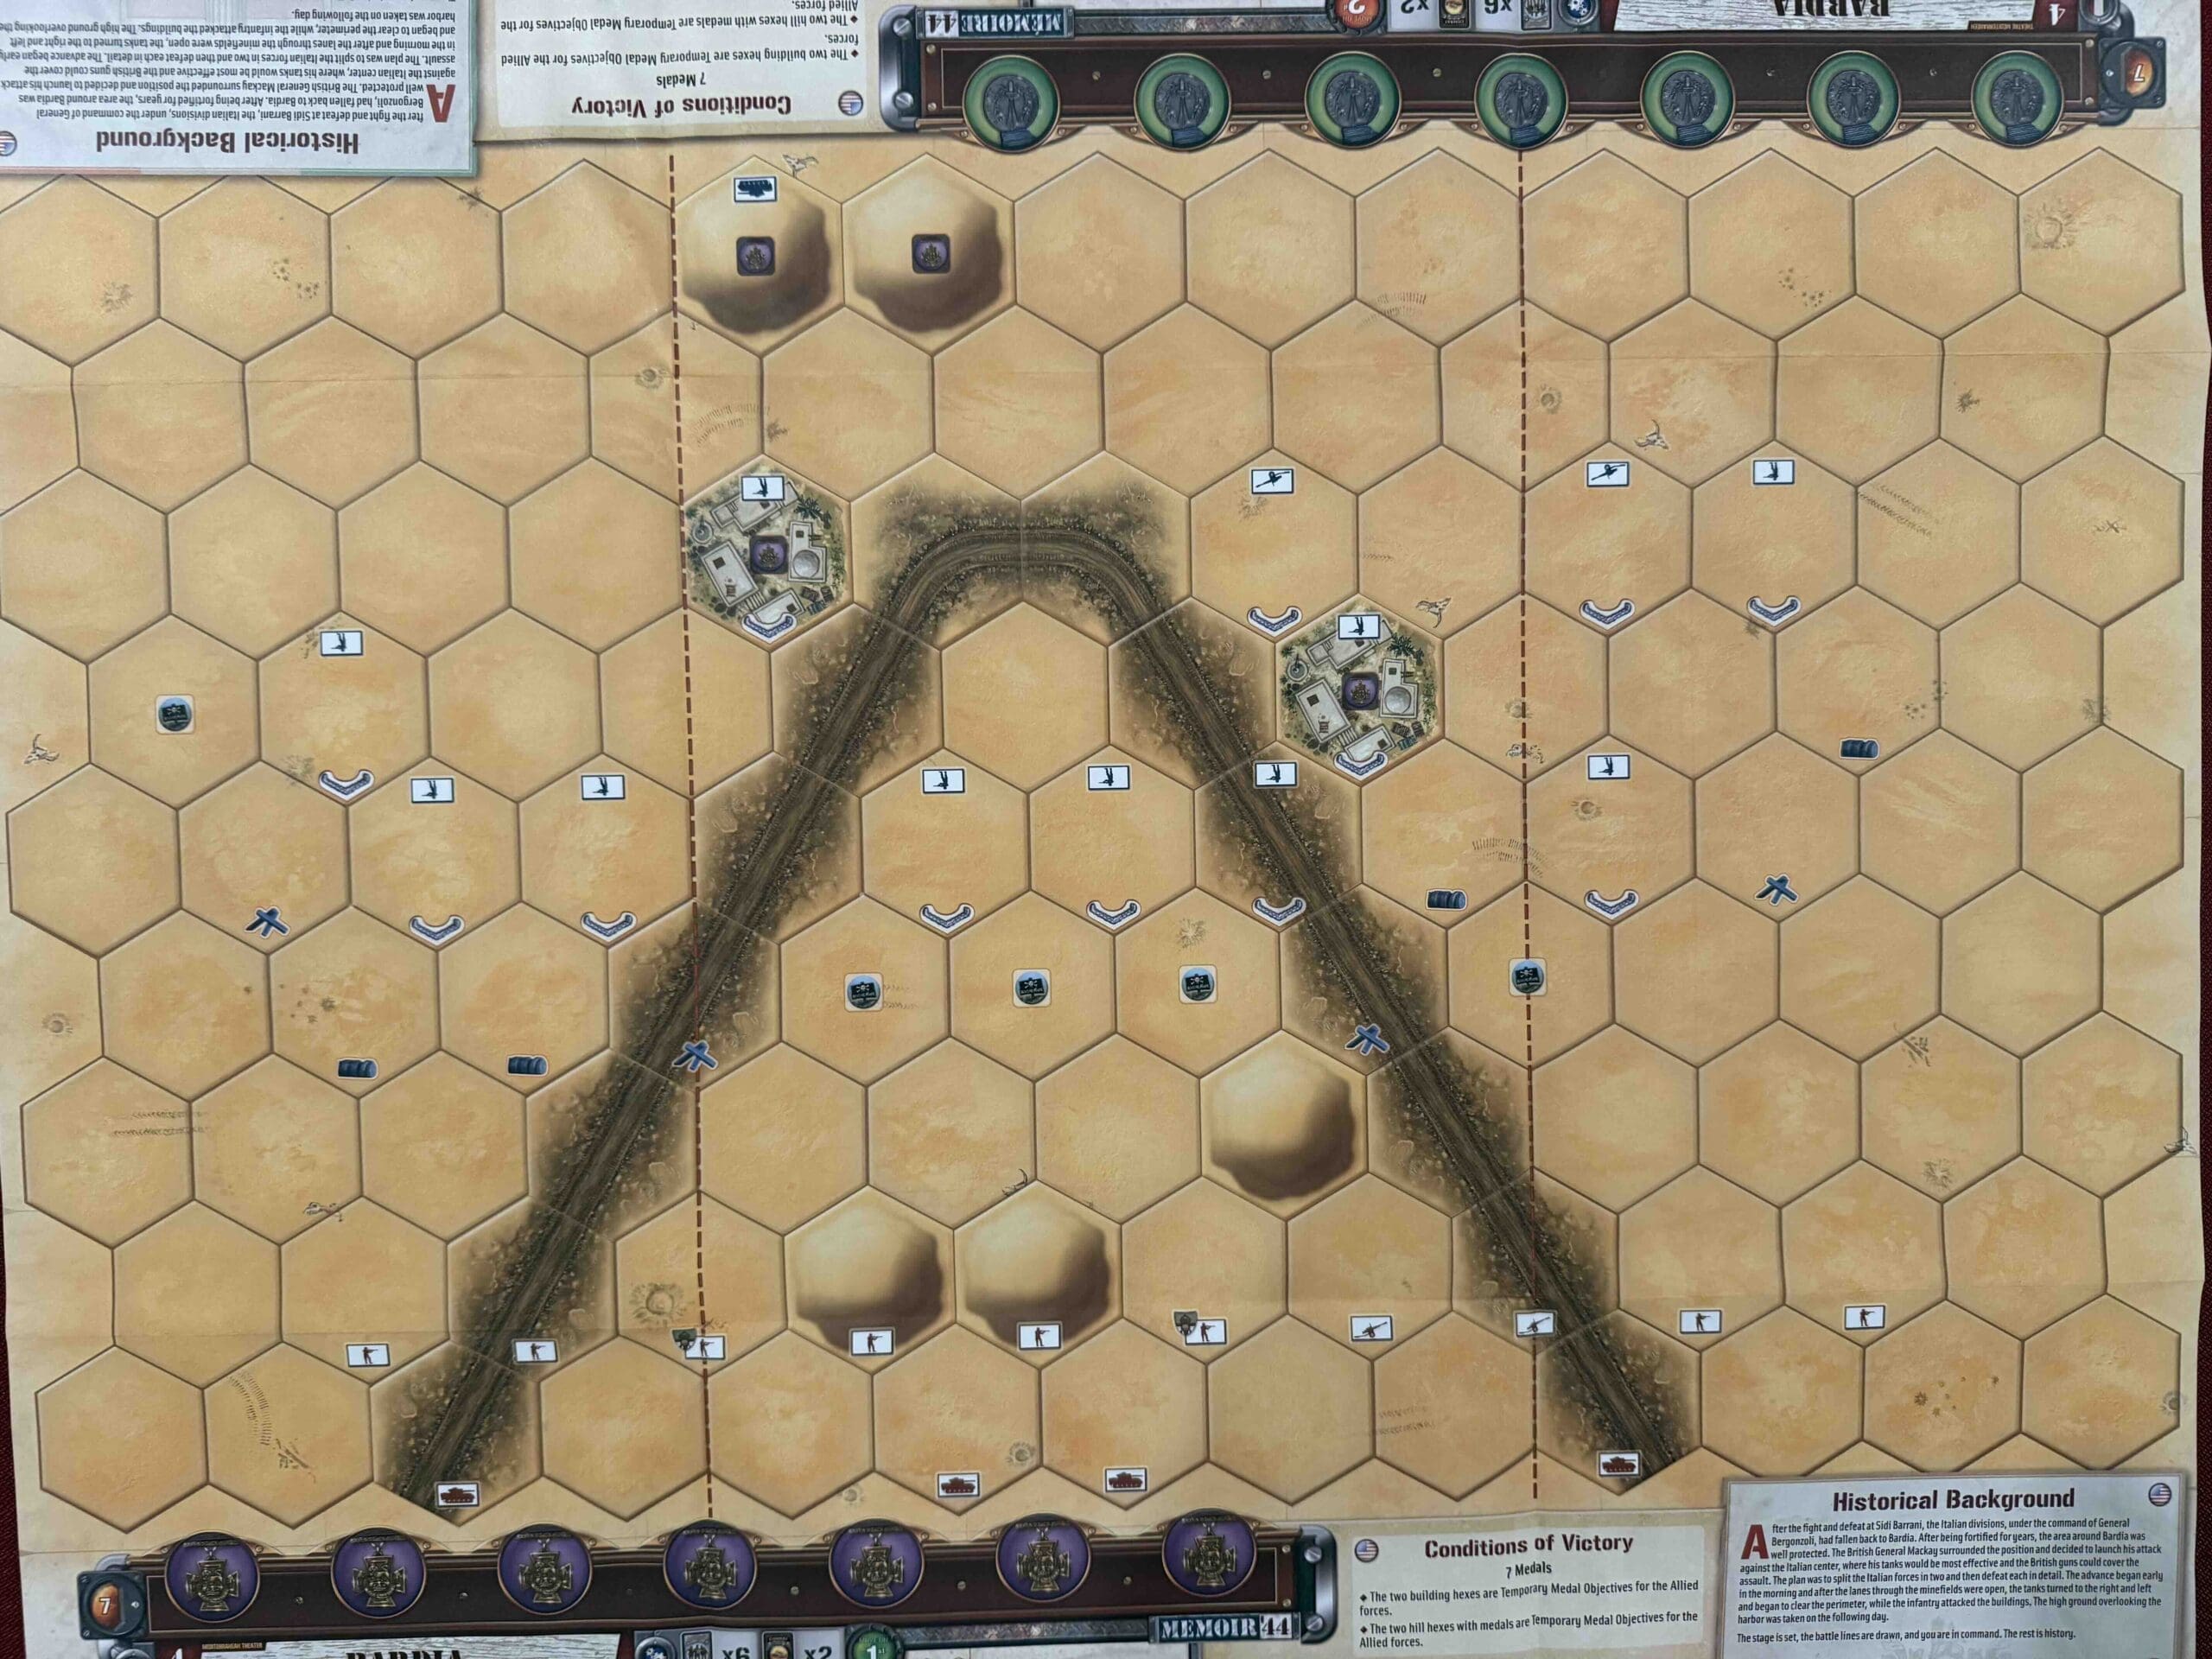
7 VP’s, including two building territorial objectives and two hill territorial objectives for the Allies

Battlefield:

Desert terrain with a branching roads running through it, and some dunes.

Troops:

Allies – 8 Infantry, 4 Armor, 2 Artillery

Axis – 10 Infantry, 1 Armor, 2 Artillery


medal allies

🔥 Winning as Allies

1.  Big Picture Strategy:  follow the roads that points like an arrow to your targets in the center section, which contains four territorial medals awaiting you at the two towns and two hills.

2.  Watch out for your right half of the battlefield which is dominated by the Italian artillery.  

medal axis

🔥 Winning as Axis

1.  Big Picture Strategy: stay behind the sandbags!  The Italians are in a defensive posture, and tactical wins are not worth the cost to your forces should you venture forth from your sandbags.

2.  Be aware that the rules of engagement for the Italian nation is that for every unit/hex which gets destroyed, you lose one command card, down to three cards in your hand.  This makes the loss of any unit devastating to your offensive capabilities.

3.  You have a strong set of Artillery on the left side of the battlefield. Use them at every opportunity.

Battle Reports

Author:

Days of Wonder

Link:

Place Battle Reports on a scenario page, or specify its scenario name in the shortcode.

Sbeitla Tunisia

Sbeitla Tunisia

Sbeitla Tunisia

Sbeitla Tunisia

Operation Frühlingswind—February 1943. The Krauts thought they had us dead to rights in central Tunisia. They were wrong.

Rommel’s boys hit us hard at Sidi Bou Zid, busted through, and kept pushing west toward Sbeitla. On February 17, they grabbed the town—but that’s where the party stopped.

Because in rolled the 1st U.S. Armored Division—Combat Command B—and they didn’t come to retreat. They dug in, fought smart, and hit the Germans with a counterattack they didn’t see coming. It wasn’t perfect, but it was bold—and it threw a wrench into the Nazi gears. They didn’t push any farther.

Sure, we took our lumps. Our tactics were green, our command still learning the ropes. But what matters is we learned. Fast. That fight at Sbeitla was a baptism by fire—and it forged better soldiers, better leadership, and a better army.

The message was clear: the Americans might get hit, but by God, we hit back—and next time, we’d be coming out swinging.

~~ General Howitzer

6 VP’s

Card Balance:

Allies – 5 + 2 Combat Cards

Axis – 5 + 2 Combat Cards

Complexity:

2

Conditions:

Desert

Context:

Historical

Location:

Tunisia

Year:

1943

Theater:

Mediterranean

Campaign:

Tunisia Campaign

Codename:

Operation Frühlingswind (Spring Wind)

Summary:

Objectives:

6 VP’s, including territorial objectives, and exit hexes.

Battlefield:

Desert terrain with a branching roads running through it, and dunes everywhere.

Troops:

Allies – 7 Infantry, 4 Armor, 1 Artillery

Axis – 8 Infantry, 5 Armor


Allied Strategy:

1.  

Axis Strategy

1. 

Battle Reports

Author:

Days of Wonder

Link:

Place Battle Reports on a scenario page, or specify its scenario name in the shortcode.

St. Joseph’s Farm

St. Joseph’s Farm

St. Joseph's Farm

St. Joseph's Farm

Chouigui Pass—November 1942. One hell of a day for the U.S. Army, and the first time our boys showed the Krauts what American steel could do.

We were green, no doubt about it. The 1st Battalion, 1st Armored Regiment—part of my beloved 1st Armored Division—rolled into action near a place called Chouigui Pass, northwest of Tebourba. The brass might call it St. Joseph’s Farm, but I’ll tell you—there was nothing holy about what went down there.

Our men, riding those M3 Stuarts and M4 Shermans, spotted a German convoy and didn’t hesitate. They tore into it with everything they had. And wouldn’t you know it? A short time later, they ran into the 10th Panzer Division—real hardened bastards—but our boys didn’t back down.

We hit ’em hard. Burned up their vehicles, shattered their lines, and let ’em know the Americans were here and we weren’t playing. It wasn’t some grand campaign-ending victory, but it mattered. It was the first time U.S. armor took the fight to the Wehrmacht and came out standing.

That fight at Chouigui Pass proved something: our tanks could run, our boys could fight, and American grit was just getting started. North Africa wasn’t going to be easy—but after that day, the Germans knew we were in the game.

And from there, we only got meaner, faster, and a whole lot more dangerous.

~~ General Howitzer

5 VP’s

Card Balance:

Allies – 5 + 2 Combat Cards

Axis – 5 + 2 Combat Cards

Complexity:

2

Conditions:

Desert

Context:

Historical

Location:

Tunisia

Year:

1942

Theater:

Mediterranean

Campaign:

Tunisia Campaign

Codename:

Summary:

Objectives:

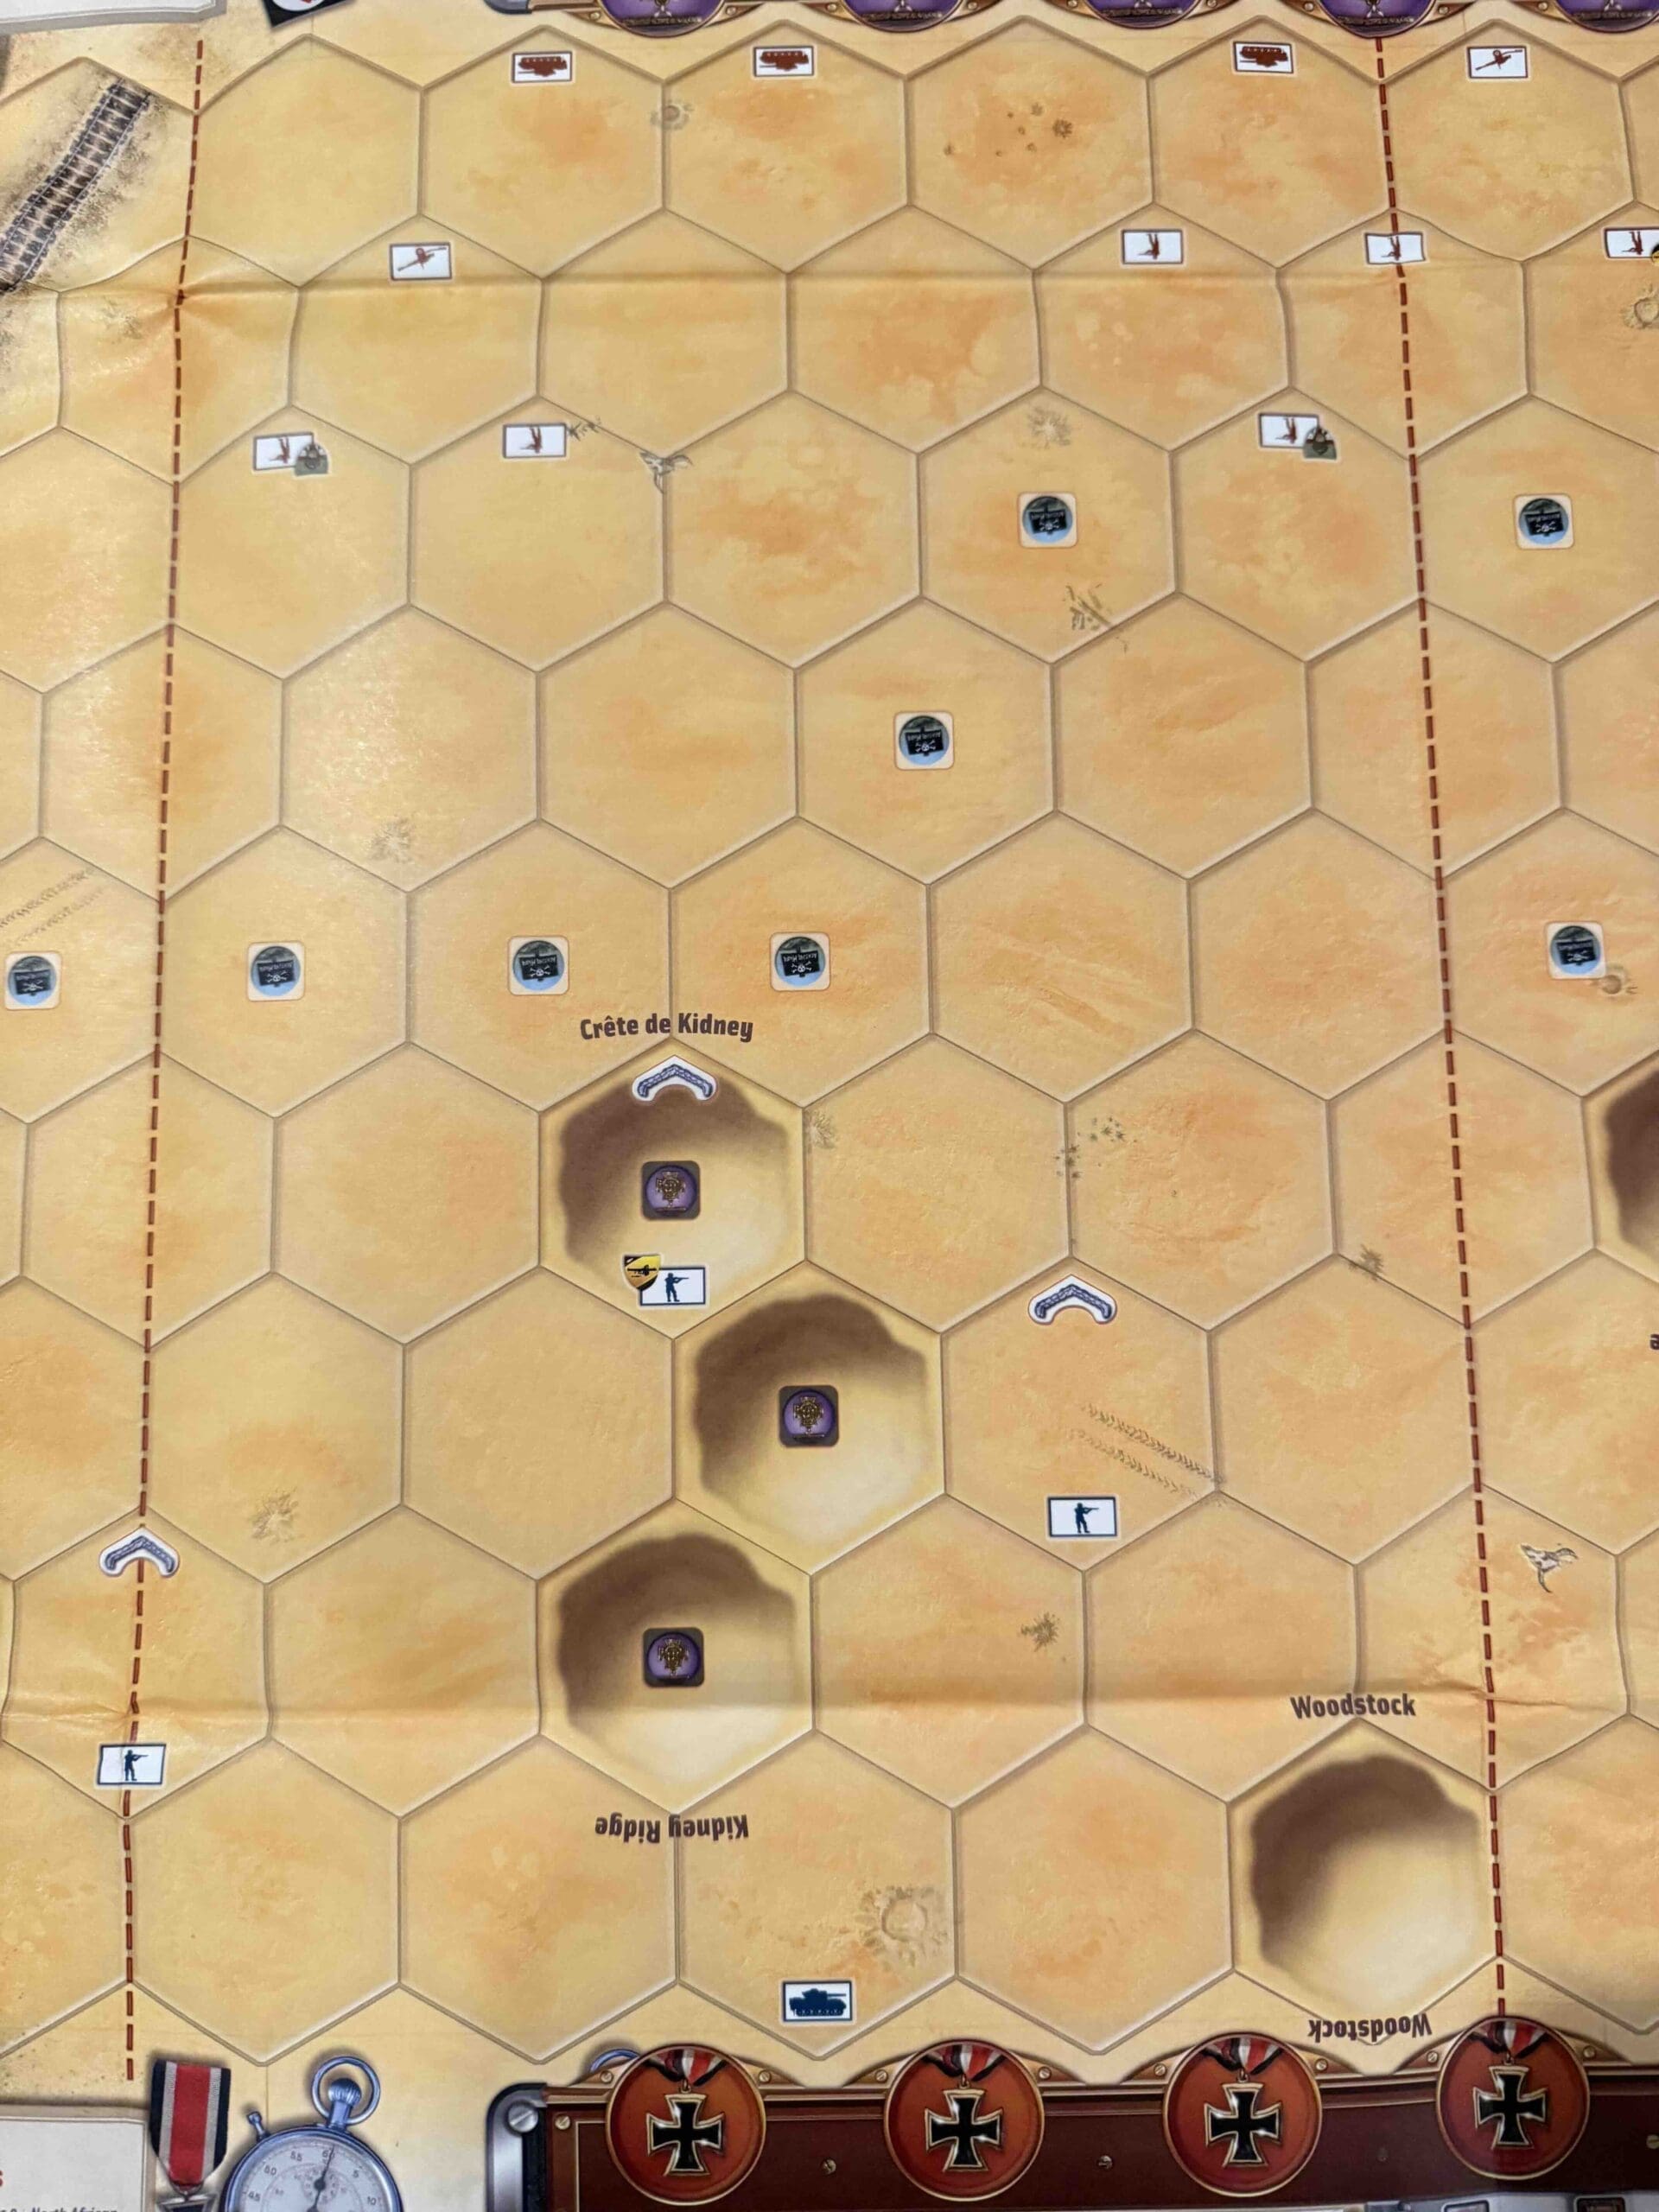
5 VP’s, including St. Joseph’s Farm as a Temporary Objective for the Axis.

Battlefield:

Desert terrain with a branching road running through it, and ridges on each flank, which provide the defensive surprise that historically occurred.

Troops:

Allies – 3 Infantry, 8 Armor, 1 Artillery

Axis – 5 Infantry, 5 Armor


Allied Strategy:

1.   Historically, the Allies surprised the Germans by hiding their Armor reserves behind the ridges.  In this scenario, the enemy obviously knows you are there, but you can still use the ridges as defensive protection until the Axis Armor gets close enough for you to launch your Armor assault, and maybe recreate history with an Allied victory. 

Axis Strategy

1. Historically, the Axis were surprised by the Allied forces hiding behind the ridges.  You know they are there, and they outnumber your forces, so you will need to score some quick hits against the forces in the center, to take them out of the action before their support shows up on the flanks.  

Battle Reports

Author:

Days of Wonder

Link:

Place Battle Reports on a scenario page, or specify its scenario name in the shortcode.

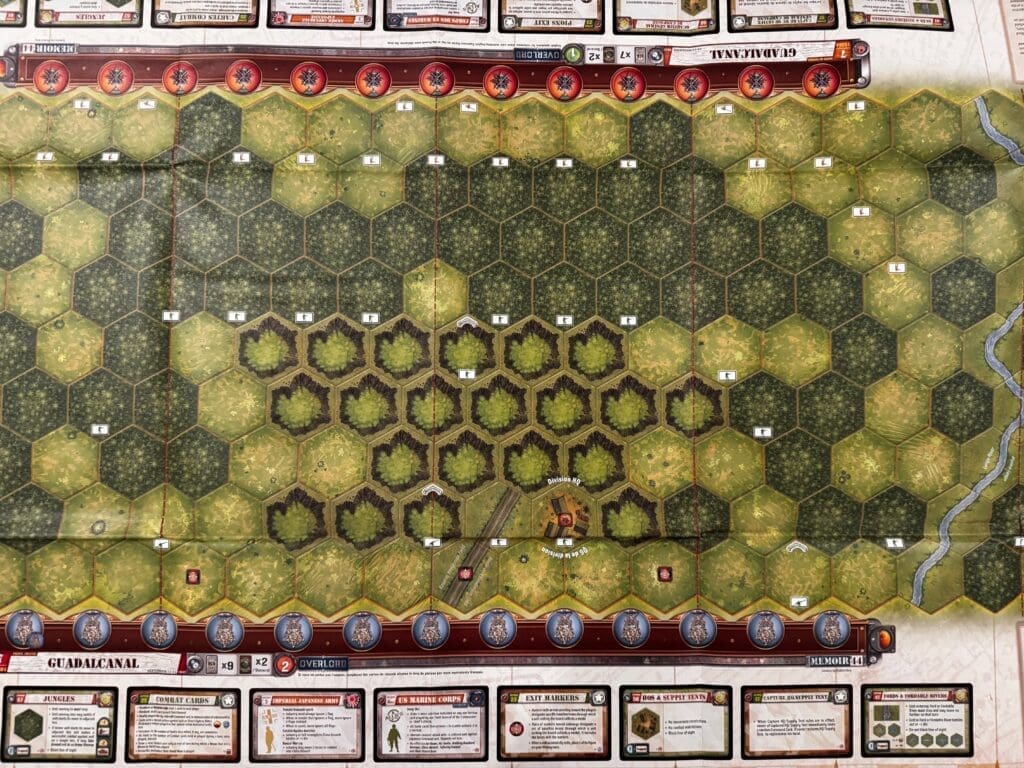
Guadalcanal  [Overlord]

Guadalcanal [Overlord]

Guadalcanal

Guadalcanal. August ’42 to February ’43. The place where the tide started to turn in the Pacific—and where the United States Marine Corps showed the world exactly what American grit looks like.

The Japanese thought they were building themselves a nice little airfield to dominate the Solomon Islands and choke off our lifeline to Australia. Big mistake. We hit that island hard, landed the U.S. Marines, and made damn sure that airstrip—Henderson Field—was going to fly our planes, not theirs.

It wasn’t a cakewalk. It was jungle rot, mud, bugs, no sleep, and short supplies. The enemy threw everything they had at us—infantry assaults, air raids, naval bombardments. But we held. We bled. And we broke them.

By the time it was over, the Japanese were down thousands of men, ships, and planes. They’d lost their shot at controlling the Pacific, and we took the initiative. From then on, it was our war to win, and we were going to take it island by island, all the way to Tokyo.

Guadalcanal wasn’t just a battle—it was a message: The United States doesn’t back down. We plant our flag, we dig in, and we don’t leave until the job’s done.

~~ General Howitzer

13 VP’s

card

Card Balance:

Allies – 9

Axis – 7

Complexity:

5

Conditions:

Jungle

Context:

Historical

Location:

Solomon Islands

Year:

1943

Theater:

Pacific

Campaign:

Guadalcanal Campaign

Codename:

Operation Watchtower

Summary:

This is an Overlord game, so make use of the Jungle Command cards, two per side.

Objectives:

13 Medals including Territorial Control, and Exit Row medals and a sudden death hex all for the Japanese.

Terrain:

Jungle terrain with a 21-hex hill in the center which is a majority-control objective for one medal. 

Troops:

Allies – 21 Marine Infantry, 3 Artillery

Axis – 24 Japanese Infantry, 3 Artillery

Special Rules:

1. Majority  Temporary Territorial Control  – whomever controls most of the 21-hill hexes gains 1 Medal

2.  Exit Row Medals – to any Japanese forces that exit

3.  Sudden Death Hex – to any Japanese forces that maintain control of the hex at the start of their next turn, total win for the Japanese


medal allies 

🔥 Winning as Allies

1. Big Picture Plan when defending against the Japanese onslaught, is to reduce every full-power unit by at least one hit in order to cancel our their Seishin Kyoiku Doctrine. 

2.  Because of the special Rules, it is imperative that the Marines defende the center section, and prevent the Japanese forces from overwhelming the hill, to gain that point; or exiting out the back, to get those points, or most importantly, never let them gain access to the sudden death hex. 

medal axis

🔥 Winning as Axis

1.  Big Picture Strategy for Axis; while the flanks provide an excellent attack possibility, if you have the cards, they should always be considered secondary to your primary objective of overwhelming the 21-hex hill and gaining all the extra win points associated with it, and the exit hexes, and the sudden death hex.

2.  When given the opportunity on your flanks, move your forces towards the central section to continue to put pressure on the enemy and eventually overrun his position.

Author:

Days of Wonder

Link:

Place Battle Reports on a scenario page, or specify its scenario name in the shortcode.
Secret Link