Twin Villages
Twin Villages
The Battle of the Twin Villages took place in December 1944, during the Battle of the Bulge in World War II. Located near Krinkelt and Rocherath in Belgium, these “twin villages” became key defensive positions for American forces as German troops launched a surprise offensive in the Ardennes.
U.S. infantry and armored units held strong defensive positions in the villages, facing fierce attacks from German forces, including tanks and infantry. Despite being heavily outnumbered and subjected to intense artillery fire, the American defenders managed to delay the German advance through skillful use of terrain and resilient fighting.
At Krinkelt-Rocherath the Germans thought they could roll through and keep their offensive charging forward—but the men dug in there had other ideas. Those towns became roadblocks of fire and steel. The resistance was fierce enough to choke the enemy’s advance, bleed their momentum, and give the rest of our forces time to regroup and fortify the Ardennes. That stand wasn’t just stubborn defense—it was the kind of fight that blunted the Bulge and helped turn the tide toward ultimate Allied victory.
~~ General Howitzer
6 VP’s
![]()
Card Balance:
Allies – 6
Axis – 4
Complexity:
3
Conditions:
Winter / Countryside
Context:
Historical
Location:
Belgium
Year:
1944
Theater:
Western Front
Campaign:
Ardennes
“Battle of the Bulge”
Codename:
Unternehmen Wacht am Rhein
Summary:
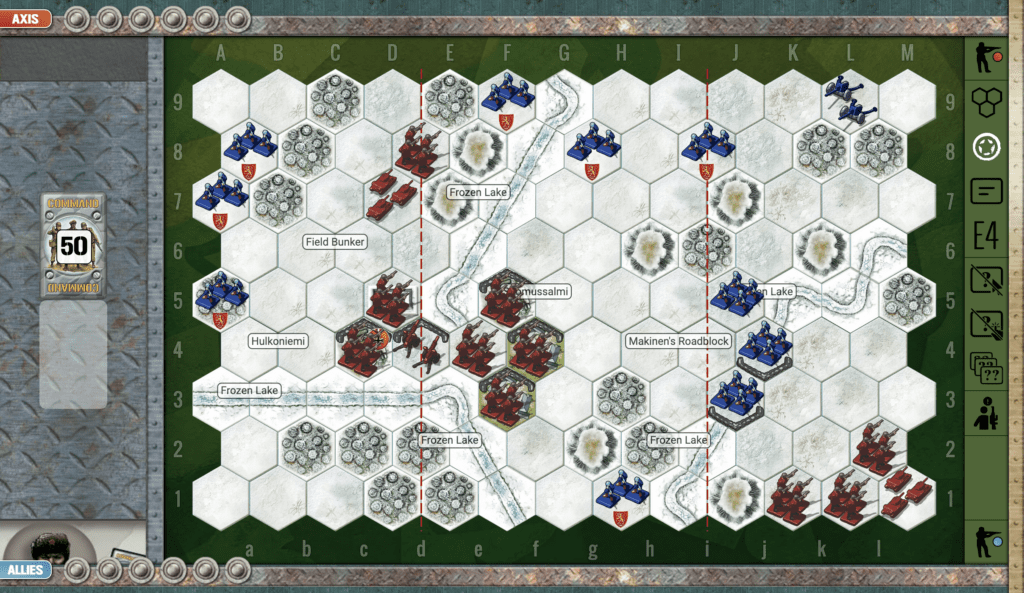
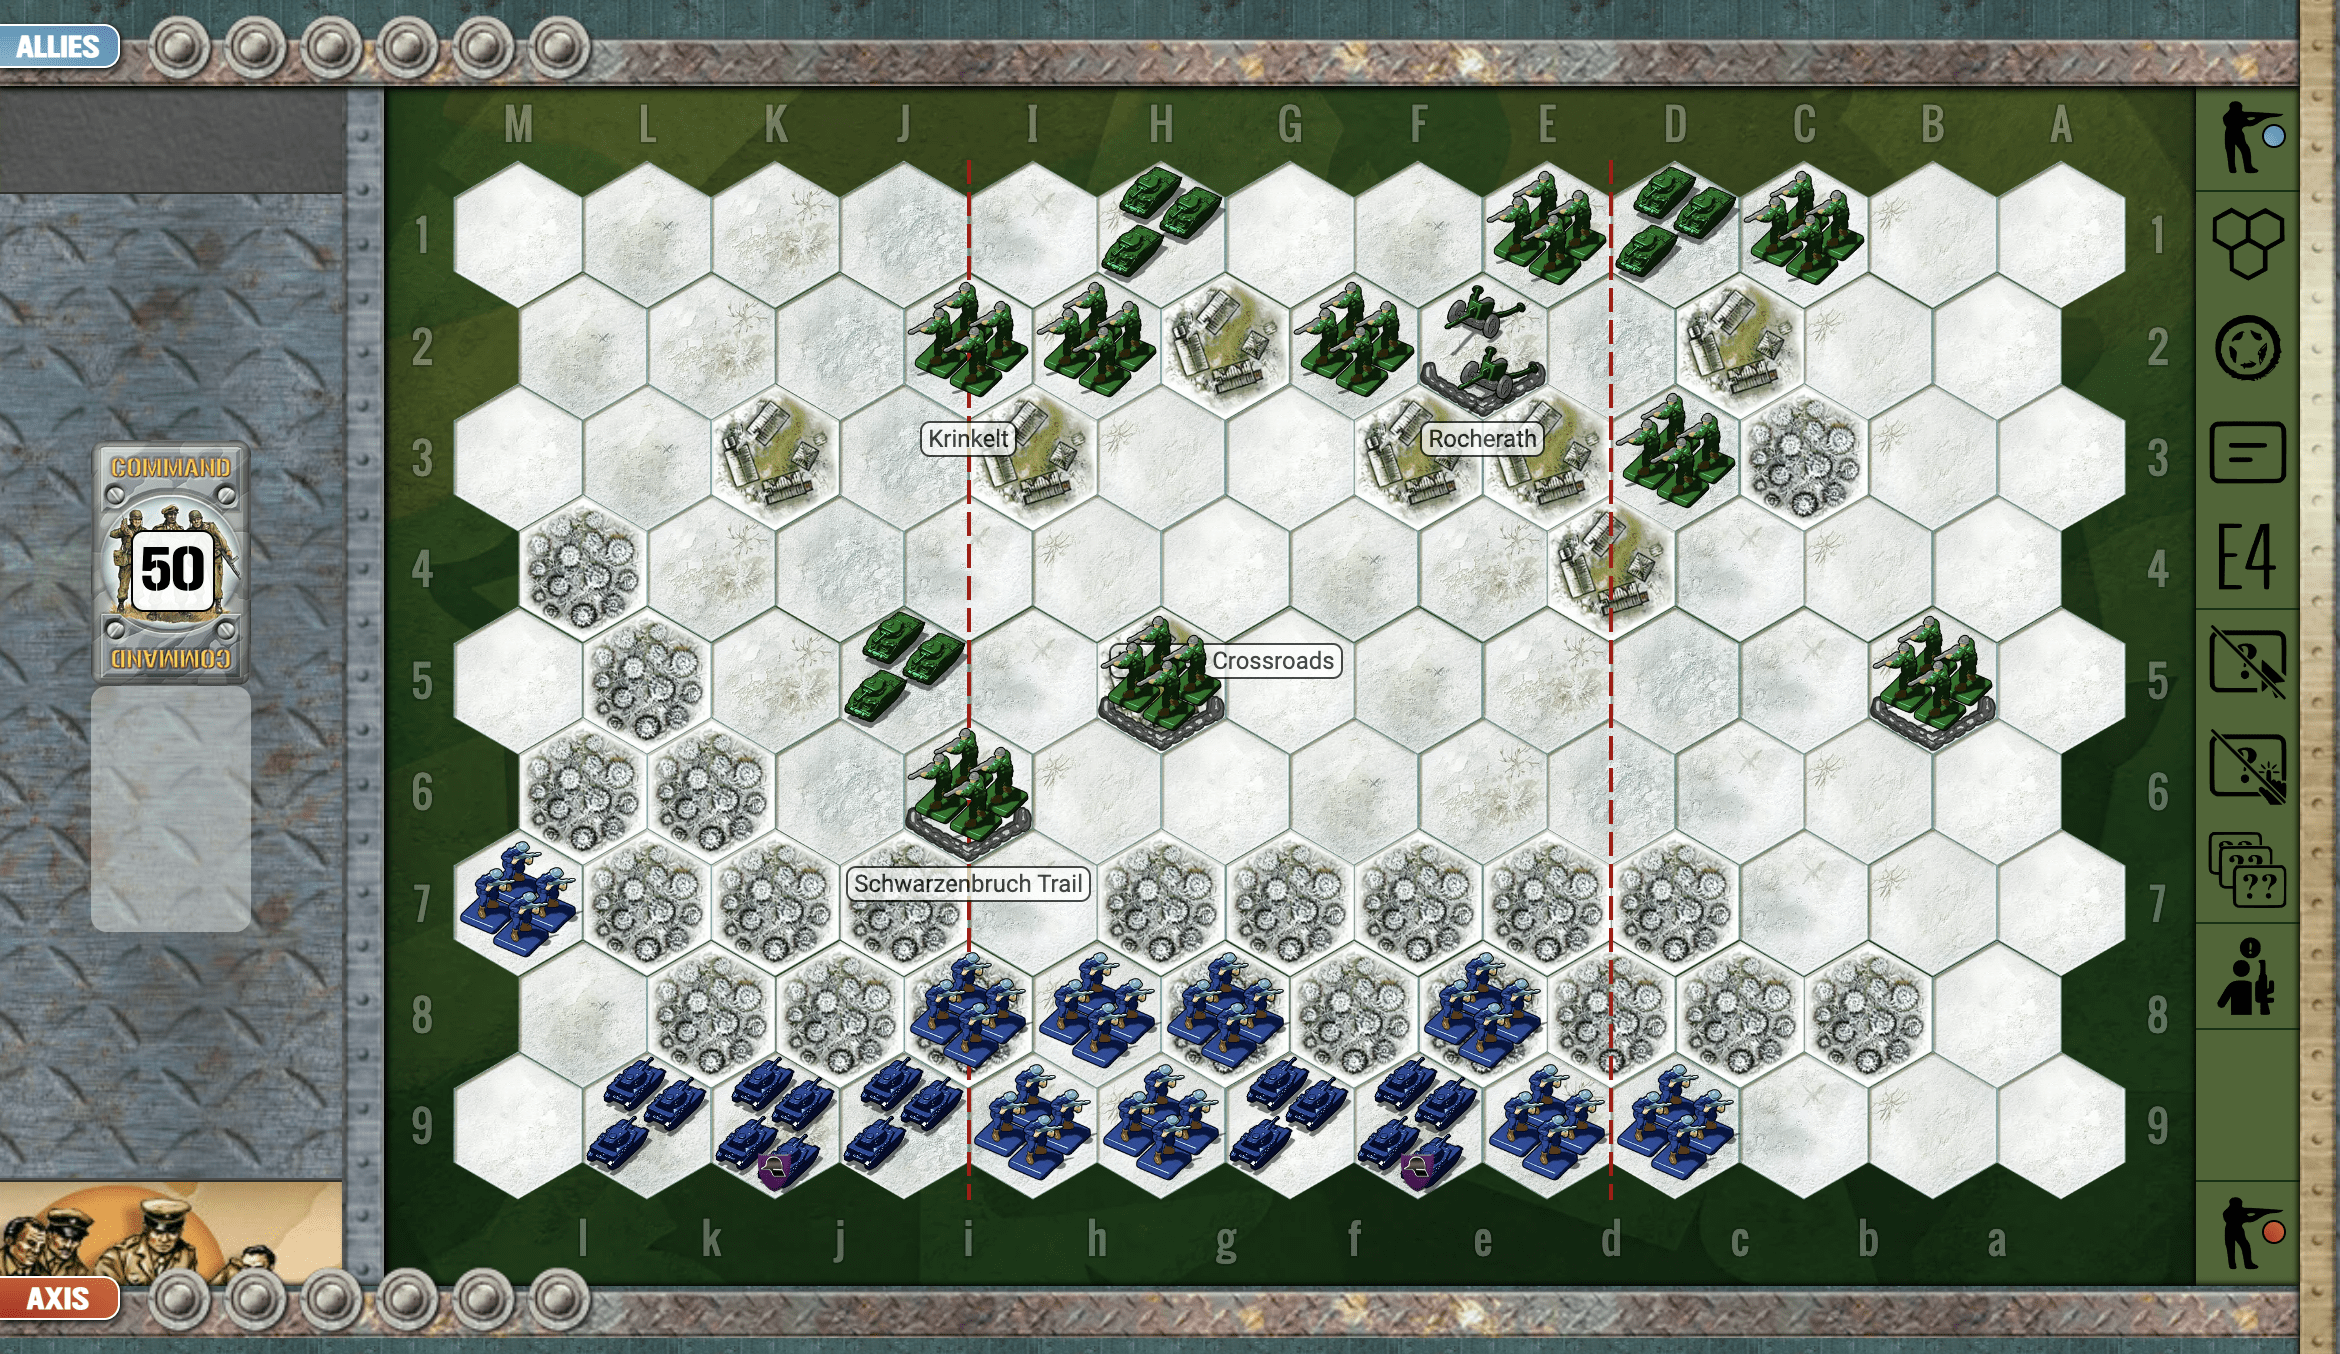
In Twin Villages, the Axis commander begins with almost all of their forces locked behind a wall of forest. The goal for Axis is to get out of the forest as quickly as possible in order to be prepared for battle. For Allies, the goal is to take out as many Axis units as possible before they break free.
Objectives:
6 VP’s ; no territorial medals
Battlefield:
The twin villages of Krinkekt and Rocherath are in the center of the map, and provide cover for whomever can control them. There is a large forest towards the Axis side, blocking their initial movement.
Troops:
Allies – Infantry 9, Armor 3, Artillery 1
Axis – Infantry 9, Armor 5

Allied Strategy
1. Remember, that historically, the Allies are on the defensive early in this campaign. But you have the opportunity to score some hits with your advance Infantry units, before you are forced to pull back. Once you remove (or lose) your Infantry at the Lausdell Crossroads, the path is clear for your tank to blast any enemy units that attempt to make their way up through the gap in the trees.
2. Early goals are to get your Infantry into the Twin villages, prepared to defend. Also, get your tanks mobile on the flanks to prevent any advances from the enemy.
 Axis Strategy
1. Mobility is the first order of the day. Your Infantry and Armor are congested and need to start advancing.
2. Your infantry at h8 is only two hexes from the enemy, with no means of retreat. You need to move and attack with that unit ASAP.
3. Your right flank is very weak, with just a single infantry unit. Do not launch attack there until you move more units into the section. Once the infantry advances into the woods, your back row will be clear for the armor to move out into attack position on the right flank.
4. An early goal will be to target the two advance Allies infantry near the Lausdell Crossroads.
5. Until you get the gap cleared on the way to the Crossroads, your armor is trapped in the woods, and it will take you two turns to get them into play.
Battle Reports
(percentage of Allied victories):
57%
Author:
Days of Wonder
Link: