Pruzana
Pruzana
The Battle of Pruzana, part of the larger Eastern Front conflicts in World War II, took place in the area around Pruzana (now in Belarus) during Operation Barbarossa, the German invasion of the Soviet Union, in 1941. German forces, advancing rapidly through Soviet-held territory, encountered Soviet resistance in Pruzana as part of the initial Soviet defenses against the Axis invasion.
5 VP’s
![]()
Card Balance:
Allies – 3
Axis – 6
Complexity:
2
Conditions:
Countryside

Location:
Russia
Year:
1941
Theater:
Eastern Front
Campaign:
Operation Barbarossa
Codename
Summary:
Objectives:
Five VP’s; no Objective Medals.
Battlefield:
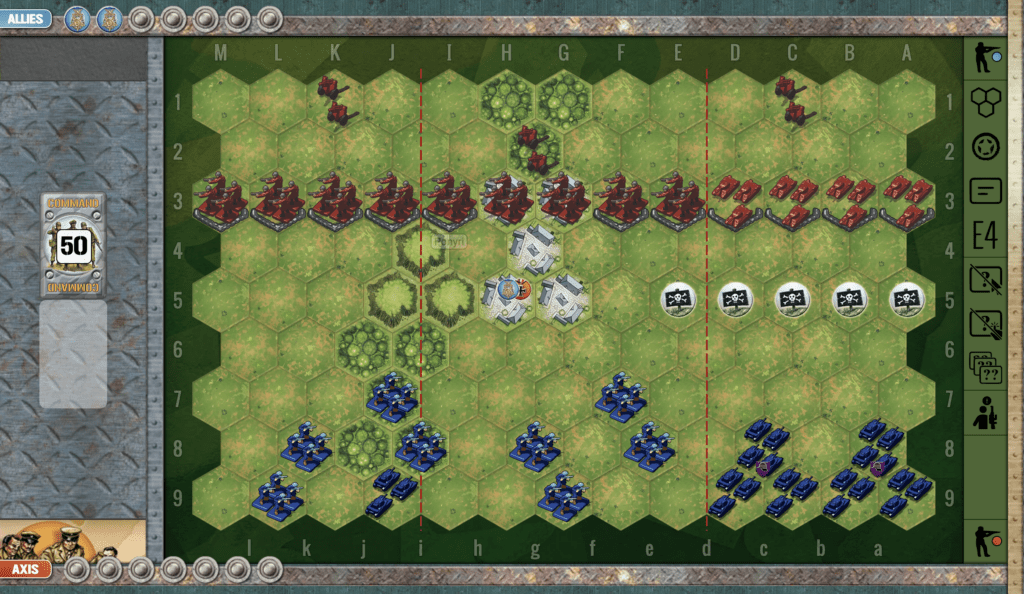
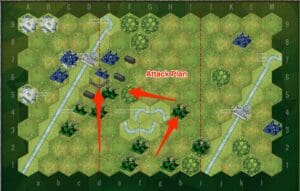
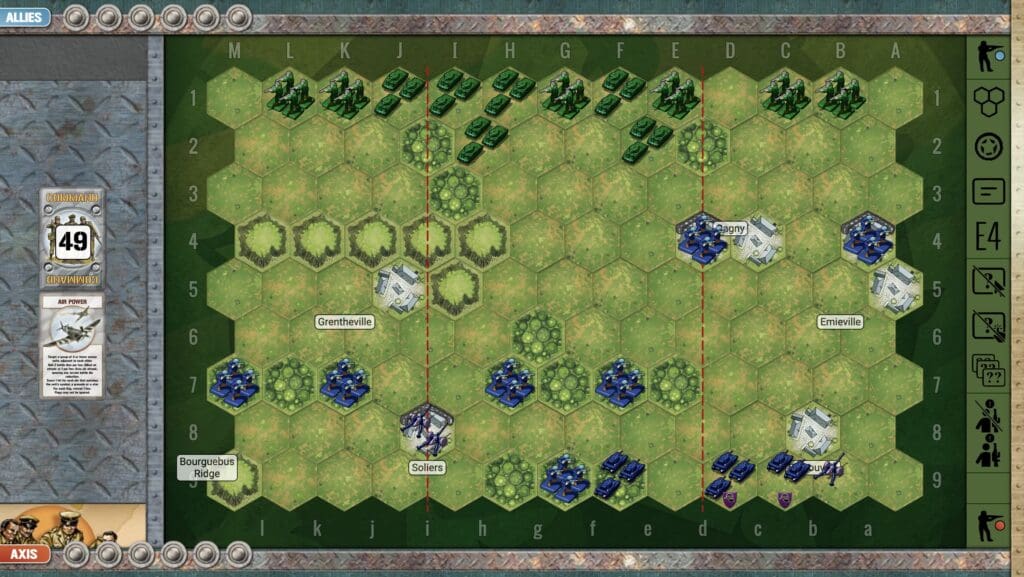
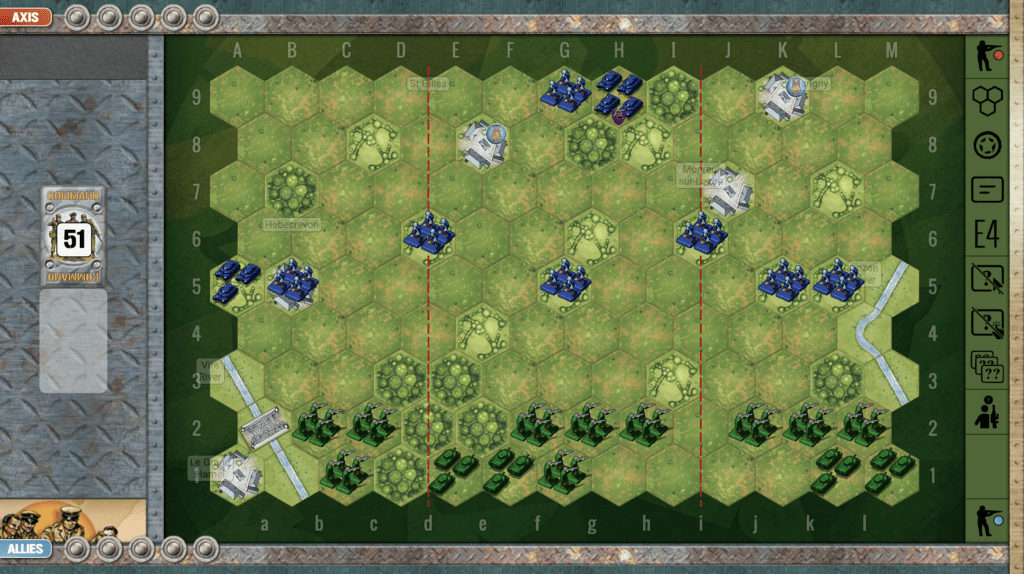
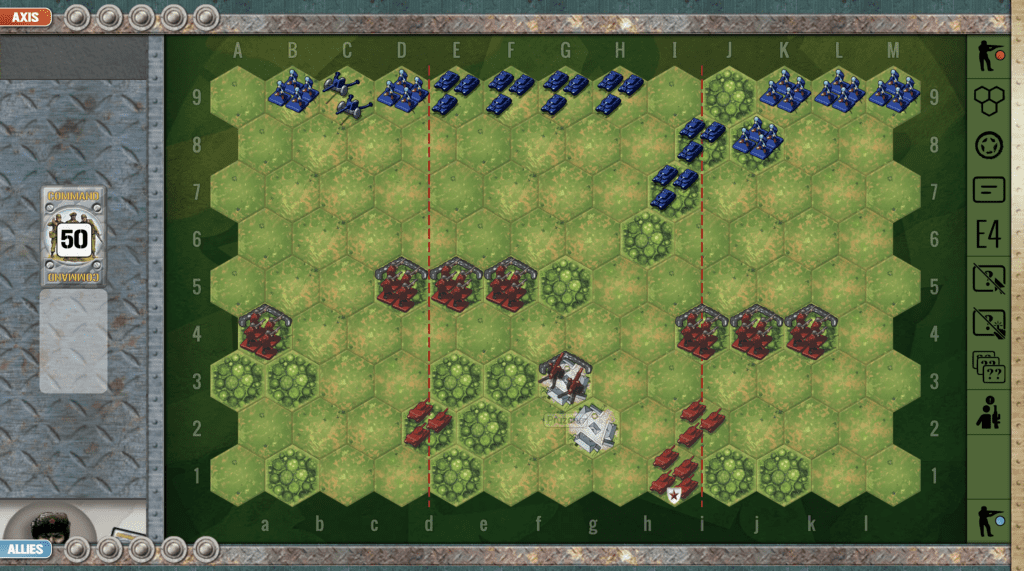
The principle feature of the Pruzana scenario are the two tree lines intersecting the battlefield in both a horizontal and a diagonal pattern, providing great cover for both sides.
Troops:
Russians – 7 Infantry, 3 Armor, including one T-34, 1 Artillery.
Axis – 6 Infantry, 6 Armor, 1 Artillery

🔥 Winning as Allies
1. The Allies can win this one by staying behind their sandbags and resisting and attacking the the Axis forces as they get near.
2. Make good use of your artillery to degrade the enemy forces as they approach.
3. Possible Attack Vector: If you get the cards and are able to bring your Armor around both sides of the center woods, you can sometimes catch the Axis in the center, and then pummel them with your Infantry in the woods, followed by your Armor. It can create a real kill box in the center, with the right set of cards.

🔥 Winning as Axis
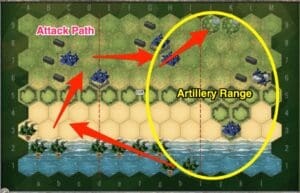
1. As Axis, you need to be wary of the enemy artillery right in the center of the battlefield. It will be able to strike much of the field of play. So if you get an early Barrage, or Air Power, take it out as soon as you can.
2. The big picture strategy is that until the enemy artillery is taken out, your best attack strategy is to move up each flank away from its full power attacks, at the same time as you use your armor to take out the infantry in the woods.
3. You can use your armor to do long distance degrading of the enemy forces, until they are at a point where your infantry can make an assault across the open fields.
4. Use your artillery on the right flank at every opportunity.
Author:
Days of Wonder
URL