Counter-Attack on Mortain
Counter-attack on Mortain
“Alright, boys—here’s the lowdown on that Axis stunt they called Operation Lüttich. Early August ‘44, the Germans thought they’d knock us back on our heels by punching through at Mortain, aiming to cut us off at Avranches and stop our drive into Brittany. Hell of a plan—if we were asleep!
They hit us hard at first, but we didn’t blink. Our boys dug in, held those lines with guts and grit. And don’t forget—our flyboys were on ‘em like hounds on a fox, raining steel and fire from the skies until those Nazis were howling for mercy.
The result? Germany’s counterattack went up in smoke—smashed, scattered, and thrown back with a hell of a lot of their tanks and men left behind in the dust. That’s the way to fight, boys—no retreat, no surrender, and always give ‘em hell!”
~~ General Howitzer
4 VP’s
![]()
Card Balance:
Allies – 6
Axis – 5
Complexity:
3
Conditions:
Countryside

Location:
France
Year:
1944
Theater:
Western Front
Campaign:
Codename:
Operation Luttich
Summary:
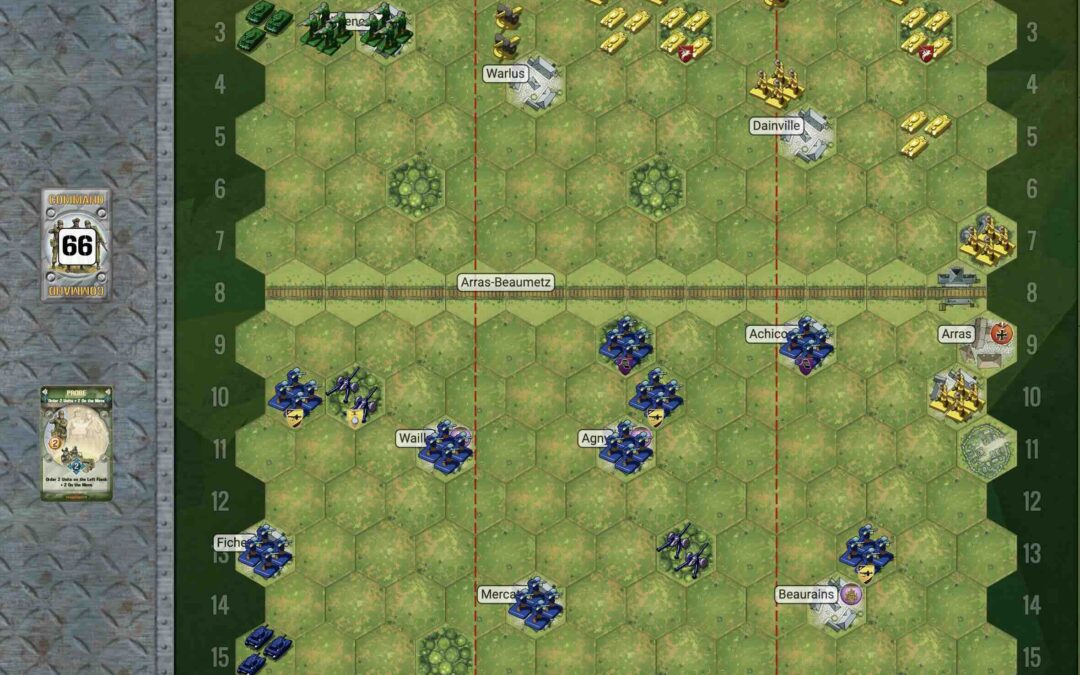
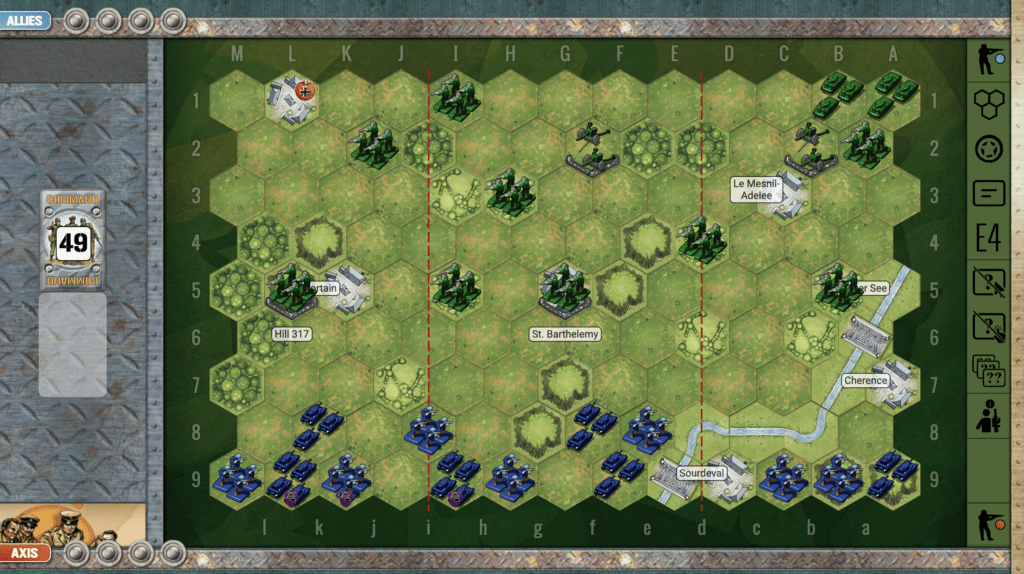
As it was historically, the Allies are very well protected, and controlling most of the field of play.
Objectives:
4 VP’s, and one Objective Medal for Axis
Battlefield:
This scenario has a nice combination of hills, forests, and hedgerows scattered across the battlefield. There is also a river in one corner making it difficult for extra infantry and armor to engage in the war.
Troops:
Allies – 9 Infantry, 2 Armor, 2 Artillery
Axis – 7 Infantry, 6 Amor

🔥 Winning as Allies
1. You have the advantage of terrain control, defensive positions in hedgrows, forests and towns. But you need to take advantage of it by quickly attacking where you can.
2. Your right flank is your weak one, being outnumbered by enemy forces, 5 to 2. Use your infantry on Hill 317 to attack the no-retreat armor before it moves away.
3. Note that as long as you have your forces on either of the two hexes of Hill 317, you can use any Recon (on the right) cards to call down Airpower attacks against the Axis. Use it, and bomb them back to Berlin!
4. Then move your infantry in the back of the right flank forward into the town of Mortain to support your other infantry unit on the hill, and to box in the enemy even more than they are already.
5. If you have the movement points, you can place your infantry at I1 into the village to defend the Objective Medal.
6. Get your armor in your left corner into the action ASAP. If you can get over to the river before the enemy has moved into safety, you can score one or two VP’s by attacking them in their no-retreat positions.

🔥 Winning as Axis
1. Your forces on the left flank are bunched up, and you have a no-retreat armor ready to get hit by the infantry hidden in the woods. You need to create some mobility on your left and some of your troops into the woods to attack the enemy.
2. Your right flank is equally problematic. You are a sitting duck back against the border. So you need to get those troops into safety into the nearby towns, at least. Even better if you have the cards to move them out into the action. Or else when the enemy armor in the upper right flank becomes mobile, they will make their way down and easily destroy one or two units.
3. It is going to be difficult to get all four VP’s, so you should target the Objective Medal in the village on your left flank. If your armor can survive the infantry attacks as you make your way there, it will be an important VP for you.
4. You only need four Medals to win this scenario, and three of them are on your left flank, ready for the taking. Just take out the two Infantry units and roll into the town of St. Hilaire.
Classic Battle Reports
(percentage of Allied victories):
39%

Author:
Days of Wonder
Link: