Bloody Ridge
Bloody Ridge
September 1942—Guadalcanal. The place? A godforsaken jungle. The mission? Hold Henderson Field—or lose the whole damn island.
The Japanese came in hard, full of fire and fury, dead set on taking back that airstrip. And standing in their way? A thin line of Marine Raiders and the 1st Marine Division, led by Colonel Merritt Edson—a man who knew how to fight.
They dug in on that ridge near the field, and when the sun went down, hell lit up. The enemy came in waves, screaming, charging, trying to break our line with steel and guts. But Edson’s boys? They didn’t break. They held, bled, and threw everything back in the enemy’s face.
For three nights it was chaos—bayonets, grenades, bullets in the dark. But when the smoke cleared, Henderson was still ours, and the ridge was soaked in blood—American and Japanese alike. That hill earned a new name—“Bloody Ridge”—and it damned well deserved it.
That stand turned the tide on Guadalcanal. It proved that the Japanese could be stopped. It proved that when the enemy thinks we’ll break—we dig in deeper.
That’s the kind of fight I respect—outnumbered, outgunned, and still coming out on top.
~~ General Howitzer
6 VP’s
![]()
Card Balance:
5 – 5
Complexity:
2
Conditions:
Jungle

Context:
Historical
Location:
Guadalcanal
Year:
1942
Theater:
Pacific Theater
Campaign
Summary:
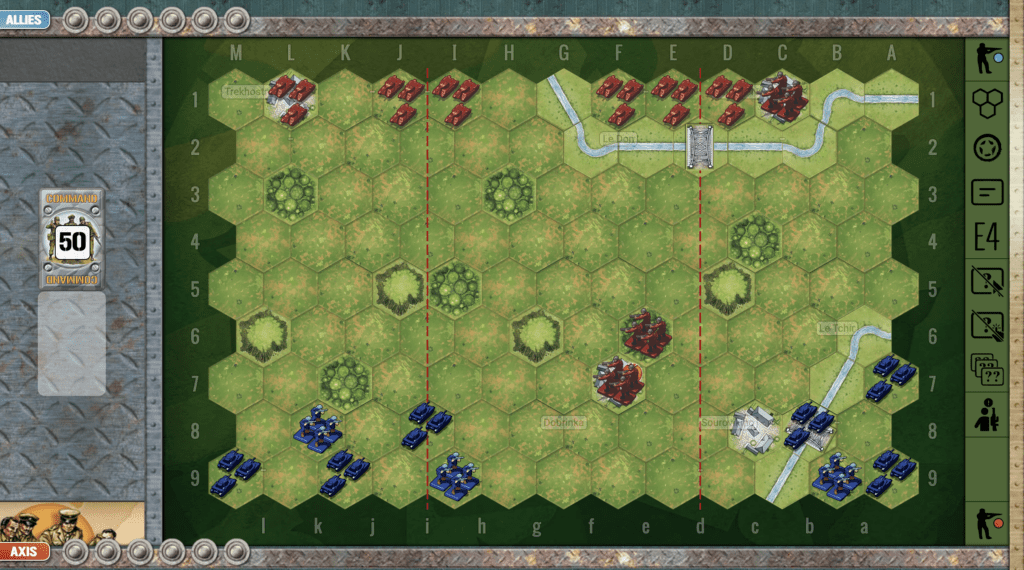
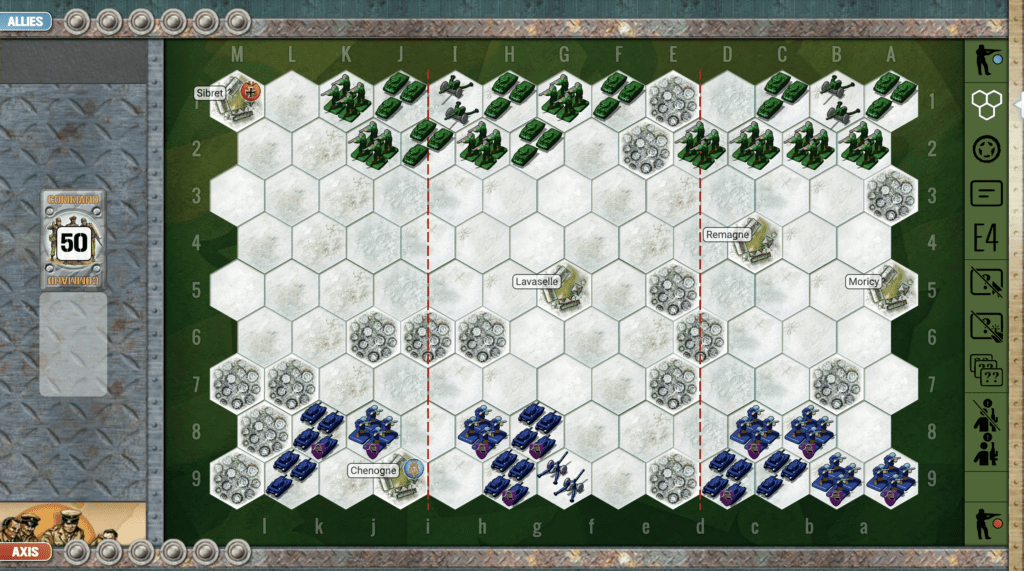
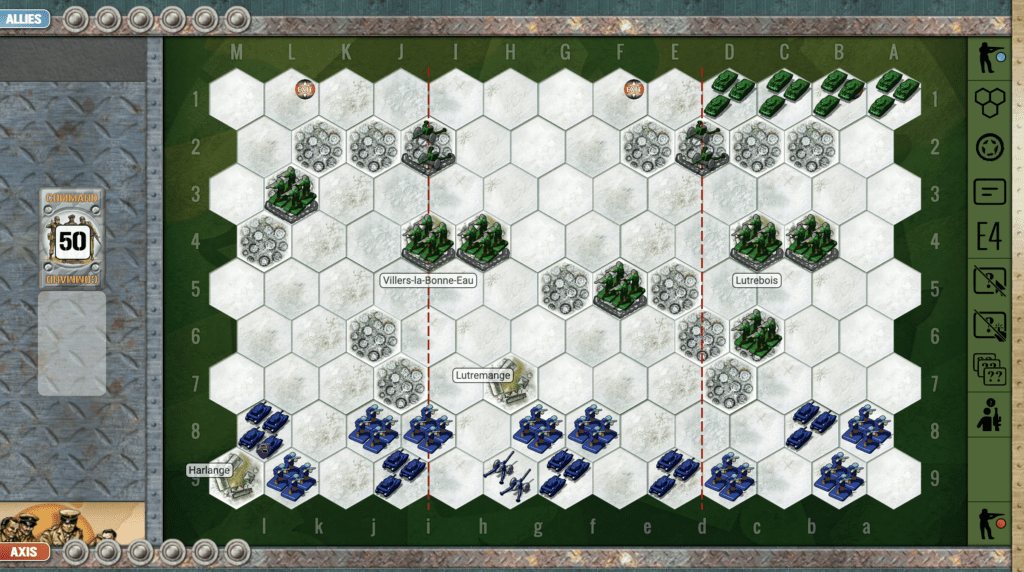
Bloody Ridge has a large series of hills in the center of the battlefield, occupied by the Marines who are defending against a vast hoard of Japanese attackers.
Objectives:
6 VP’s, plus the Japanese can target two hexes at the top of the battlefield representing Henderson field as Objective Medals.
Battlefield:
Jungle with a series of bluffs in the center, controlled by the Marines.
Troops:
Marines, 10 infantry, 1 artillery
Japanese, 12 infantry, 1 artillery

🔥 Winning as Allies
1. One advantage you have as Allies is your artillery which is placed in the center of the battlefield, straddling the left and center sections.
2. Because the Marines are out-numbered, and behind sandbags, they have a primarily in a defensive role in this game, unless the cards cooperate. So do not rush out of your protection unless given a good reason by the cards and circumstances. And that’s an order!
3. Because of the Seishin Kyoiku Doctrine, and the Banzai War Cry, you positively need to hit every full-power enemy hex unit at least once. This will reduce their attack from the super-powered 4D attack. If not, they will overwhelm your forces.

🔥 Winning as Axis
1. The Japanese have a numerical advantage. This fact, combined with the principles of Seishin Kyoiku, and the Banzai War Cry mean that you should rush forward as quickly as possible while your infantry units are still fully intact to get the extra attack dice provided.
2. You have an advantage on your left flank with your artillery and infantry. That is your probably best forward option. Watch out for the Marine artillery on your right flank.
Author.
URL