Counter-Attack at Arras
Counter-Attack at Arras
Background
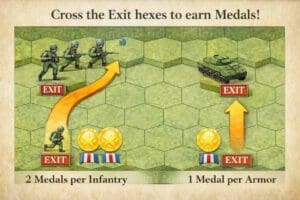
6 VP’s
![]()
Card Balance:
Allies – 6
Axis – 5
Complexity:
3
Conditions:
Countryside

Location:
France
Year:
1940
Theater:
Western Front
Campaign:
Battle of France
Codename:
Operation Frankforce
Summary:
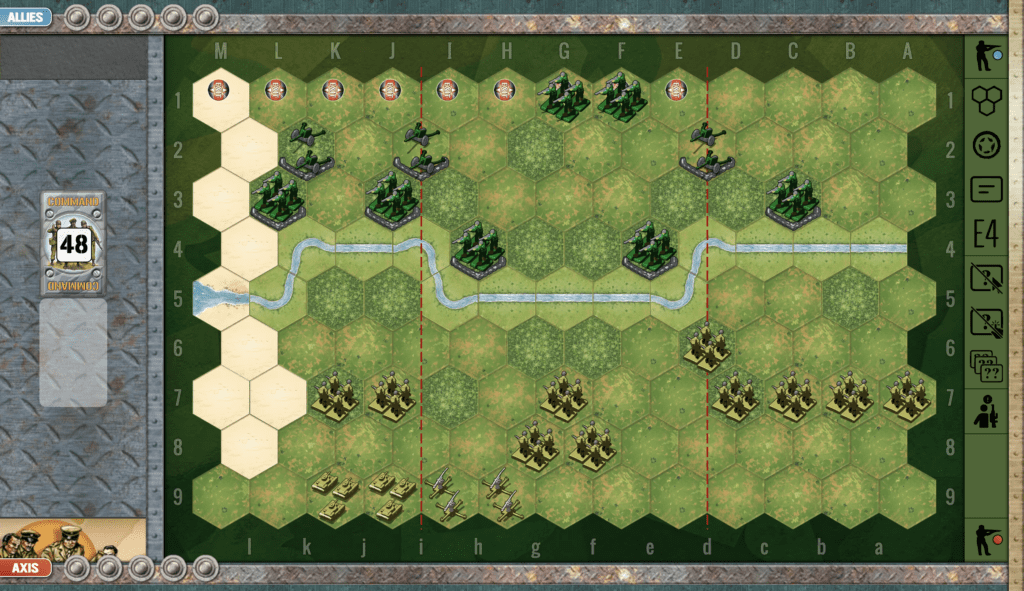
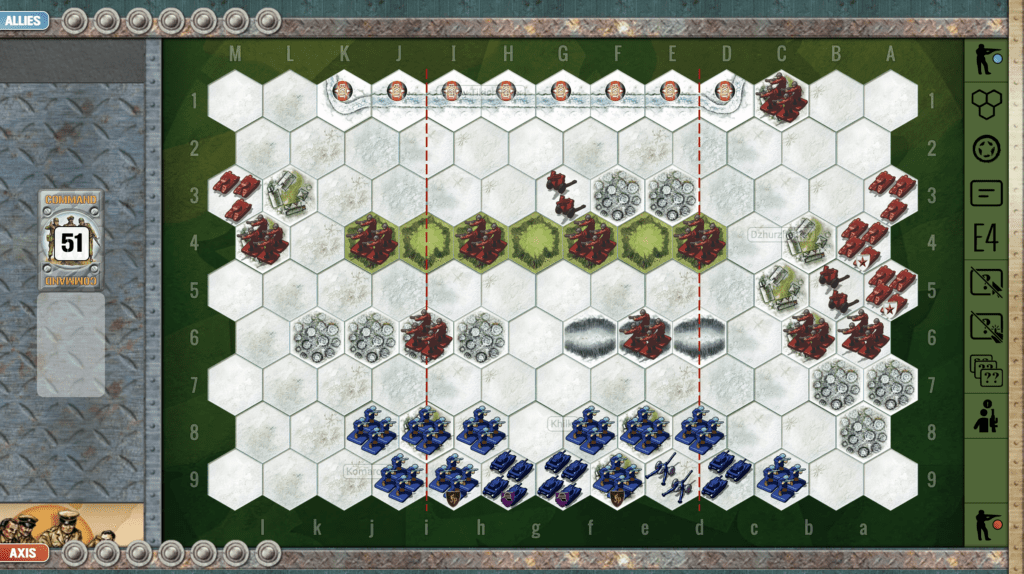
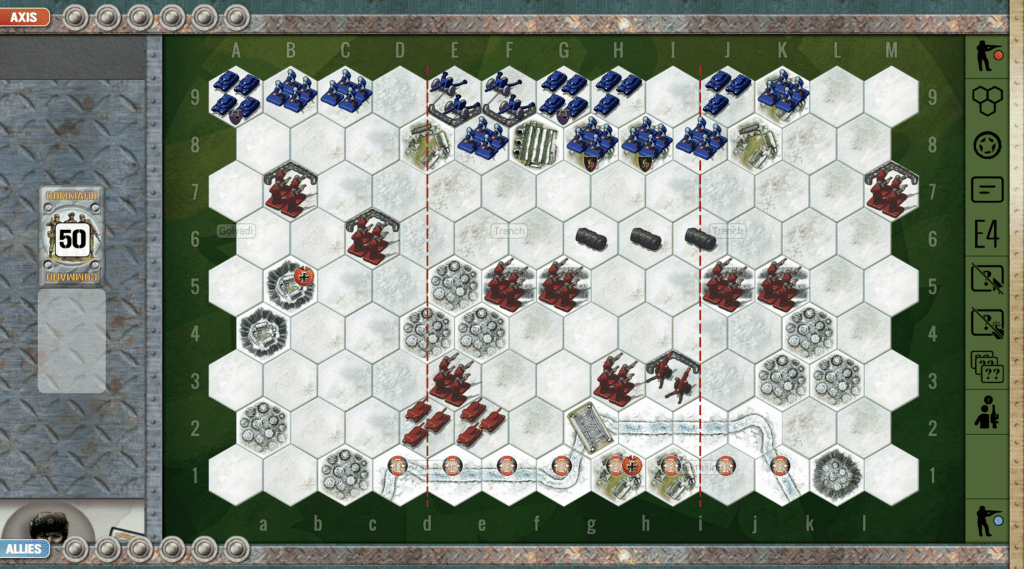
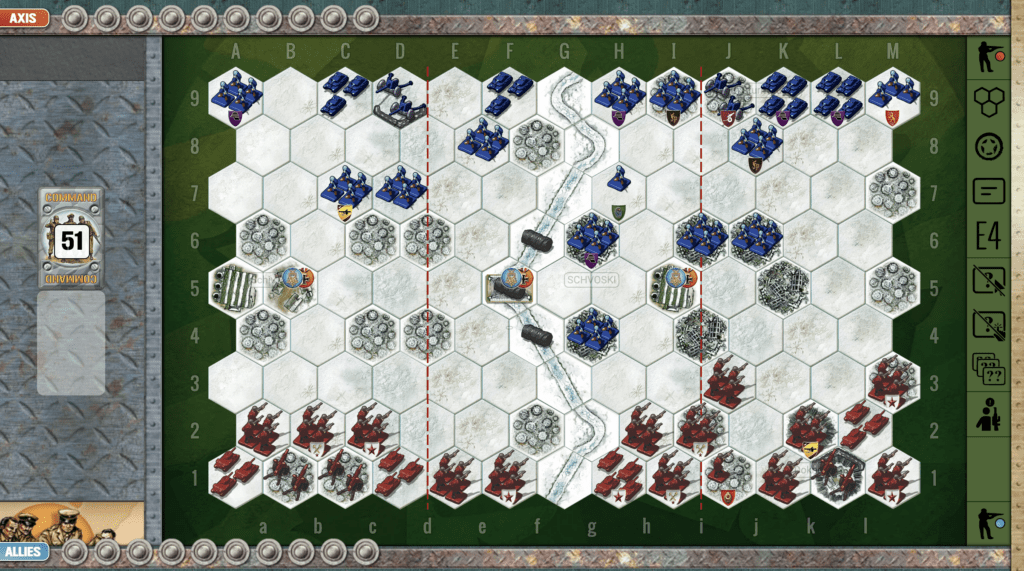
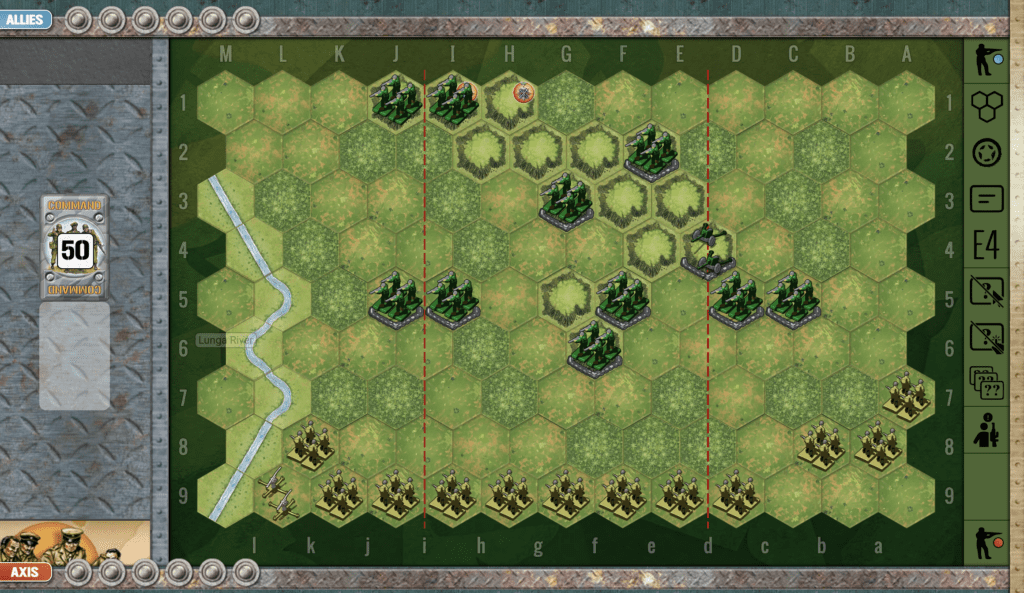
This scenario has a set of hills on one flank, and a row of forests on the other flank, with a three-hex town in the center. It is around these obstacles that the battle ensues.
Objectives:
Six VP’s, so strategy comes into play; not just tactics.
Battlefield:
Countryside with the three-hex town of Arras in the center.
Troops:
Allies, 6 Infantry, 5 Armor, 1 Artillery;
Axis, 9 Infantry, 6 Armor,1 Artillery

🔥 Winning as Allies
1. Axis is very close to Agny, and may secure it quickly. So use your flanks to provide more lucrative avenues of attack. The ridgeline of trees on your left flank give your infantry, and especially your armor great cover to attack the enemy. On your right flank, secure it with both infantry and armor. Don’t leave infantry behind.
2. Move your artillery forward one row to have better hit strength on the entire town of Arras.

🔥 Winning as Axis
1. Your Axis forces begin the scenario very close to Agny. Seize control of the town so that the enemy will have to pay dearly to gain it.
2. There is a path between the forest on your right flank. Seize the town at the end of it, to challenge any forces which may attempt to come through the pass. And as the cards allow, use it yourself to attack the enemy armor at the end of that pass.
3. Move your artillery forward at least one row to gain more dominance in the center section.
4. Remember that as Axis in this scenario, blitz rules are in effect, so you can use a Recon card to call in an airstrike against adjacent units. This is most useful in the beginning when the Allied forces are still lined up agains the back border. The Axis airpower only drops one dice per hex, but since it is a six VP game, this kind of softening up of the enemy in the beginning can pay dividends later on.

Author:
Days of Wonder / RBorg
URL