Rzhev – The Meat Grinder
Rzhev (the Meat Grinder)

6 VP’s
![]()
Card Balance:
Allies – 4
Axis – 6
Complexity:
4
Conditions:
Winter

Location:
Russia
Year:
1942
Theater:
Eastern Front
Summary:
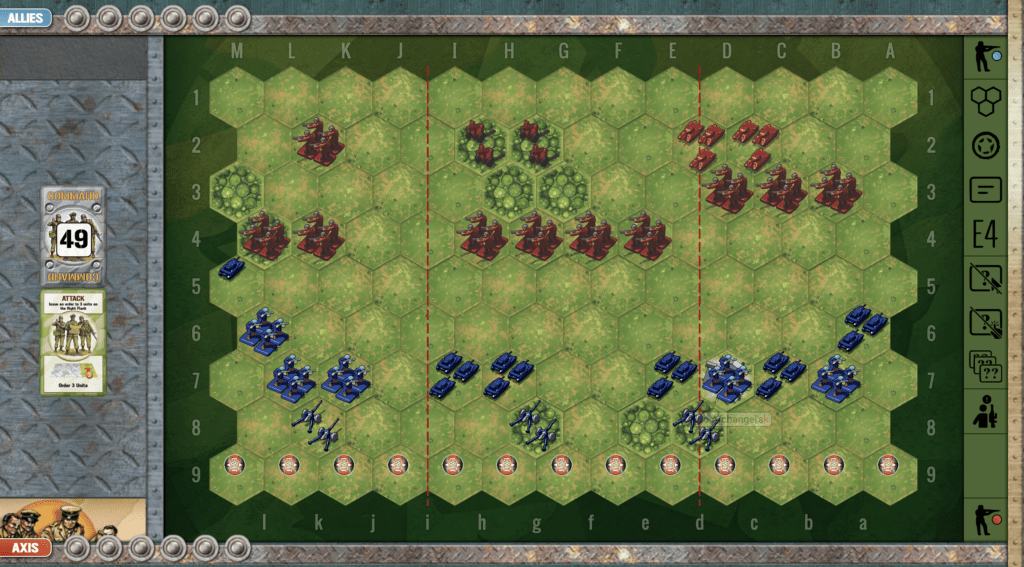
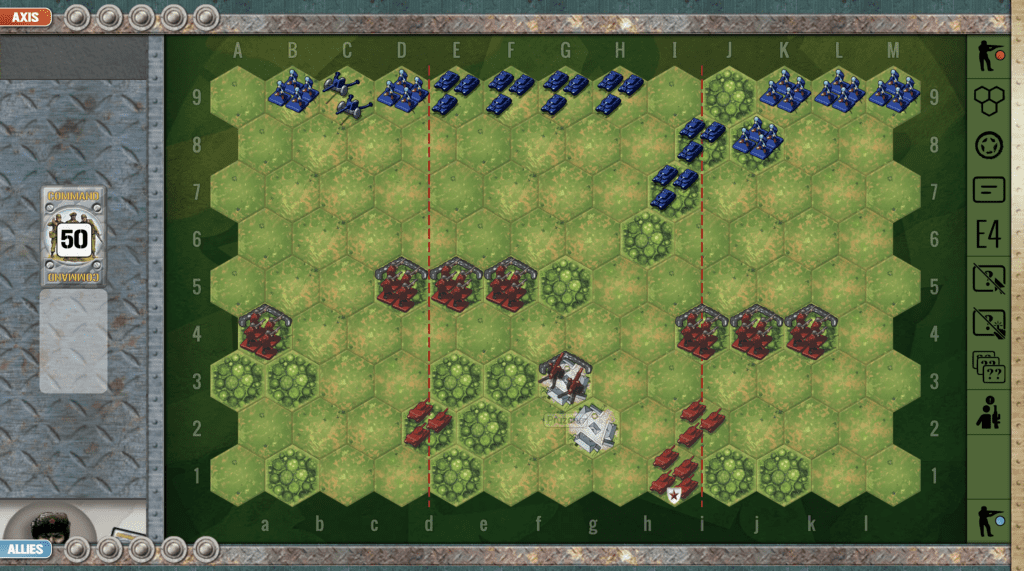
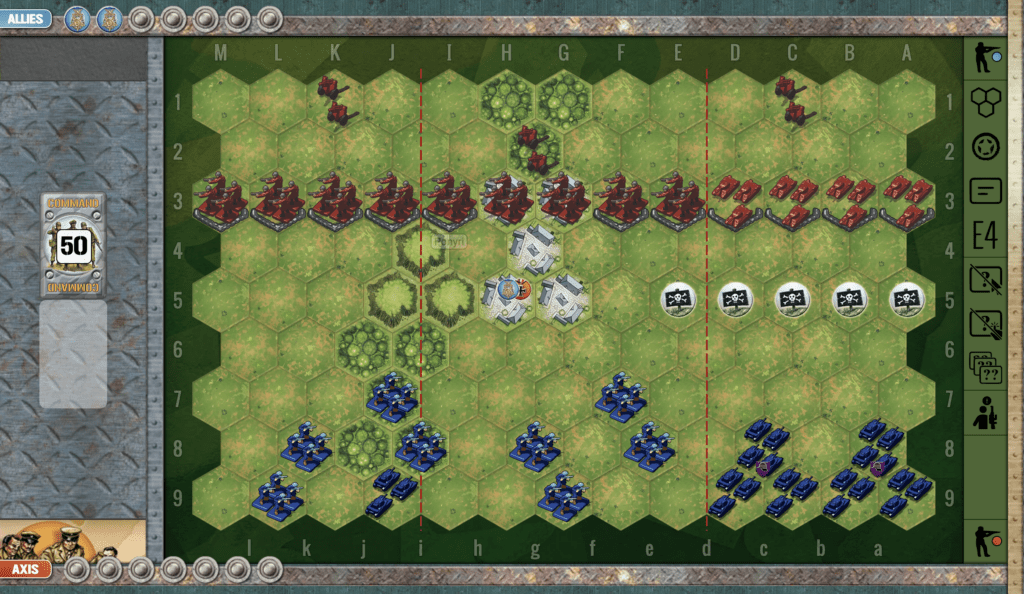
Rzhev is a complex scenario recreating the Soviet counter-offensive with a 10 VP goal. This requires a long-term plan, as quick tactical hits will not win such a long battle. Night rules are in effect.
Objectives:
10 VPs,
including Objective medals for both Axis and Allies, plus Exit objectives for Allies.
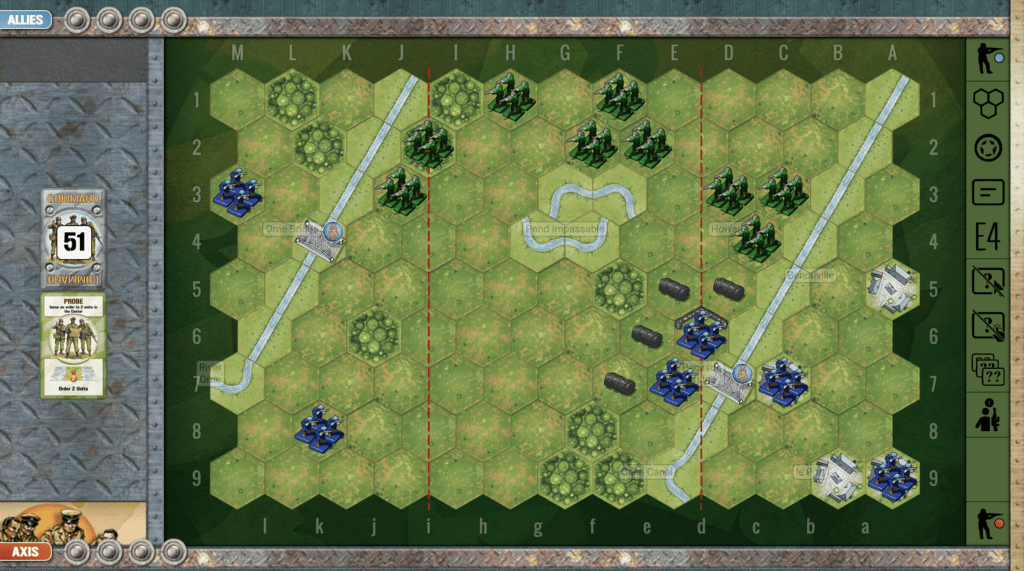
The town of Belyi is a temporary medal objective worth 1 medal for both sides. If any unit occupies any of the three hexes marked with an ‘A’ they gain a medal irregardless if an opponent occupies any of the other hexes. Both sides can earn 1 medal at the same time.
The town of Rzhev is a temporary medal objective worth 2 medals for both sides. If any unit occupies any of the 3 hexes marked with a ‘B’ they gain 2 medals irregardless if an opponent occupies any of the other hexes.
Terrain:
The Axis forces already control much of the battlefield, as sandbagged troops who are very difficult to dislodge, while the Russians are pressed up against the wall.
Troops:
Allies – 9 Infantry including a Sniper, 5 Armor, 1 Artillery
Axis – 10 Infantry including a Sniper, 4 Armor, 1 Artillery

🔥 1. Winning as the Soviets (Allies)
Soviets must be surgical, not brute-force.
Your troops have numbers but terrible defensive terrain.
So your victories come from forcing the Axis out of their woods.
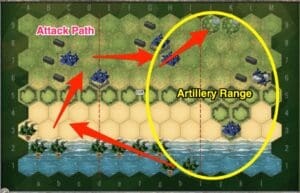
Do NOT Push the Center First
The center looks juicy… but it’s a trap.
If you push center:
-
You feed medals to the German artillery in the woods
-
You take 2-dice fire from multiple directions
-
You lose tempo
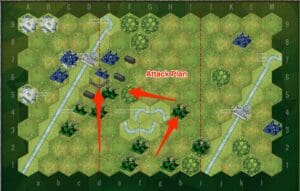
2. You can attack the well-protected Axis Infantry units by placing your Armor in the forest and degrading them over several turns. Time is on your side, so there is no need to rush the attack until you are ready.
3. You have a well-placed Artillery right in the center of the battlefield. Use it at every opportunity to take out enemy forces. If you get the chance to concentrate firepower using a card like Firefight, Barrage, or Airpower, then use it to destroy the enemy Artillery against the back border before it moves forward.

🔥 1. Winning as the Germans (Axis)
Because this is a Russian counter-attack scenario, the Germans are primarily in a defensive position and out-numbered. So use your protections well. You must get your Armor into a good defensive tactical position to allow for mobility when needed, and defense of open terrain in the center and left section.
2. Your artillery is well-placed in the center. Use it to good effect before it is overwhelmed by the enemy.
Battle Reports
(percentage of Allied victories):
31%
Author:
Days of Wonder