Battle of Abbeville

Battle of Abbeville

Battle of Abbeville

The Battle of Abbeville was a hard-hitting brawl that showed just how unprepared we were for the kind of fast, mechanized war the Germans were waging. After their lightning dash to the Channel, the Germans dug in around Abbeville, threatening to cut off our northern forces. The French, led in part by de Gaulle and his 4e Division Cuirassée, threw in the big boys—those heavy Char B1 bis tanks and Hotchkiss H35s and H39s. The Brits rolled up with Matilda I and II tanks, tough as hell but slower than molasses in January.

We launched a series of assaults to punch the Germans off those Somme bridgeheads, but coordination was lousy, the terrain was brutal, and too many tanks broke down before they even fired a shot. The enemy wasn’t sitting on their hands either—they had Panzer IIIs and IVs guarding the line, with light Panzers filling in the gaps and 88mm Flak guns ripping through anything we sent their way.

Despite brave pushes and a few local breakthroughs, we couldn’t dislodge them. The Germans held the high ground, held the bridges, and held the initiative. That failure didn’t just cost us a patch of land—it helped seal France’s fate. The Germans kept their corridor, tightened the noose, and by the end of June, France was on her knees.

Abbeville wasn’t the biggest battle, but it damn sure mattered. It reminded us that guts alone wouldn’t win this war—we needed better gear, tighter coordination, and leaders ready to move fast and hit hard.

~~ General Howitzer

10 VP’s

Card Balance:

Allies – 6

Axis – 6

Complexity:

4

Conditions:

Countryside

Context:

Historical

Location:

France

Year:

1940

Theater:

Western

Campaign:

Codename:

Summary:

Objectives:

10 VP’s, including two Temporary Objective Medals.
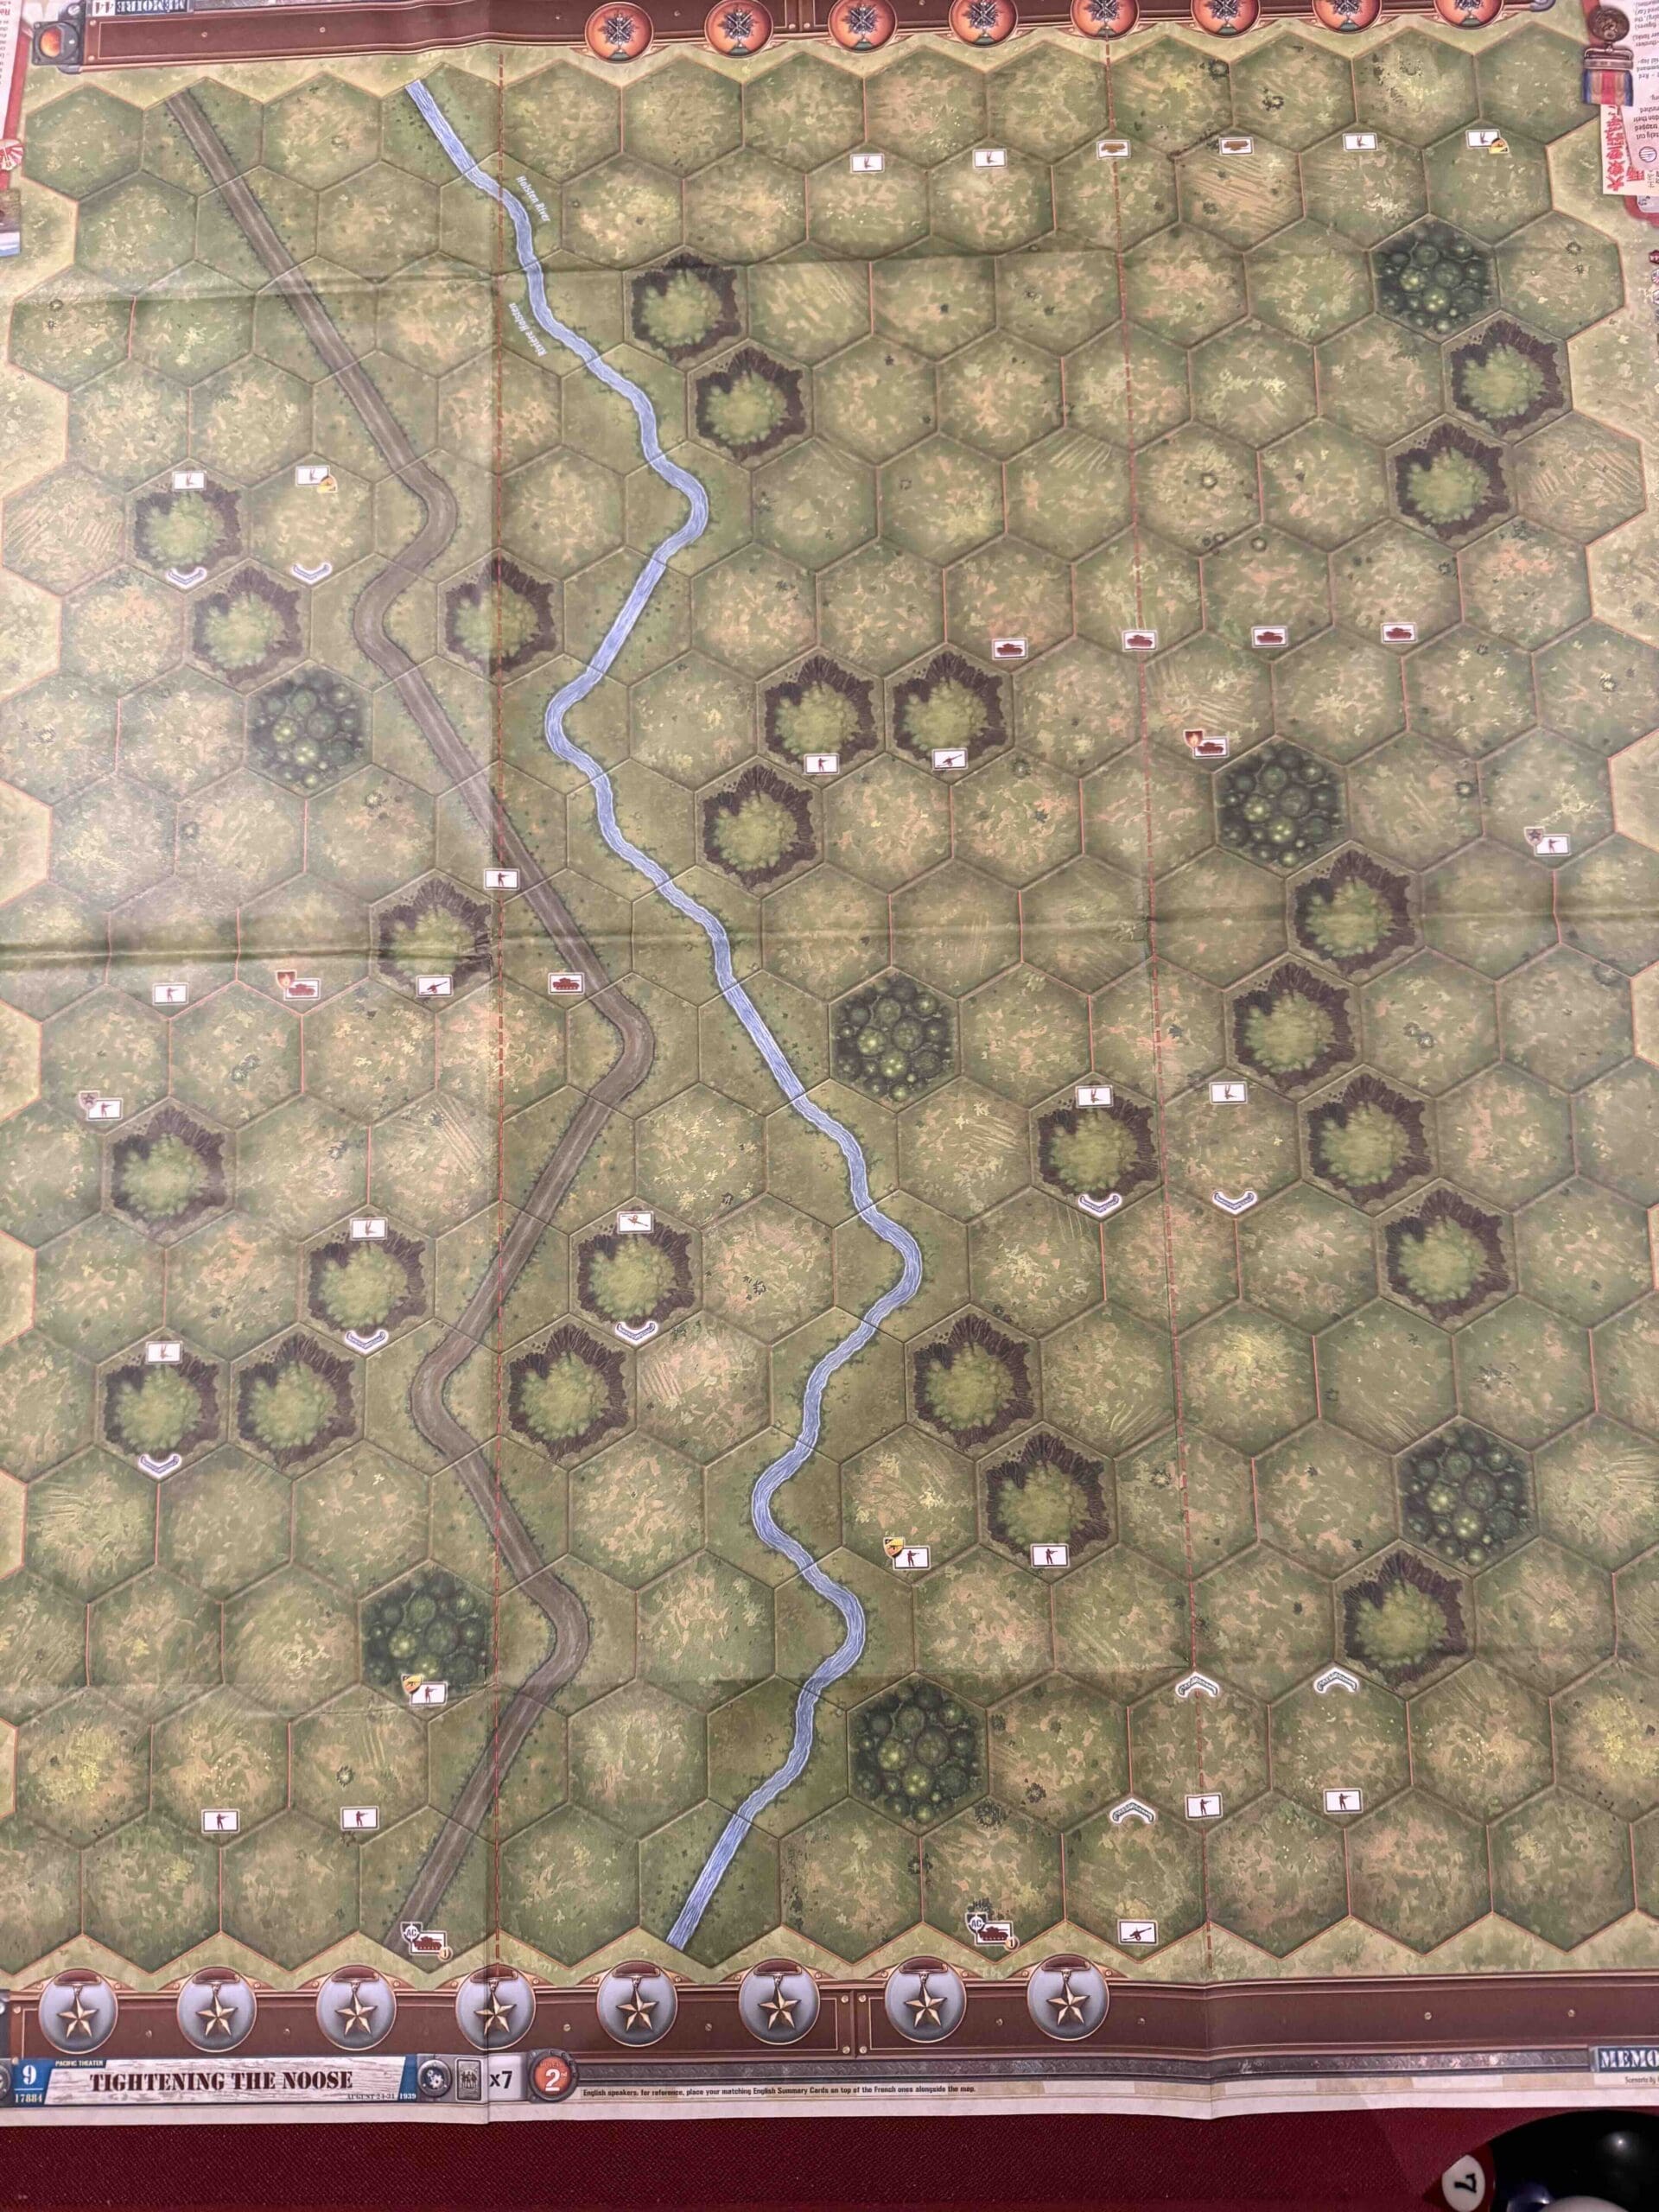
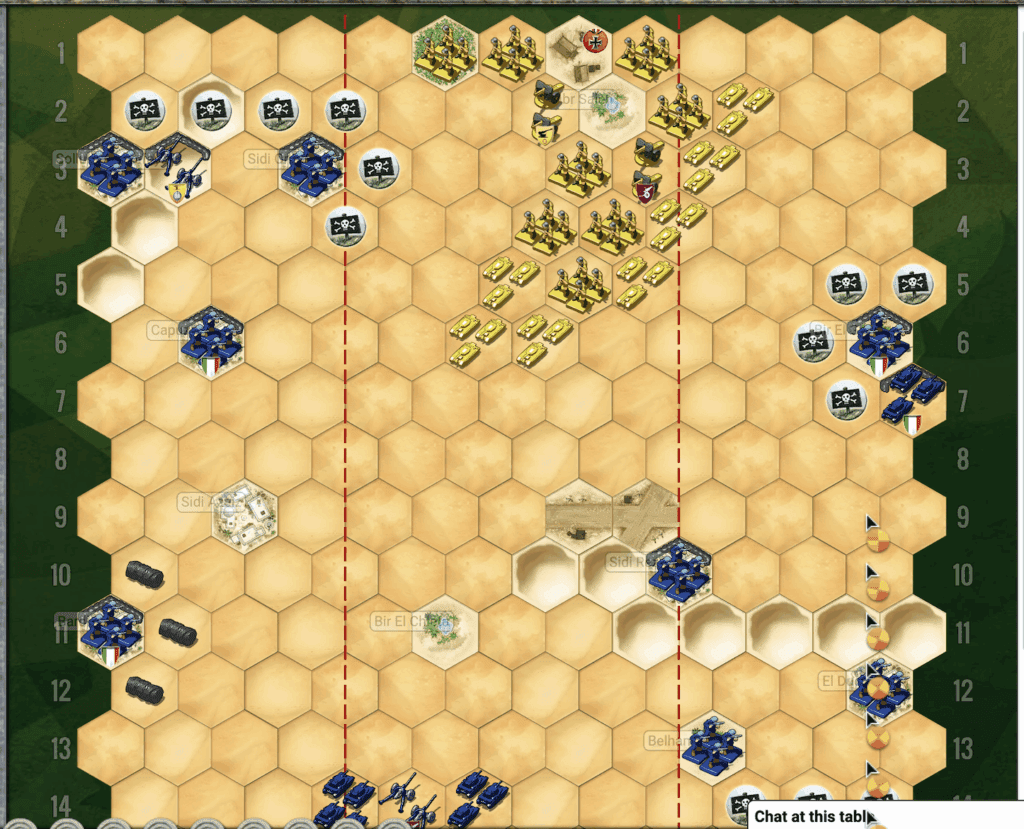
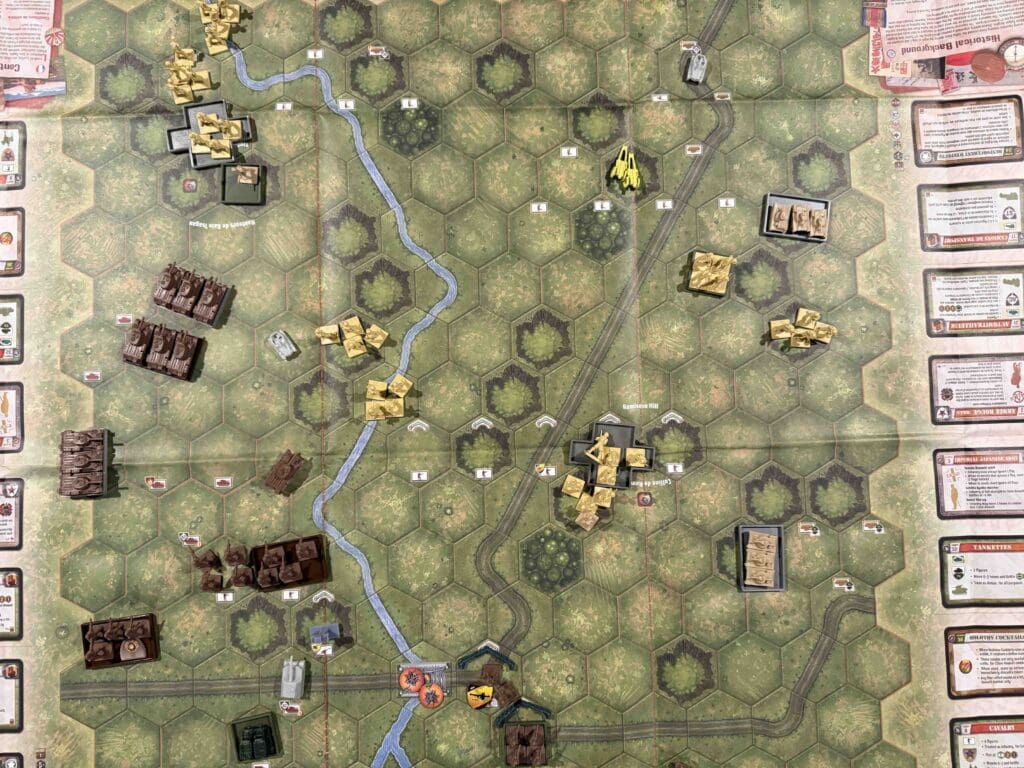
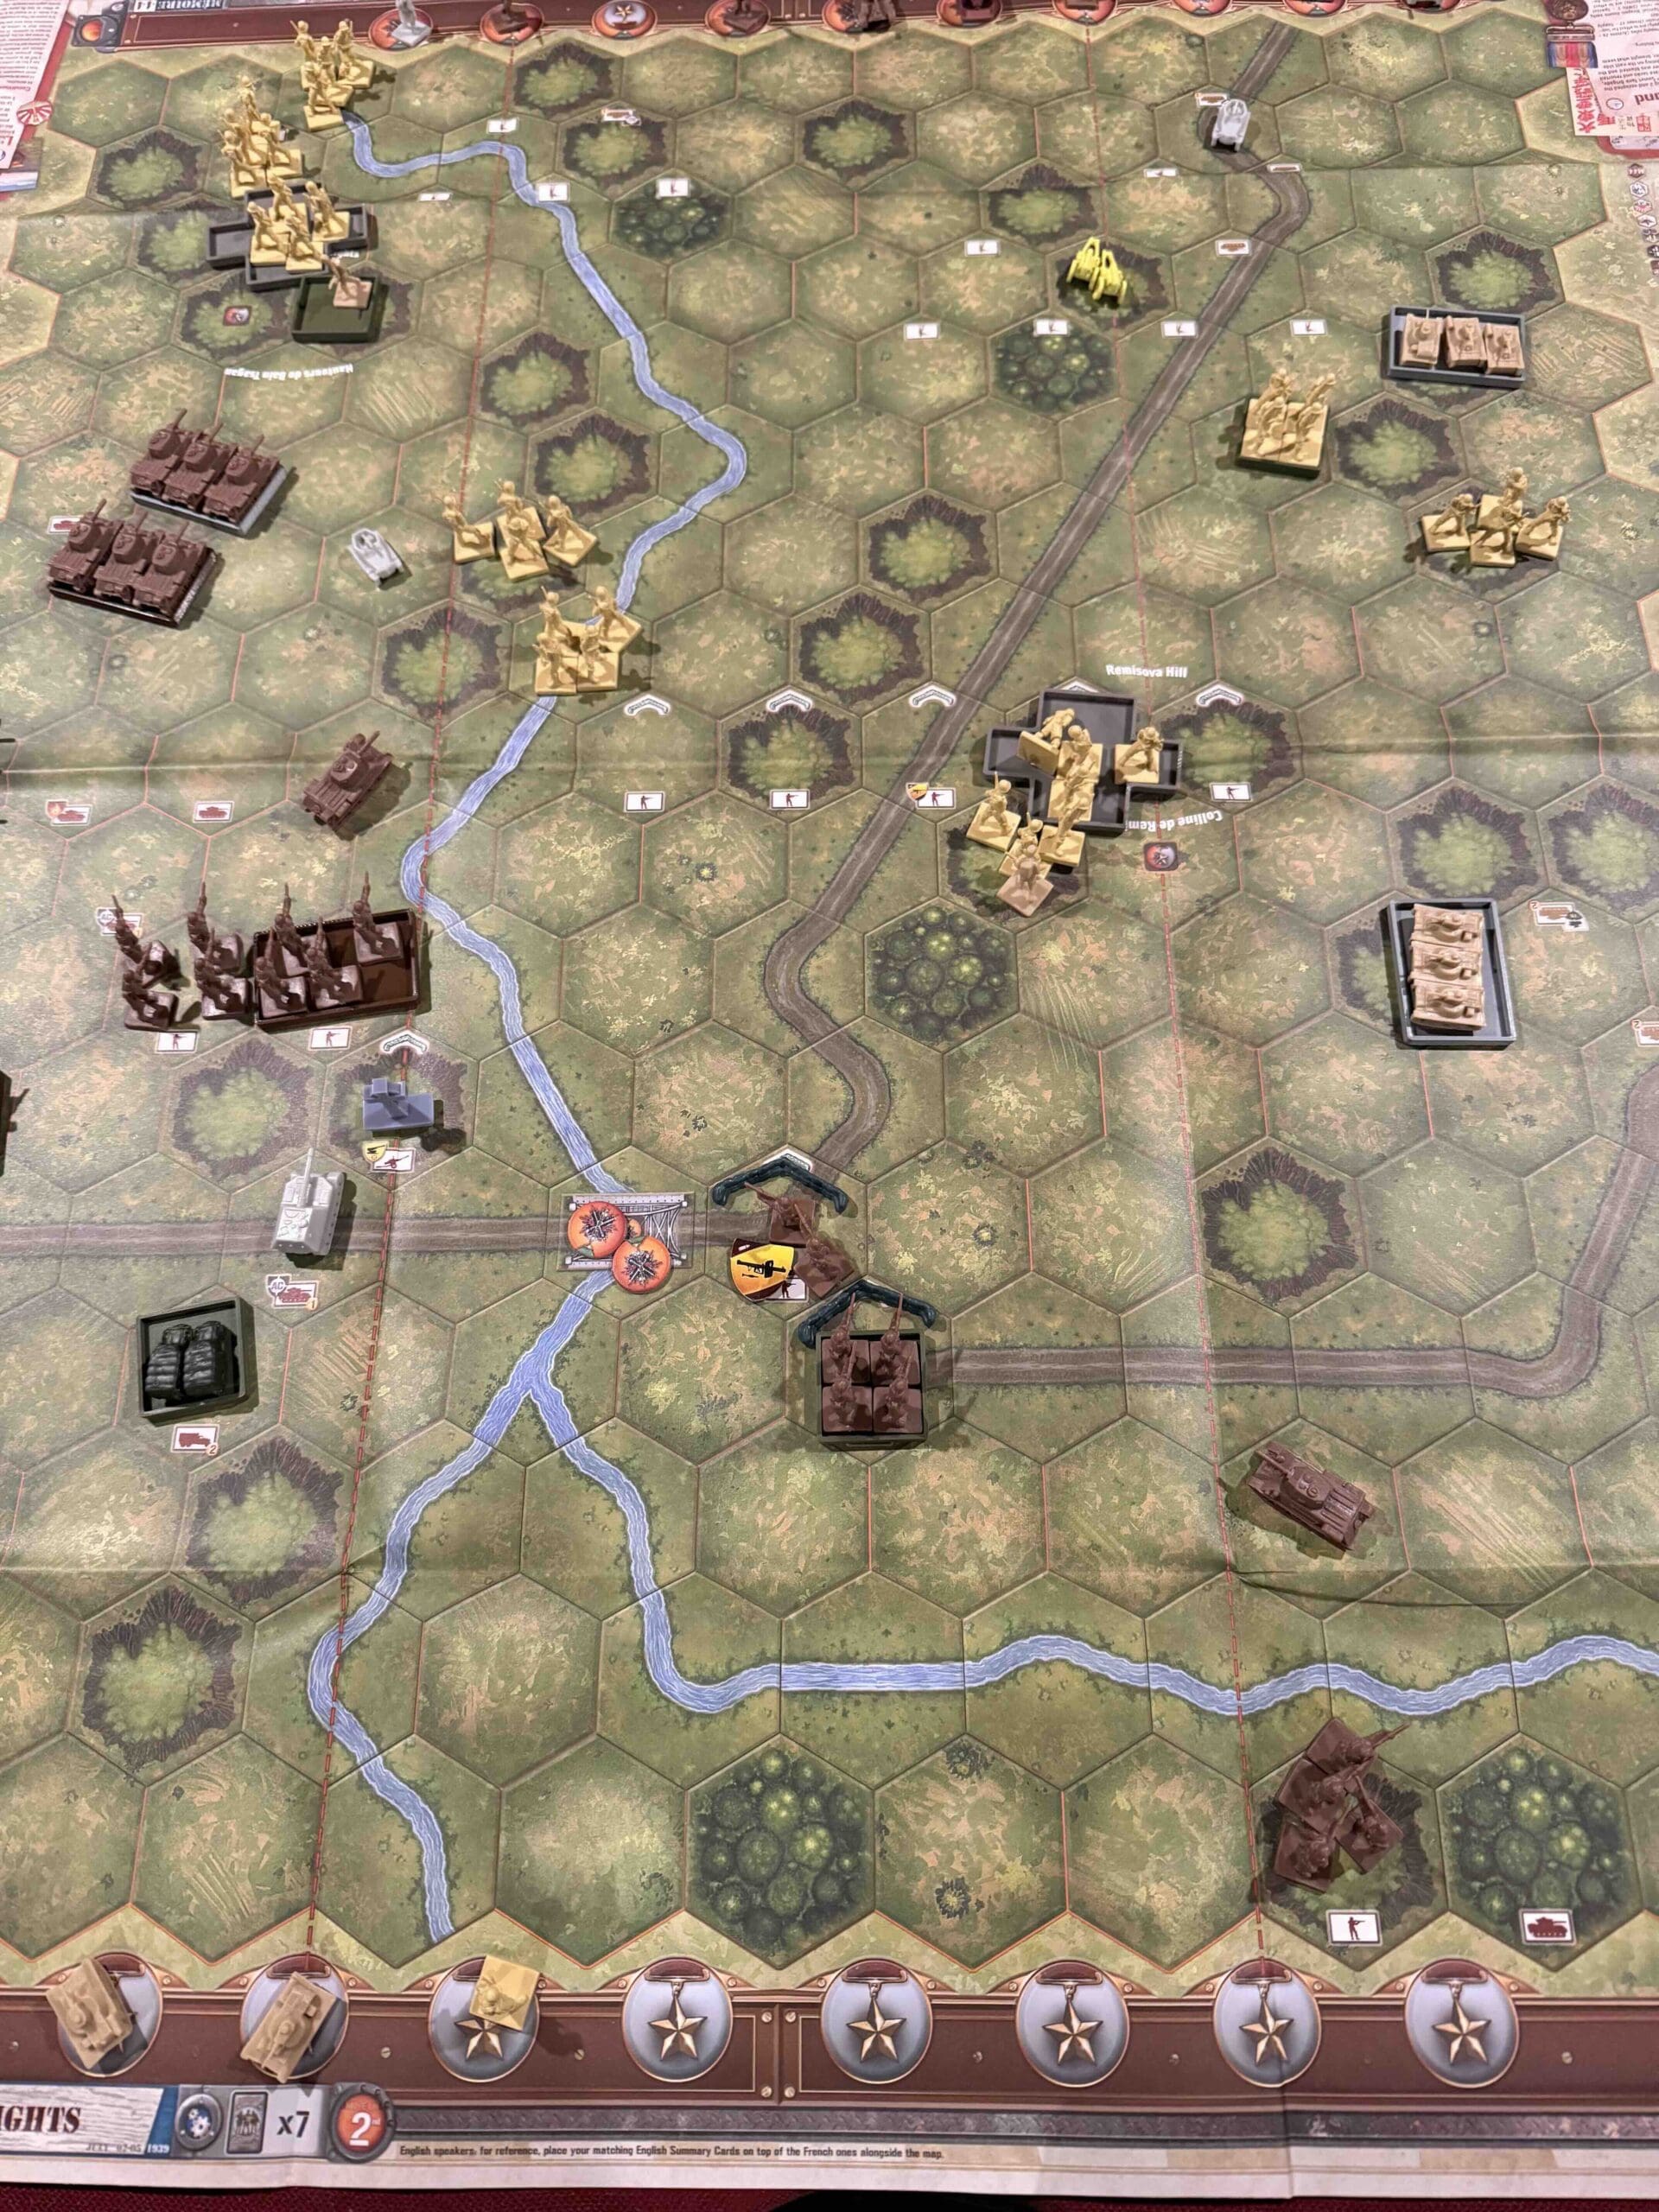
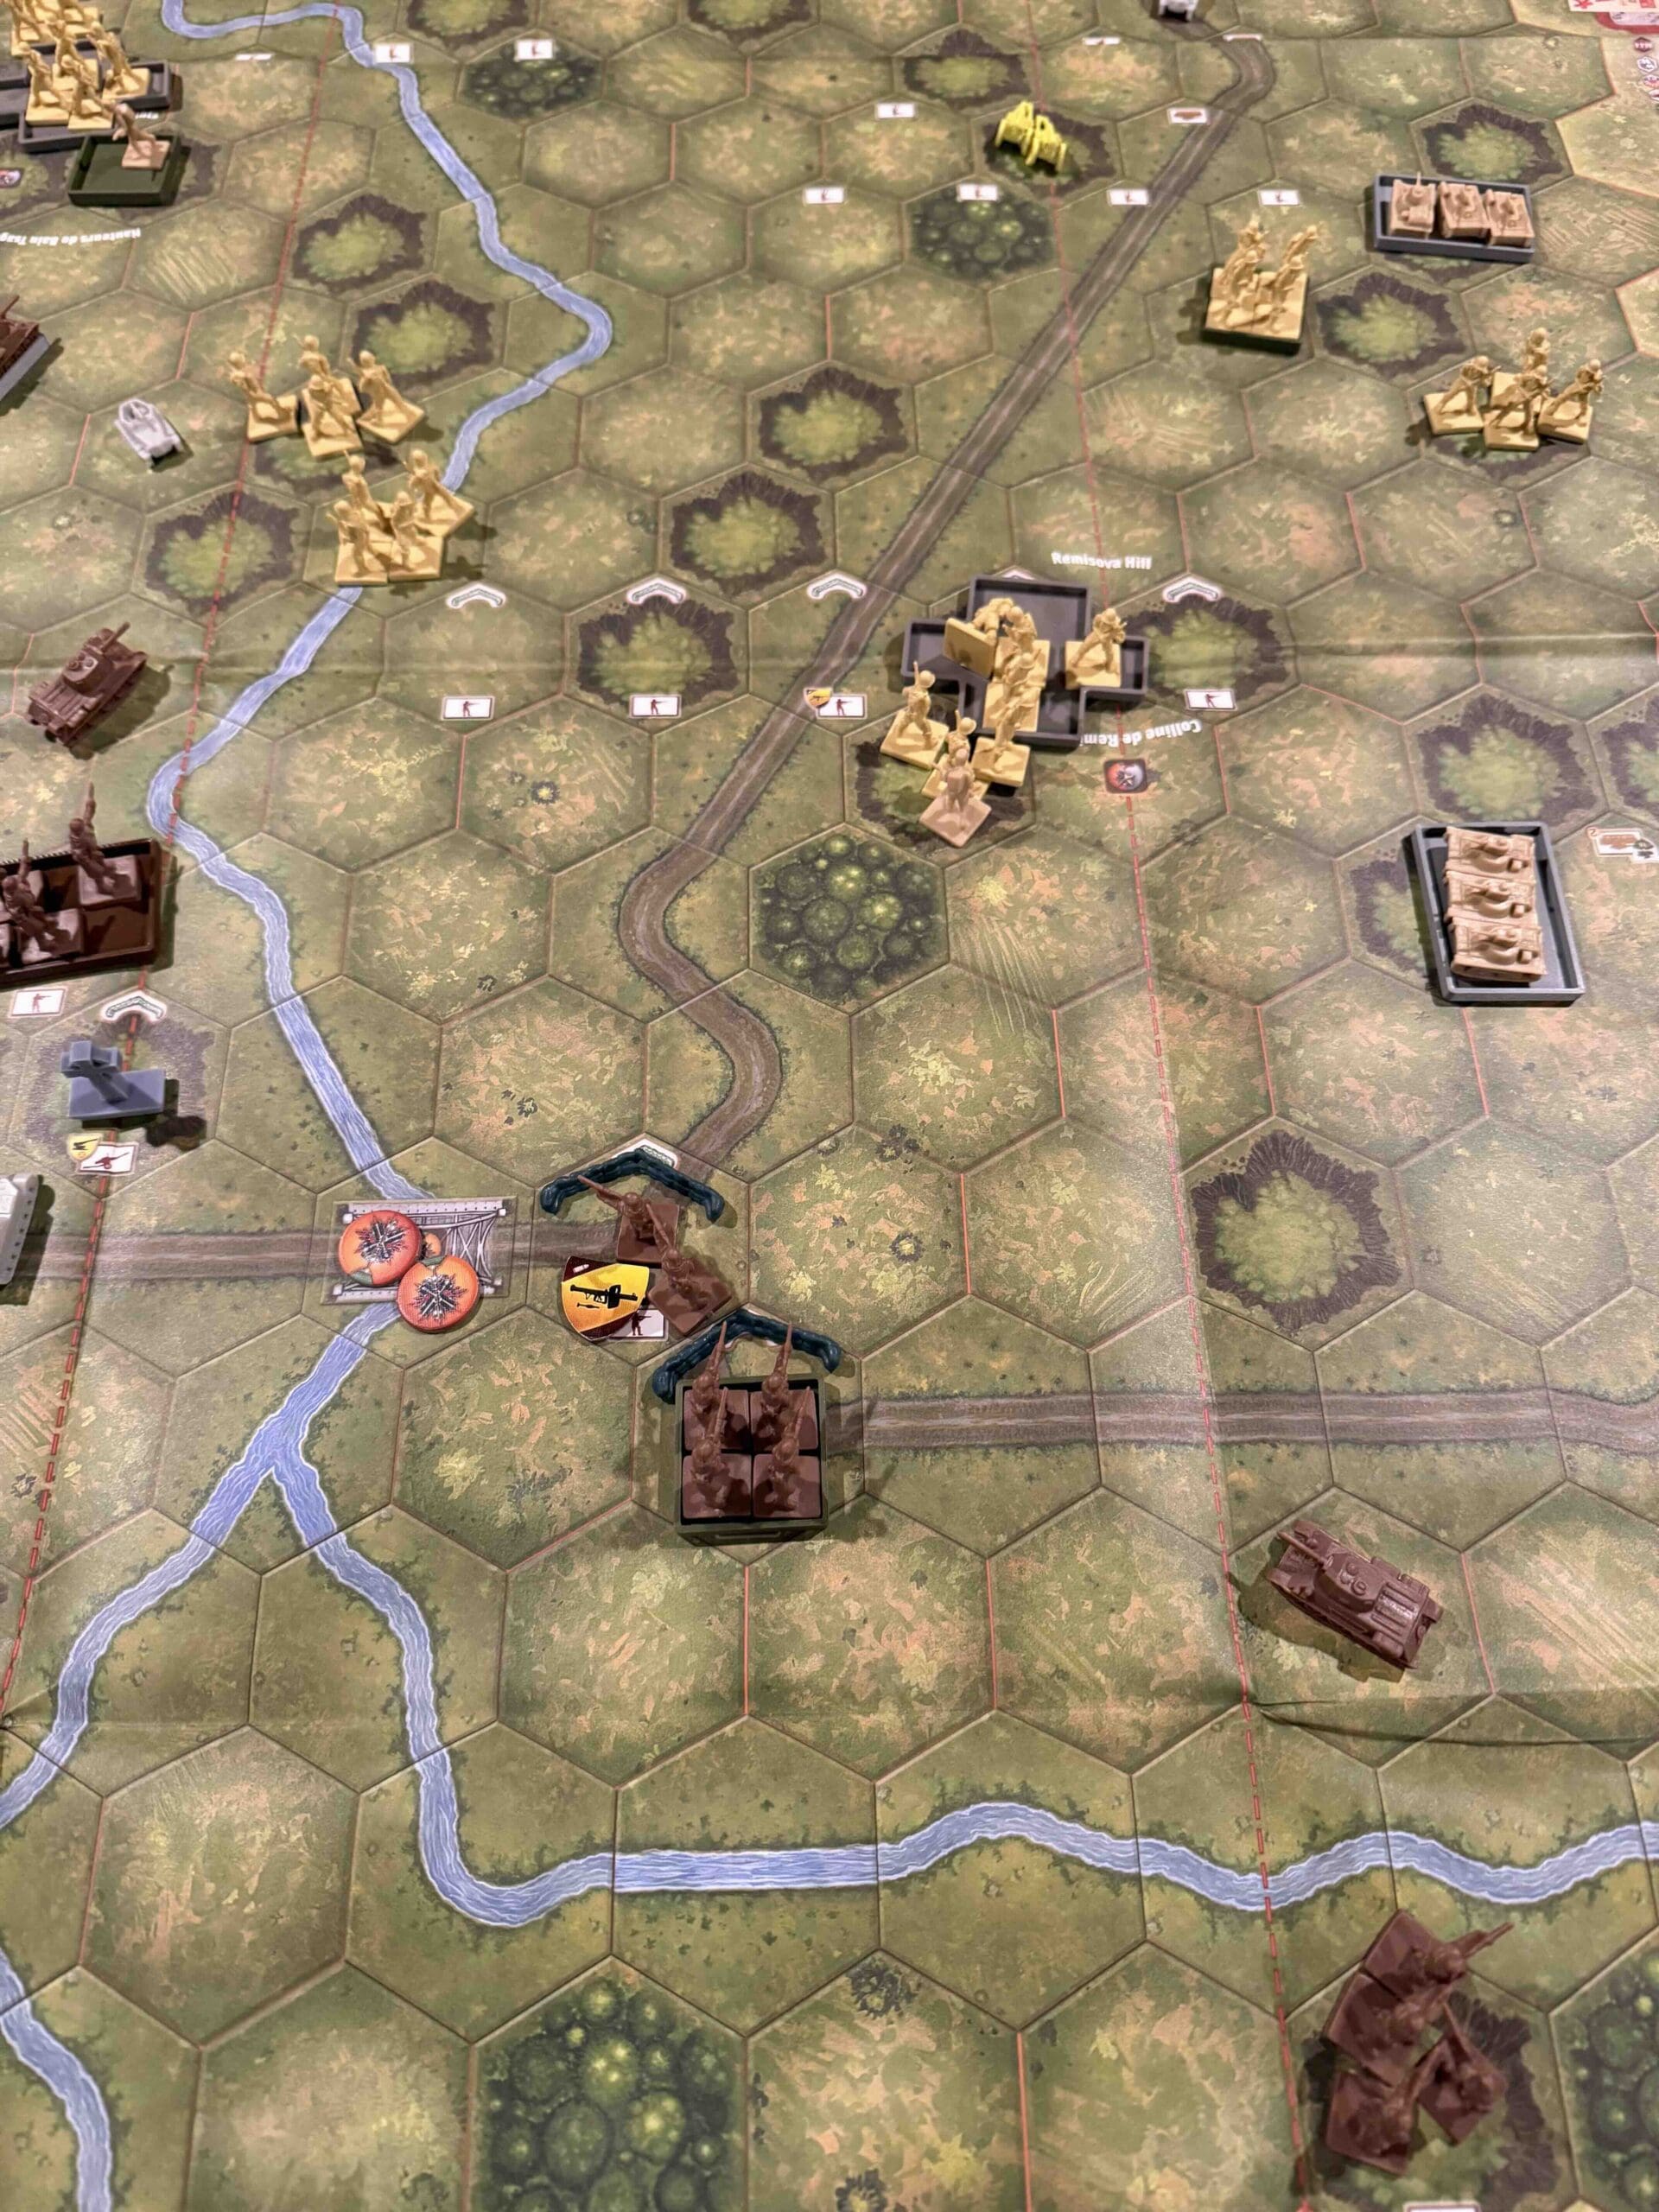
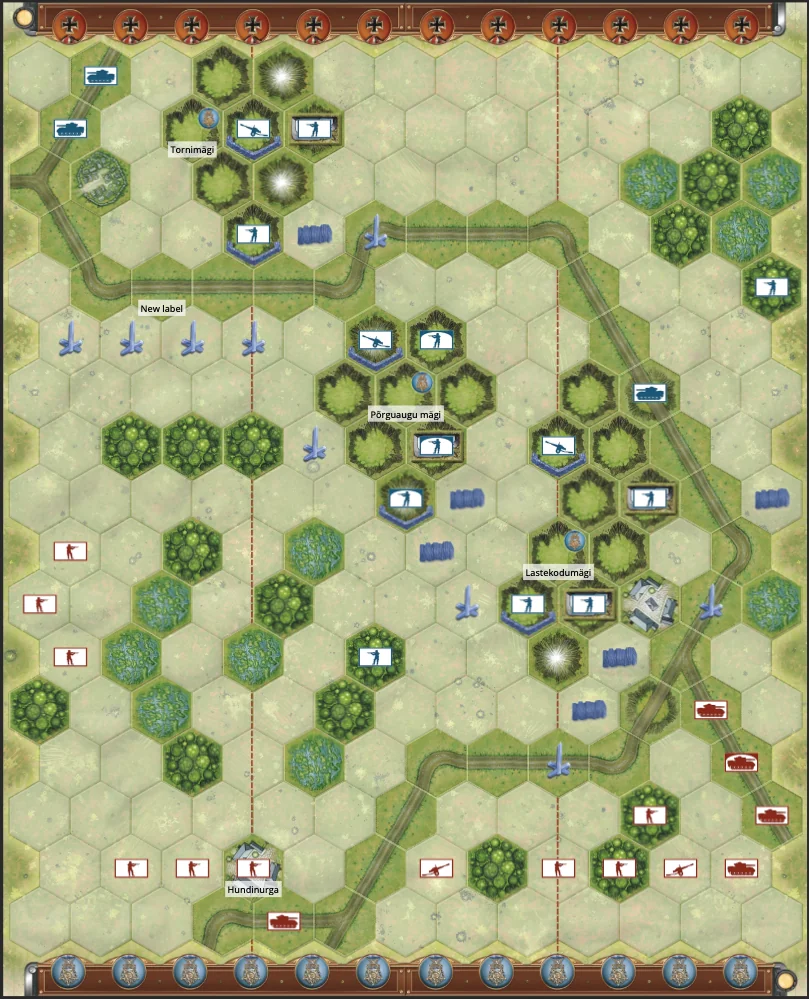
Battlefield:

A countryside with a stretch of river across one end.
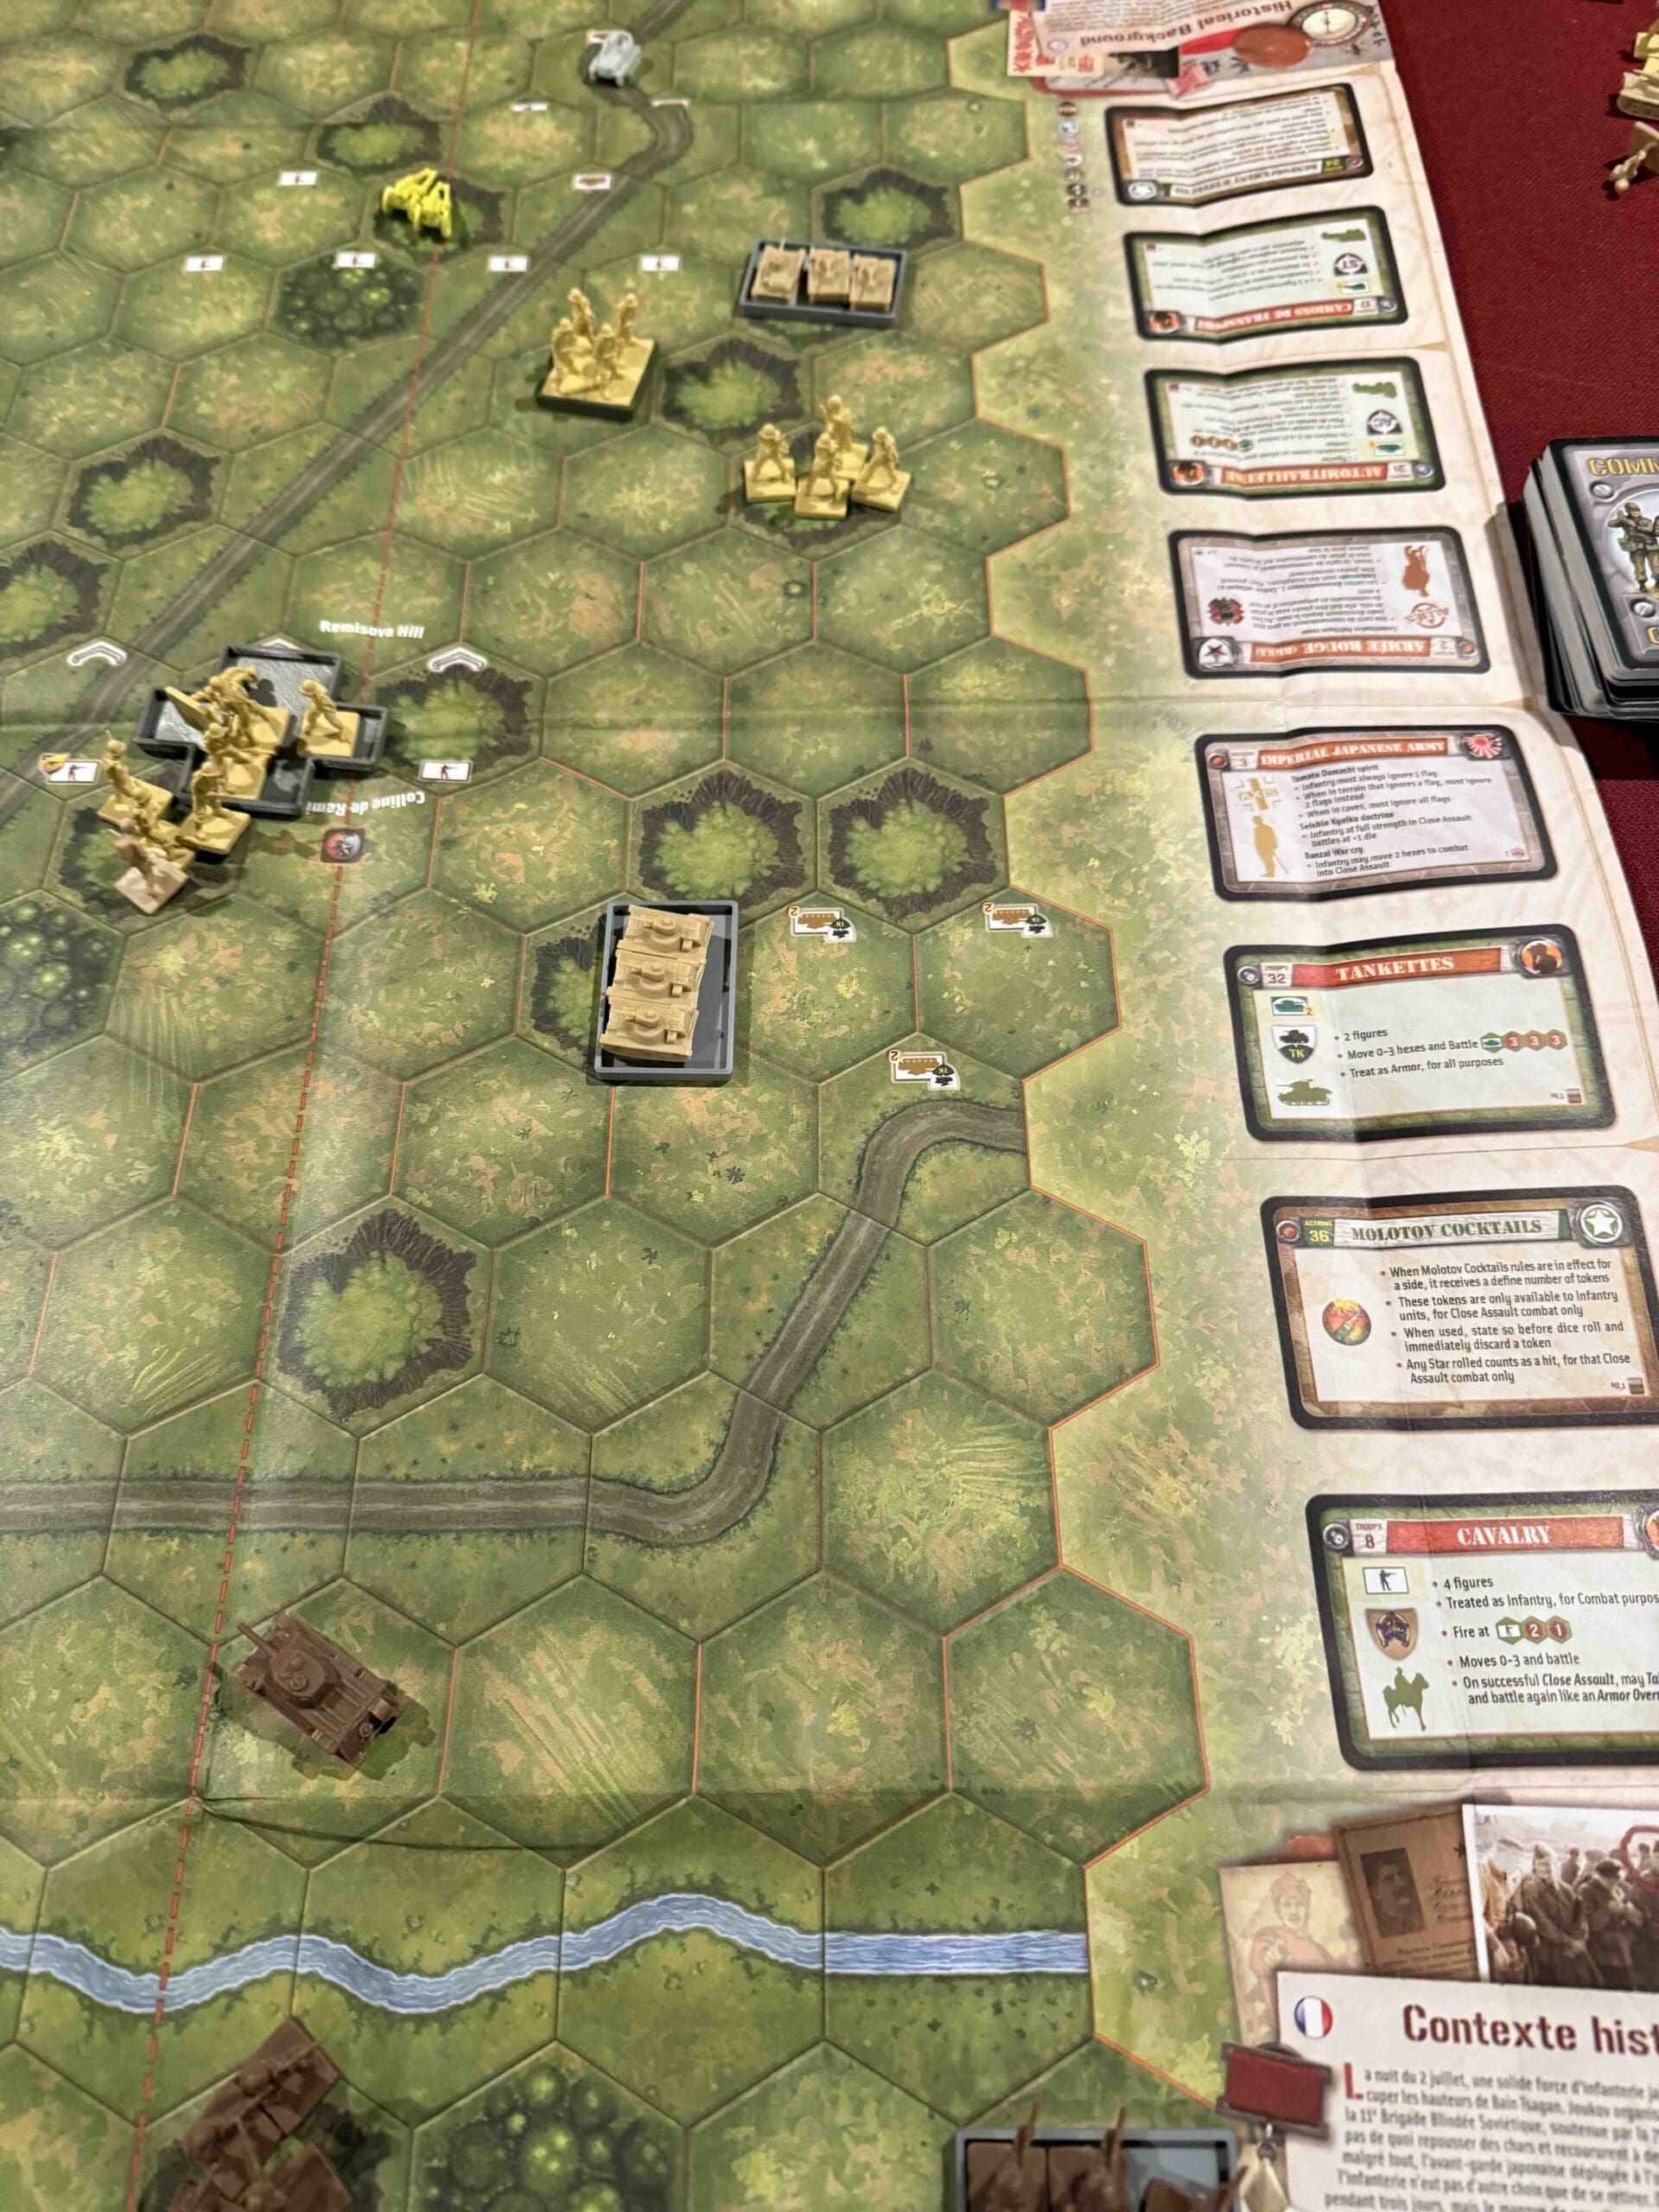
Troops:

Allies – 10 Infantry, 3 Artillery

Axis – 10 Infantry, 6 Armor, 2 Artillery


medal allies

Allied Strategy:

1.  Big Picture Strategy: You have 5 Armor to the enemy’s none, but they have three well-entrenched Artillery, which give them a strong defensive advantage.  You will have to bring your two Artillery forward to provide some balance; at the same time, using your Armor to attack their many Infantry and keep them back as you move your Artillery into range. 

2.  Concentrate your forces and just pick off each forward enemy infantry unit, section by section, as you move your forces forward together.

medal axis

Axis Strategy:

1.  Big Picture Strategy: Consolidate your forces and remain in a defensive stance.  You have an Artillery advantage. Use it.

2.  Your forces are spread out and unable to defend each other. If you have the opportunity, you may want to pull back your forward units, and attempt to form some sort of a defensive line.

Battle Reports

4
BR - Abbeville

Author:

Days of Wonder

Link:

Tightening the Noose

Tightening the Noose

“Listen up! In August ‘39, the Red Army under that tough son of a gun, Zhukov, went to work along the Khalkhin-Gol River—right on the border of Mongolia and Manchuria. The Japanese wanted to push their luck and bite off a chunk of land, but Zhukov wasn’t about to let that happen.

He took tanks, infantry, artillery, and air power, and he tightened that noose like a hangman on payday! Those Japanese 23rd Division boys didn’t know what hit ‘em—no way out, no way to retreat, just the iron hammer of the Soviets crushing them from every side.

The result? A total victory for Zhukov and his Red Army, driving the Japanese back and showing the world that these Russians could fight, surround, and destroy like nobody’s business. That’s the kind of operation I like, boys—surround ‘em, cut ‘em down, and don’t stop until the job’s done!

~~ General Howitzer

8 VP’s

Card Balance:

Allies – 7

Axis – 4

Complexity:

4

Conditions:

Countryside

countryside

Context:

Historical

Location:

Mongolia

Year:

1939

Theater:

Eastern

Campaign:

Codename:

Summary:

Objectives:

8 VP’s, plus Territorial Objective Medals for each side

Battlefield:

Countrsyide with a road and a river stretching up and down the battlefield

Troops:

Allies (Soviet Union) – 9 Infantry, 9 Armor, 3 Artillery

Axis (Japanese ) – 10 Infantry, 2 Armor, 1 Artillery


medal allies

Allied Strategy:

1.

medal axis

Axis Strategy

1. 

Battle Reports

0
BR - Tightening the Noose

Author:

Days of Wonder

Operation Crusader

Operation Crusader

scenario_Operation-Crusader_1

“Listen up, men! In November ‘41, the British Eighth Army—under the command of General Auchinleck—thundered across the sands of the Marmaric Desert like a damn hurricane, aimed straight at those Italian-German armored divisions. Cunningham’s boys rolled out with 700 tanks, ready to grind the Germans and their Italian buddies into the dirt and lift the siege at Tobruk.

For three weeks, it was a seesaw slugfest around Sidi Rezegh, with that garrison at Tobruk busting out to join the main show. The German Panzergruppe fought like devils, but they were no match for the sheer weight of British armor and artillery.

Rommel might have been a cagey fox, but even he had to admit defeat when he saw the Eight Army rolling over his battered panzers. He ordered the survivors to pull back to Gazala, leaving Tobruk free and the British in charge of the field. That’s what happens when you bring overwhelming firepower to a knife fight, boys—you don’t just win, you drive the enemy clean out of the desert!

~~ General Howitzer

12 VP’s

Card Balance:

Allies – 6

Axis – 6

Complexity:

4

Conditions:

Desert

Context:

Historical

Location:

Libya

Year:

1941

Theater:

Mediterranean

Campaign:

Tobruk Breakout

Codename:

Operation Crusader

Summary:

Objectives:

12 VP’s, plus a Territorial Objective Medal for the Axis.

Battlefield:

Desert with a ridge of hills in the center of the battlefield.

Troops:

Allies  – 10 Infantry, 8 Armor, 3 Artillery (Big Guns and Mobile)

Axis  – 10 Infantry, 5 Armor, 3 Artillery (including a Flak88 and a Big Gun)


medal allies

Allied Strategy:

1.  Make use of your Tobruk forces and especially the Artillery as much as possible.

2.  You have a massive force gathered together in the center section.  You will need to peel off a few to deal with the isolated Axis forces at hex 6 and 7 on your right section, and the rest towards the Axis forces on the other side. 

Overall Strategy

1.  Both sides have to make immediate decisions on overall strategy. Do the Allies move straight for Tobrouk, or the Axis main force, or do they clean up the battlefield from A to M as they go?  [~Admiral Frigate] 

2.  There are four Oasis hexes; two primarily in Allied territory and two mainly in the Axis territory.  This is a long scenario, so take the opportunity to restore your units back to strength. 

medal axis

Axis Strategy:

1.  If you can surround and wipe out the forces at Tobrouk quickly, then your forces can swing around and assist your brothers at arms further north. 

2.  Your Big Gun at I15 is in range to attack the units in Tobruk.  Once you get one hit, your permanent targeting reticule will give you one extra dice roll for that hex.  Through the course of a long game, you can earn one or two medals this way if you faithfully fire it at every opportunity given. 

 3.  You have a Mobile Artillery, keep moving it forward at every opportunity. You can make for the hills to your right. It will server you well against the mass of Allied forces headed your way. 

Battle Reports

10
BR - Crusader

Author:

Days of Wonder

Link:

Bain Tsagan Heights

Bain Tsagan Heights

BTH_map_breakthrough_overhead

“Listen up, boys! In early July ‘39, over in the dusty wilderness of Mongolia, the Japanese thought they’d pull a fast one at the Bain Tsagan Heights—cross the river, flank the Soviets, and wrap the whole show up in a bow. But Zhukov wasn’t about to let those plans play out!

Zhukov hit back hard and fast, bringing in tanks, artillery, and infantry to pound those Japanese troops into the dirt. They fought like hell on those heights—bayonets flashing, guns roaring, tanks rolling—and the Soviets broke that flanking move right in half.

This wasn’t just a local scrap, boys—it was a turning point. That Soviet victory at Bain Tsagan sent a clear message: you mess with the Red Army, you pay in blood. It helped push Japan to shift its focus away from Siberia and toward the Pacific, changing the whole game for the coming war.

So remember this—when you see the enemy making a move, you don’t wait—you smash him before he knows what hit him! That’s the way to win!

~~ General Howitzer

10 VP’s

Card Balance:

Allies – 7

Axis – 5

Complexity:

4

Conditions:

Countryside

Context:

Historical

Location:

Siberia

Year:

1939

Theater:

Eastern

Campaign:

Khalkin Gol

Codename:

Summary:

Objectives:

10 VP’s, including four! objective medals; ( two ridges and a 2-medal bridge)

Battlefield:

Countryside with a river cutting through the Allies left flank, and long road cutting at an angle through the terrain directly to the two-medal bridge.

Troops:

Allies (Russia) – 12 Infantry, 9 Armor, including two Armored Cars, plus two Supply Trucks, 1 Big Gun!

Axis (Japan) – 12 Infantry, 7 Armor, including 3 Tankettes, 2 Armored Cars, 1 Artillery.


Allied Strategy:

1.  Big Picture: Allies are initially on the defense, due to the attack by the Japanese.  But they have enormous armor resources at their disposal on their left flank to bring to bear upon the battle in both the left flank and the center section.  And historically, this is what General Zukhov did.  In fact a pivot by the Allied Armor on the left flank over the ridgeline at river will allow them to reign down terror upon the Japanese forces assaulting the Remisova Hill.

2.  Your puny Armor and Infantry forces in the right flank are pretty useless, as they need to cross the river before they can engage the enemy.  But if they can at least move forward one hex, so that they do not get pinned against the backwall, that will be sufficient.

3.  Guard the bridge crossing the river. It is worth two medals.

4.  You have a Big Tom Gun, which has massive range of 8 hexes, and allows you to zero in on forces in a hex and increase your attack strength by another 1D.  Use it early and often.

Axis Strategy

1.  Big Picture Strategy: this was a long-shot for the Japanese historically, which they lost, but they have been known to win this scenario.  Use your Tankettes, which have good movement, to get into the battle and score some wins.  Advance forcefully with your infantry and overwhelm them using your Seishin Kyoiku Doctrine might combined with your Bonzai speed.

Battle Reports

3
BR - Bain Tsagan Heights

Author:

Days of Wonder

Link:

[Ukraine] Soviet raid on Grigorevka

Soviet Raid on Grigorevka

memoir 44 scenario Raid on Grigorevka

September 1941—Odessa’s under siege, and the Soviets are getting hammered by Romanian artillery. So what do they do? They go on the offensive—hard.

Captain Koren takes the lead at sea with the 3rd Naval Infantry Regiment, nearly 2,000 marines, while a small team of 23 paratroopers drops inland. The plan? Hit ’em from the front and the rear—paralyze their command, cut their lines, and blow those damned guns to hell.

Night of September 21st, the paratroopers jump near Hill 57.3—not clean, not pretty, but they get the job done. Took out a whole Romanian regimental HQ—with two dozen men. Meanwhile, Koren’s marines land at Grigorevka under a curtain of naval fire from the destroyers Bojkij and Bezuprechnyj, and they take those artillery batteries by storm.

By sunrise, they’re linking up with the 421st Rifle Division, and the Romanians? They’re pulling back—the 13th and 15th Divisions, thrown into reverse. That’s pressure off Odessa, and a big black eye for the Axis.

This wasn’t some massive Soviet steamroller. This was initiative, coordination, and guts. A rare joint strike—air, land, and sea—and it worked. Captain Koren didn’t wait to be hit—he hit first.

That’s how you win a war. Not by sitting in the trenches—but by getting out, striking hard, and making the enemy bleed where they thought they were safe.

~~ General Howitzer

12 VP’s

Card Balance:

Allies – 5

Axis – 4

Complexity:

4.5

Conditions:

Countryside

countryside

Context:

Historical

Location:

Ukraine

Year:

1941

Theater:

Eastern

Campaign:

Codename:

Summary:

Objectives:

12 VP’s, plus Objective Medals for Allies for the Romanian HQ, and each Artillery battery destroyed.

Battlefield:

Countrsyide  and beach in a deep breakthrough battlemap

Troops:

Allies (Soviet Union) – 14 Infantry, 2 Destroyers!

Axis (Romania ) – 10 Infantry, 3 Artillery


medal allies

Allied Strategy:

1. Soviets, as Allies, do a six unit paradrop.  Drop them where you have the best set of cards to assist your attack.

Also, note that the paratroopers will not battle the first turn they are dropped, so they have to endure one round of enemy fire before they can attack.

2.  The Axis outnumber you on your right flank at the start of the game, and the three forward units are in strong defensive positions, which suggests attacking elsewhere.

3.  As Allies, you have two Destroyers at the start of the game.  Two factors affecting their performance are visibility and location.

Visibility:  Because of the night visibility rules, the Axis units may have time to move out of range of the ship guns before daylight arrives.

Location: This concerns the ability to get the Destroyers onto the border line so they have more flexibility on which section cards can activate them.

Once daylight arrives the Destroyers have a range of eight hexes, so their maximum firing range is row ten.  Of course, that is their maximum range, but their effective firing range (of 2D attacks), is actually row six.

4.  There is a Temporary Medal Objective at the Romanian HQ on row 13. If you keep pushing in that direction to keep pressure on the enemy, it should afford you some success.

5.  Each of the enemy Artillery is worth two! victory points, so target them when you can.

6.  Because the enemy has three very powerfully placed artillery, and you have a lot of artillery, your plan will have to be to so overwhelm the artillery that you are able to take them out with your superior numbers before they take you out with with their superior firepower. 

7.  Possible Attack Vector: completely by-pass the territory controlled by the enemy Artillery when you do your para-drop.  Aim for the back of the battlefield around the Romanian HQ, and the town of Novi Bilvari. There are plenty of Infantry units to take out, while you wait for daylight to arrive, so that your Destroyers can engage with the Artillery batteries.

Big Picture Strategy:

1.  This is a Breakthrough game. 
The field of battle is very deep. It is more than likely your troops are not going to be placed where they need to be.  Therefore, all the section cards which allow you to attack in one section and then move units anywhere, are your friend.  In the beginning of the game it is actually as important to make use of cards that might have limited attack power (like 1 or 2), but allow you to move two units around.  This will allow you to get them into play.

2.  Nightime attack rules. 
The game starts in complete darkness, where you can only attack units that are next to you.  We know that daylight is definitely an advantage for the Allies, because once you reach full daylight, the power of the Destroyers begins to be felt, as they can reach out to row 10, and pummel you from above.  But what about Nightime settings from 2-5?  These are actually better for the Axis, as it allows them to use their Artillery and attack at a distance any of the Allied Infantry coming for them.  Because the Allied Infantry can move two hexes and still battle, they can very quickly get to the Artillery an overwhelm them.  So allowing some range attacks up to 3 hexes away is good for the Axis Artillery forces.  (See pic2 above)

medal axis

Axis Strategy:

1.  Your first defensive objective is to respond to wherever the Allied paratroopers happen to land.  Respond immediately with available Infantry and Artillery to address the threat.

2.  Bring your reserve units into play as soon as you can by moving the rear units forward on the map.

3.  Because each Artillery unit is worth two! Medals, you will need to protect them in some way.  Either move them back from the Destroyers’ range, or protect them from Infantry attacks by bringing your own Infantry into play.

4.  The enemy forces are elite, so they can move two hexes and still attack. So be aware of this so that a single Infantry unit doesn’t get surrounded and destroyed.

5.  It is going to take an average of six turns before the daylight arrives and the Destroyers are fully activated to row 10. This will give you time, if you want to, to move your Artillery further back on the battlefield out of their range. 

Battle Reports

18
BR - Soviet Raid

Author:

Days of Wonder

Battle Of Tannenburg Line (BT,EF,TP)

Battle Of Tannenburg Line (BT,EF,TP)

map

By the summer of 1944, the Soviet Red Army was on the offensive, pushing westward toward the Baltic Sea in a bid to crush the German Army Group North. One of the most critical defensive positions for the Germans lay in northeastern Estonia, on the Tannenberg Line. This line was anchored by the Sinimäed Hills — a series of three steep elevations known as Lastekodumägi, (Children’s Home Hill), Põrguaugu (Hell’s Hole), and Tornimägi (Tower Hill). These hills provided a natural defensive barrier, and the Germans had heavily fortified them with bunkers, trenches, and artillery positions.


Facing them was the Soviet Leningrad Front, under the command of Marshal Leonid Govorov, tasked with breaking through the Tannenberg Line and opening the path to the Baltic Sea. Soviet forces included powerful infantry, armor, and artillery units, determined to seize the high ground. However, the rugged terrain and Axis fortifications posed a formidable challenge. Swamps, forests, and anti-tank obstacles complicated the Soviet advance, making coordinated assaults difficult. The German defenders, led by General Johannes Frießner, included regular Wehrmacht units and elite Estonian Waffen-SS forces, fighting tenaciously to hold their positions on the Sinimäed Hills. These defensive positions offered a clear advantage, giving the Axis the ability to rain down fire on Soviet units struggling to traverse the open ground and difficult terrain below.


The Soviet assault began on July 25, 1944, with fierce fighting erupting on the hills. Over the course of the battle, Soviet forces launched wave after wave of attacks, while the Axis defenders, outnumbered but well-entrenched, fiercely resisted.

The stage is set, the battle lines are drawn, and you are in command. The rest is history.

12 VP’s

Card Balance:

Allies – 5

Axis – 6

Complexity:

4

Conditions:

Countryside

Context:

Historical

Location:

Estonia

Year:

1944

Theater:

Eastern Front

Summary:

Objectives:

12 VP’s, including some territorial objectives:

Lastekodumägi, Põrguaugu mägi and Tornimägi are Permanent Medal Objectives for the Allied forces.

Terrain:

Includes a series of three steep elevations known as Lastekodumägi, (Children’s Home Hill), Põrguaugu (Hell’s Hole), and Tornimägi (Tower Hill). These hills provided a natural defensive barrier, and the Germans had heavily fortified them with bunkers, trenches, and artillery positions.

Troops:

Allies – 9 Infantry, 5 Armor, 2 Artillery

Axis – 10 Infantry, 3 Armor, 3 Artillery

Special Rules:

Russian command rules are in effect


Allied Strategy:

Axis Strategy

1
BR - Tannenburg Line

Author:

raikster