Operation Cobra
Operation Cobra
5 VP’s
![]()
Card Balance:
Allies – 5
Axis -4
Complexity:
3
Conditions:
Countryside

Location:
France
Year:
1944
Theater:
Western Front
Campaign:
Battle of Normandy
Codename:
Cobra
Context:
Historical
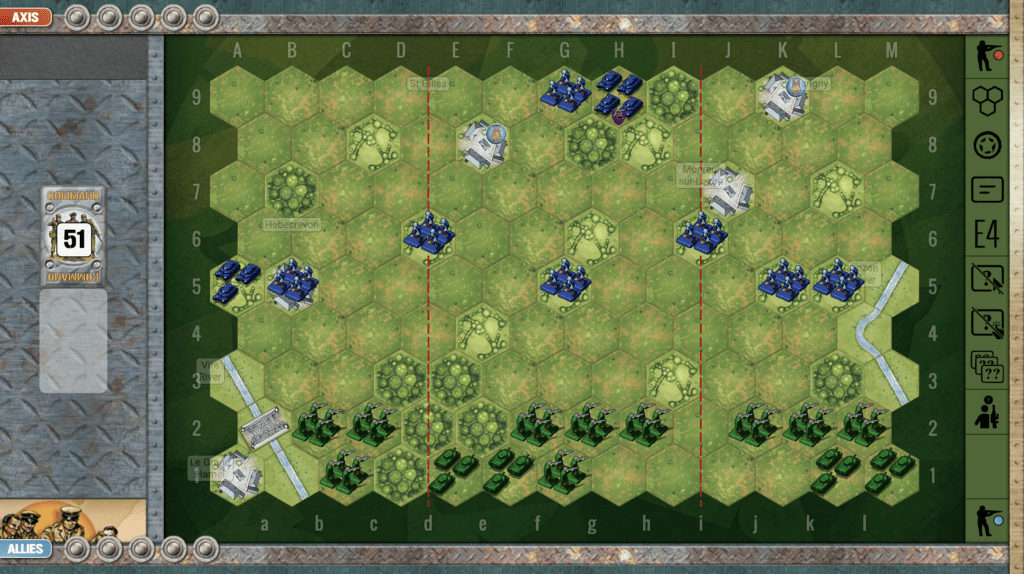
Summary:
The Allies begin with a numerical advantage at the start of the scenario. But they have to make it past well-protected Axis forces who are lodge in hedgerows scattered across the battlefield.
Objectives:
5 VP medals including two territorial medal objectives.
Terrain:
Hedgerows and countryside
Troops:
Allies – 10 Infantry, 4 Armor
Axis – 7 Infantry, 2 Armor

🔥 Winning as Allies
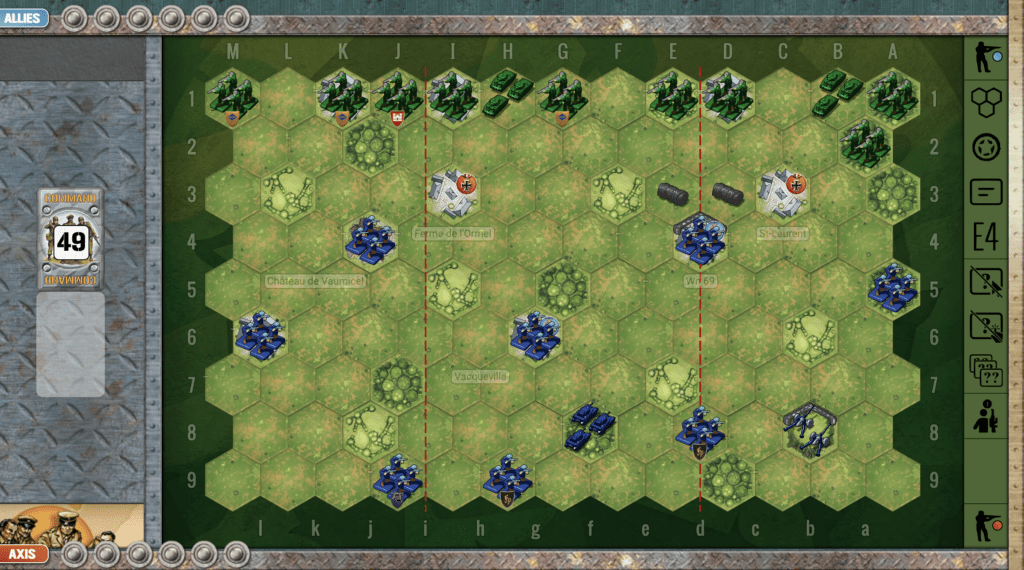
1. Big picture strategy is to push up the center and to the right towards the territorial medal objectives in the two towns. You should be able to dislodge the infantry in the center hedgerow at G5. But the two infantry in the hedgerows at L5 and K5 are going to be more difficult. You may be able to by-pass them by just going up the center. If you gain the initiative, the enemy will have to respond. And then you can hit him with your superior firepower from your armor, and overwhelm him with your infantry.
2. You have a numerical superiority everywhere except your left flank. That will be quickly under attack by the enemy forces which can attack your no-retreat infantry. So first turn available, get them into the woods to their right.
3. All of your armor is stuck behind the infantry, so get some movement on your troops. The goal is to maximize mobility, in order to capitalize on opportunity. Based on the cards, you can decide whether to attack center or right; preferably with armor at a distance to degrade enemy preparedness.

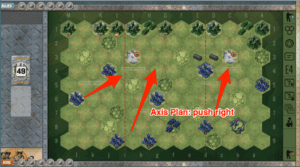
🔥 Winning as Axis
1. Big picture strategy is that the Allies outnumber you, and your role may be primarily defensive. But your front units in the hedgerows can put up a good fight. If you can get a Dig-In! card early on that will help.
2. Get your armor which is trapped in the back out into a mobile position as soon as you can.
3. Some early attacks from your troops on the right flank against the trapped Allied troops could gain you a medal, or at least a weakened Allied force in that section.
4. If it looks like the Allies are going to push past you towards the territorial medal of St. Gilles, you will want to move some infantry there as an additional defensive measure. Protect your two territorial medals from enemy capture!
Battle Reports
(percentage of Allied victories):
52%
Author:
Days of Wonder
Link: