Schwammenauel Dam

Schwammenauel Dam

Historical Summary

We didn’t fight our way to the Schwammenauel Dam for scenery — we took it because it was choking our advance. The Germans thought they could hold the Roer hostage by flooding the valley and buying themselves time. That was a mistake. American infantry went in, took that dam under fire, and shut the valve on German delay tactics. Once the dam was secured, Operation Grenade could roll forward without interference, and the Roer was crossed on our terms. That action tore down the last real barrier in the Rhineland and put our armies back on the march straight into the heart of Germany — exactly where we intended to go.

~~ General Howitzer

VP’s:

5

Card Balance:

Allies – 5

Axis – 5

Complexity:

4

Conditions: 

Mountains & Countryside

Location:

Germany

Year: 

1945

Theater:

Western Front

Campaign:

Allied Rhineland Campaign

Summary

This is an exciting scenario with some unique features which recreate actual events on the battlefield in 1945.

Objective:

Six Medals will win, but the principle objective for the Allies is to preserve the two dams, Schwammenauel and Urft.  Should either of them get successfully sabotaged by the Germans, and the Allies will likely lose the scenario.

Battlefield:

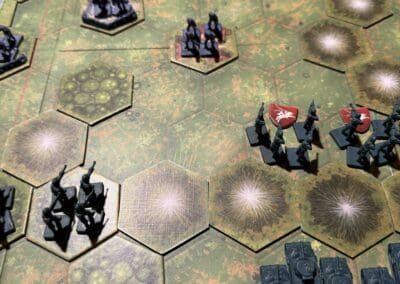
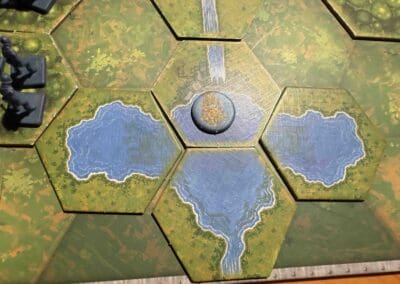
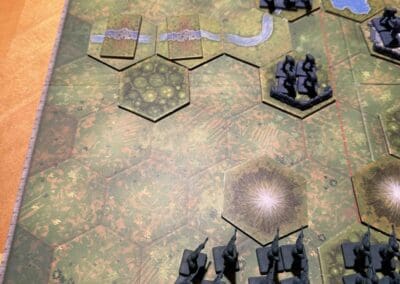
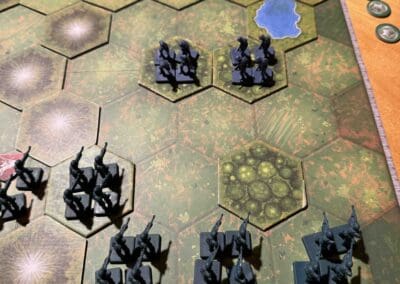
It is rugged mountainous terrain encircled by a river, mountains, and forests, with a dam at either end of the River Roer.

Troops:

Allies: 10 Infantry, 2 Armor

Axis: 8 Infantry

Special Rules:

Sabotaging a Dam – each of the two dams require a total of 4 stars to be destroyed.  At the start of every turn, no matter what cards they hold in their hand, the Axis player rolls two dice, one of each dam.  However, the dice will only count and apply to a dam if an Axis unit is on the actual dam hex.  For each Star rolled, if the dam is occupied by Axis forces, a star icon is placed on that dam. Once a total of four stars accrue, the dam is destroyed, and the Axis player receives 4! victory medals per dam. 

medal alliesAllied Strategy:

1.  Big Picture Strategy:  Destroy the enemy or capture the dams before they are sabotaged. Your best option, historically is to capture the Urft Dam first.

2.  You have two Armor units, but given the rugged terrain, they will be almost useless to you.  If you waste your time trying to get them out from behind the mountain, you will be giving the Axis time to sabotage the dam.

3.  Your paratroopers have landed in a dangerous spot, pressed up against the mountain wall as they are. Move them forward to attack ASAP, before they are destroyed.

4.  Your right flank is your strongest at the start.  Move quickly forward to overwhelm the enemy and secure the  Urft Dam.

medal alliesAxis Strategy:

1.  Big Picture Strategy:  the goal is to delay the Allies (delaying tactics) as long as possible so that you can blow the dam(s).  This will take at least four turns, but in reality, much longer.  If you successfully sabotage one dam, (worth 4 medals!), you only need to take out one other Allied unit to win.  Should you blow both dams, you are guaranteed a win.  (Historically, the Germans were able to blow the discharge valves of the Schwammenauel Dam and flood the Roer River.

2.  The Dam provides no battle protection. The only reason to stay on the hex is to attempt to sabotage the dame.  But once the Allies get close, keep some forces in the woods to attack and slow down the enemy.

3.  The Allied Paratroopers are easy prey, backed up against the mountain.  Take them out quickly before they can attack your forces in the town of Kommerscheit.

1
BR - Schammenauel Dam

Author:

Days of Wonder

URL

Moyland Wood (Operation Veritable)

Moyland Wood (Operation Veritable)

The Battle of Moyland Wood, part of Operation Veritable, took place in February 1945 near the village of Moyland in Germany. It was a significant engagement between British and Canadian forces of the Allied 21st Army Group and German forces as the Allies sought to clear the Reichswald Forest and advance into the Rhineland. The battle featured British and Canadian forces facing German defenders, including the 116th Panzer Division.  Fierce fighting in dense woods and muddy terrain saw the Allies overcoming stiff German resistance and counterattacks.  The Allies secured Moyland Wood, enabling their continued advance toward the Rhine.  The battle highlighted the challenges of wooded combat and the importance of infantry-armor-artillery coordination.

General Howitzer summarizes:
Moyland Wood was an awful grinder—thick trees, knee-deep mud, and a dug-in enemy hell-bent on stopping us. The Brits and Canadians went toe-to-toe with the 116th Panzer Division, hacking through the forest under fire. It was slow, brutal work, but they pushed the Germans back and took the wood. That fight proved one thing: in terrain like that, you’d better have your infantry, tanks, and artillery working like a single fist—or you’re dead in the mud. With Moyland secured, the road to the Rhine was wide open.

6 VP’s

Card Balance:

5 – 5

Complexity:

3

Conditions:

Countryside

Codename:

Operation Veritable

Context:

Historical

Location:

Germany

Year:

1945

Theater:

Western

Campaign

Codename:

Operation Veritable

Summary:

Objectives:

in this scenario is the town of Louisendorf and its victory points. The forms the crux of the battle strategy in many cases.

Battlefield:

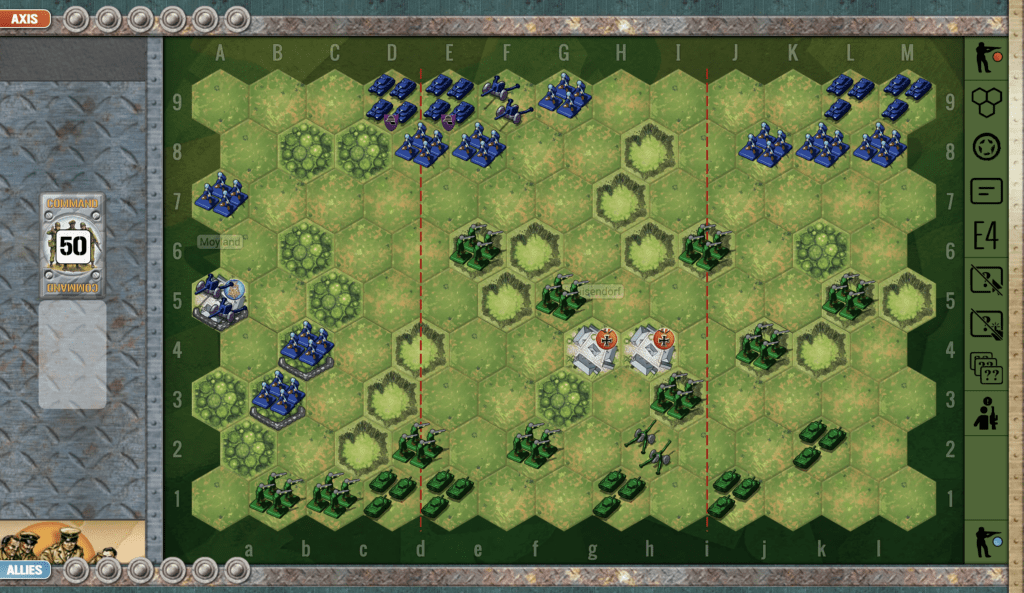
Moyland Wood has a range of hilly hexes cutting across diagonally. There are two Axis VP’s right in the center town hexes. The Allied forces are scattered across the battlefield, in control of several hills, thus slowing down the forward advance of the Axis forces toward the VP town objectives.

Troops:

Allies – 10 Infantry, 5 Armor, 1 Artillery

Axis – 9 Infantry, 4 Armor, 2 Artillery

Allied Strategy:

1. The number one objective for Allies is to not easily surrender Louisendorf and its victory medals. As one is able, some of the center infantry should be placed into the town.

2. The round begins with the Allies scattered across the battlefield with no cohesive organizing principle. They will need to very quickly assemble and organize for an attack strategy before the Axis picks off the individual units. The Allied player needs to spend some time just arranging the troops into a battle plan.

3. At the start of the game, the advanced Allied infantry in the center section should really pull back into the town of Louisendorf for two reasons: first because the advanced unit is subject to multiple attacks from nearby Axis units with very little of its own supporting units to help support it, and second, in order to solidify a defense in the town.

4. Be wary of the well-placed artillery on your left flank, and the sandbagged infantry in the woods. It is really a losing battle to attack that flank unless you have an outstanding set of attack cards for that section.

5. Note that the ridge-line on your left flank is within the two-dice hex range of the artillery. So should you think about placing your armor on the point, which would make a great offensive and defensive position, if the enemy has the right combination of cards that flank, they will be able to attack and degrade the armor fairly quickly.

Axis Strategy:

1. Number one objective for Axis is to target the town of Louisendorf and its VP. The Axis begin the game with an outstanding offensive & defensive position on their right flank. Use it early on to hit the Allied units which are pressed up against the back boundary. Without a retreat option, the odds increase nicely for some successful kills.

2. Note that your forces on your left flank are fairly exposed, and backed up agains the boundary.  Should the Allies get some armor on the hill facing your forces, they will be able to deal some damage rather quickly.

3. As cards allow, gather your forces for an assault on the center, with the town hexes as your objective. And while the enemy is distracted defending for the impending attack, use your overwhelming firepower on your right flank to pick off units and gain one or two VP’s.

19
BR - Moyland Woods

Author:

JBorg

URL

Bastogne Corridor East

Bastogne Corridor East

scenario_BastogneCorridorEast

The Battle of Bastogne Corridor East was a crucial engagement during the Battle of the Bulge in World War II. It occurred in late December 1944 and early January 1945, focusing on the eastern approach to the besieged town of Bastogne, Belgium.

German Objective: The German army aimed to break through U.S. defenses east of Bastogne to secure critical roads and regain momentum after their advance stalled.

Allied Response: U.S. forces, including the 101st Airborne and supporting armored divisions, mounted a fierce defense despite being surrounded and outnumbered. The weather improved, allowing Allied air support to deliver supplies and conduct airstrikes.

Outcome: The Allies successfully held the eastern corridor, repelling repeated German attacks. This defense helped maintain the Allied hold on Bastogne and contributed to the eventual German retreat, marking a turning point in the Ardennes Offensive.

General Howizer has some observations on this battle:

The Germans threw everything they had at us—tanks, infantry, the works—but our boys, including the damn fine 101st Airborne and our armor, stood their ground like a stone wall. Surrounded? Outnumbered? Hell, that just meant we could shoot in every direction. Then the skies cleared, and our flyboys swooped in with supplies and bombs, giving the Germans a taste of hell from above.

We held that eastern corridor like bulldogs on a bone, smashed every attack they sent, and kept Bastogne in Allied hands. That stand didn’t just hold the line—it broke the enemy’s back and turned the tide in the Ardennes.

Memoir 44 Details

6 VP’s

Card Balance:

5 – 5

Complexity:

3

Conditions:

Winter

winter

Location:

Belgium

Year:

1944

Theater:

Western Front

Campaign:

Ardennes (Battle of the Bulge)

Context:

Historical

Strategy Summary


Objectives:

6 VP’s, including Exit Medals for the Axis forces

Terrain:

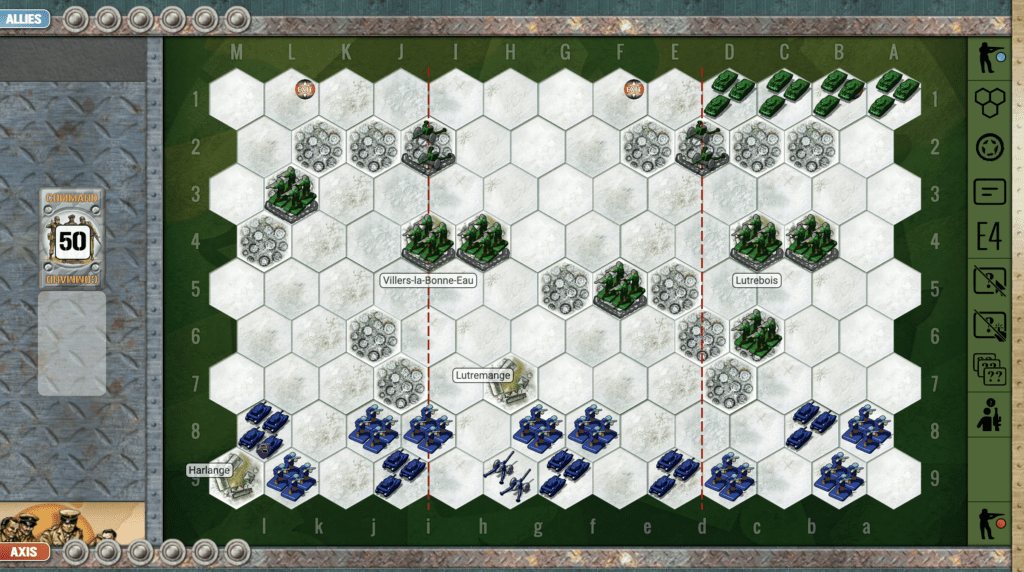
In this scenario, the Allies control two-thirds of the battlefield at the start. Because there are scattered forests across the field of play, it makes it difficult for the Axis to push them out. But they begin the round with superior forces, while the Allies are crammed into the back of one flank.

Troops:

Allies – 7 Infantry, 4 Armor, 2 Artillery

Axis – 8 Infantry, 5 Armor, 1 Infantry

Allied Strategy:

1. Big Picture Strategy:

Focus on defending villages and chokepoints, leveraging defensive terrain and slowing down Axis tanks. Keep units close to key areas like the exit markers to prevent breakthroughs.

2.  You have four armored units jammed together in the lower left flank. At least half of those will need to shift right to engage the enemy in the center section, to prevent Axis forces from escaping across the exit row.

Axis Strategy:

1. Big Picture Strategy:
Use tanks’ mobility to avoid prolonged battles in forests and villages. Concentrate forces for a decisive breakthrough toward the exit markers or to capture critical objectives like villages.

2.  Given the preponderence of the Allied armor on your right flank, this would be your weak flank. So be careful of launching an attack on that side unless you have a tremendous set of cards for it.

3. Also note that the Allied infantry at c6 is within a two dice attack of your no-retreat armor unit. So you will need to move that away quickly.

4. You have a lot of forces on your left flank. Spend a card to get them into the action in the center section when you can.

19
BR - Bastogne East

Author:

Days of Wonder

URL:

Across the River Roer

Across the River Roer

scenario_AcrossTheRiverRoer_start

Across the River Roer wasn’t just another bridgehead — it was the kind of operation that tests an army’s guts and grit. In February ’45, the Germans tried to drown the Allies out of the Rhineland by blowing their dams and turning the Roer into a boiling, flooded barrier. They figured the rising water would halt us cold. It didn’t. It just delayed the inevitable.

When the river finally dropped, our boys moved with discipline and fury. Under artillery, machine-gun fire, and every trick the enemy could throw, they forced that crossing, yard by yard, boat by boat. The Germans were dug in, determined, and desperate — but they couldn’t stop an army that had momentum, purpose, and the will to finish the job.

The Roer crossing cracked open Germany’s western shell and put us on the doorstep of the Rhine itself. And once you reach the Rhine, you’re cutting straight into the enemy’s heart. This operation proved again that no flood, no fortress, no line of resistance can hold back an Allied force that’s hell-bent on victory.

~~ General Howitzer

6 VP’s

Card Balance:

6 Allies
4 Axis

Complexity:

3

Conditions:

Countryside

countryside

Location:

Germany

Year:

1945

Theater:

Western Front

Campaign:

Rhineland

Codename:
Operation Grenade

Summary

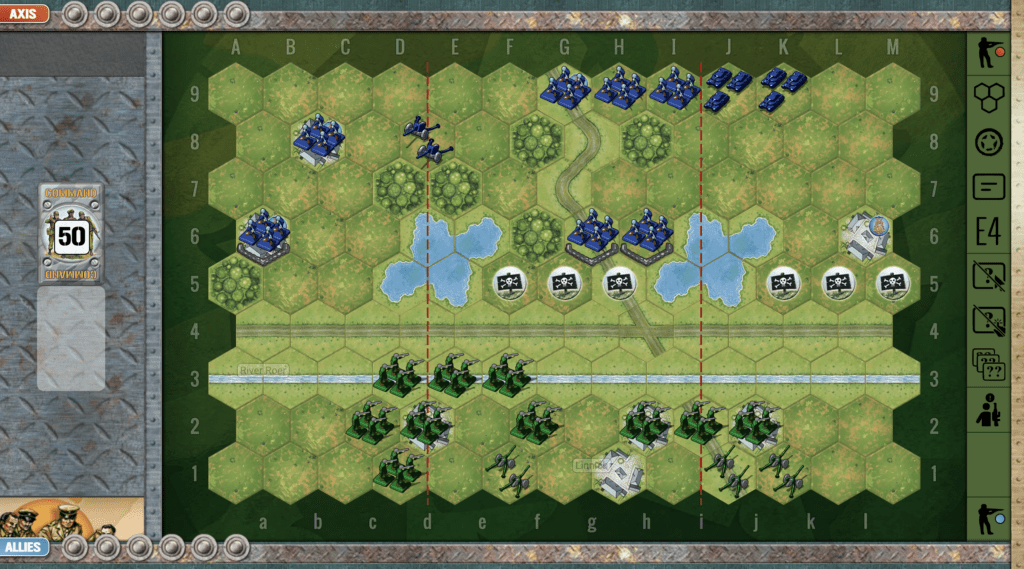
Artillery plays a major role in this scenario, with three on one side and one on the other. 

Objectives:

Six VP’s including all three town objectives and an exit hex for the Allies, if they can get there.

Terrain:

The River Roer is a major strategic barrier which slows the advance into battle.

Troops:

Allies – 10 Infantry, 3 Artillery

Axis – 7 Infantry, 2 Armor, 1 Artillery

Allied Strategy:

1.  Attack Vector Options: Left Flank:
If you are going for a left flank assault, the enemy artillery will pick off your forces as you advance. So gather at the river first, since that barrier will stop your troops for one turn. Once everyone has breached it, then you will have to attack en masse and quickly attack before the artillery takes you out.

2.  Your artillery on the right can provide support fire for your troops if you pursue a central or right flank attack. But if you can move them forward at least one row before the battle begins, do that. The result will be that the sandbagged infantry in the center will be subject to 2D attacks from the artillery.

3.  Attack Vector Options:  Right Flank
An attack on the right flank is going to be a challenge as long as the enemy armor can move in and attack your infantry on the open plain before the town with the victory hex.  And then should you even reach it, you have to hold it until the end of the game to get the VP’s.

Axis Strategy:

1.  Historically, the Allies were able to move across the Roer and establish a 3-mile beachhead.  This means that the scenario is stacked against you, if you attempt to come out from your defensive positions and launch an assault. You may be able to do it, especially with your armor on your left flank, but be careful, as the Allied artillery is powerful. 

2.  Keep your armor mobile. You will most likely need them on your left flank to defend the town hex medal objective.

3.  Move your infantry in the back of the center section forward to replace the infantry you will lose in the center and right flanks.

21
BR - Roer

Author:

Days of Wonder

URL: