Battle of Dubno – Brody

Force vs. Finesse: Battle of Dubno - Brody
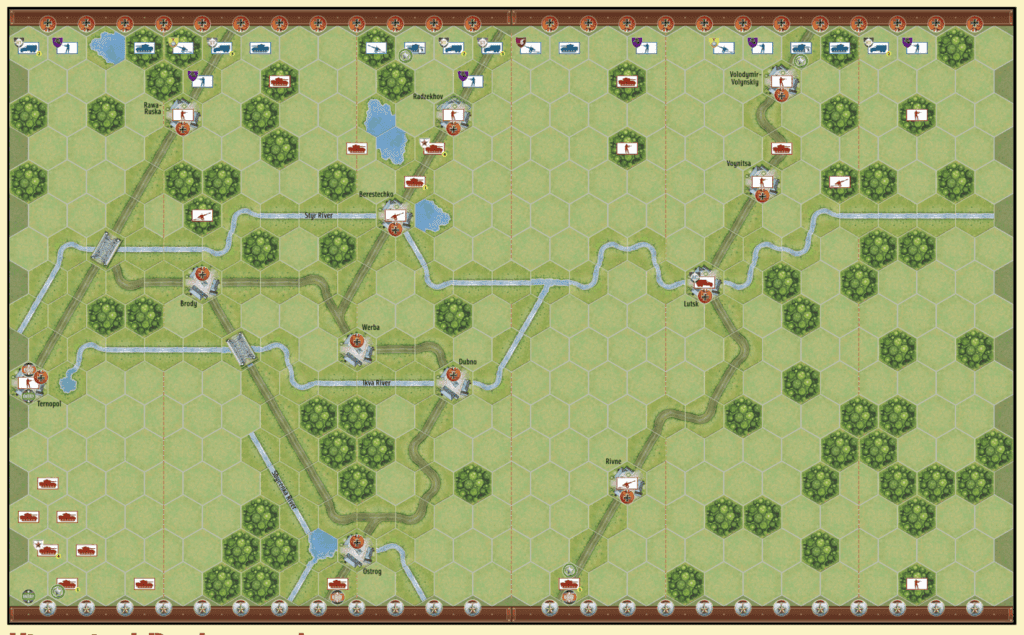
Scenario_Toulon_start_Allies

The Battle of Dubno–Brody (June 23–30, 1941) was one of the largest tank battles of World War II, fought during the opening phase of Operation Barbarossa between Germany’s Army Group South and the Soviet Southwestern Front.

Results:

  • German Panzer forces decisively defeated the numerically superior Soviet armored units, destroying or capturing thousands of tanks.

  • Soviet forces suffered catastrophic losses and were forced into retreat.

Strategy:

  • The Germans used fast, coordinated Panzer thrusts and encirclement tactics to neutralize Soviet armor.

  • Soviet forces, hampered by poor coordination, mechanical breakdowns, and weak communications, failed to execute an effective counteroffensive.

General Howitzer summarizes its impact:
That win at Dubno–Brody blew the road wide open for the Germans into Ukraine and straight toward Kiev. It showed the Soviets their armor doctrine was a mess, and they paid for it in steel and blood. But they’re stubborn—those losses lit a fire under them, and the lessons they learned there would come back to bite the Germans hard later in the war.

24 VP’s (!)
[ This is a ‘break-lord’ scenario ]

card

Card Balance:

Allies –

  • 4 cards for each half of the board

Axis –

  • 6 cards for each half of the board

Complexity:

5

Conditions:

Countryside

countryside

Context:

Historical

Location:

Russia

Year:

1941

Theater:

Eastern Front

Campaign:

Codename:

Operation Barbarossa

Summary:

Objectives:

24 VP’s, plus many other conditions. Read the PDF special rules.

Terrain:

Countryside with rivers and roads 

Troops:  (check the PDF for specific the specific troop deployments)

medal allies

Allied Strategy:

1.  

medal axis

Axis Strategy

1. 

0
BR - Dubno-Brody

Author:

Willem Boersma

Complete Scenario Link:

https://generalhowitzer.com/bsk-pdf-manager/battle-of-dubno-brody/

Operation Crusader

Operation Crusader

scenario_Operation-Crusader_1

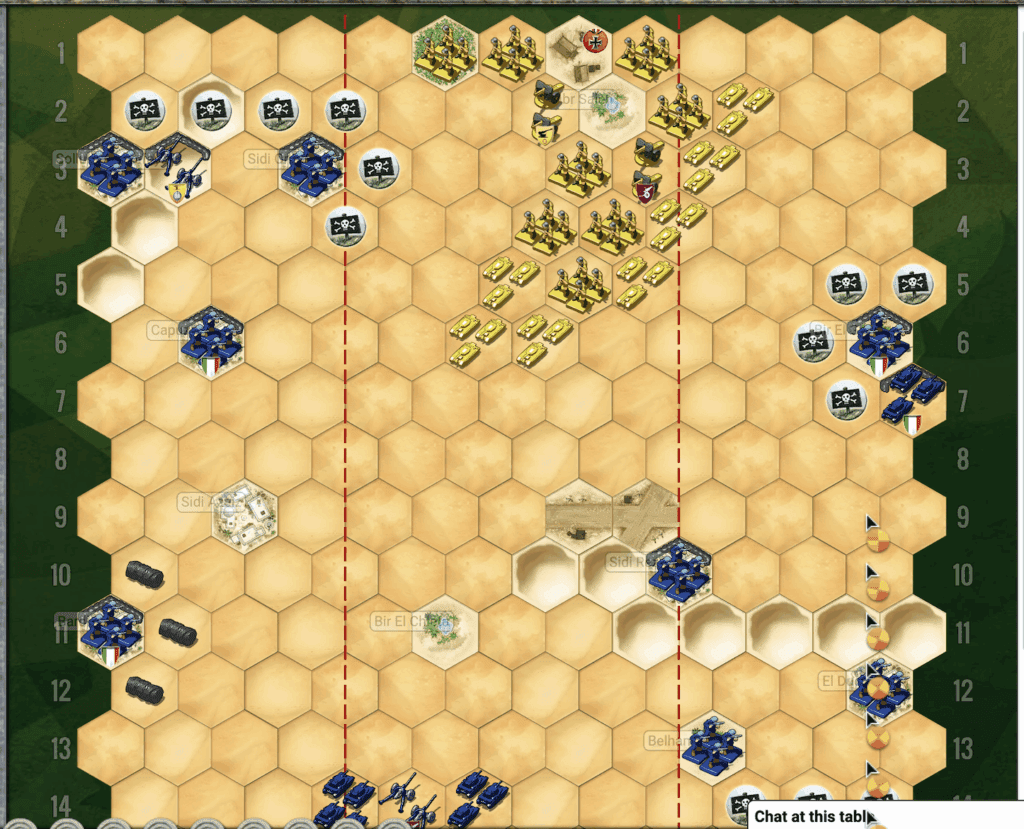
“Listen up, men! In November ‘41, the British Eighth Army—under the command of General Auchinleck—thundered across the sands of the Marmaric Desert like a damn hurricane, aimed straight at those Italian-German armored divisions. Cunningham’s boys rolled out with 700 tanks, ready to grind the Germans and their Italian buddies into the dirt and lift the siege at Tobruk.

For three weeks, it was a seesaw slugfest around Sidi Rezegh, with that garrison at Tobruk busting out to join the main show. The German Panzergruppe fought like devils, but they were no match for the sheer weight of British armor and artillery.

Rommel might have been a cagey fox, but even he had to admit defeat when he saw the Eight Army rolling over his battered panzers. He ordered the survivors to pull back to Gazala, leaving Tobruk free and the British in charge of the field. That’s what happens when you bring overwhelming firepower to a knife fight, boys—you don’t just win, you drive the enemy clean out of the desert!

~~ General Howitzer

12 VP’s

Card Balance:

Allies – 6

Axis – 6

Complexity:

4

Conditions:

Desert

Context:

Historical

Location:

Libya

Year:

1941

Theater:

Mediterranean

Campaign:

Tobruk Breakout

Codename:

Operation Crusader

Summary:

Objectives:

12 VP’s, plus a Territorial Objective Medal for the Axis.

Battlefield:

Desert with a ridge of hills in the center of the battlefield.

Troops:

Allies  – 10 Infantry, 8 Armor, 3 Artillery (Big Guns and Mobile)

Axis  – 10 Infantry, 5 Armor, 3 Artillery (including a Flak88 and a Big Gun)


medal allies

Allied Strategy:

1.  Make use of your Tobrouk forces and especially the Artillery as much as possible.

2.  You have a massive force gathered together in the center section.  You will need to peel off a few to deal with the isolated Axis forces at hex 6 and 7 on your right section, and the rest towards the Axis forces on the other side. 

Overall Strategy

1.  Both sides have to make immediate decisions on overall strategy. Do the Allies move straight for Tobruk, or the Axis main force, or do they clean up the battlefield from A to M as they go?  [~Admiral Frigate] 

2.  There are four Oasis hexes; two primarily in Allied territory and two mainly in the Axis territory.  This is a long scenario, so take the opportunity to restore your units back to strength. 

medal axis

Axis Strategy:

1.  If you can surround and wipe out the forces at Tobrouk quickly, then your forces can swing around and assist your brothers at arms further north. 


Battle Reports

2
BR - Crusader

Author:

Days of Wonder

Link:

Bardia

Bardia

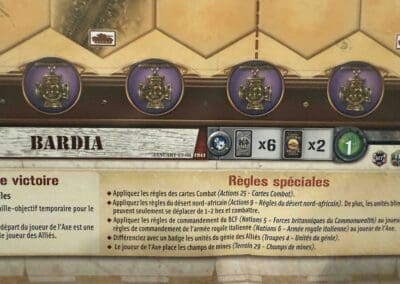
Bardia, January 1941—now that was a proper kick in the teeth for the Italians, and the Aussies delivered it with style.

This was the first big ground fight cooked up and led by an Australian outfit—6th Australian Division, under General Mackay—and let me tell you, those boys weren’t there to play games. Their target? Bardia, a heavily fortified Italian stronghold in Libya. Italians thought they were sitting pretty behind wire, guns, and concrete. Big mistake.

The 16th Brigade hit ’em from the west—smart move, weakest spot in the line. The engineers crawled through hell, cut through barbed wire, filled anti-tank ditches, and cleared a path like pros. Then came the punch: Matilda II tanks from the Brits’ 7th Royal Tank Regiment rolled in with the infantry. After that, it was a hammer-and-anvil job—17th and 19th Brigades came crashing in to finish the job.

By the end, Bardia was ours. Thousands of Italians surrendered, and the whole damn front cracked wide open. That victory let the Allies charge deeper into Libya and gave Rommel a reason to pack his bags for North Africa.

The Aussies proved two things at Bardia: one, they could plan and fight like hell; and two, when you combine tanks, grit, and coordination—you win. That’s the kind of war I like: fast, bold, and overwhelming.

~~ General Howitzer

7 VP’s

card

Card Balance:

Allies – 6 + 2 Combat Cards

Axis – 6 + 2 Combat Cards
(Note that Italian rules call for a loss of one Command Card for every Italian unit/hex lost, until 3 remain.)

Complexity:

2

Conditions:

Desert

Context:

Historical

Location:

Libya

Year:

1943

Theater:

Mediterranean

Campaign:

Western Desert Campaign

Codename:

It was part of Operation Compass

Summary:

Objectives:

7 VP’s, including two building territorial objectives and two hill territorial objectives for the Allies

Battlefield:

Desert terrain with a branching roads running through it, and some dunes.

Troops:

Allies – 8 Infantry, 4 Armor, 2 Artillery

Axis – 10 Infantry, 1 Armor, 2 Artillery


medal allies

Allied Strategy:

1.  Big Picture Strategy:  follow the roads that points like an arrow to your targets in the center section, which contains four territorial medals awaiting you at the two towns and two hills.

2.  Watch out for your right half of the battlefield which is dominated by the Italian artillery.  

medal axis

Axis Strategy

1.  Big Picture Strategy: stay behind the sandbags!  The Italians are in a defensive posture, and tactical wins are not worth the cost to your forces should you venture forth from your sandbags.

2.  Be aware that the rules of engagement for the Italian nation is that for every unit/hex which gets destroyed, you lose one command card, down to three cards in your hand.  This makes the loss of any unit devastating to your offensive capabilities.

3.  You have a strong set of Artillery on the left side of the battlefield. Use them at every opportunity.

Battle Reports

1
BR - Bardia

Author:

Days of Wonder

Link:

[Ukraine] Soviet raid on Grigorevka

Soviet Raid on Grigorevka

Soviet Raid

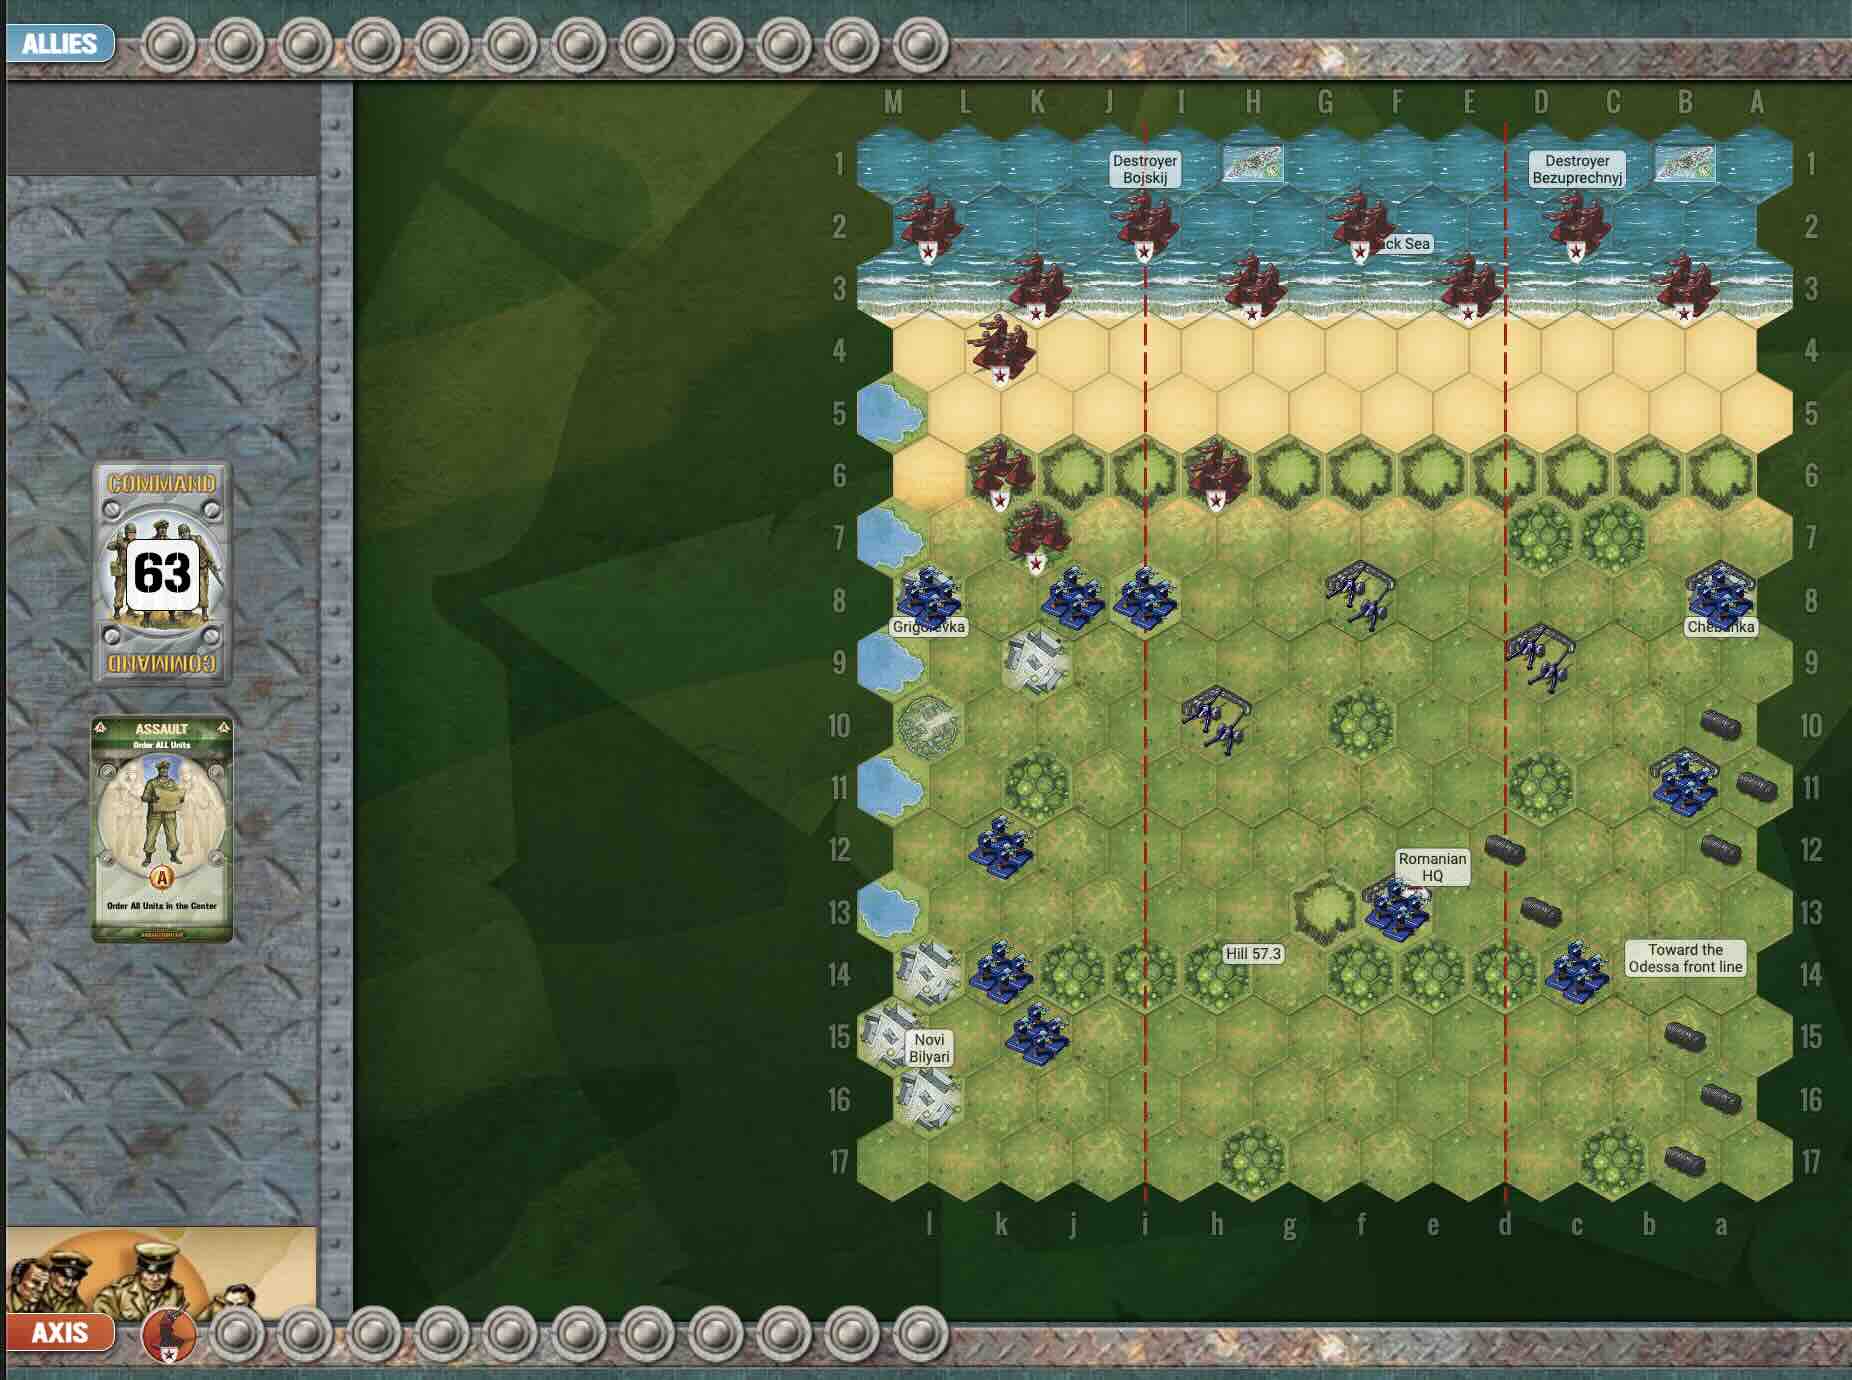
September 1941—Odessa’s under siege, and the Soviets are getting hammered by Romanian artillery. So what do they do? They go on the offensive—hard.

Captain Koren takes the lead at sea with the 3rd Naval Infantry Regiment, nearly 2,000 marines, while a small team of 23 paratroopers drops inland. The plan? Hit ’em from the front and the rear—paralyze their command, cut their lines, and blow those damned guns to hell.

Night of September 21st, the paratroopers jump near Hill 57.3—not clean, not pretty, but they get the job done. Took out a whole Romanian regimental HQ—with two dozen men. Meanwhile, Koren’s marines land at Grigorevka under a curtain of naval fire from the destroyers Bojkij and Bezuprechnyj, and they take those artillery batteries by storm.

By sunrise, they’re linking up with the 421st Rifle Division, and the Romanians? They’re pulling back—the 13th and 15th Divisions, thrown into reverse. That’s pressure off Odessa, and a big black eye for the Axis.

This wasn’t some massive Soviet steamroller. This was initiative, coordination, and guts. A rare joint strike—air, land, and sea—and it worked. Captain Koren didn’t wait to be hit—he hit first.

That’s how you win a war. Not by sitting in the trenches—but by getting out, striking hard, and making the enemy bleed where they thought they were safe.

~~ General Howitzer

12 VP’s

Card Balance:

Allies – 5

Axis – 4

Complexity:

4.5

Conditions:

Countryside

countryside

Context:

Historical

Location:

Ukraine

Year:

1941

Theater:

Eastern

Campaign:

Codename:

Summary:

Objectives:

12 VP’s, plus Objective Medals for Allies for the Romanian HQ, and each Artillery battery destroyed.

Battlefield:

Countrsyide  and beach in a deep breakthrough battlemap

Troops:

Allies (Soviet Union) – 14 Infantry, 2 Destroyers!

Axis (Romania ) – 10 Infantry, 3 Artillery


Allied Strategy:

1. Soviets, as Allies, do a six unit paradrop.  Drop them where you have the best set of cards to assist your attack.

Also, note that the paratroopers will not battle the first turn they are dropped, so they have to endure one round of enemy fire before they can attack.

2.  The Axis outnumber you on your right flank at the start of the game, and the three forward units are in strong defensive positions, which suggests attacking elsewhere.

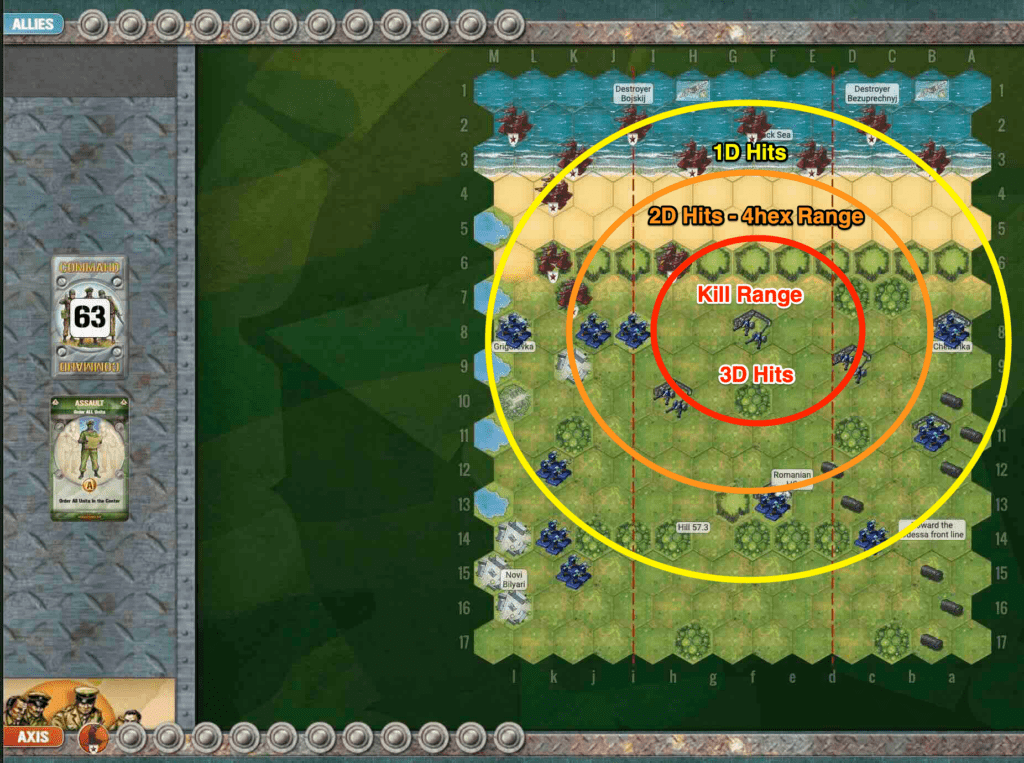
3.  The Allies have two Destroyers at the start of the game.  Two factors affecting their performance are visibility and location.

Visibility:  Because of the night visibility rules, the Axis units may have time to move out of range of the ship guns before daylight arrives.

Location: This concerns the ability to get the Destroyers onto the border line so they have more flexibility on which section cards can activate them.

Once daylight arrives the Destroyers have a range of eight hexes, so their maximum firing range is row ten.  Of course, that is their maximum range, but their effective firing range (of 2D attacks), is actually row six.  

Axis Strategy

1.  Your first defensive objective is to respond to wherever the Allied paratroopers happen to land.  Respond immediately with available Infantry and Artillery to address the threat.

2.  Bring your reserve units into play as soon as you can by moving the rear units forward on the map.

3.  Because each Artillery unit is worth two! Medals, you will need to protect them in some way.  Either move them back from the Destroyers’ range, or protect them from Infantry attacks by bring your own Infantry into play.

Battle Reports

2
BR - Soviet Raid

Author:

Days of Wonder

Wake Island

Wake Island

Wake Island was a little speck in the Pacific, but in December ’41 it became a fortress of American grit. Right after Pearl Harbor, the Japanese thought they’d steamroll it. On the 11th, they charged in—and got their noses bloodied. Our Marines and gunners blasted ships out of the water and sent the enemy packing, the first time in the war a U.S. force had thrown back an amphibious assault.

But the enemy came back heavier on the 23rd, with more ships, more planes, and more men than that tiny garrison could handle. The Marines fought like crazy, but Wake was finally overrun. Even so, their stand proved to the world that Americans don’t just roll over—we fight, we bleed, and we make the enemy pay dearly for every inch. Wake Island was no surrender; it was a warning shot that the United States was in this war to the finish.

~~ General Howitzer

6 VP’s

Card Balance:

5 – 5

Complexity:

2

Conditions:

Beach

Location:

North Pacific

Year:

1941

Theater:

Pacific

Campaign

Codename

Summary:

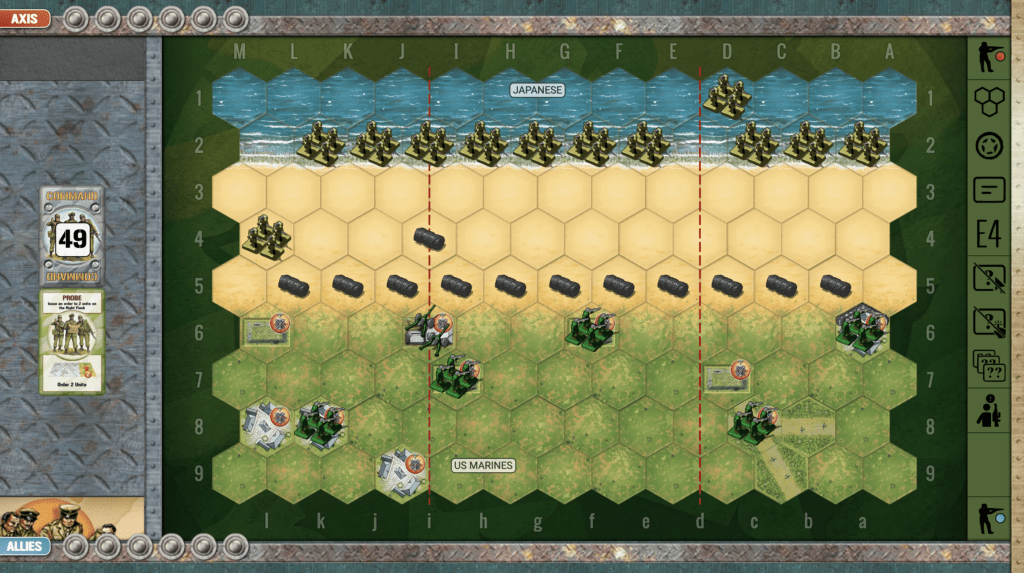
The Wake Island scenario has the Japanese attacking Marines who are defending. The beachfront is barricaded with a row of wire. But if they can get past that barrier, every town and fortress hex is a victory medal objective for them.

Objectives:

6 VP’s, plus the Axis have potentially 10 (!) Medal Objectives.

Battlefield:

A flat beach defended with wire and Marines in bunkers and one artillery.

Troops:

Allies – 5 Infantry, 1 Artillery

Axis – 12 Infantry!

Allied Strategy:

1.  Historically the Allies were overwhelmed in the second attack when 1500 invaders attacked, so the goal is to get some quick hits before they reach the Medal Objectives.

2.  Use your artillery at every opportunity, especially early in the game before they move away from it. 

Axis Strategy:

1.  As a general rule, avoid the artillery in the center-right.  Move your troops to the left and attack the left flank. There are plenty of VP’s available on the left side without even having to go anywhere near the artillery.

2. However if you have the cards for a sustained and rapid attack on the right, do it. The fact that there are two hexes unprotected by wire allows the you to very quickly reach the enemy bunkers. 

3.  You can use your advance infantry unit to quickly gain control of the field bunker at M6, and its VP. Then three more Objective Medals are available to you in the towns.  Then as you quickly bring other infantry forward the advance unit can attack the enemy infantry in the town at K8. That’s a total of 5 VP’s relatively unprotected. If you can survive the artillery attacks while you seek out your 6th VP on the left flank, you could have a win to brag about!

DoW Battle Reports

(percentage of Allied victories):

32%

19
BR - Wake

Author:

Days of Wonder

Link:

Sidi Rezegh Airfield

Sidi Rezegh Airfield

scenario_SidiRezeghAirfield_start

“Listen up, boys! Back in November ‘41, the battle for Sidi Rezegh Airfield was one hell of a dust-up in the North African sands. The South Africans and the British 7th Armoured Division—those Desert Rats—were gunning to knock the Axis on their heels and bust open that siege at Tobruk.

The Germans and their Italian pals weren’t about to give up that airfield without a fight. Our boys slammed into those anti-tank guns and Panzers like a battering ram, and at first, they made some headway. But Rommel, that desert fox, came roaring back with his own counterattack, and it turned into a slugfest—blood, sweat, and tanks grinding it out in the sand.

In the end, the Brits had to pull back from the airfield, but they gave Rommel a bloody nose and knocked his supply lines out of whack. And don’t forget—Operation Crusader didn’t end there. That airfield scrap was part of the bigger plan that finally lifted the siege of Tobruk and turned the tables in North Africa.

So remember this, men: sometimes you take a few lumps, but you keep punching, and that’s how you win the war!

~~ General Howitzer

5 VP’s

Card Balance:

Allies – 4

Axis – 5

Complexity:

2

Conditions:

Desert

Location:

North Africa

Year:

1941

Theater:

Mediterranean

Campaign

Summary:
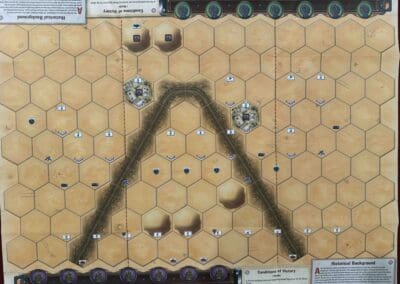
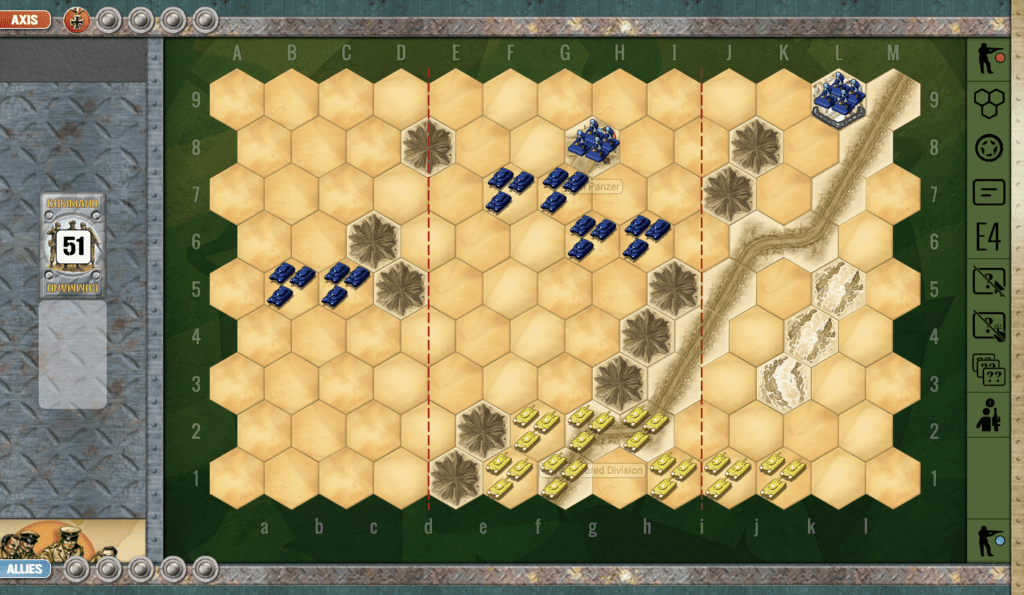
This desert scenario has a roadway passing through two sections cutting at an angle, blocked by escarpments. This is a tank battle ‘mano-a-mano’ and in many cases the attacker with the early momentum can gain the upper-hand and win.

Objectives:
This is a 5 VP game, and since it is a tank battle will go very quickly. The Axis begins with one point already, thanks to their control of the airfiled. 2.

Battlefield:
The field of play is all desert, with an escarpment and road running at any angle through much of the right flank. The small opening between escarpments is where the Axis will have to attack. The British can attempt to use the road for rapid progress towards the top of the map where the airfield lies.

Troops:
The Axis begin with an armor and mobility advantage to their side. The British also have no infantry, so some of infantry command cards will be converted to sigle armor unit commands.

Allied Strategy:

1. Allies need to remember that because of North African Desert rules, your armor can only move two hexes, while Axis can move three. Watch your armor placement carefully to avoid a series of close assault attacks.

2. The Allied armor begins in a congested formation with several units having no retreat options. This places the Allies in a position, since they move first of attacking the Axis armor immediately, before they are attacked – while they are still pinned against the back border – by the three-hex moving Axis units. So even if the card do not allow you to move a lot of units, you simply must attack and get your forces forward.

3. The British will need to attack an overwhelming tank force which has greater mobility than them (3 hex moves vs. 2 hex moves). In order to do this, it may help to threaten an attack on the airfield, thus diverting some Axis armor resources towards defense of said airfield.

Axis Strategy:

1. Axis begins with one victory medal for the airfield. As long as they hold the airfield, they keep the medal. So part of Axis’ considerations and planning must not only include the outright attack on the Allies in the sand, but also thought must be given to defending the airfield. Do not allow the Allies to distract you, while they prepare for an assault against it.

Battle Reports

(percentage of Allied victories):

28%

23
BR - Sidi Rezegh

Author:

Days of Wonder

Link: