Battle of Alam el Halfa
Battle of Alam el Halfa

Aug 29 – Sep 6, 1942
Alam el Halfa was Rommel’s last real chance to win the desert war and grab Egypt, and he knew it. His numbers were thinning, his supplies were running dry, and time was about to turn against him. So he did what gamblers always do when the clock is running out—he rolled the dice one more time and tried the same wide flanking punch he’d used at Gazala.
But this time, the British weren’t blind. ULTRA told them exactly what was coming, and Montgomery finally did something smart: he stopped chasing glory and prepared to fight on ground of his choosing. He planted his forces on the Alam el Halfa and Ruweisat ridges, dug tanks into the sand like steel bunkers, and told Rommel, “Come get it.”
This wasn’t a battle of fancy maneuvers—it was a battle of discipline. Rommel charged in from the south and smashed straight into prepared defenses, air power, and fuel shortages he couldn’t overcome. His attack burned itself out, and with it went his last hope of victory in North Africa.
The lines are drawn, the enemy is committed, and now it’s your fight. Hold the ground, let the enemy break himself, and remember this: when the enemy makes his last move, you make sure it’s his last mistake.
~~ General Howitzer
VP’s
8
![]()
Card Balance:
Allies – 6
Axis – 6
Complexity:
3
Conditions:
Desert
Context:
Historical
Location:
North Africa
Year:
1944
Summary:
8 Victory Points:
8 Medals, including three Permanent Medal Objectives for Axis control of three town hexes.
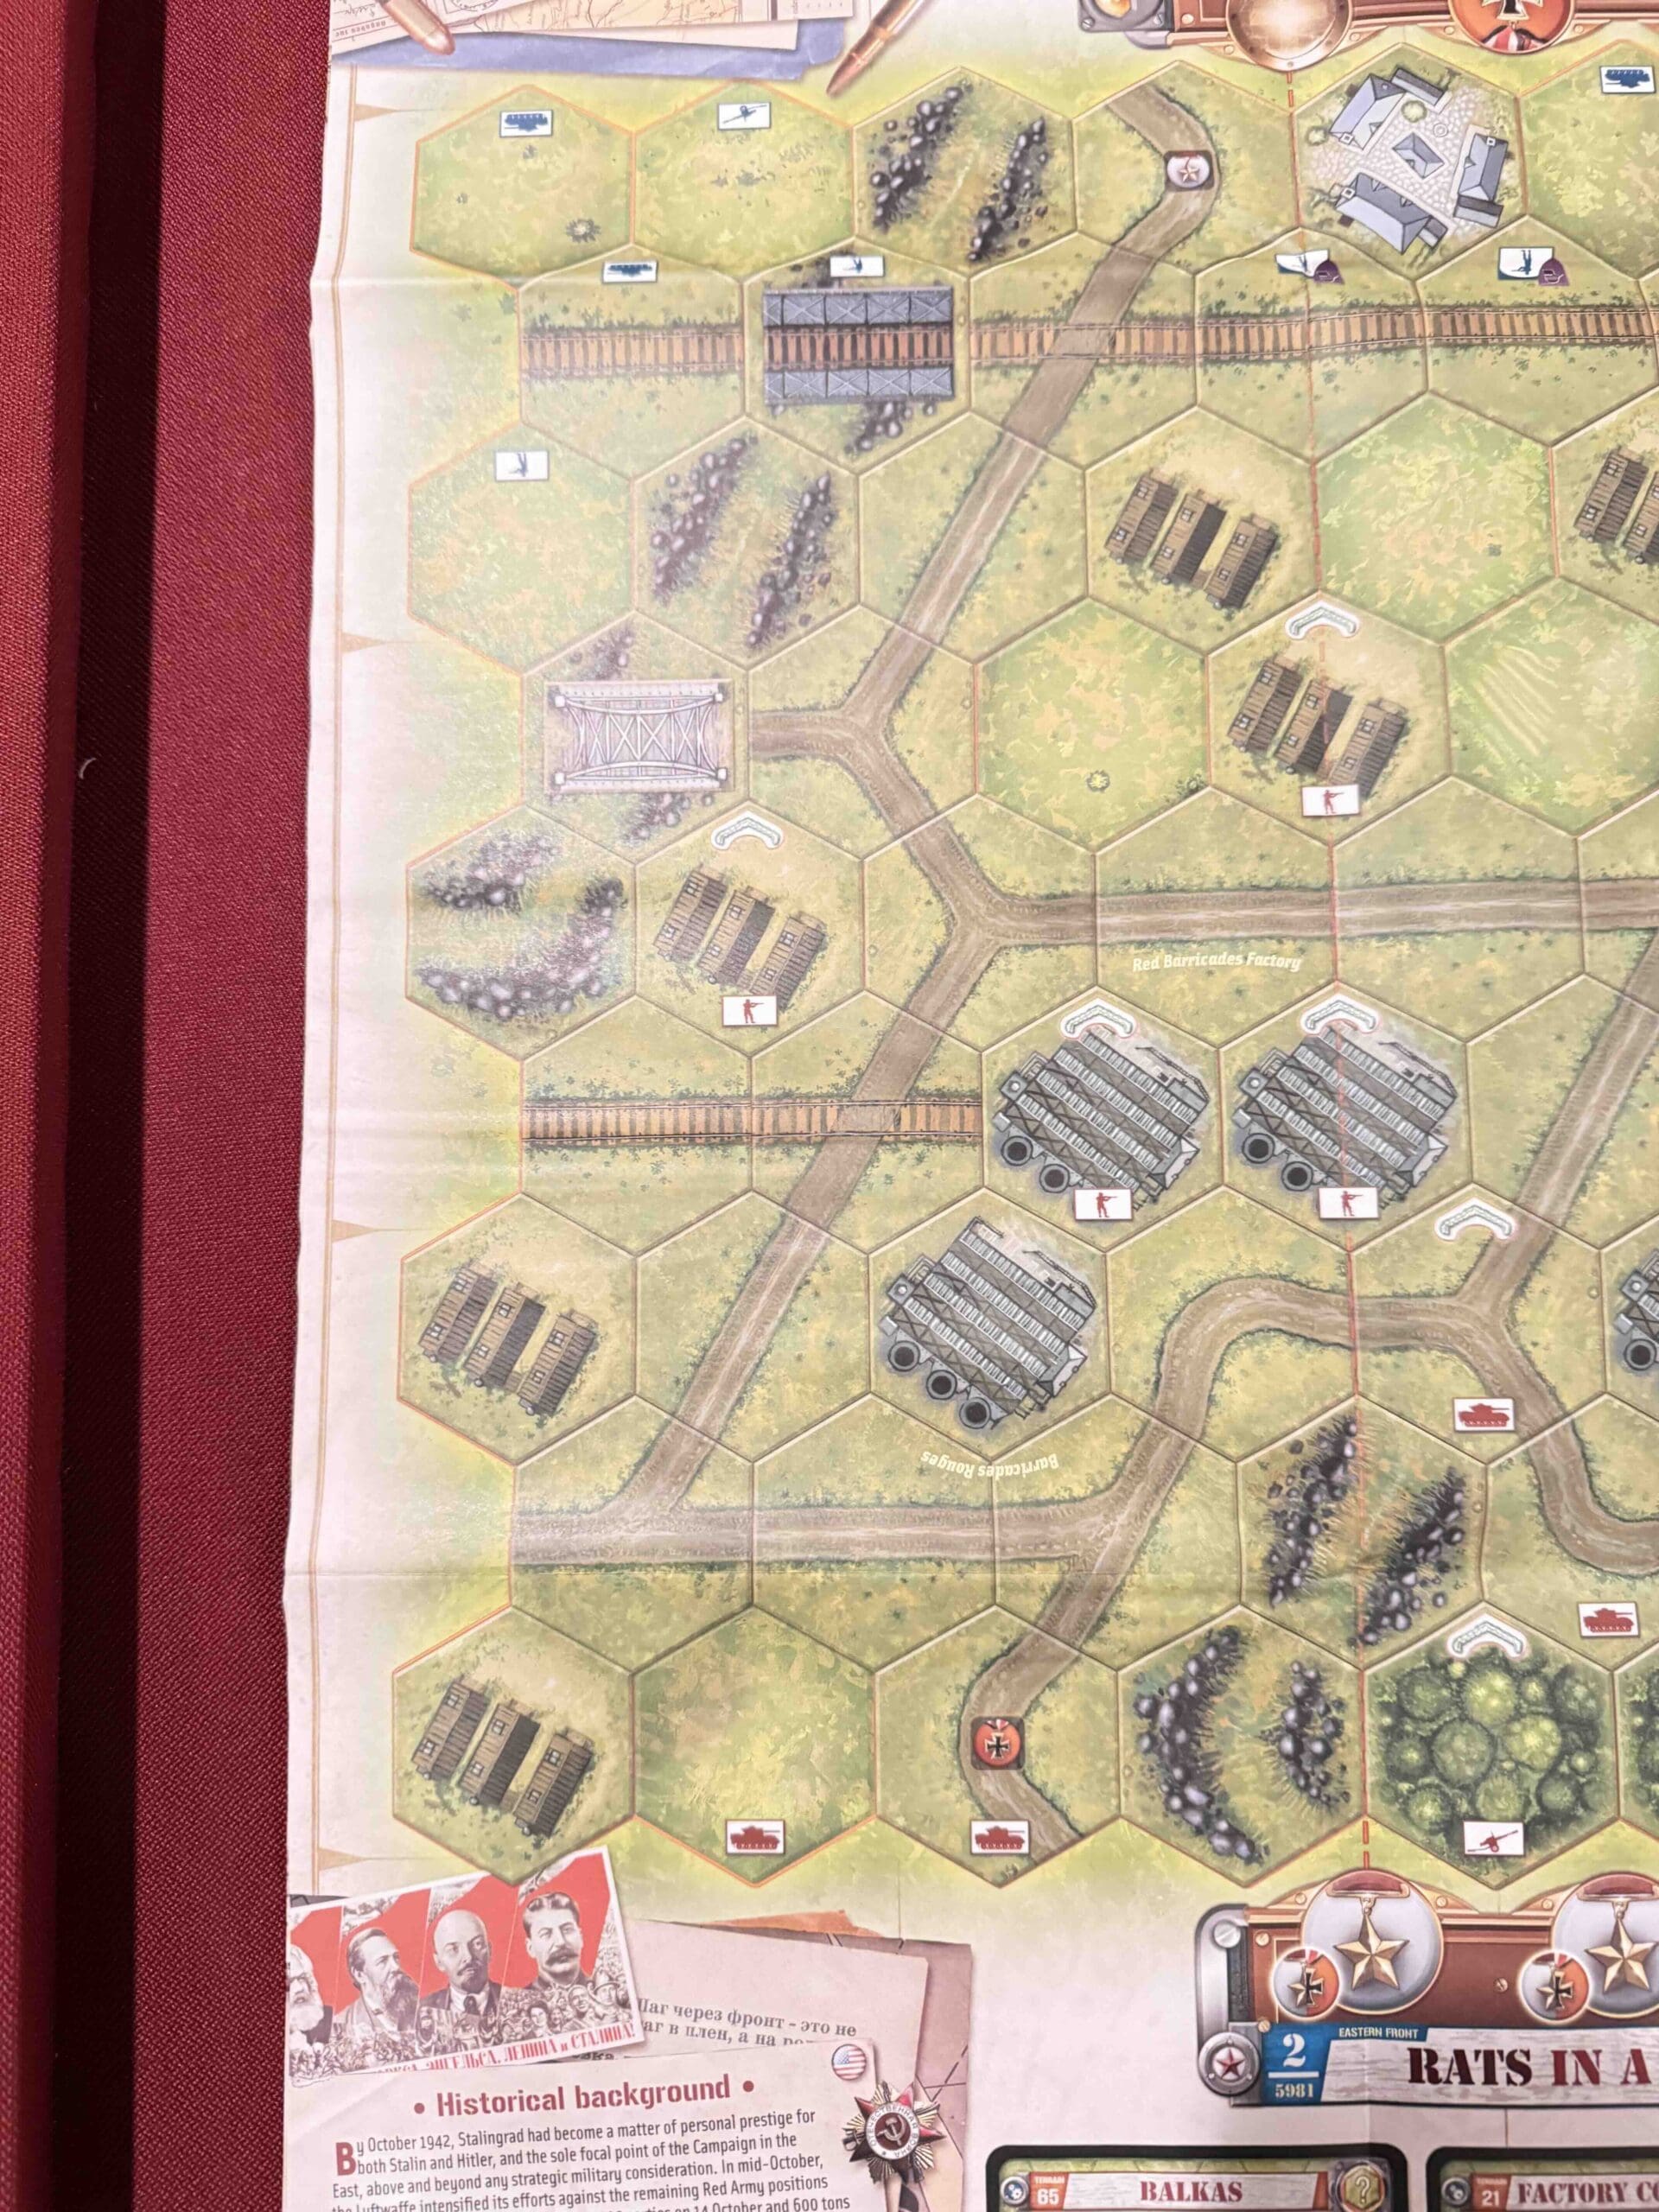
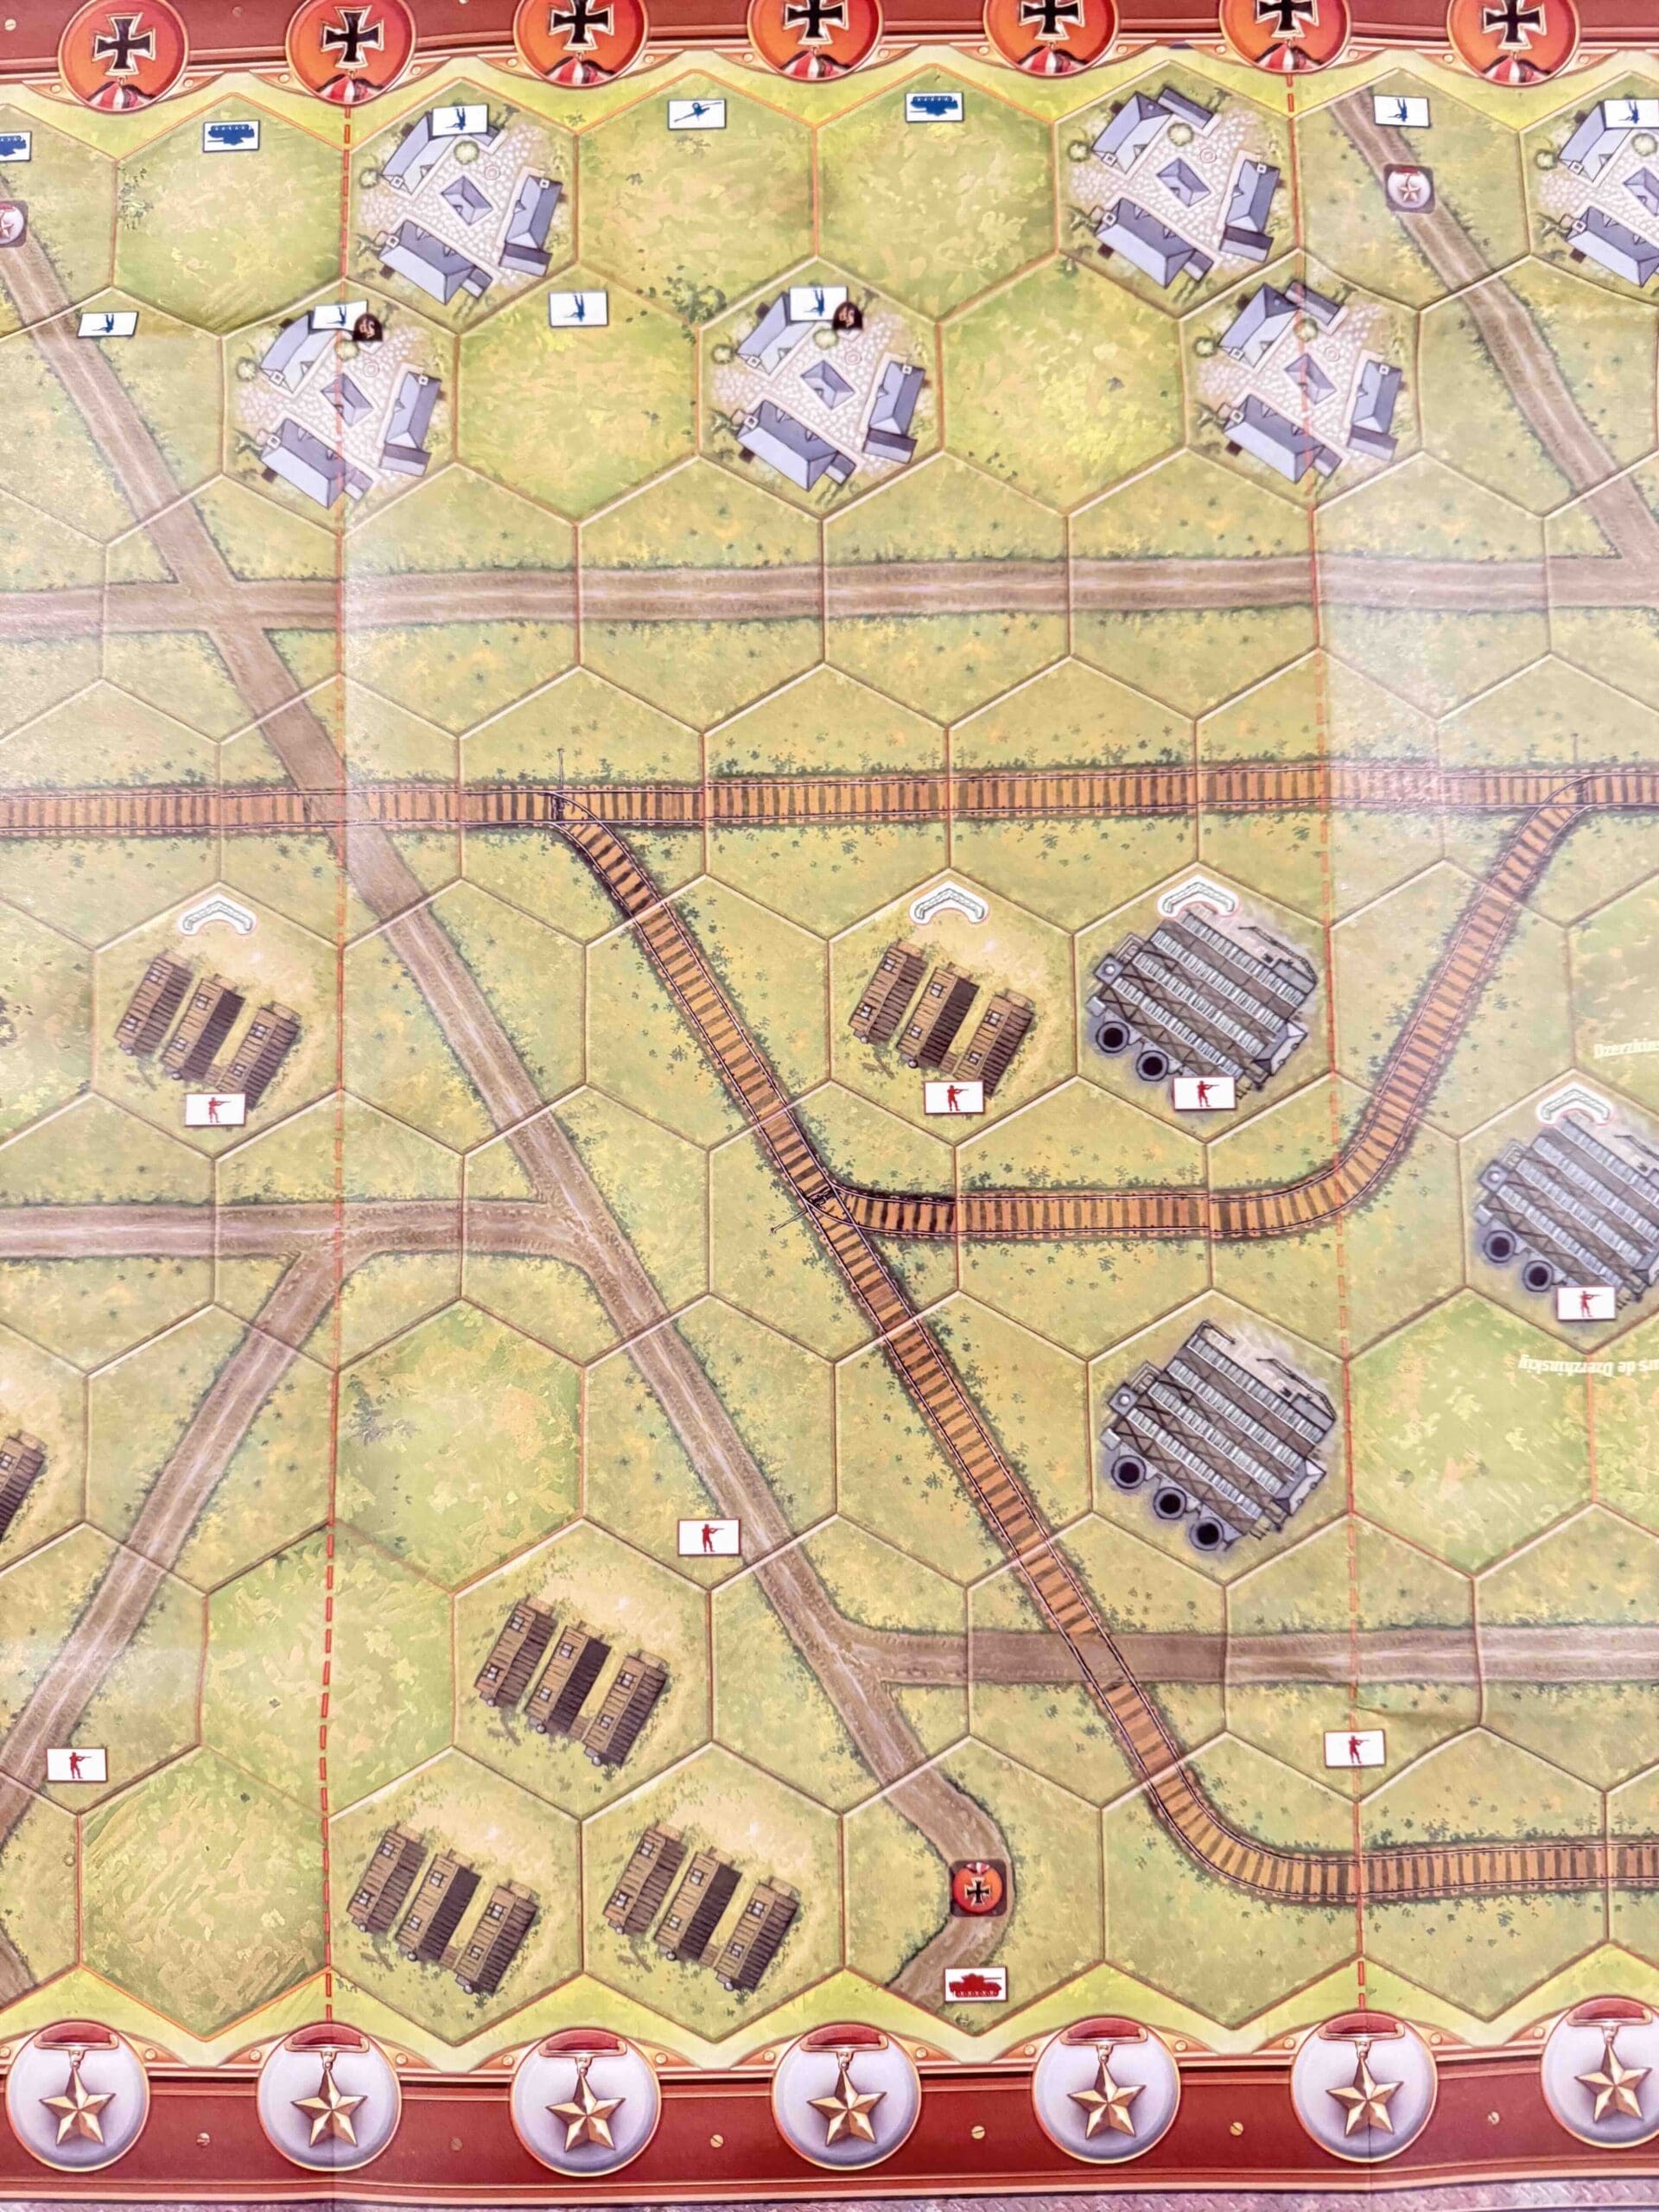
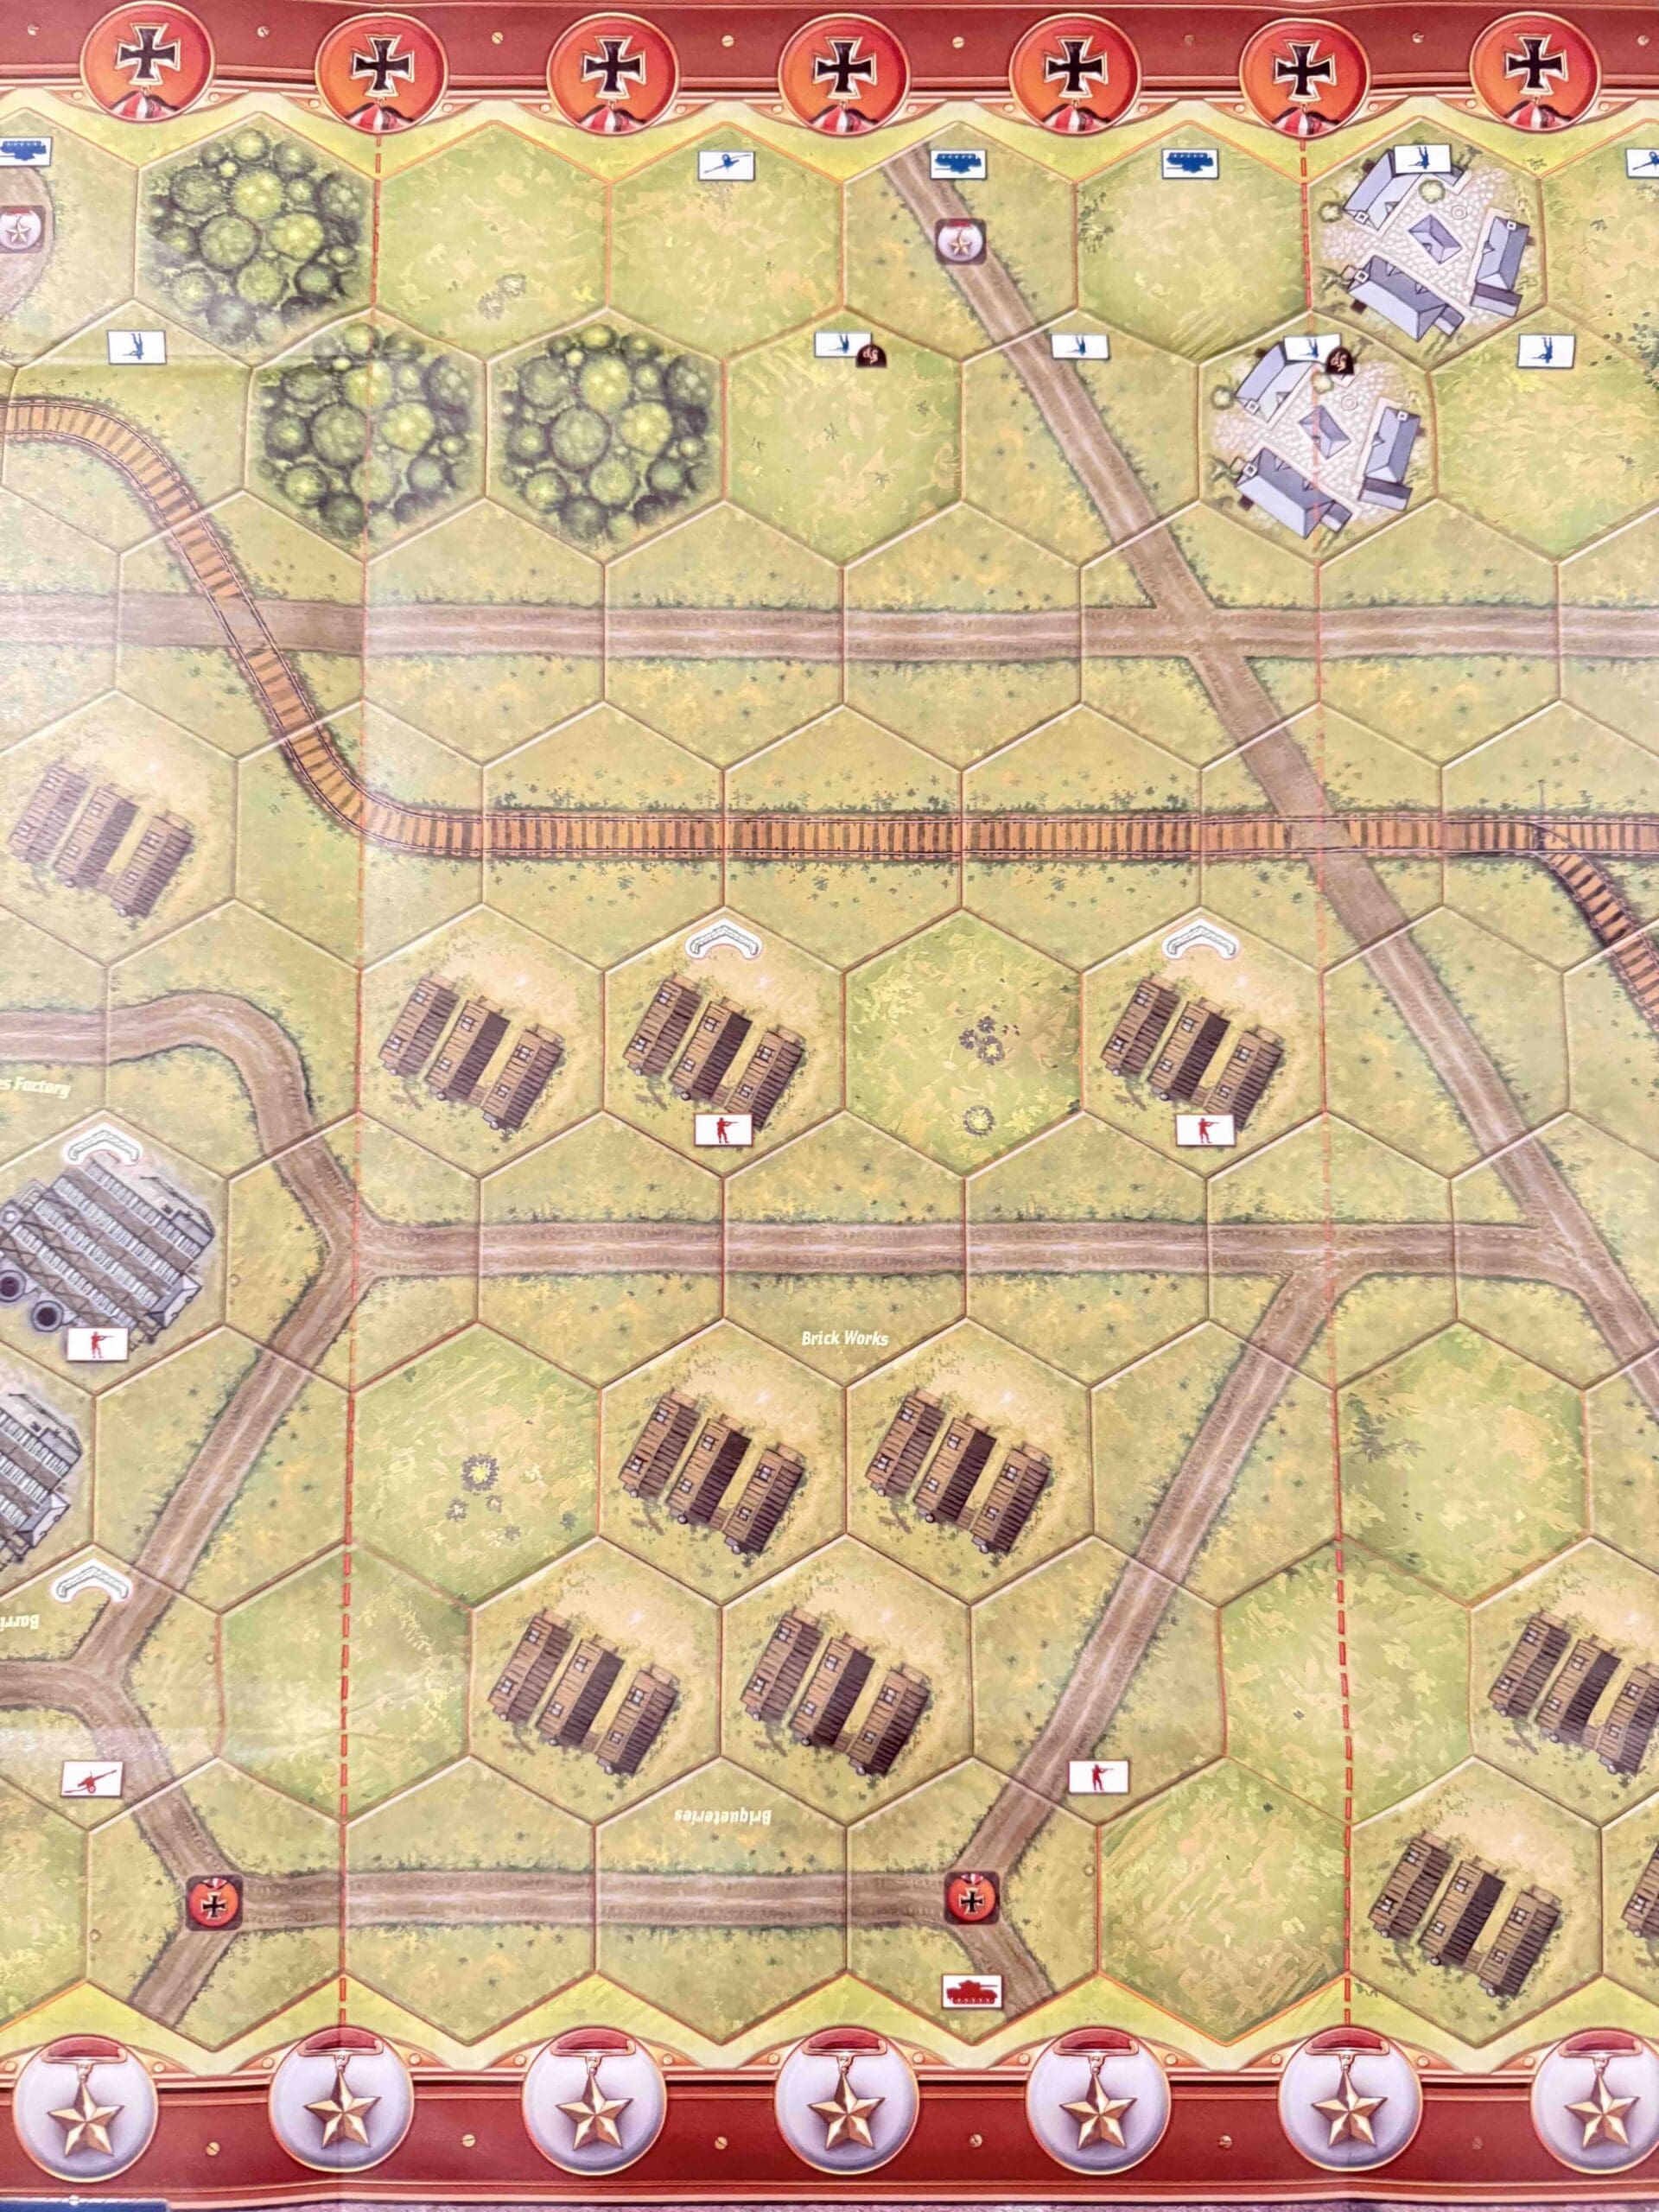
Terrain:
Desert with some ridges and a railroad track.
Troops:
Allies – 7 Infantry, 8 Armor, 2 Artillery
Axis – 10 Infantry, 8 Armor, 2 Artillery

Allies:

Axis:
Author: Days of Wonder
URL