Pruzana

Pruzana

Pruzana

The Battle of Pruzana, part of the larger Eastern Front conflicts in World War II, took place in the area around Pruzana (now in Belarus) during Operation Barbarossa, the German invasion of the Soviet Union, in 1941. German forces, advancing rapidly through Soviet-held territory, encountered Soviet resistance in Pruzana as part of the initial Soviet defenses against the Axis invasion.

5 VP’s

Card Balance:

Allies – 3

Axis – 6

Complexity:

2

Conditions:

Countryside

Location:

Russia

Year:

1941

Theater:

Eastern Front

Campaign:

Operation Barbarossa

Codename

Summary:

Objectives:
Five VP’s; no Objective Medals.

Battlefield:
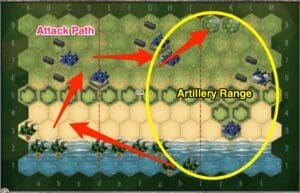
The principle feature of the Pruzana scenario are the two tree lines intersecting the battlefield in both a horizontal and a diagonal pattern, providing great cover for both sides.

Troops:
Russians – 7 Infantry, 3 Armor, including one T-34, 1 Artillery.
Axis – 6 Infantry, 6 Armor, 1 Artillery

🔥 Winning as Allies


1.  The Allies can win this one by staying behind their sandbags and resisting and attacking the the Axis forces as they get near.

2.  Make good use of your artillery to degrade the enemy forces as they approach.

3.  Possible Attack Vector:  If you get the cards and are able to bring your Armor around both sides of the center woods, you can sometimes catch the Axis in the center, and then pummel them with your Infantry in the woods, followed by your Armor.  It can create a real kill box in the center, with the right set of cards.

🔥 Winning as Axis

1.  As Axis, you need to be wary of the enemy artillery right in the center of the battlefield.  It will be able to strike much of the field of play. So if you get an early Barrage, or Air Power, take it out as soon as you can.

2.  The big picture strategy is that until the enemy artillery is taken out, your best attack strategy is to move up each flank away from its full power attacks, at the same time as you use your armor to take out the infantry in the woods.

3.  You can use your armor to do long distance degrading of the enemy forces, until they are at a point where your infantry can make an assault across the open fields.

4.  Use your artillery on the right flank at every opportunity.

30
BR - Pruzana

Author:

Days of Wonder

URL

Pointe-du-Hoc

Pointe-du-Hoc

Pointe-du-Hoc

scenario_PointeHoc_start_Allies

The Battle of Pointe du Hoc was a critical part of the D-Day invasion on June 6, 1944. Pointe du Hoc, a steep cliff overlooking the English Channel between Utah and Omaha beaches, was targeted because it housed a German gun battery capable of threatening the Allied landings.

U.S. Army Rangers were tasked with scaling the 100-foot cliffs to neutralize the German artillery positions believed to be in bunkers at the top.  About 225 Rangers from the 2nd and 5th Ranger Battalions led by Lieutenant Colonel James Rudder.  Using ropes, ladders, and grappling hooks under intense German fire, the Rangers climbed the cliffs while under heavy fire.  The Rangers discovered the artillery guns had been moved inland. They located and destroyed the guns using thermite grenades. The Rangers suffered heavy losses—fewer than half were still capable of fighting after the battle.

General Howitzer sums up its importance:

Listen up, men—Pointe du Hoc wasn’t just another hill; it was the lynchpin in the whole damned invasion. Our boys scaled those cliffs under fire, ripped out the German artillery, and made damn sure nothing could rain hell on Utah and Omaha. It was guts, grit, and glory—one of the boldest strikes of D-Day, and it damn well helped crack open Fortress Europe.

~ General Howitzer

4 VP’s

Card Balance:

Allies – 6

Axis – 4

Complexity:

2

Conditions:

Beach

Location:

Normandy

Year:

1944

Theater:

Western Front

Campaign:

Invasion of Normandy

Codename:

Part of Operation Overlord

Briefing:

This scenario is a tough one for the Germans, as the Allies have a 69% success rate.

Objectives:

Because this is a 4 VP scenario, every single hit matters, so both Axis and Allies need to carefully target and concentrate their fire.

Battlefield:

This scenario has a ridge running across the entire battlefield. It is a two-hex move to climb the hill, so it is a challenge for the Allies to mount it. But once they do, it is a short trip to the forest in the corner containing additional victory points. 

Troops:

Allies – 9 Infantry

Axis – 5 Infantry, 1 Artillery

🔥 Winning as Allies

1. Like all beach scenarios, the goal is to get off the beach as quickly as possible. But the ridge running across the beach, does allow Allies to assemble their forces just behind the ridge, massing together, until they are ready to climb the ridge together and attack.

2. Watch out for the infantry hex on the Pointe, and for the artillery on your right flank. You will need to shift your forces to the left as quickly as possible, or the enemy could gain one VP before you even get out of the water. You can move your infantry in a straight lateral move while still in the water, to get away from the Pointe.

3. The best pathway to the VP’s in the forest on your right flank, is to overwhelm the enemy on the left flank, and work your way all the way across the middle section into the forest. Once you make your way off the beach on the left flank, you can take a bit of time to assemble all of your forces, and gather the cards you need for your center section attack.  This will keep you out of the Artillery range.

Memoir 44 scenario Pointe de Hoc

🔥 Winning as Axis

1. Take advantage of the ridge facing the shore. If you have the infantry movement cards, get to the ridge and batter the troops as they approach. If you just sit in your bunkers or sandbags, and wait for them to mass and attack, you will be overwhelmed.

2. First moves are to attack with your infantry from on the point, and your artillery while Allies are still in the water. This will force them up the coast away from your artillery, and most importantly, away from the victory points in the woods.

3. Use your artillery well to slow down, harass, and destroy the troops while they are still on the beach.

4. Once the Allies make it up onto the ridge, if you can restore your remaining forces back into your bunkers, it may give you enough time to degrade the enemy forces enough to prevent their achievement of the VP’s in the forest on your left flank.

Battle Reports

(percentage of Allied victories):

69%

Scales-Allies-Weighted
41
BR - Pointe

Author:

Days of Wonder

Link:


Pegasus Bridge

Pegasus Bridge

Pegasus Bridge

The Battle of Pegasus Bridge took place on June 6, 1944, during the D-Day invasion of Normandy. Just after midnight, British airborne troops from the 6th Airborne Division, led by Major John Howard, carried out a daring glider assault to capture two critical bridges over the Caen Canal and the Orne River, later known as Pegasus Bridge and Horsa Bridge.

General Howitzer:

Now listen up! The mission was crystal clear: secure those bridges, and do it without hesitation. Why? So no German panzers dare roll onto our beaches and stomp the Allied advance inland. You shall not let them through!

Despite stiff resistance, the British airborne forces struck swiftly and clean—bridges seized, German counterattacks cut off, and few casualties to count. That’s the hallmark of precision, restraint, and utter battlefield dominance.

Capturing Pegasus Bridge wasn’t a side theater—it was the backbone of D‑Day success. Once secured, reinforcements poured inland and German armored units were effectively nailed down before they ever saw the fight. This operation wasn’t coincidence—it was craftsmanship.

Let me be blunt: this was one of the most precise airborne operations in history—pure planning, unshakeable bravery, executed in lockstep with strategic vision. That’s how wars are won—not by waiting for luck, but by making it happen.

4 VP’s

Card Balance:

Allies – 6

Axis – 2, 3, 4

Complexity:

1

Conditions:

Countryside

Location:

Normandy

Year:

1944

Theater:

Western Front

Campaign

Codename

Briefing:

This intro scenario to M44 has only infantry, so managing their movements and ability to attack will determine victory and success. It is heavily favored for the Allies, to represent history, so the Axis need to have a great combination of card management, lucky dice and good strategy to win.

Objectives
Four VP’s, and two bridge Objective Medals.

Battlefield:
Countryside, slashed by two rivers – the Orne and the Caen Canal, whose bridges are the focus of the Objective Medals.

Troops:
Allies – 9 Infantry
Axis – 6 Infantry

🔥 Winning as Allies:

1. The Allies are faced with the need to literally ‘divide and conquer’ on two fronts. One strategy to address this is to focus your energies first on your right flank and take out the units defending the bridge. Once they are gone, and the bridge is gained you will already have three of your needed four points. You will of course have to manage your forces on your left flank so that the enemy is not picking them off one by one from acrosss the sandbags and from across the river.

2. The other attack option is to encircle the enemy by going around the lake with your excess Infantry forces. The Allies have more Infantry than can effectively attack in the narrow range between the river and the lake.  So you can send some around the lake on a long-range mission to attack the enemy from the other side as well.

Memoir 44 Pegasus Bridge Scenario

🔥 Winning as Axis:

1, Because Allies are heavily favored with a 9-6 infantry count, and a 69% success rate, the Axis must get all of their infantry into the fight as soon as possible. Early moves to activate the infantry in the corner of the right flank should be implemented. They can bring a good flanking maneuver to slow down the Allied attack on their sandbagged comrades by firing across the Benouville river.

2. An alternative attack strategy, if you have the movement cards for it is to get at least one of your infantry units across the bridge and into the fight in the center section.

3. Although the Objective Medal of Orne Bridge is within easy reach of the Allies, there is no need to sit on it and wait to be attacked out in the open (As a bridge provides no defensive value). A better strategy would be to have the two infantry units on the left flank to secure protection in the grove of trees above and below near the bridge. Each unit would be within two hexes of the bridge and able to send a withering attack against any Allied units who prematurely try to grab the bridge without first clearing the Axis defenders.

DoW Battle Reports

( percentage of Allied victories):

69%

Scales-Allies-Weighted
41
BR - Pegasus

Author:

Days of Wonder

Link

Panzers vs. Grants

Panzers vs. Grants

Panzers vs. Grants

“Listen up, boys! In May ‘42, in the blazing North African desert, the British 7th Armoured Division rolled out their shiny new Grants—those big 75mm guns looked damn impressive on paper. They thought they’d finally have the edge over Rommel’s Panzers.

But let me tell you, those German 15th Panzer boys weren’t in the habit of rolling over for anyone! They didn’t give a damn about new tanks—they had the tactics, the guts, and the desert smarts. The British fought hard, but the Germans danced circles around them, turning that desert into a killing ground.

In the end, those Grants put up a hell of a fight, but the Germans sent ‘em packing. That’s the lesson of that day, boys—firepower alone don’t win the battle; it’s the man in the tank and the way he fights that makes the difference!

~~ General Howitzer

5 VP’s

Card Balance:

Allies – 4

Axis – 6

Complexity:

2

Conditions:

Desert

Location:

North Africa

Year:

1942

Theater:

Mediterranean Theater

Campaign:

Battle of Gazala

Codename

Summary:

This scenario is played out on an almost wide-open sandy battlefield with tanks battling it out. It is a great test of the attacking power of the Allied Grants vs. the German Panzers.

Objectives:
This is a 5 VP game, and since it is on an open desert battlefield, it will proceed rather quickly. There is one Medal Objective hex for the Axis in the form of the British HQ and Supply Tents.

Battlefield:
An open desert terrain with just a few sand dunes and an oasis.

Troops:
Seven Panzers vs five Grants, balanced by the fact the Axis only have 1 infantry, and the British have five. No artillery.

🔥 Winning as Allies

1. As the Allies, you are at an armor disadvantage. The enemy starts the scenario with most of the armor misplaced on the flanks, and only two in the center section. But as soon as they consolidate their forces together, you will feel the might of their firepower. Therefore you need to work your units, infantry and armor as a cohesive force. Do not let your armor get out way ahead of the infantry. Work them together for a stronger attack.

2. Focus your effort and cards, as they will allow, on the center section where you can defend against attacks from either flank.

3. The goal is five VP’s, and since the enemy only has two infantry, this means you will have to take out at least three Panzer units.

🔥 Winning as Axis

1.  Your Panzers in the center and right flank are outnumbered due to the four-figure tank units of the British, so you will need to get your Panzers which are stuck behind the palm forest on left flank into the game as soon as you can.

2.  Do not attack on your right flank until you have the material and cards to do it.

3.  Note that the HQ/Supply Tent is a Permanent Medal Objective.  If you are able to push them out and take the terrain, you gain a Permanent Medal, even if you leave the hex.

Classic Battle Reports:

(percentage of Allied victories)

32%

23
BR - Panzers
Scales-Axis-Weighted

Author:

Days of Wonder

URL

Operation Cobra

Operation Cobra

Operation Cobra

scenario_Cobra_start_Allies

Operation Cobra was a key World War II military offensive launched by the Allies in late July 1944 during the Battle of Normandy. Its goal was to break through German defenses and enable a rapid advance across France. Following the D-Day landings, Allied forces faced strong German resistance, slowing their progress.

General Howitzer summarizes:
Operation Cobra was a hammer blow—Bradley opened with a sky full of bombs, and when the smoke cleared, our boys rolled right through Saint-Lô and tore the German line apart. We punched deep into France, drove the enemy into the Falaise Pocket, and opened the road straight to Paris. That’s how you break a front—fast, hard, and without mercy.

5 VP’s

Card Balance:

Allies – 5

Axis -4

Complexity:

3

Conditions:

Countryside

Location:

France

Year:

1944

Theater:

Western Front

Campaign:

Battle of Normandy

Codename:

Cobra

Context:

Historical

Summary:

The Allies begin with a numerical advantage at the start of the scenario. But they have to make it past well-protected Axis forces who are lodge in hedgerows scattered across the battlefield.

Objectives:

5 VP medals including two territorial medal objectives.

Terrain:

Hedgerows and countryside

Troops:

Allies – 10 Infantry, 4 Armor

Axis – 7 Infantry, 2 Armor

🔥 Winning as Allies

1.  Big picture strategy is to push up the center and to the right towards the territorial medal objectives in the two towns. You should be able to dislodge the infantry in the center hedgerow at G5. But the two infantry in the hedgerows at L5 and K5 are going to be more difficult. You may be able to by-pass them by just going up the center. If you gain the initiative, the enemy will have to respond. And then you can hit him with your superior firepower from your armor, and overwhelm him with your infantry.

2.  You have a numerical superiority everywhere except your left flank. That will be quickly under attack by the enemy forces which can attack your no-retreat infantry. So first turn available, get them into the woods to their right.

3. All of your armor is stuck behind the infantry, so get some movement on your troops. The goal is to maximize mobility, in order to capitalize on opportunity.  Based on the cards, you can decide whether to attack center or right; preferably with armor at a distance to degrade enemy preparedness.

🔥 Winning as Axis

1.  Big picture strategy is that the Allies outnumber you, and your role may be primarily defensive. But your front units in the hedgerows can put up a good fight. If you can get a Dig-In! card early on that will help.

2. Get your armor which is trapped in the back out into a mobile position as soon as you can.

3.  Some early attacks from your troops on the right flank against the trapped Allied troops could gain you a medal, or at least a weakened Allied force in that section.

4.  If it looks like the Allies are going to push past you towards the territorial medal of St. Gilles, you will want to move some infantry there as an additional defensive measure.  Protect your two territorial medals from enemy capture!

Battle Reports
(percentage of Allied victories):
52%

37
BR - Cobra

Author:

Days of Wonder

Link:

Mont Mouchet

Mont Mouchet

Mont Mouchet

scenario_MontMouchet_start_Allies

The Battle of Mount Mouchet took place in June 1944 in south-central France, where the French Resistance (Maquis) mounted a significant stand against German forces. Mount Mouchet served as a major base for the Maquis, who aimed to disrupt German supply lines and occupation efforts in preparation for the Allied invasion of Normandy.

At Mount Mouchet, the Germans came in hard, determined to smash the Maquis stronghold once and for all. Outnumbered and outgunned, those French Resistance fighters didn’t flinch—they fought like lions, slowed the enemy, and bled them for every step. Their stand forced the Germans to pour in resources they could’ve used elsewhere, and that alone was a victory of sorts.

In the end, the Maquis were overrun and the mountain fell—but their grit and sacrifice echoed loud. That fight showed the world that France’s spirit was unbroken, and in the critical months after D-Day, it helped weaken the enemy’s grip on the region. The Maquis proved you don’t need tanks and planes to make a difference—you just need guts, and plenty of it.

~~ General Howitzer

4 VP’s

card

Card Balance:

Allies – 5

Axis – 4

Complexity:

2

Conditions:

Countryside

Location:

France

Year: 
1944

Theater:

Western Front

Summary:

The asymmetrical starting pattern of this game makes for an interesting and challenging battle for both sides.

Objectives: 4 Medals
(Each Axis Armor unit counts as two VP’s.)

Terrain: 

Countryside

Troops:

Allies – 7 French Resistance

Axis – 6 Infantry, 2 Armor

medal allies

🔥 Winning as Allies

1. The Allies quickest path to victory lies in eliminating the Axis armor units, which each count as two VP’s for the Allies. This means quickly gaining control of the forest hexes on the left flank in order to attack the armor from a position of defensive cover.

2.  Also grab control of the hill on the right flank to gain the heights advantage against the enemy.

medal axis

🔥 Winning as Axis

1.  As soon as possible, get your armor into the battle, as your infantry is slightly outnumbered.  But be careful, and do not get too close as each lost armor counts as two VP’s for the enemy.

 2. Your forces begin in disarray, so you will need to coordinate your troops into a cohesive fighting force.

Classic Battle Reports
(percentage of Allied victories):

42%

25
BR - Mount Mouchet

Author:

Days of Wonder

Link: