Prokhorovka (Kursk)
La Prokhorovka ( Kursk ) [Overlord]
Prokhorovka_overview

Prokhorovka_Axis_L1

Prokhorovka_Axis_L2

Prokhorovka_Axis_L3

Prokhorovka_Axis_R1

Prokhorovka_Axis_R2

Prokhorovka_Axis_R3
Prokhorovka_fullLeftFlank
Prokhorovka_fullRightFlank
The Battle of Prokhorovka on July 12, 1943, was one of the largest tank clashes of World War II, fought between Soviet forces and Germany’s II SS Panzer Corps during the Battle of Kursk. The Soviets launched a massive counterattack to halt the German advance, resulting in brutal close-quarters fighting.
General Howitzer summarizes the results:
Prokhorovka was the kind of fight that strips war down to raw courage and cold steel. On July 12, 1943, the Germans drove forward with their elite SS Panzer divisions, thinking they’d punch a clean hole through the Soviet lines and finish the Kursk offensive on their terms. Instead, they ran headfirst into a Soviet counterattack that came on like a tidal wave of T-34s.
This wasn’t long-range dueling — this was knife-fight range, tank against tank, guns blazing at fifty yards, machines ramming each other like charging bulls. The battlefield turned into a cauldron of smoke, fire, and shattered armor. And in that chaos, the Russians did what mattered most: they stopped the Germans cold.
The Panzers never got their breakthrough. Kursk slipped from Hitler’s grasp. And Prokhorovka proved once again that in war, the side that holds its ground with grit and fury — not just fancy equipment — is the side that turns the tide.
12 VP’s
Card Balance:
Allies – 10
Axis – 10
Complexity:
4
Conditions:
Countryside
Context:
Historical
Location:
Russia
Year:
1943
Theater:
Eastern
Campaign:
Battle of Kursk
Codename:
Operation Citadel
Summary:
Objectives:
12 VP’s
Battlefield:
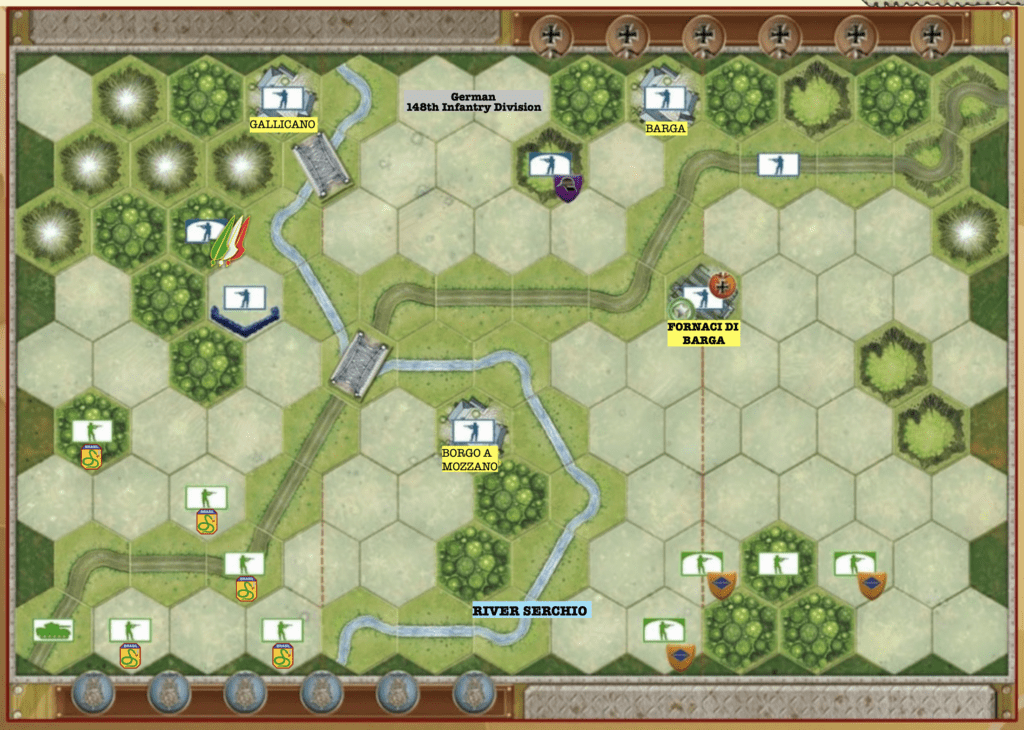
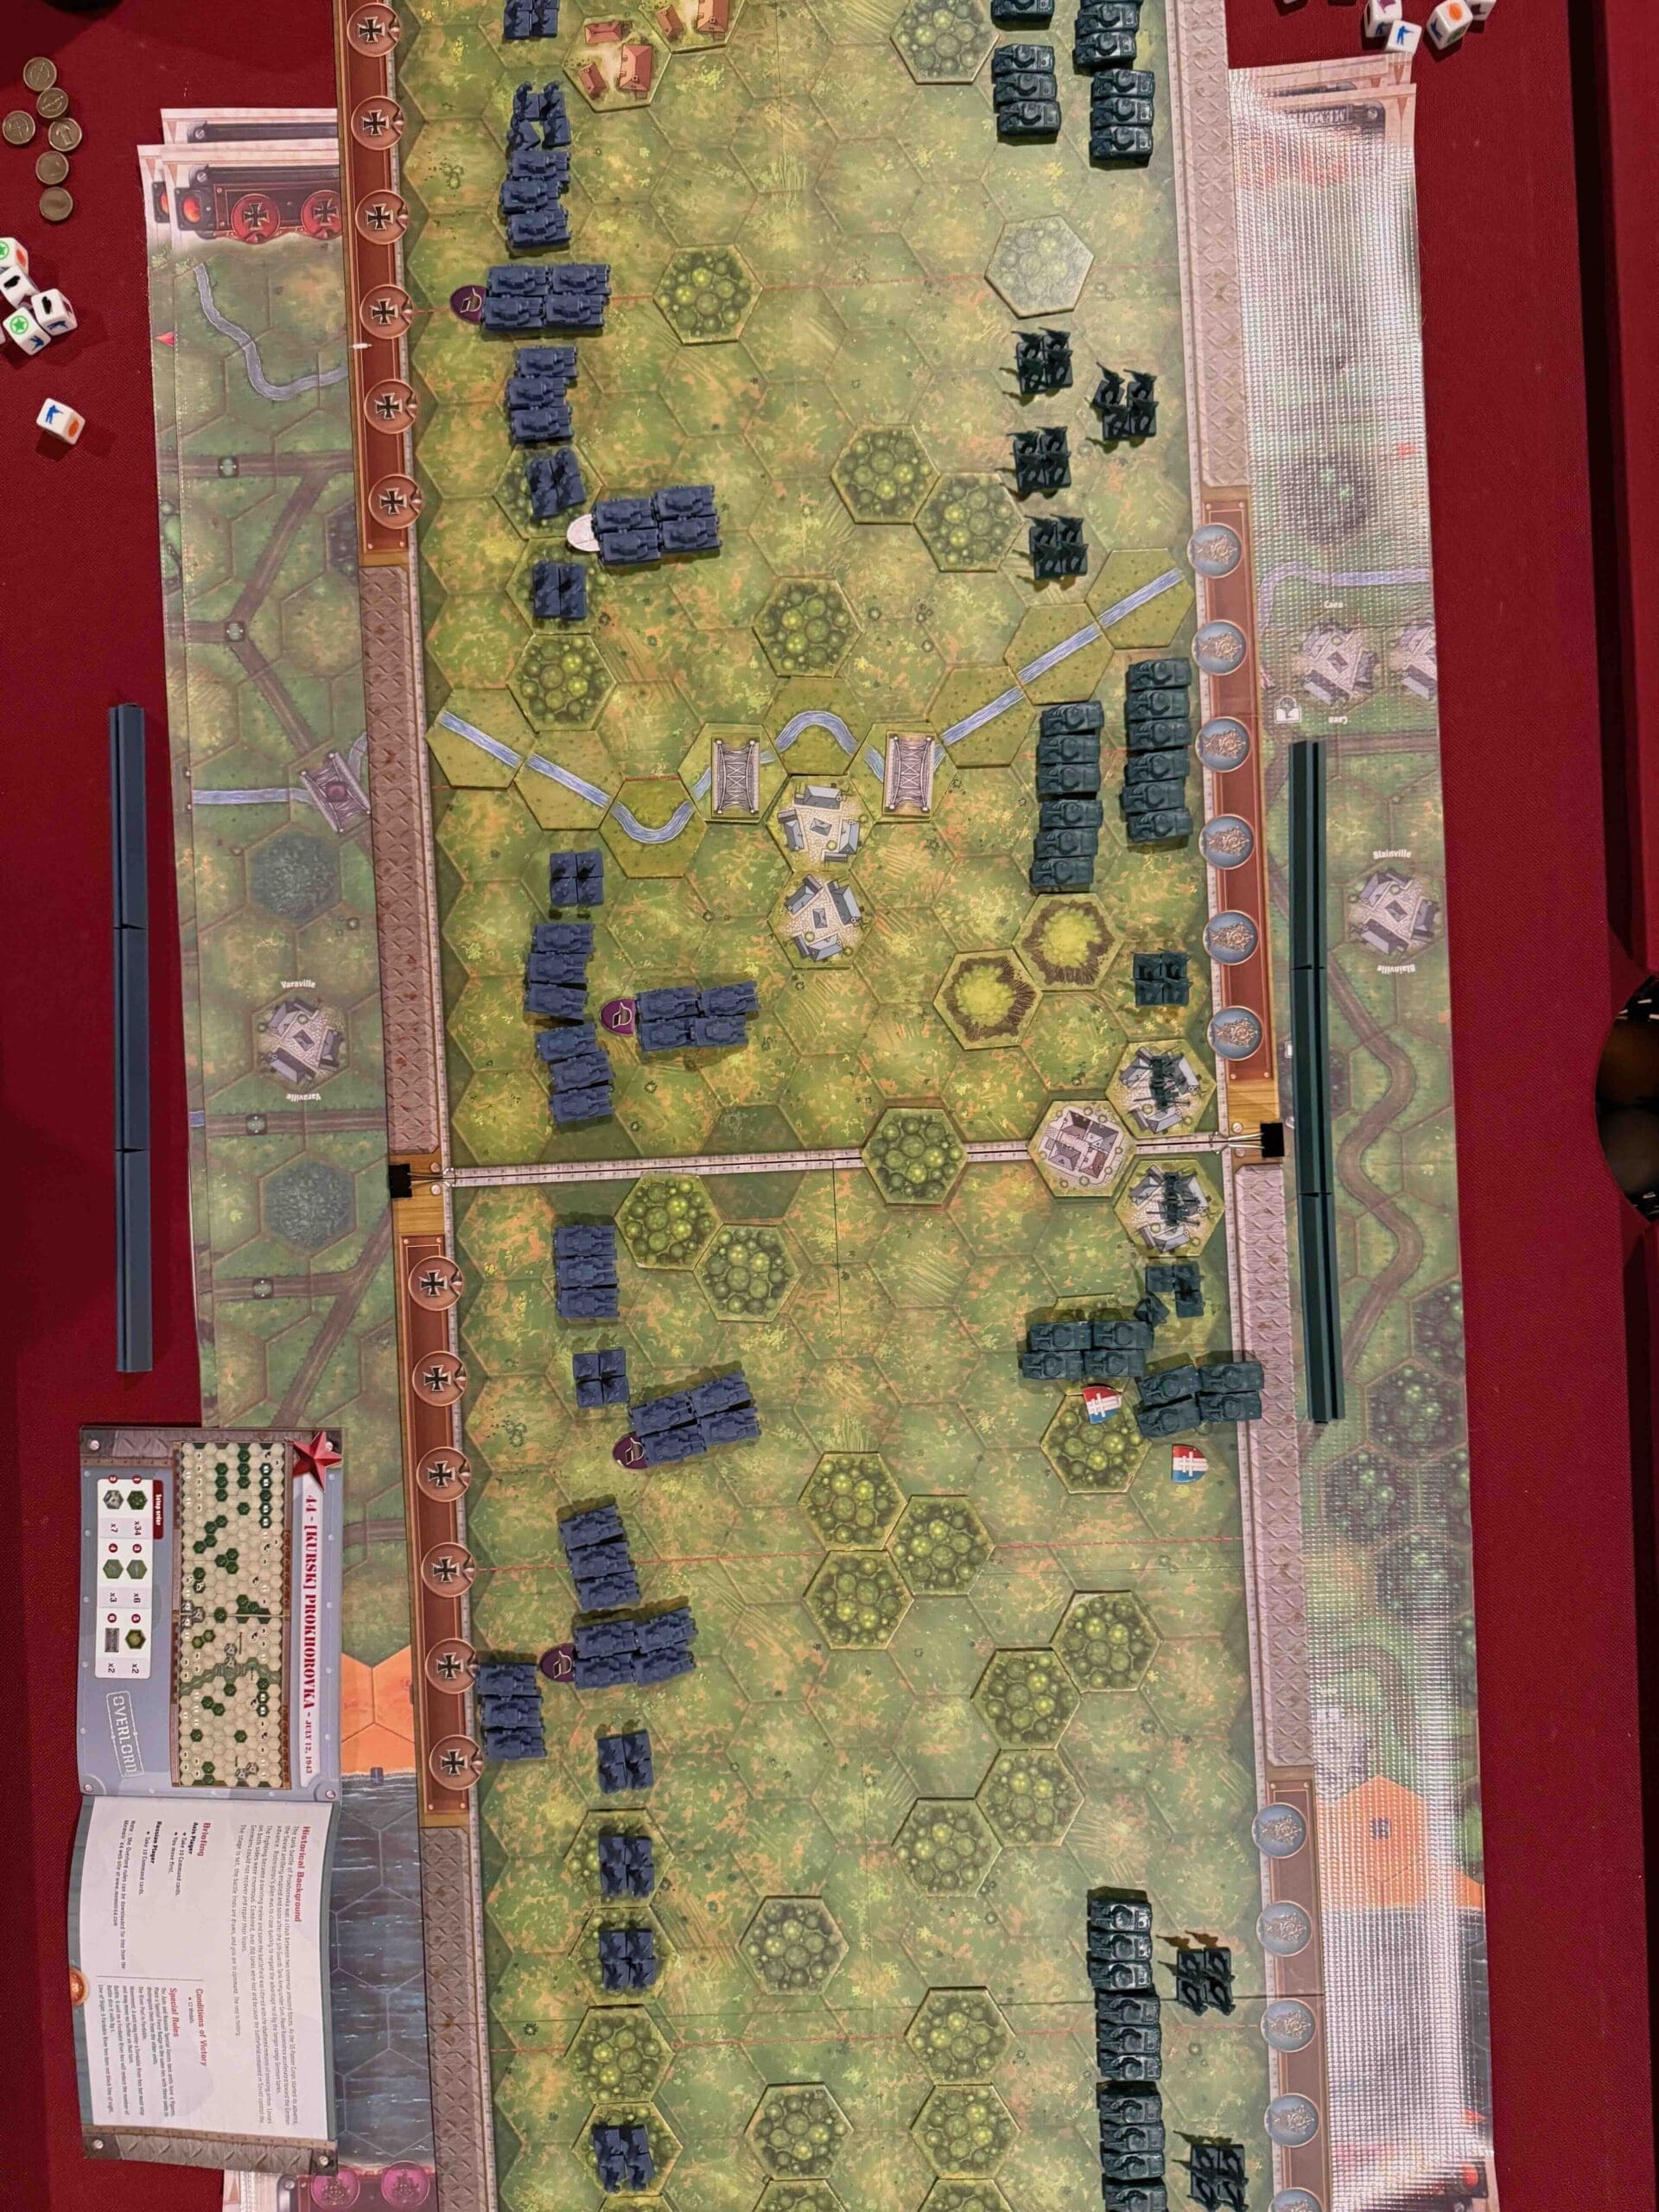
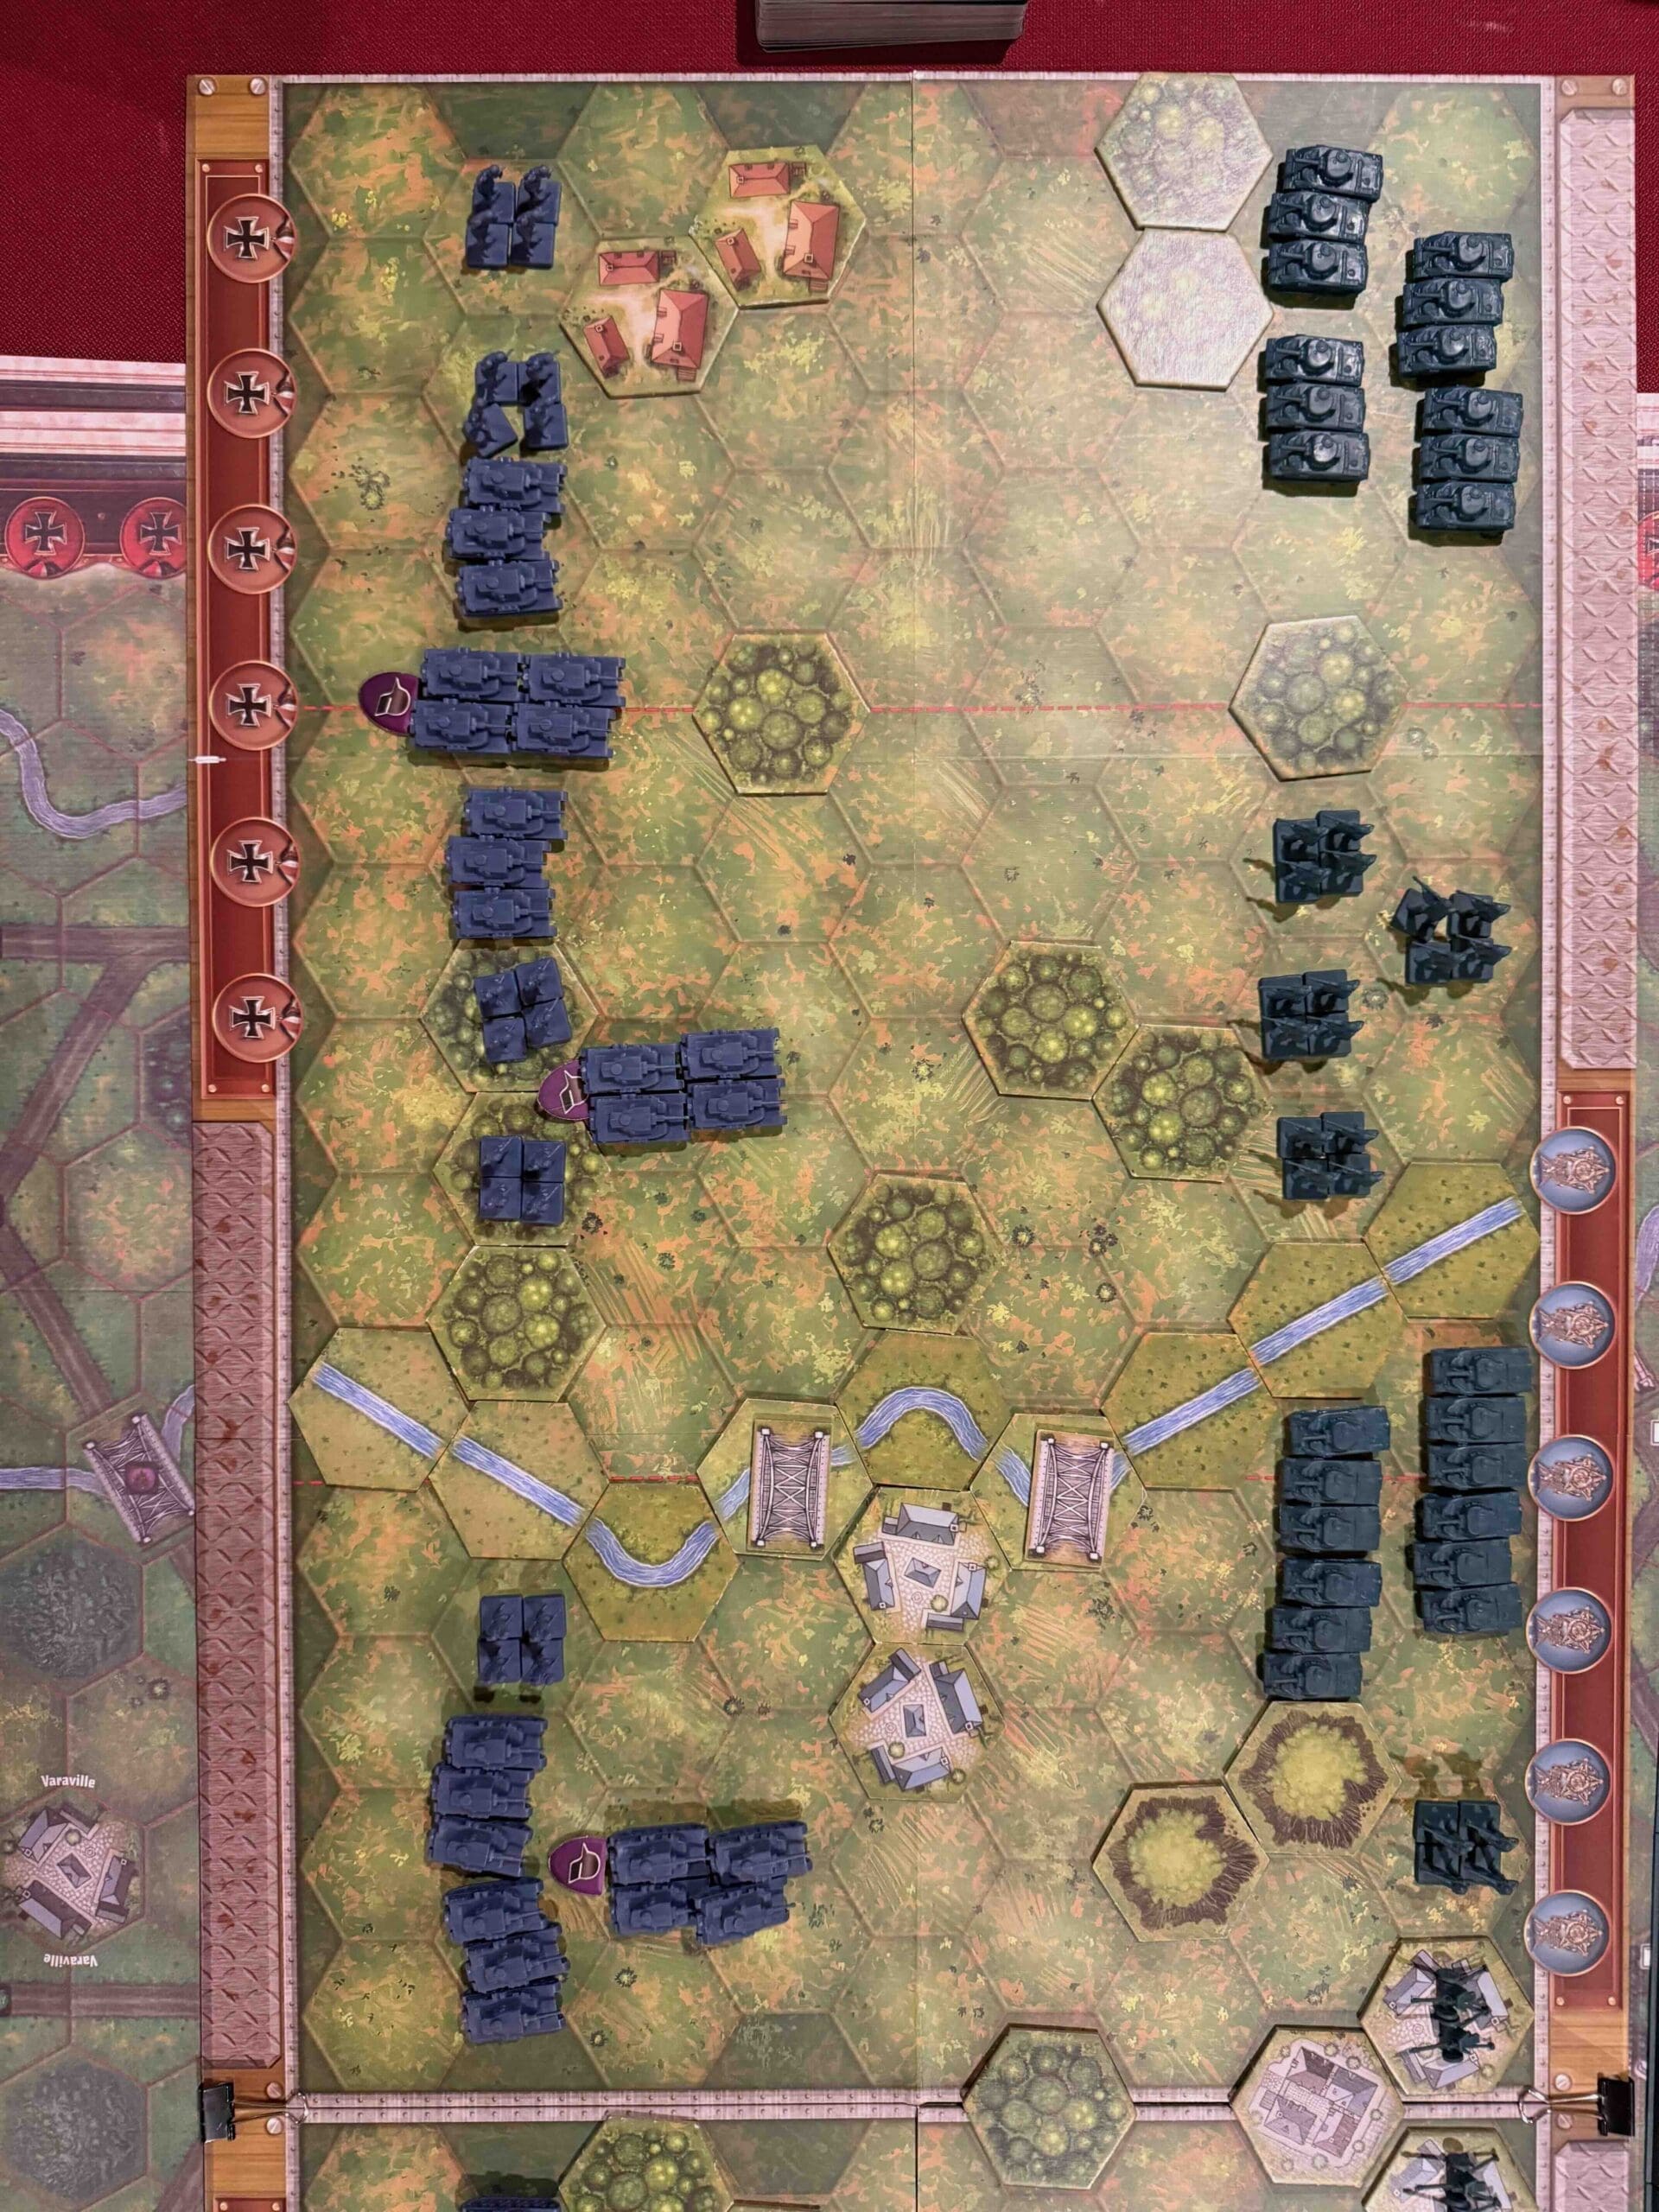
A countryside with the River Pesl cutting vertically through the left section.
Troops:
Allies – 8 Infantry, 15 Armor, 2 Artillery
Axis – 11 Infantry, 14 Armor
Special Rules:
1. The River Psel is fordable.

🔥 Winning as Allies
1. You have two Artillery placed right in the center of the battlefield hidden in the town hexes. They will be much more useful to you, if you can move them forward a hex or two.
2. Move your Armor unit which is in the forest hex just to the left of the city of Prokhorovka up into the forest hex which is exactly in the center of the battlefield. It will give you a magnificent view of the battlefield in all directions.
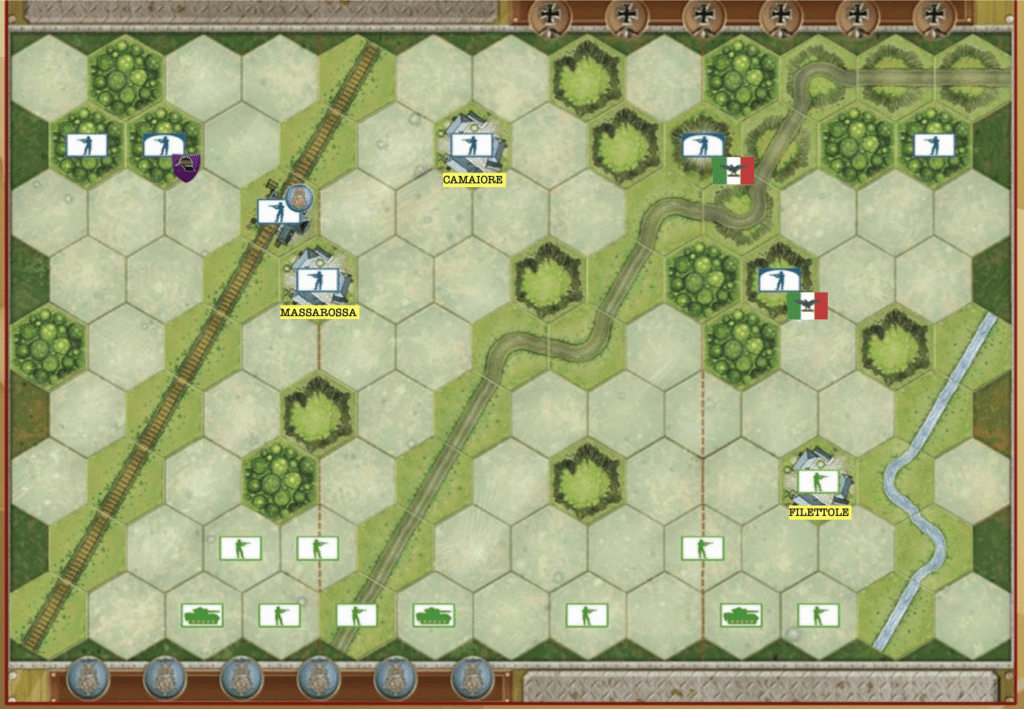
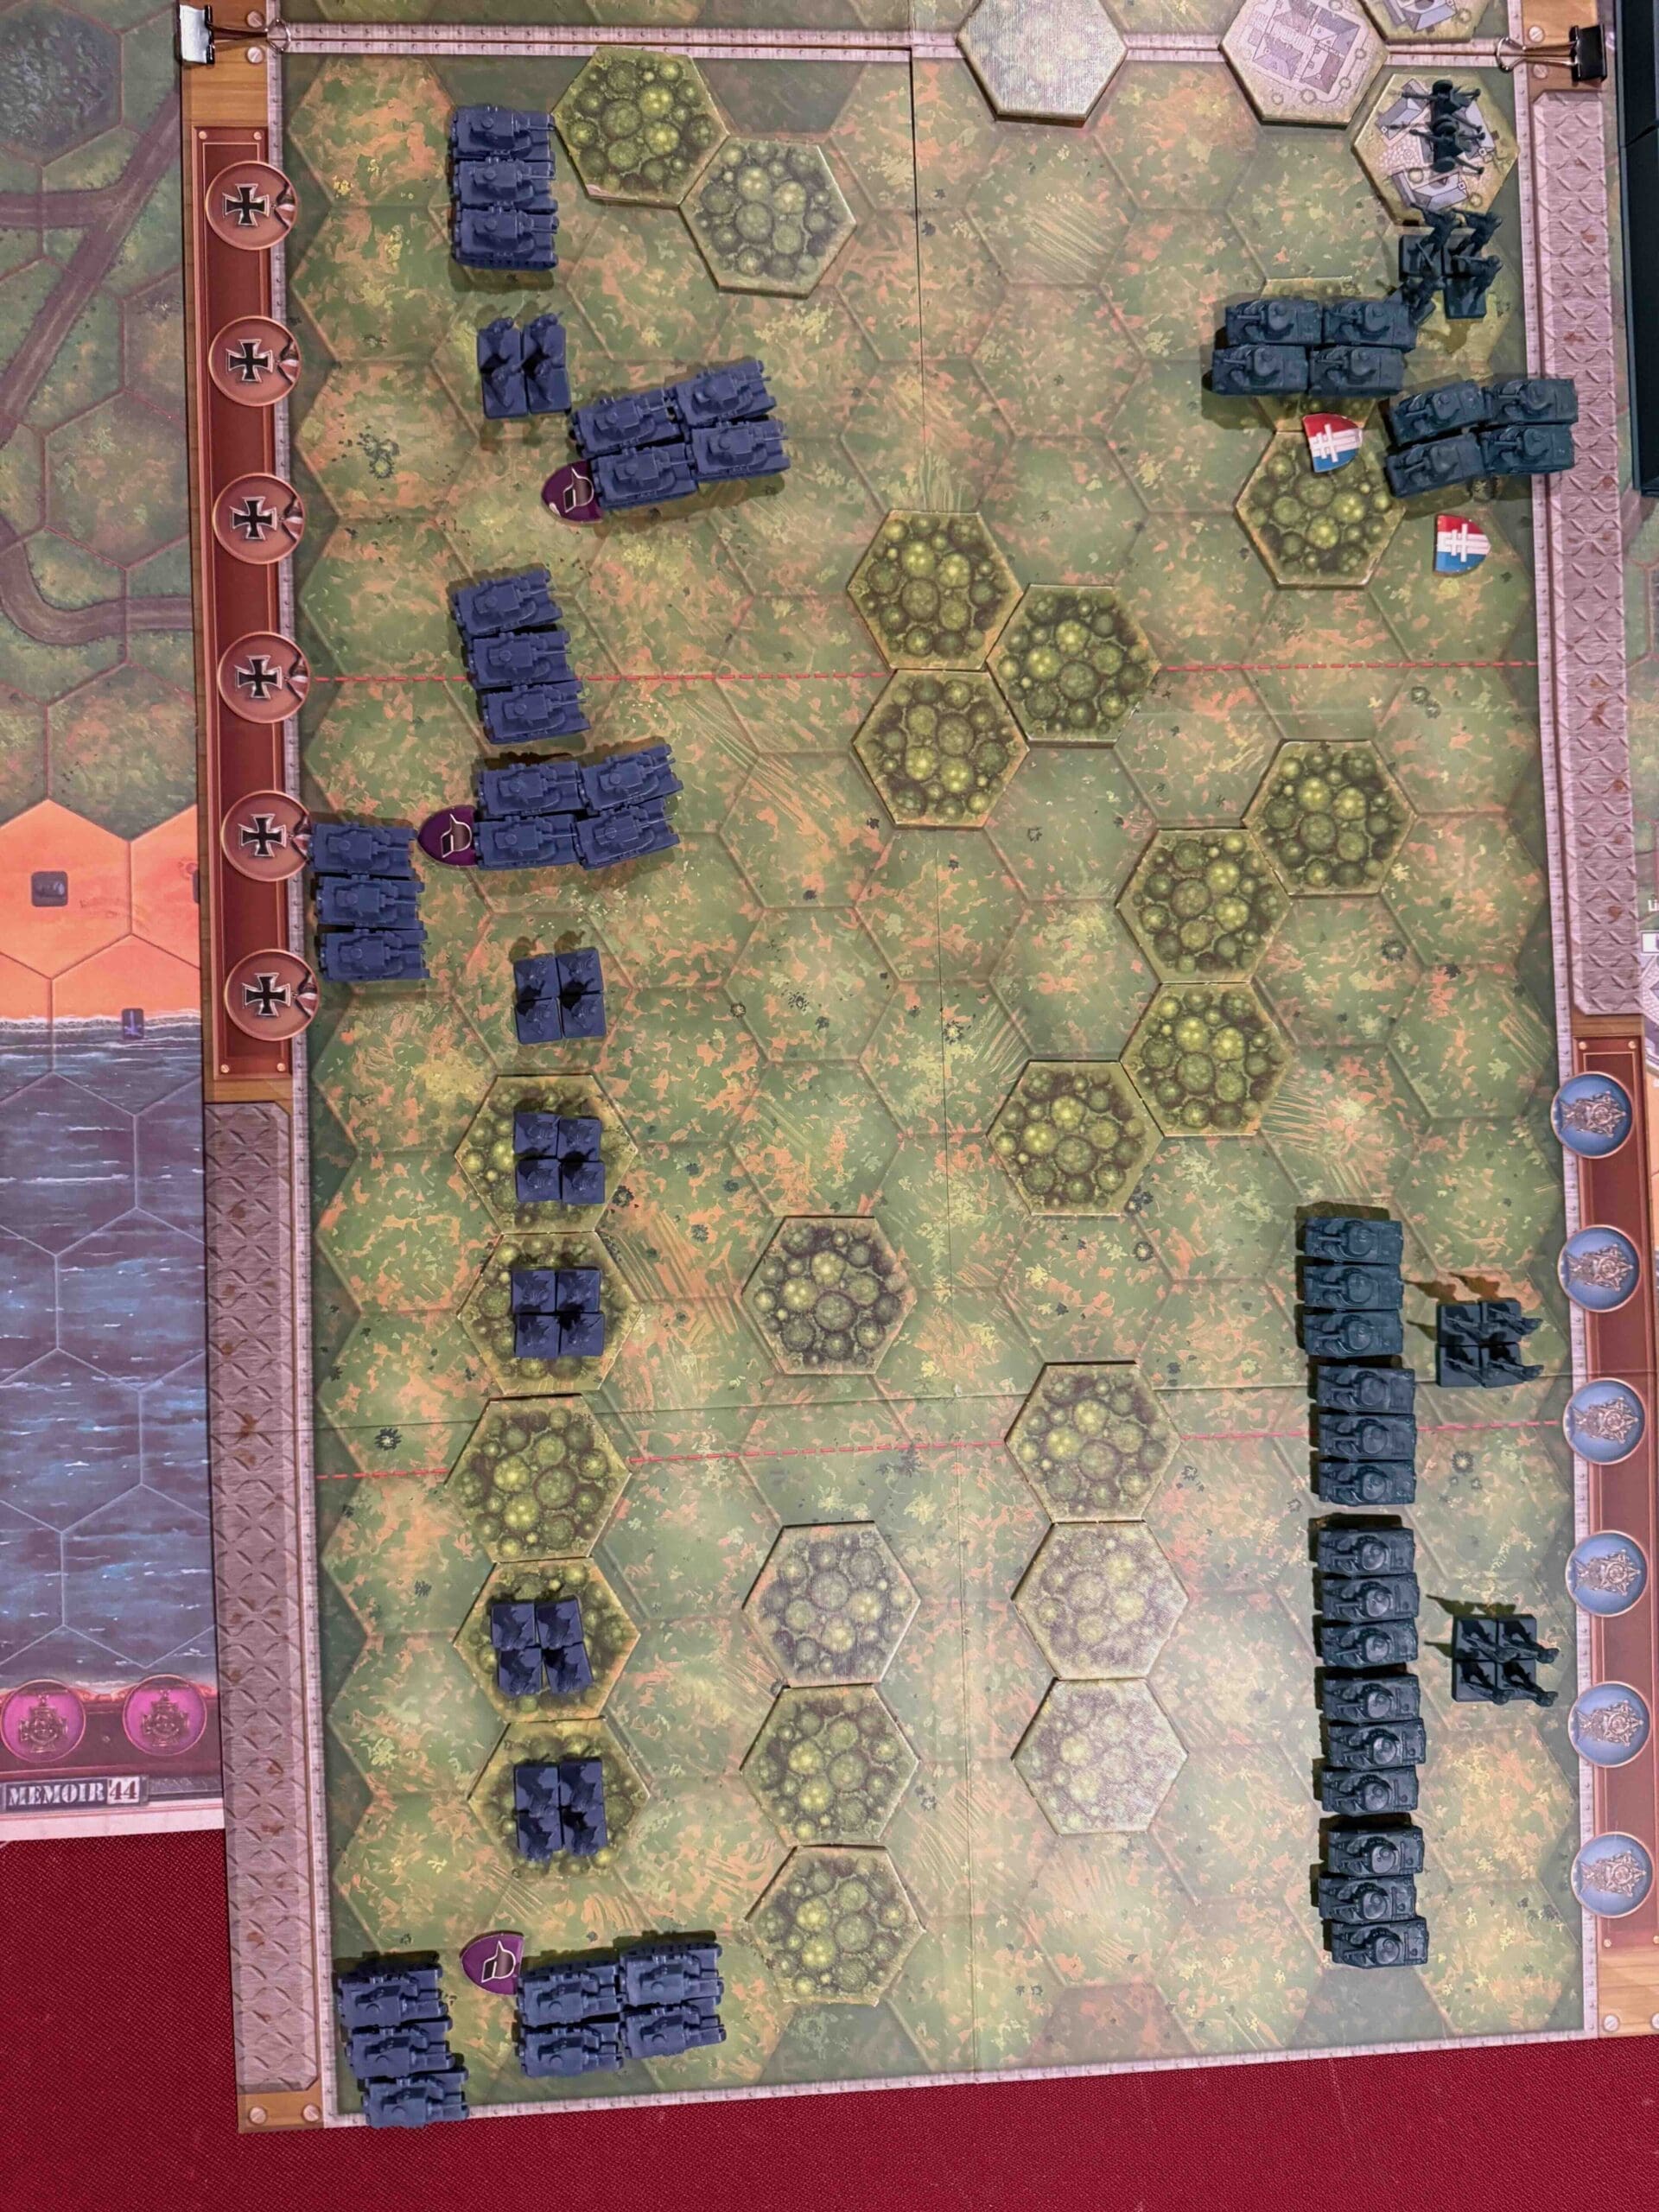
3. Your Armor units stuck in the right corner, need to come forward to be prepared for attack in that section.
STRATEGIC OVERVIEW
1. This is a 12 medal game so there is a lot of strategic placement which will pay dividends for you to win later on in the game.
2. So grab the forest and town hexes as quickly as possible, so that you can attack the enemy forces from a safe location. There are so many tanks in this scenario that if you leave any of your forces out in the open, they will get wiped out.
3. There are so many tank figures in this game that as many as 50 armor figures could get wiped out before the game is over.

🔥 Winning as Axis
1. The Axis have an attack vector on the right section. They can move their Infantry two hexes forward and capture the woods in the very center of the battlefield. Also, your Armor in the right need to be move forward quickly and placed into the forest hexes to be prepared to attack the enemy.
2. Get all of your Armor which is sitting out in the open in the center section into defensive positions, or they will be wiped out.
Battle Reports
Author:
Days of Wonder
Link: