Resistance on the Scheldt
Escaut - Schelde: Resistance on the Scheldt
May 1940—Belgium. The Ghent bridgehead’s gone, the line’s buckling, and the enemy’s coming fast. But those Belgian boys? They didn’t flinch. They stood tall along the Upper Scheldt, and by God, they fought like hell.
May 20th, the Germans tried to cross near Gavere and Oudenaarde, slipping through the Scheldt loop. But the 10th Belgian Infantry Division wasn’t having it. They hit back hard at Zingem, backed by dead-on artillery, and shoved the enemy right back across that river like yesterday’s garbage.
Meanwhile, the British Expeditionary Force was dug in south of Oudenaarde, watching the flank all the way to the French border. And when it came time to blow the bridges? They did it right—every span destroyed, nothing left for the Nazis to use. That’s how you do a withdrawal—scorched and smoking.
But the Germans weren’t done. After licking their wounds at Zingem, they regrouped behind the Koppenberg and came back swinging on May 21—infantry, Luftwaffe, and the river running low enough to wade. Despite a hell of a stand by the Brits, the Krauts got a foothold. That foothold became a push—toward the Lys, toward the coast, toward the final stand.
May 28, King Leopold III surrendered. Belgium was down—but not for lack of courage.
You want to talk guts? Talk Zingem. Talk the Scheldt. Talk men who held the line until the last minute. The field was set, the players were in position, and history came charging through the smoke.
~~ General Howitzer
6 VP’s
Card Balance:
Allies – 5
Axis – 6
Complexity:
3
Conditions:
Countryside
Context:
Historical
Location:
Belgium
Year:
1940
Theater:
Western
Campaign:
Codename:
Summary:
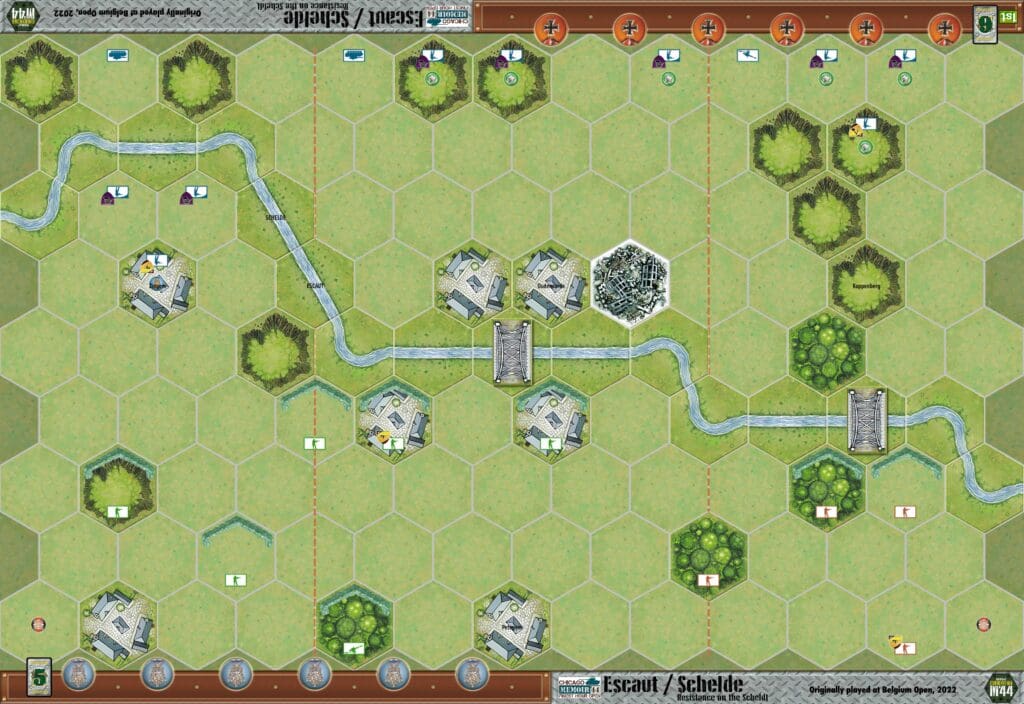
Objectives:
6 VP’s, plus Exit Rows for Axis; a town medal for Allies, and a Permanent Medal if the Allies blow up two bridges.
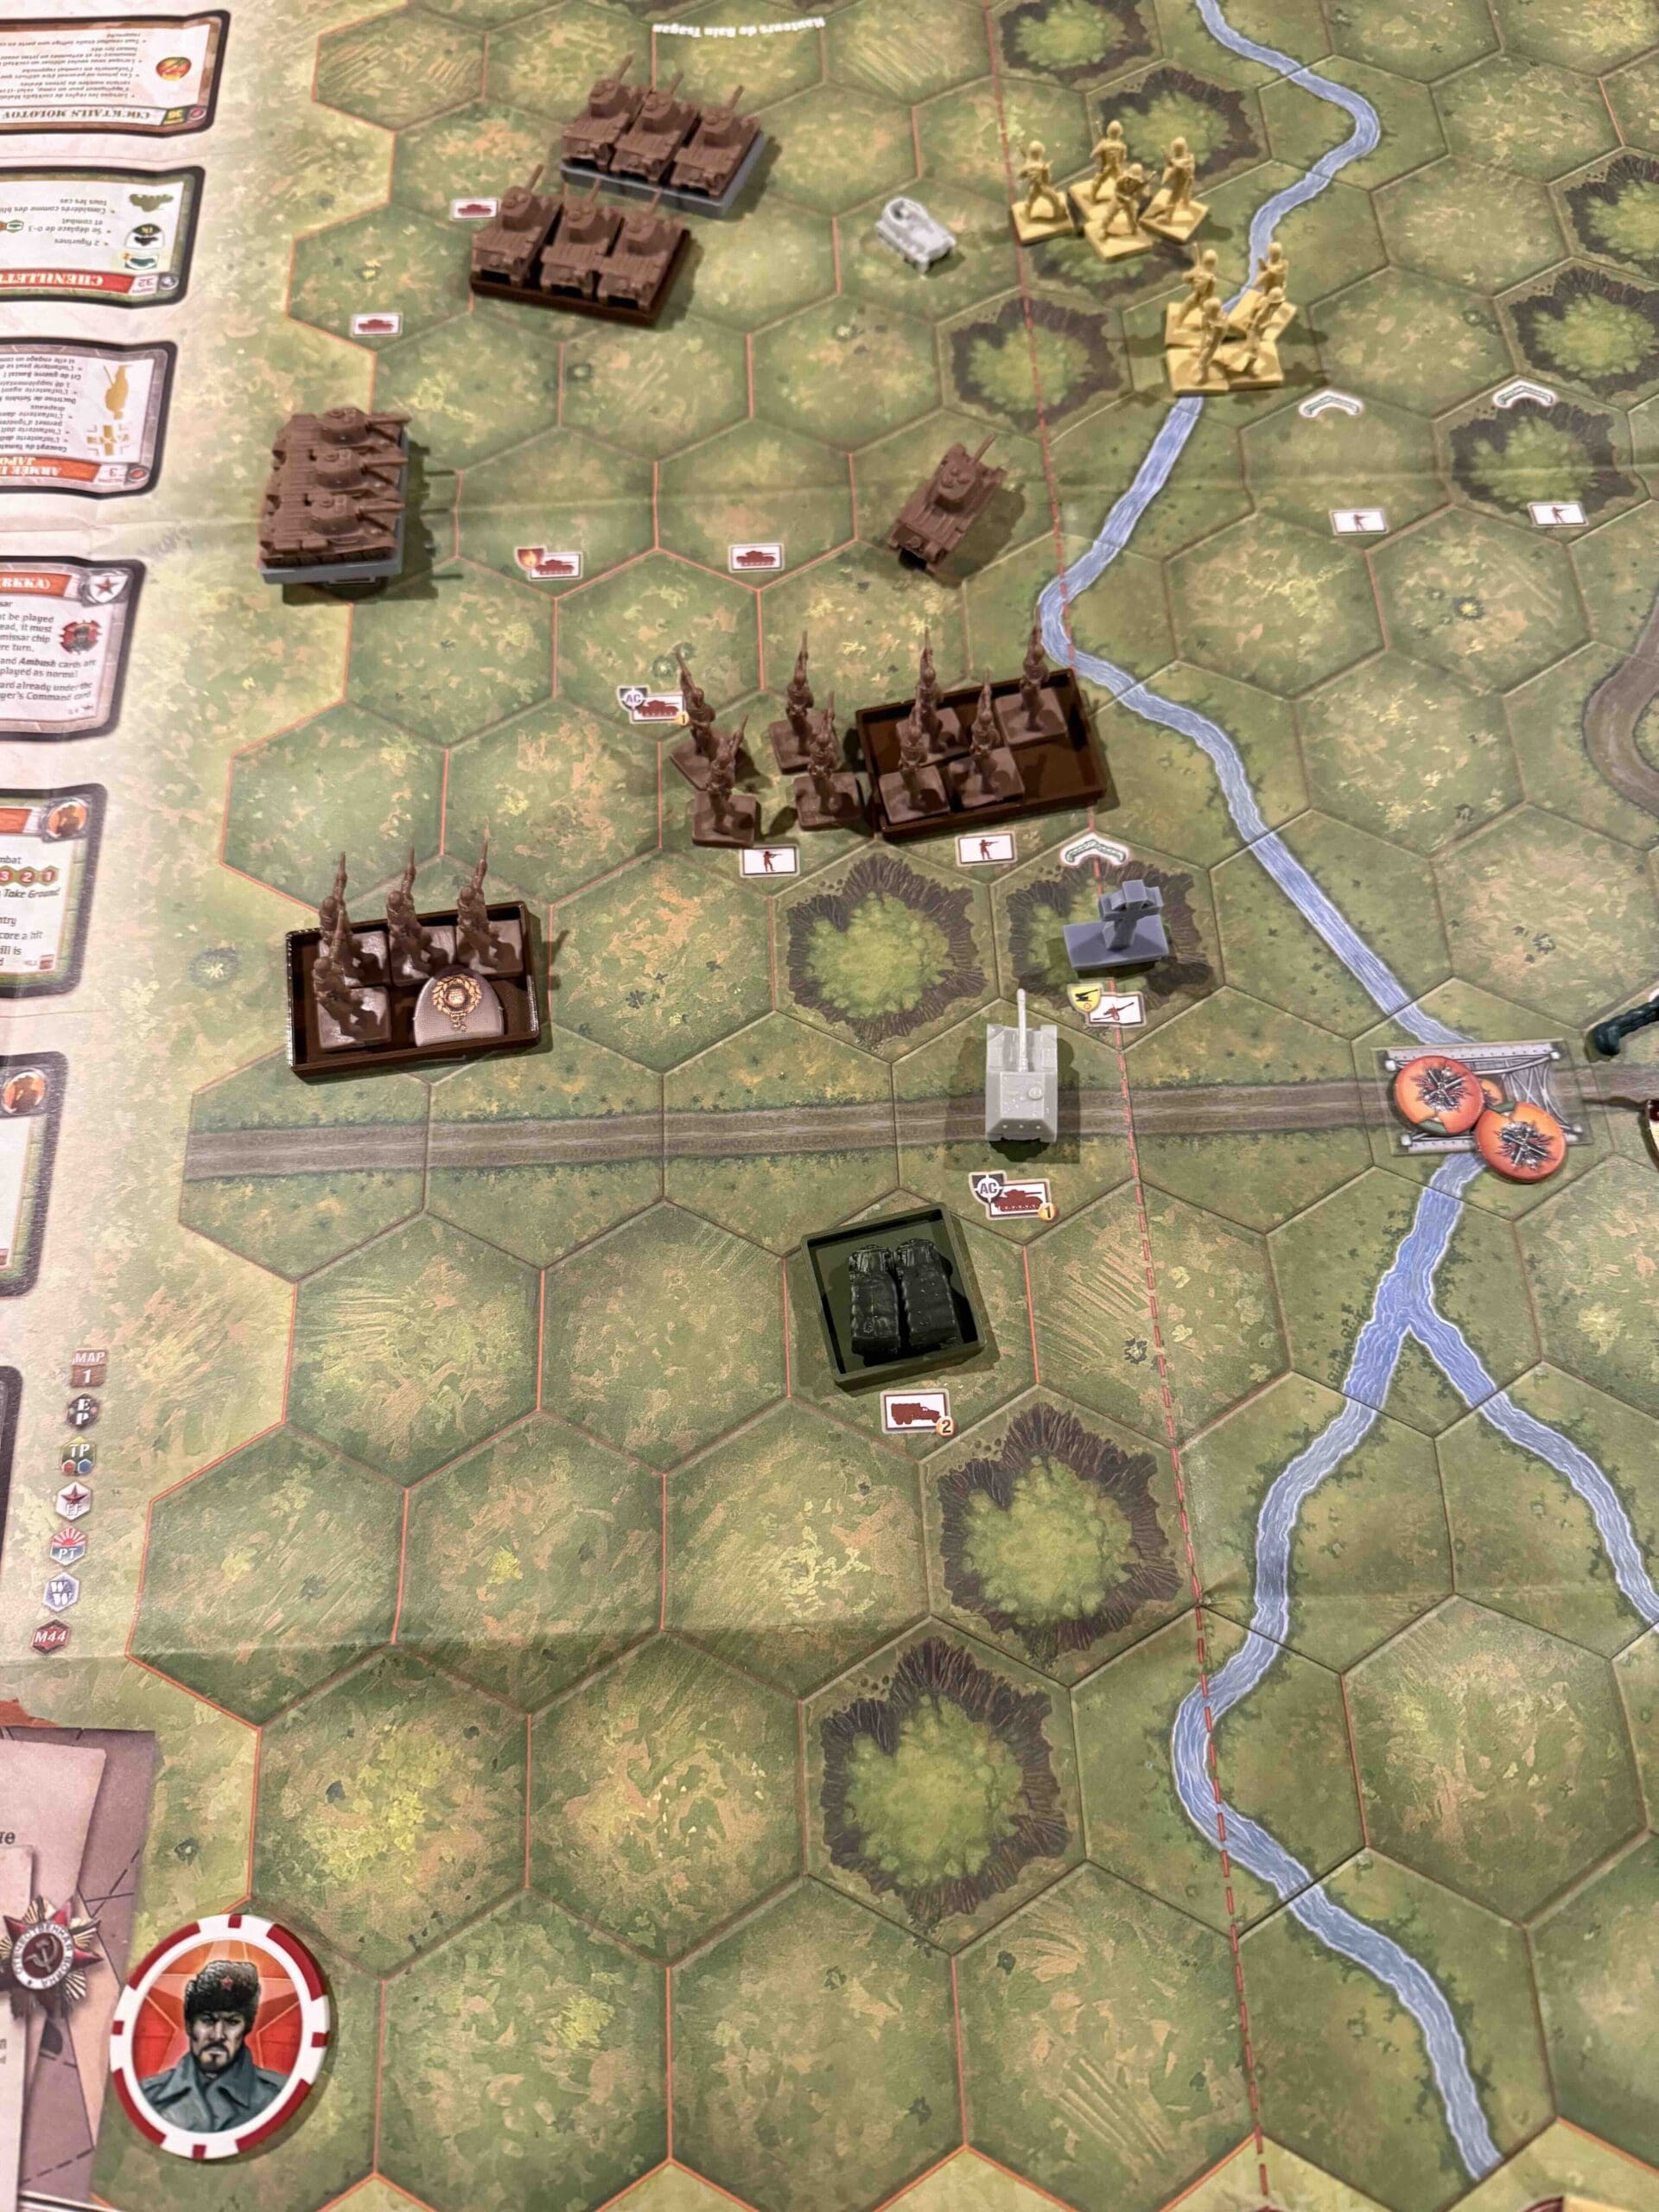
Battlefield:
Countryside with a river cutting across the field.
Troops:
Allies – 9 Infantry, some with machine guns, 1 Artillery
Axis – 9 Infantry, some with machine guns and mortars , 2 Armor, 1 Artillery
Allied Strategy:
1.
Axis Strategy
1.
Battle Reports
Author:
Originally prepared for Belgium 2022; also used in The Finest Hour Open, Chicago 2025
Link: