Mignano Monte Lungo
Mignano Monte Lungo

Listen up, men—
The Battle of Mignano Monte Lungo was a damn fine example of grit and redemption. After switching sides, the Italian troops had something to prove—and by God, they did it. That mountain was no cakewalk. The Germans were dug in deep, with every ridge covered by fire, and the terrain was as unforgiving as a mule kick to the gut.
But those Italians, with the Yanks watching, clawed their way up that blasted rock from December 8 to the 16th, 1943. Took casualties. Took hell. But they took the mountain too. That wasn’t just a hill—it was a message: Italy was back in the fight, and they were fighting on the right side this time.
Monte Lungo wasn’t just a tactical win. It was a morale sledgehammer. And it cracked open the road to Cassino. That’s how you turn the tide—with steel in your spine and fire in your gut.
~~ General Howitzer
6 VP’s
![]()
Card Balance:
Allies – 6
Axis – 5
Complexity:
3
Conditions:
Countryside

Context:
Historical
Location:
Italy
Year:
1943
Theater:
Western
Campaign:
The Italian Campaign
Codename
Summary:
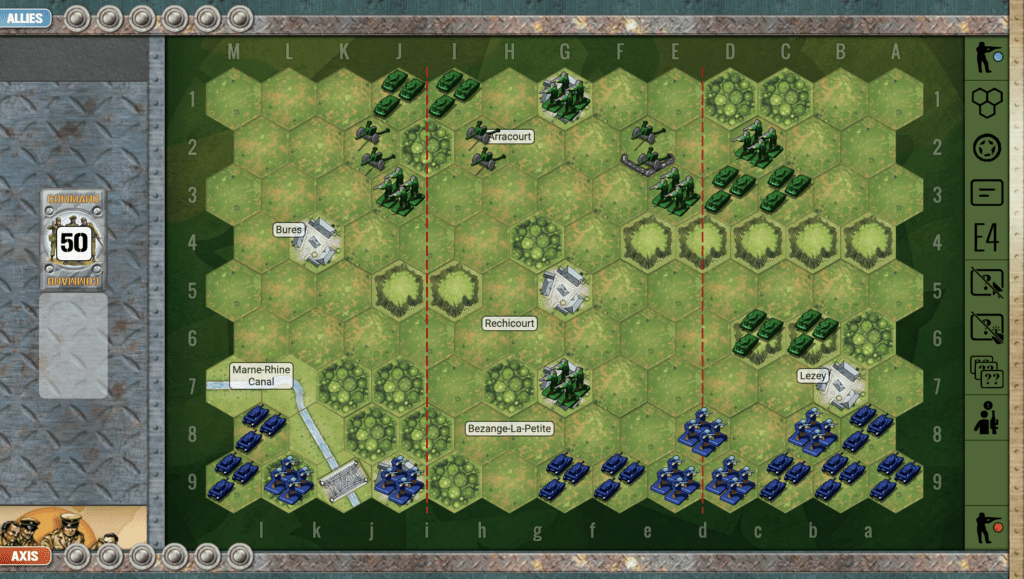
The Axis forces begin this scenario in control of the hexes across two-thirds of the battlefield, protecting two VP town hexes. The challenge for the Allies is to cross the open plain with out being decimated before they can control the hills and get to the VP’s.
Objectives:
6 VP’s, plus Monte Lungo and Monte Rotondo are temporary Medal Objectivese for the Allies.
Battlefield:
Troops:
Allies –
Axis –

🔥 Winning as Allies
1. Big Picture Strategy: the Axis forces have an Artillery guarding the left flank, and it’s objective medal. But there is an objective medal on the right flank. Head all of your forces in that direction.
2. If you can move your Artillery forward one row, you will be able to hit more of the enemy with 2D attacks.

🔥 Winning as Axis
1. Big Picture Strategy: Guard the Objective Medal on your left flank. If the enemy gets the right cards, they can very quickly come upon your forces and overwhelm them.
Battle Reports:
(percentage of Allied victories)
Author:
Days of Wonder
ID:
Link: