Operation Spring
Operation Spring
6 VP’s
![]()
Card Balance:
Allies – 5
Axis – 6
Complexity:
4
Conditions:
Countryside
Context:
Historical
Location:
France
Year:
1944
Theater:
Mediterranean
Campaign:
Battle of Normandy
Codename:
Operation Spring
Summary:
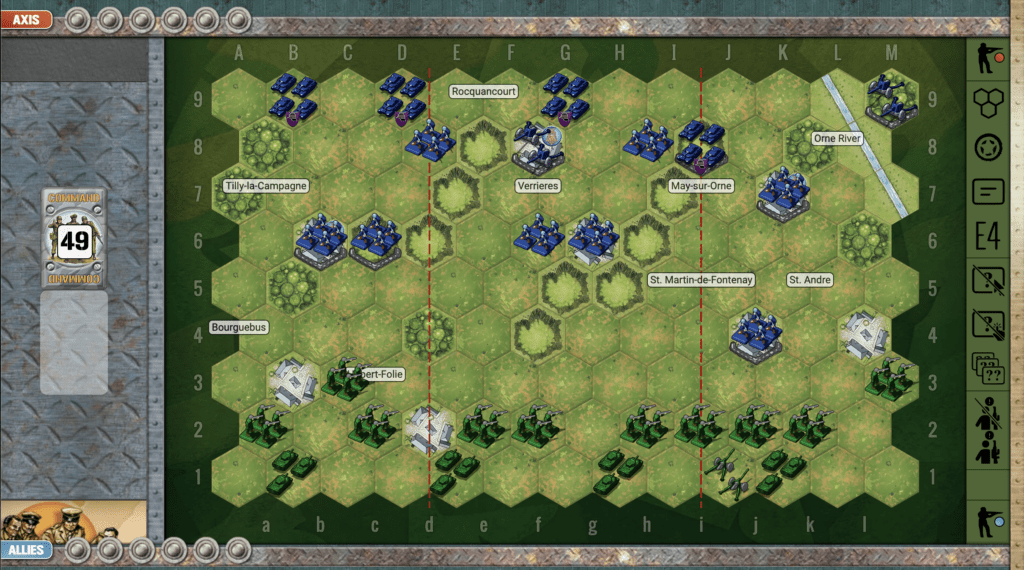
Objectives:
6 VP’s including territorial objectives for town captures
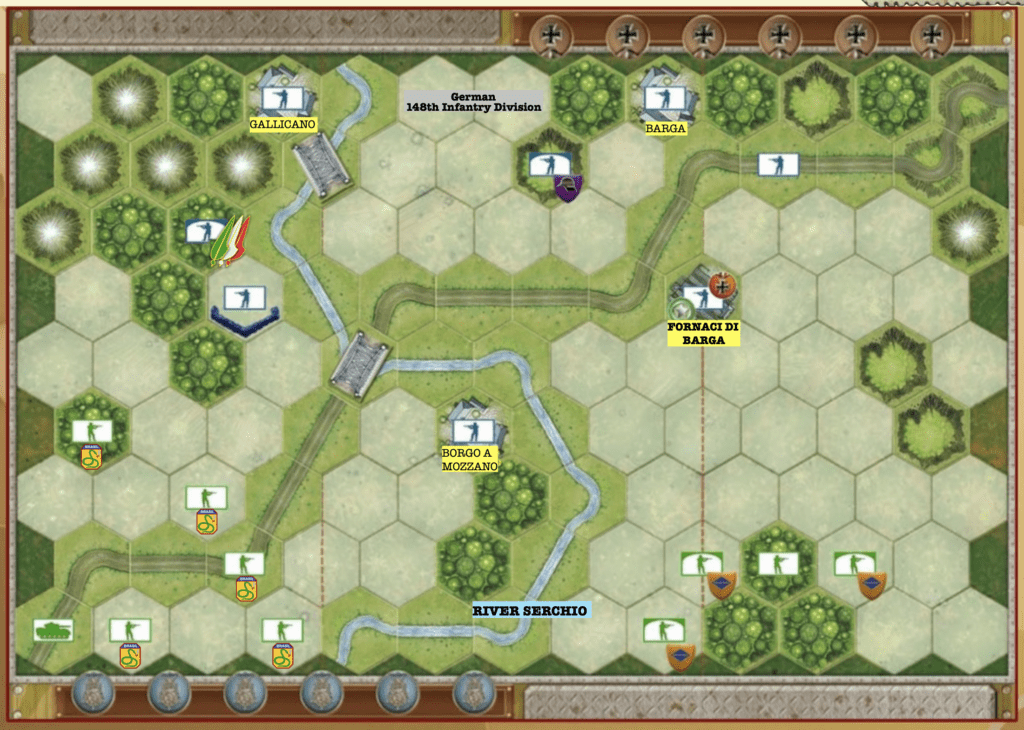
Terrain:
Countryside with a couple of hilly ridges angling across the central section.
Troops:
Allies – 10 Infantry, 4 Armor, 1 Artillery
Axis – 7 Infantry, 4 Armor, 2 Artillery

🔥 Winning as Allies
1. Your artillery in the right flank can control all the area around St. Andre. If you move it forward just one row towards the center, and position it between both sections, you will be in a better offensive position to control the right flank, but more importantly, can support the attack against the central hills with 2D rolls.
2. If you get the right set of cards, you can quickly gain the hilly advantage in the center section. From there you will be able to make things much for difficult for the Axis forces. But be aware that your plan must include an assault on the Allies central artillery, and medal objective.

🔥 Winning as Axis
1. Your trapped artilley behind the Orne River will only be basically useful for defensive purposes, should the enemy make a fool-hardy assault on that flank.
2. Your artillery in the town of Verriers will be the key to controlling the central section and eliminating any enemy forces that try to control the central hills.
3. One of the two armor on your right flank should be placed on the ridge in the central section as both a deterrant, and eventual attack function. The other can either defend against any attack towards the town of Tully-la-campaigne, or eventual move into the center to support that attack vector.
Author:
Link: