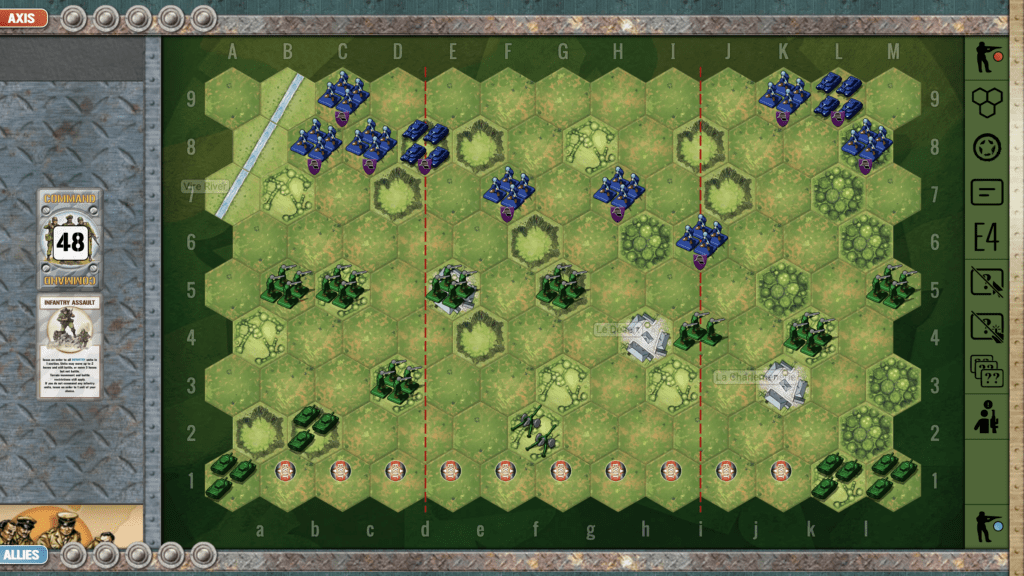
Martinville Ridge

Martinville Ridge
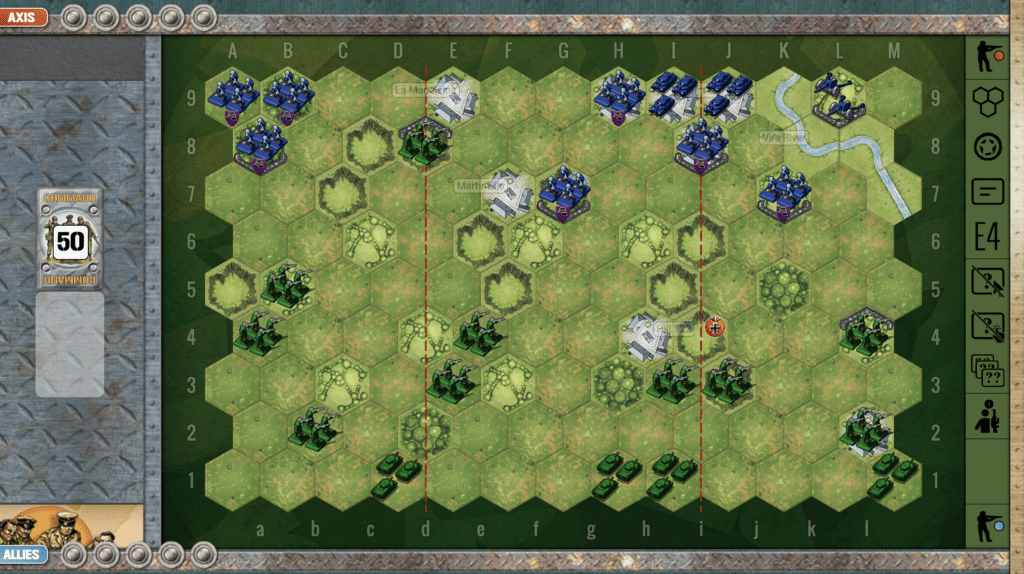
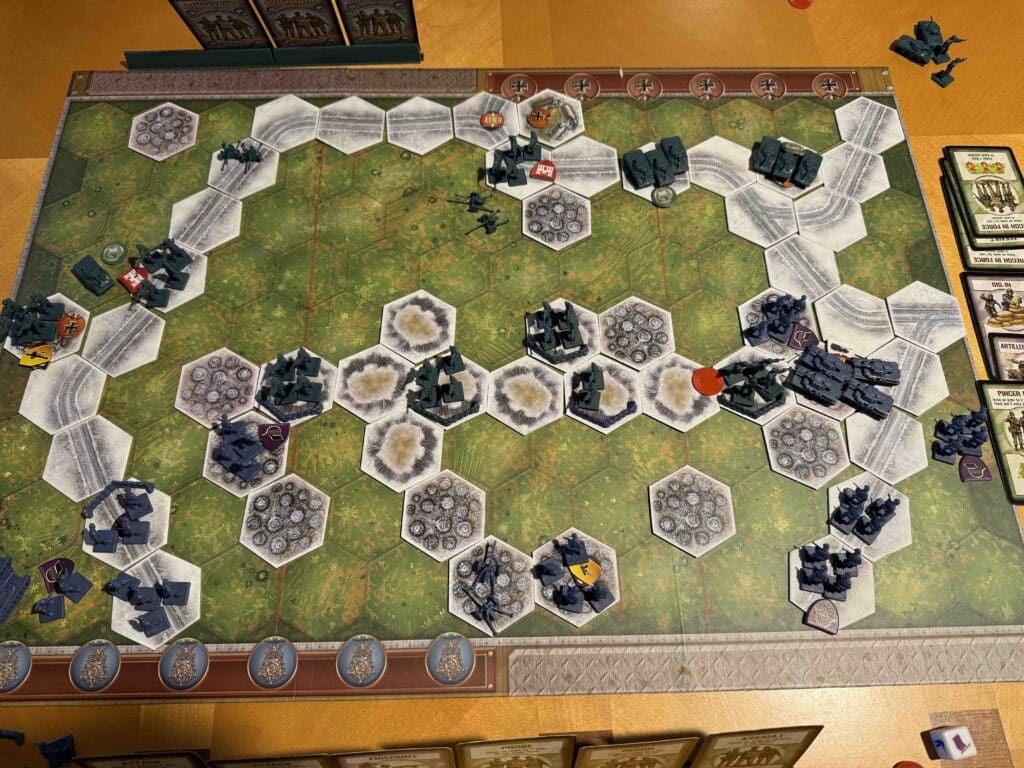
scenarios_MartinvilleRidge_start

“Listen here, men! The Battle of Martinville Ridge was a mean slugfest in July ‘44, right in the thick of the Normandy bocage. That damn hedgerow country turned every field into a fortress, and every ridge was a death trap. Our boys from the 35th Infantry Division went up that ridge with grit and guts, trying to crack those Nazi defenses wide open.

The Germans had the high ground and those thick hedgerows, making every inch of dirt a hellhole to fight for. We took the ridge at first—bayonets and grenades leading the way—but those Germans counterattacked like devils, forcing us to pull back and regroup. But I’ll tell you what: every drop of sweat and blood we left on that ridge kept the enemy tied up and bleeding too.

We didn’t take Martinville Ridge outright, but we sure as hell rattled the Germans’ cages and cleared the way for our breakout later in Cobra. That’s the price of victory, boys—no easy ground, no easy days. Keep pushing, keep killing, and never give ‘em an inch!

~~ General Howitzer

5 VP’s

card

Card Balance:

Allies – 5

Axis – 5

Complexity:

3

Conditions:

Countryside

countryside

Context:

Historical

Location:

France

Year:

1944

Theater:

Western Front

Campaign:

Normandy Campaign

Summary:

Objectives:

5 VP’s, plus territorial objectives for each side.

Allies can target St. Lo and the ridge by Martinville. Axis targets Hill 122. 

Terrain:

The battlefield is scattered with hills, towns, hedgerows, and forests.

Troops:

Allies – 10 Infantry, 4 Armor

Axis – 7 Infantry, 2 Armor, 1 Artillery


medal allies

Allied Strategy:

1.  Your forces are scattered and in disarray. You need to coordinate them into a cohesive attack force.

2.  Be aware that the enemy will quickly mass their forces for an attack against your forward infantry unit at d8.  If you can move your left flank Armor up to support it, you may be able to hold the position for a while and inflict some damage on the Axis.

3.  Beware the enemy Artillery in the corner of your right flank. Although he is locked in there, he can still roll powerful attacks on that flank.  Stay away and nullify any firepower from there.

4.  Your strategy should include plans for a continual push up the center in order to bring pressure to bear upon the two Medal Objectives on the hill and in the city of St. Lo.

5.  Possible Attack Vector: One attack plan you can pursue is on the left flank. You only need five medals to win, and there are three enemy units up in the corner.  If you get a good set of attack cards, such as Infantry Assault you can quickly surround them and take them out.

medal axis

Axis Strategy:

1.  Your forces are outnumbered, so you will need to get your armor out of the town into attack positions.  You also need to move your infantry from the corner on your right flank and into a more centralized position.  An early win for you can be the forward Allied Infantry unit at d8.

2.  You have two Territorial Medals to protect.  Be aware of the mobility range of their Armor should they push up the center. If you move your units off of those hexes, be certain the enemy cannot sneak in at the end and grab a final medal.

3.  The Allies have a Medal Objective waiting for you at ‘i4’ (Hill 122); just go get it! Your Armor, Artillery, and the two Infantry on the left section may be able to provide you with the means to reach it, with the right set of cards. 

45
BR - Martinville Ridge

Author:

Days of Wonder

Link:

Panzer Lehr Counter Attacks

Panzer Lehr Counter-Attacks

scenario_PanzerLehr_1

The Panzer Lehr Counterattacks occurred in July 1944 during the Normandy Campaign in World War II. The Panzer Lehr Division, an elite German armored unit, launched a series of counterattacks against advancing Allied forces, particularly around the town of Saint-Lô, in an effort to halt the Allies’ breakout from the beachheads.

Listen up, men—Panzer Lehr was no ragtag outfit. It was Germany’s pride: tanks gleaming, engines roaring, veterans in every seat. But when the hammer fell, all that iron and swagger met the full fury of Allied steel and sky. Our fighter-bombers tore them apart from above, our artillery shook the ground beneath them, and when the dust cleared, Lehr was bleeding oil and fire across the Norman fields.

Their counterattacks? Brave but doomed—crushed under the weight of Operation Cobra, the breakout that ripped open Hitler’s precious front and sent his armies reeling toward the Falaise trap. Panzer Lehr learned the hard way what happens when you stand in the path of an army that’s rolling for victory.

~~ General Howitzer

5 VP’s

card

Card Balance:

Allies – 6

Axis – 5

Complexity:

2

Conditions:

Countryside

Context:

Historical

Location:

France

Year:

1944

Theater:

Western Front

Campaign:

Normandy Campaign

Summary:

Objectives:

5 VP’s, plus the a exit row medals for the Axis

Terrain:

The battlefield is scattered with hills, towns, hedgerows, and forests.

Troops:

Allies – 8 Infantry, 4 Armor, 1 Artillery

Axis – 8 Infantry, 2 Armor


medal allies

Allied Strategy:

1.  You have an Armor superiority, but only if you get your armor that are stuck in the right corner, out into the action. It will take two turns to get them out and mobile.

2.  You have an Artillery in the center, protect it, and use it.

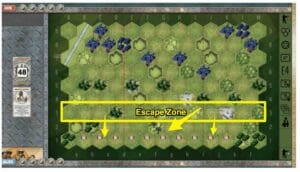
3.  The Axis forces have a massive row of Exit Hexes, which you need to defend. Do not allow their forces to get an incursion deep into your territory in any section. If any Armor makes it to row three, they can escape the next turn. 

4.  Make use of your defensive cover hexes, and defend against enemy advancements. 

medal axis

Axis Strategy:

1.  Big Picture strategy is that your forces begin in disarray.  You need to consolidate your forces, and coordinate your efforts.  The Allies begin with control of two-thirds of the battlefield. They are protected by hedgerows, towns, and hills.  You will need to develop a strategy to attack those units one by one with concentrated firepower until each one is eliminated.

2.  Because there are a row of exit hexes which can provide additional medals for you,  you should continue a relentless push deep into the enemy territory.  If you can bring in your flank forces toward the center, it will make your forces unstoppable.

Memoir 44 Scenario

20
BR - Panzer Lehr

Author:

Days of Wonder

Link:

Payback! – Operation Bagration, Phase 1

Payback! - Operation Bagration, Phase 1

Scenario_Toulon_start_Allies

Exactly 4 years after the Nazi invasion of the Soviet Union, the Russians were now ready to pay back the Germans in kind! The Allies had finally landed in France and the German forces were stretched thin. Moreover, an elaborate campaign of deception had the Germans convinced the Russian Summer Offensive would be launched further to the South in Ukraine. Therefore, Army Group Center had been stripped of much of its armour and artillery. The main objective of the offensive was to liberate Belorussia and its capital Minsk. The success was to prove so enormous, however, that by the end of Operation Bagration the Soviets found themselves at the gates of Warsaw and the shores of the Baltic. German Army Group Center, which three years earlier, had come so close to capturing Moscow, had ceased to exist. Will you be able to duplicate this success as the Russian player or will you be able to slow them down and thereby save a substantial number of German troops, playing the Germans? The battle lines are drawn, you are in command and the rest is history!

36 VP’s (!)

card

Card Balance:

Allies –

  • Allied player [ Soviet Union ]
  • 6 Command cards for each Breakthrough board
  • You move first.

Axis –

  • Axis player [ Germany ]
  • Start with 3 Command cards for each Breakthrough board
  • Draw 2 cards each turn until you have 5 for each Breakthrough board

Complexity:

5

Conditions:

Countryside

countryside

Context:

Historical

Location:

Year:

1944

Theater:

Eastern Front

Campaign:

Codename:

Operation Bagration

Summary:

Objectives:

36 VP’s, plus many other conditions. Read the PDF special rules.

Terrain:

Countryside with rivers and roads 

Troops:  (check the PDF for specific the specific troop deployments) 

medal allies

Allied Strategy:

1.  

medal axis

Axis Strategy

1. 

0
BR - Payback

Author:

Willem Boersma

Complete Scenario Link:

https://generalhowitzer.com/62ne

Operation Spring

Operation Spring

scenario_OperationSpring_start


Operation Spring was  launched on July 25-27, 1944, during the Battle of Normandy. The operation aimed to capture key positions south of Caen, France, and support the larger Allied offensive, including Operation Cobra by the Americans.

  • The 2nd Canadian Infantry Division, supported by tanks from the 2nd Canadian Armoured Brigade, led the assault.
  • Their objectives included capturing key villages like Verrières Ridge, May-sur-Orne, and Tilly-la-Campagne, vital for controlling the high ground.
  • The Canadians faced well-entrenched German forces, including elements of the 12th SS Panzer Division and the 1st SS Panzer Division (Leibstandarte Adolf Hitler).
  • Heavy resistance, powerful defensive fire, and poor visibility caused high casualties.
  • The operation failed to achieve its primary objectives, though it diverted German forces from other fronts.
  • Canadian forces suffered over 1,500 casualties, marking one of their most costly engagements in Normandy.

Here are General Howitzer’s comments on the battle:

“Listen up! Operation Spring kicked off on July 25th, 1944. It was the Canadians’ job to take the high ground south of Caen, hit those German defenses, and give the Americans in Operation Cobra a clear path to move out.

Even though they didn’t take everything they wanted, they tied down those German divisions and gave the Allies the breathing room to keep pushing. That’s how you fight, boys—you go where you’re needed, you hit the enemy hard, and you keep the pressure on, no matter the cost!

6 VP’s

Card Balance:

Allies – 5

Axis – 6

Complexity:

4

Conditions:

Countryside

Context:

Historical

Location:

France

Year:

1944

Theater:

Mediterranean

Campaign:

Battle of Normandy

Codename:

Operation Spring

Summary:

Objectives:

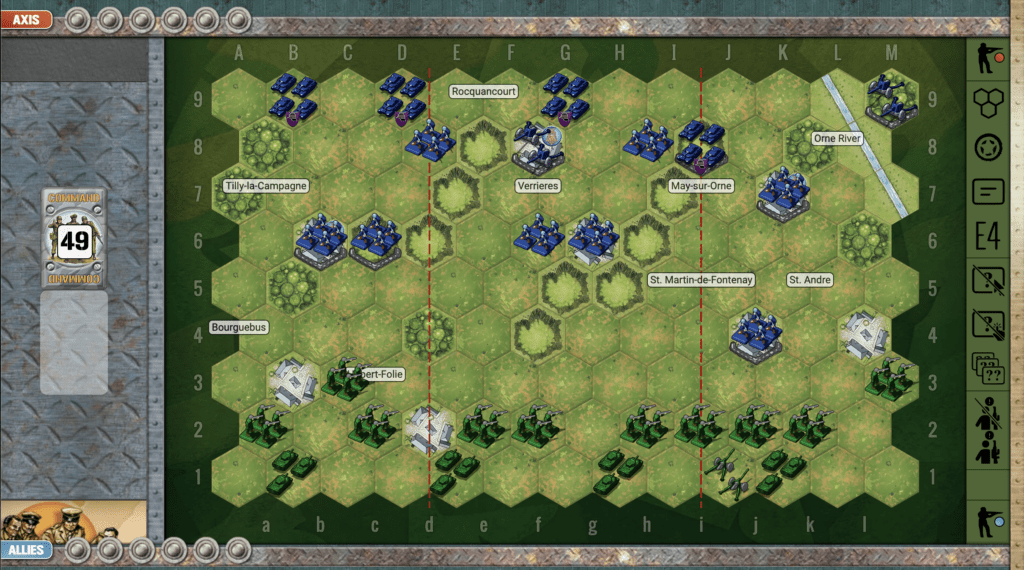
6 VP’s including territorial objectives for town captures

Terrain:

Countryside with a couple of hilly ridges angling across the central section.

Troops:

Allies – 10 Infantry, 4 Armor, 1 Artillery

Axis –  7 Infantry, 4 Armor, 2 Artillery


medal allies

Allied Strategy:

1.  Your artillery in the right flank can control all the area around St. Andre.  If you move it forward just one row towards the center, and position it between both sections, you will be in a better offensive position to control the right flank, but more importantly, can support the attack against the central hills with 2D rolls.

2. If you get the right set of cards, you can quickly gain the hilly advantage in the center section. From there you will be able to make things much for difficult for the Axis forces. But be aware that your plan must include an assault on the Allies central artillery, and medal objective. 

medal axis

Axis Strategy:

1.  Your trapped artilley behind the Orne River will only be basically useful for defensive purposes, should the enemy make a fool-hardy assault on that flank.

2.  Your artillery in the town of Verriers will be the key to controlling the central section and eliminating any enemy forces that try to control the central hills.

3.  One of the two armor on your right flank should be placed on the ridge in the central section as both a deterrant, and eventual attack function.  The other can either defend against any attack towards the town of Tully-la-campaigne, or eventual move into the center to support that attack vector.

23
BR - Operation Spring

Author:

Link:

Battle Of Tannenburg Line (BT,EF,TP)

Battle Of Tannenburg Line (BT,EF,TP)

map

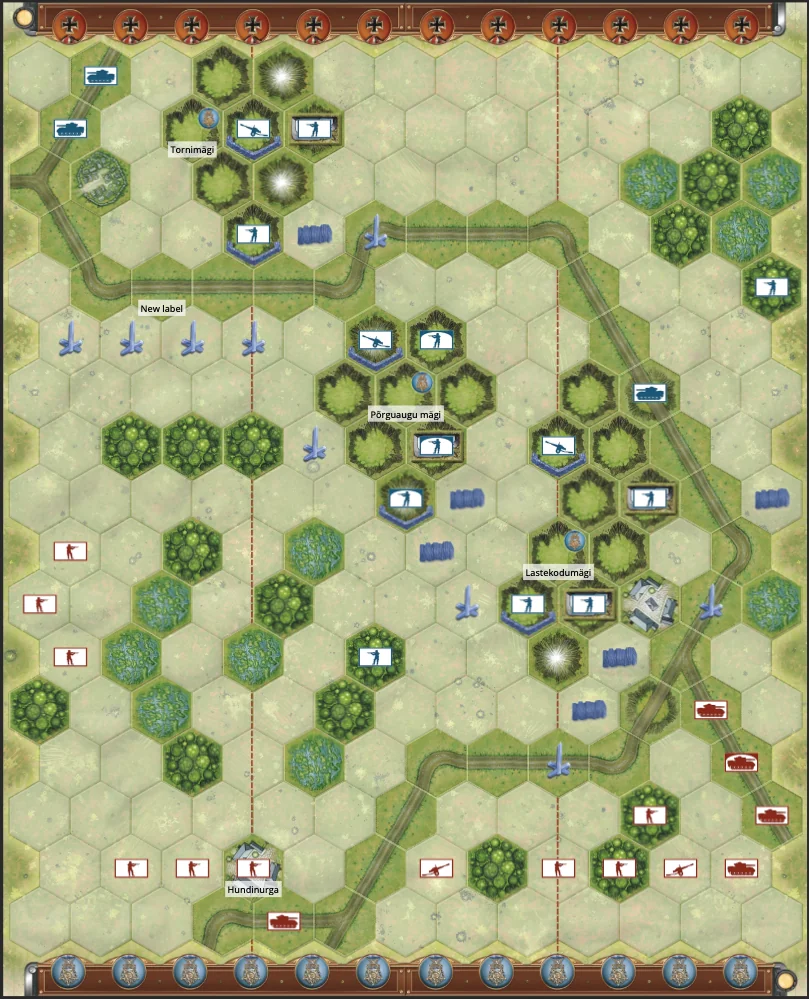
By the summer of 1944, the Soviet Red Army was on the offensive, pushing westward toward the Baltic Sea in a bid to crush the German Army Group North. One of the most critical defensive positions for the Germans lay in northeastern Estonia, on the Tannenberg Line. This line was anchored by the Sinimäed Hills — a series of three steep elevations known as Lastekodumägi, (Children’s Home Hill), Põrguaugu (Hell’s Hole), and Tornimägi (Tower Hill). These hills provided a natural defensive barrier, and the Germans had heavily fortified them with bunkers, trenches, and artillery positions.


Facing them was the Soviet Leningrad Front, under the command of Marshal Leonid Govorov, tasked with breaking through the Tannenberg Line and opening the path to the Baltic Sea. Soviet forces included powerful infantry, armor, and artillery units, determined to seize the high ground. However, the rugged terrain and Axis fortifications posed a formidable challenge. Swamps, forests, and anti-tank obstacles complicated the Soviet advance, making coordinated assaults difficult. The German defenders, led by General Johannes Frießner, included regular Wehrmacht units and elite Estonian Waffen-SS forces, fighting tenaciously to hold their positions on the Sinimäed Hills. These defensive positions offered a clear advantage, giving the Axis the ability to rain down fire on Soviet units struggling to traverse the open ground and difficult terrain below.


The Soviet assault began on July 25, 1944, with fierce fighting erupting on the hills. Over the course of the battle, Soviet forces launched wave after wave of attacks, while the Axis defenders, outnumbered but well-entrenched, fiercely resisted.

The stage is set, the battle lines are drawn, and you are in command. The rest is history.

12 VP’s

Card Balance:

Allies – 5

Axis – 6

Complexity:

4

Conditions:

Countryside

Context:

Historical

Location:

Estonia

Year:

1944

Theater:

Eastern Front

Summary:

Objectives:

12 VP’s, including some territorial objectives:

Lastekodumägi, Põrguaugu mägi and Tornimägi are Permanent Medal Objectives for the Allied forces.

Terrain:

Includes a series of three steep elevations known as Lastekodumägi, (Children’s Home Hill), Põrguaugu (Hell’s Hole), and Tornimägi (Tower Hill). These hills provided a natural defensive barrier, and the Germans had heavily fortified them with bunkers, trenches, and artillery positions.

Troops:

Allies – 9 Infantry, 5 Armor, 2 Artillery

Axis – 10 Infantry, 3 Armor, 3 Artillery

Special Rules:

Russian command rules are in effect


Allied Strategy:

Axis Strategy

1
BR - Tannenburg Line

Author:

raikster

Battle in the Schnee Eifel

Battle in the Schnee Eifel

Schnee_WholeBoard
The Battle of Schnee Eifel occurred in December 1944 during the early days of the Battle of the Bulge, the last major German offensive on the Western Front in WWII.

The Schnee Eifel, a forested ridge in eastern Belgium, was held by U.S. forces, mainly the 106th Infantry Division. On December 16, 1944, German forces launched a surprise attack, encircling and overwhelming two regiments of the 106th. After intense fighting and lacking supplies, around 6,000 American soldiers were forced to surrender—one of the largest mass surrenders of U.S. troops in the war.

The loss was a setback for the Allies but did not stop their eventual counteroffensive and victory in the Ardennes.

6 VP’s

Card Balance:

Allies – 4

Axis – 6

Complexity:

4

Conditions:

Winter

winter

Context:

Historical

Location:

Belgium

Year:

1944

Theater:

Western

Campaign:

Battle of the Bulge

 Summary:

Objectives:

6 VP’s, plus three Permanent Medal Objectives for the Axis (Turn Start) for Roth by Prum, Auw by Prum and Pleialf), plus a Sudden Death Exit hex for the Axis

Battlefield:

Winter countryside with a hilly ridge across the center, with scattered forests, and a road encircling almost the entire battlefield.

Troops:

Allies – 8 Infantry including two Engineers, 3 Armor (Tank Destroyers), 2 Artillery

Axis – 9 Infantry including one Machine Gun unit and five Elites,  2 Armor, including one Tank Destroyer, 1 Artillery

Special Weapons:  Tank Destroyers, Machine Guns.


medal allies

Allied Strategy:

1. Historically, the Allies got routed, so the primary goal here is to protect the permanent medal objectives and the exit hex. 

2.  Get your two Artillery into play quickly and use them as much as you can to take out the enemy.  

3.  Your two Tank Destroyers on the left flank should move forward, in and around to defend the city of Roth by Prum, which is a Permanent Medal Objective.

4.  Your other Tank Destroyer and two Artillery should defend the city of Blelaif, which is another Permanent Medal Objective.

medal axis

Axis Strategy

1. Historically, the Axis had the largest victory of the war in this battle, so speed and attack are your principle tools.

2.  Get your Tank Destroyer and Infantry on the right flank mobile and engaging the enemy as soon as you can.

3.  On your left flank, you have overwhelming advantage with your four Infantry units, and one Armor.  Use it to overwhelm the defenses at the town of Blelaif to gain the Permanent Medal Objective.

2
BR - Schnee Eifel

Author:

Days of Wonder

Armor_Infantry_Prisoners