Payagyi Burma

Payagyi Burma

Payagyi-Burma

The Battle of Payagyi occurred in early March 1942 during the Burma Campaign of World War II. British forces, specifically ‘B’ Squadron of the 7th Queen’s Own Hussars, engaged Japanese troops near the village of Payagyi, north of Pegu. The British operated American-made M3 Stuart light tanks, while the Japanese fielded Type 95 Ha-Go light tanks.

Upon arrival, the British encountered Japanese forces already present in the village. Despite poor visibility and challenging radio communications, the British launched an attack. In the ensuing combat, they destroyed two Type 95 tanks, disabled two more, and captured four Japanese anti-tank guns. However, the British also suffered losses, including the disabling of a Stuart tank by enemy fire.

The Battle of Payagyi exemplifies the intense and fluid nature of the early stages of the Burma Campaign, highlighting the challenges faced by Allied forces in the face of the Japanese advance.

6 VP’s

Card Balance:

Allies – 6 + 2 Combat Cards

Axis – 4  + 2 Combat Cards

Complexity:

3

Conditions:

Jungle

Context:

Historical

Location:

Burma

Year:

1942

Theater:

Pacific

Campaign:

Burma Campaign

Codename:

Summary:

Objectives:

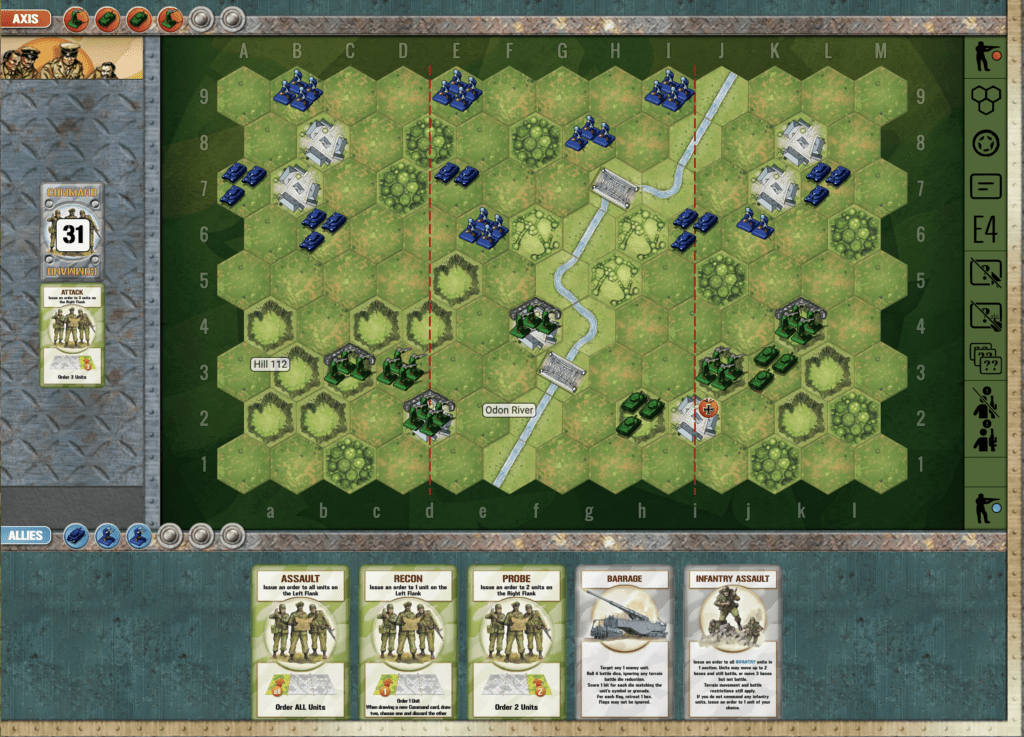
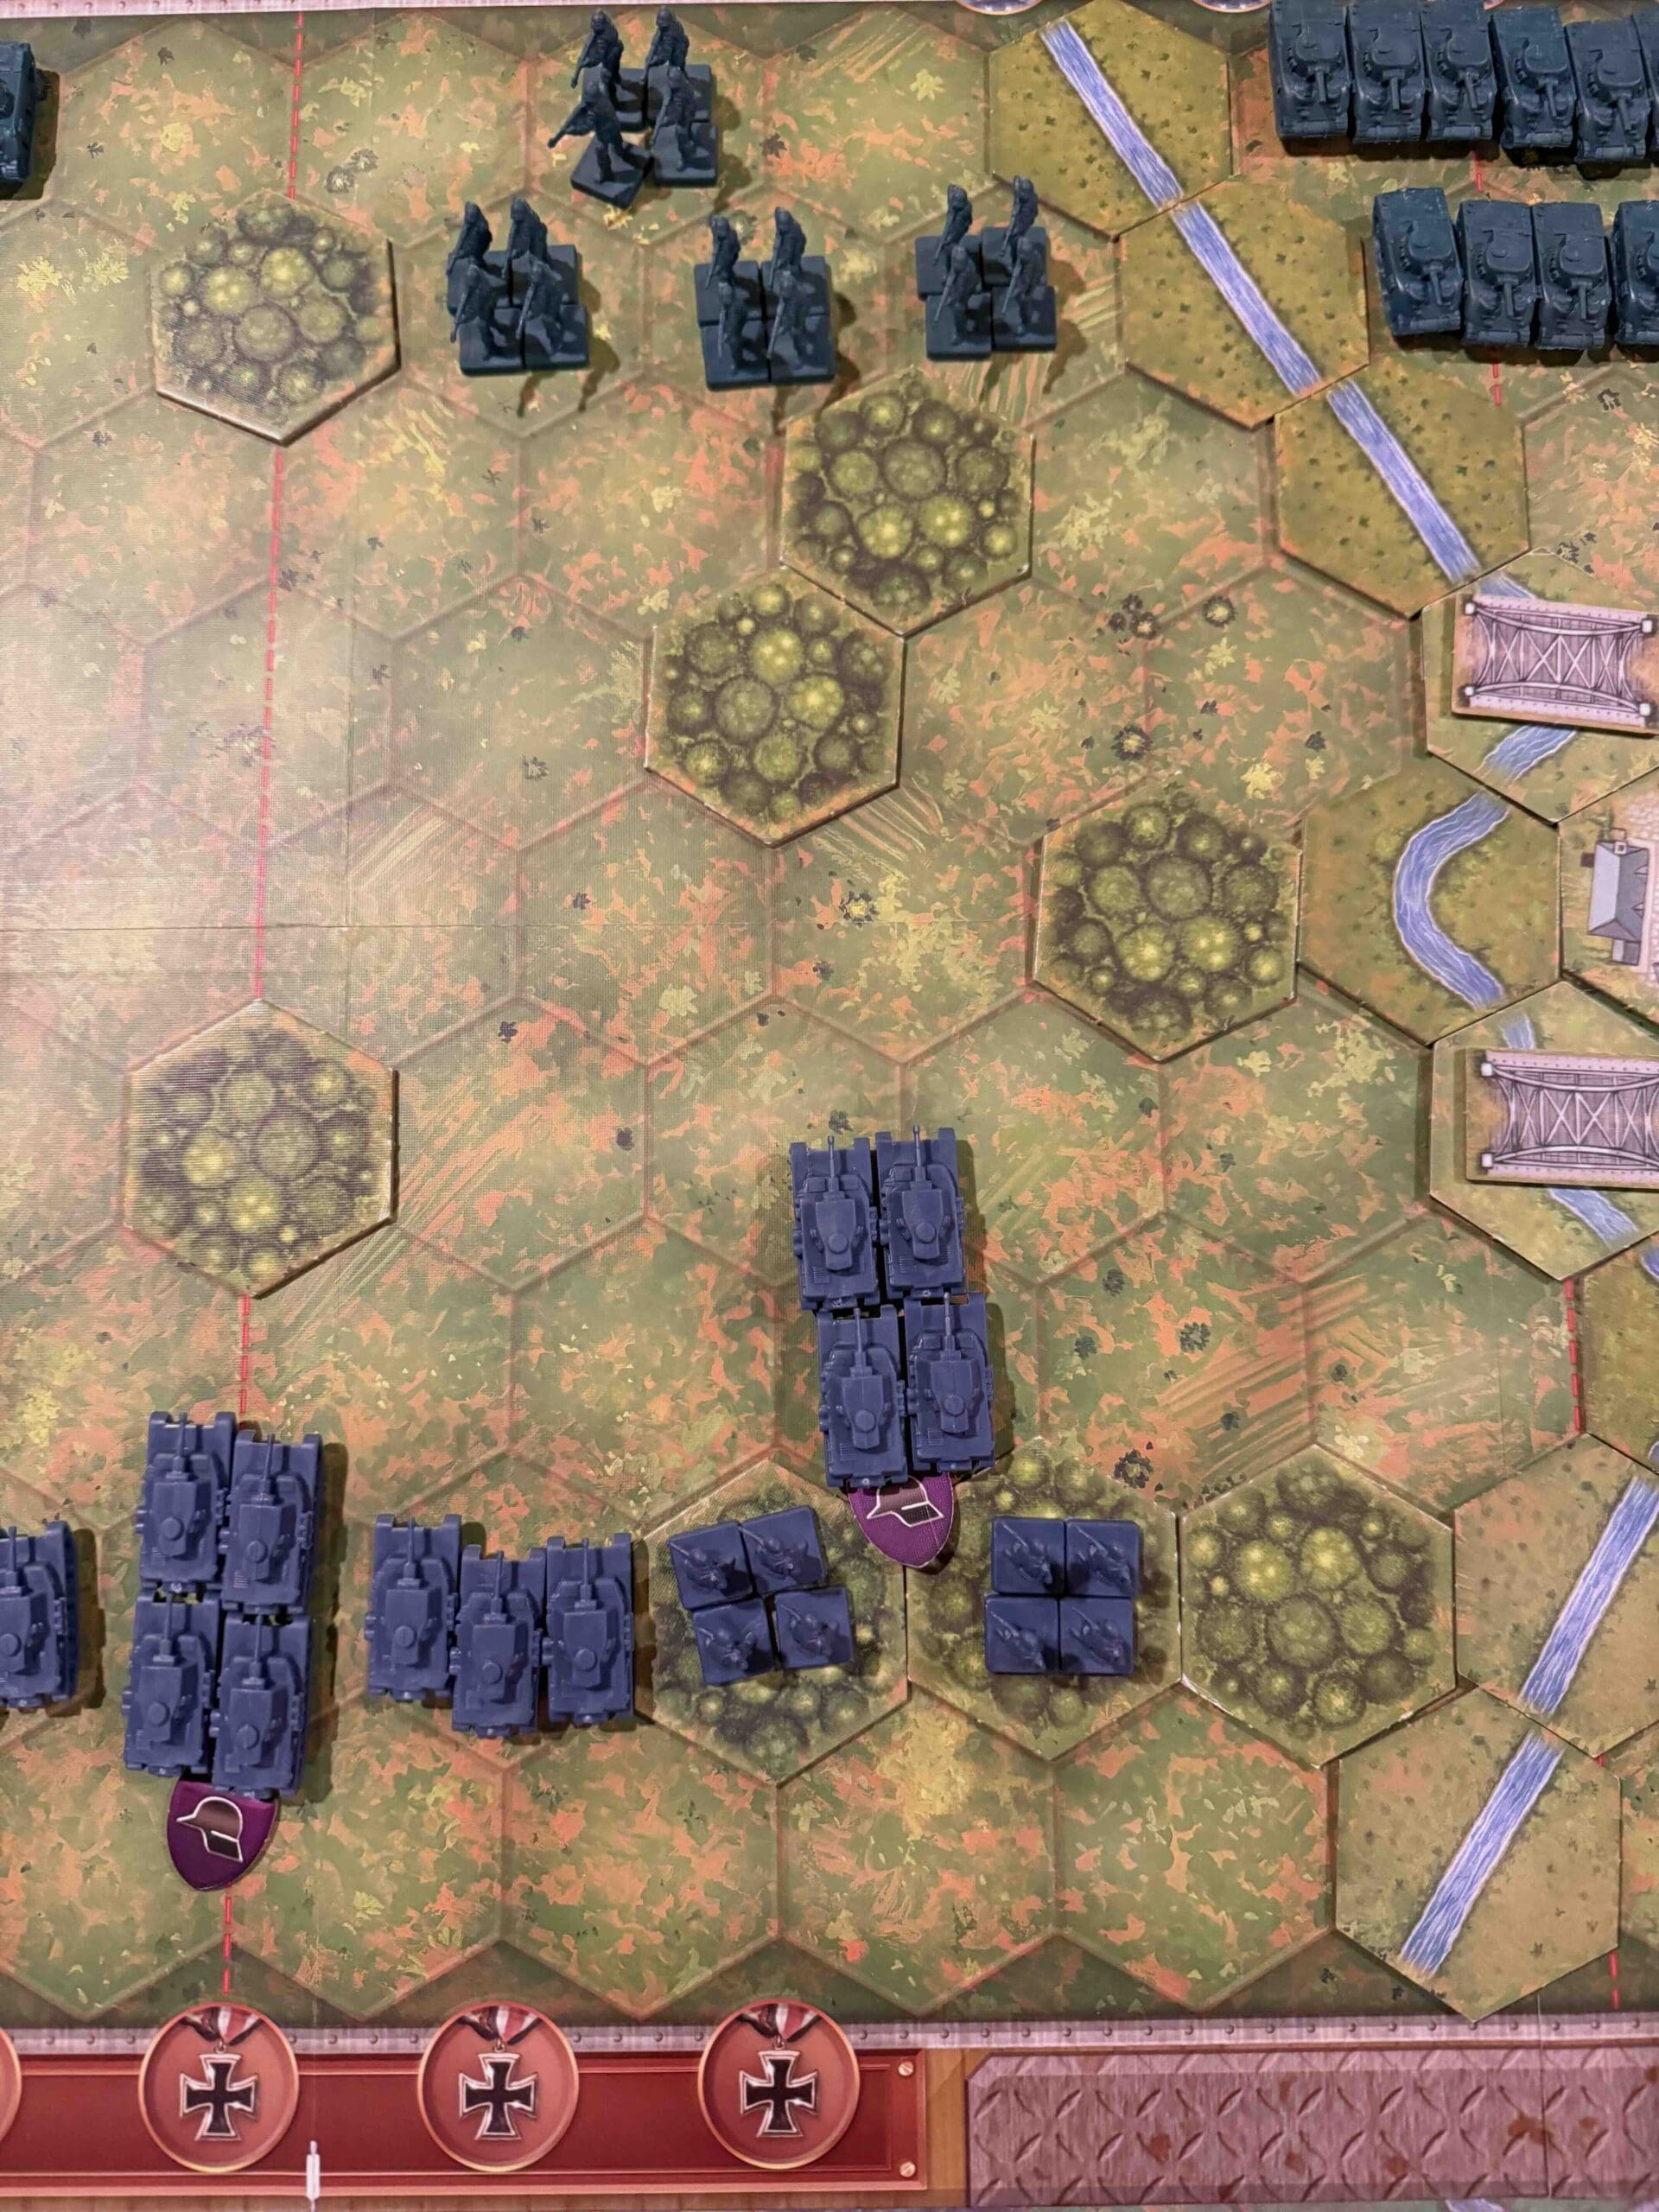
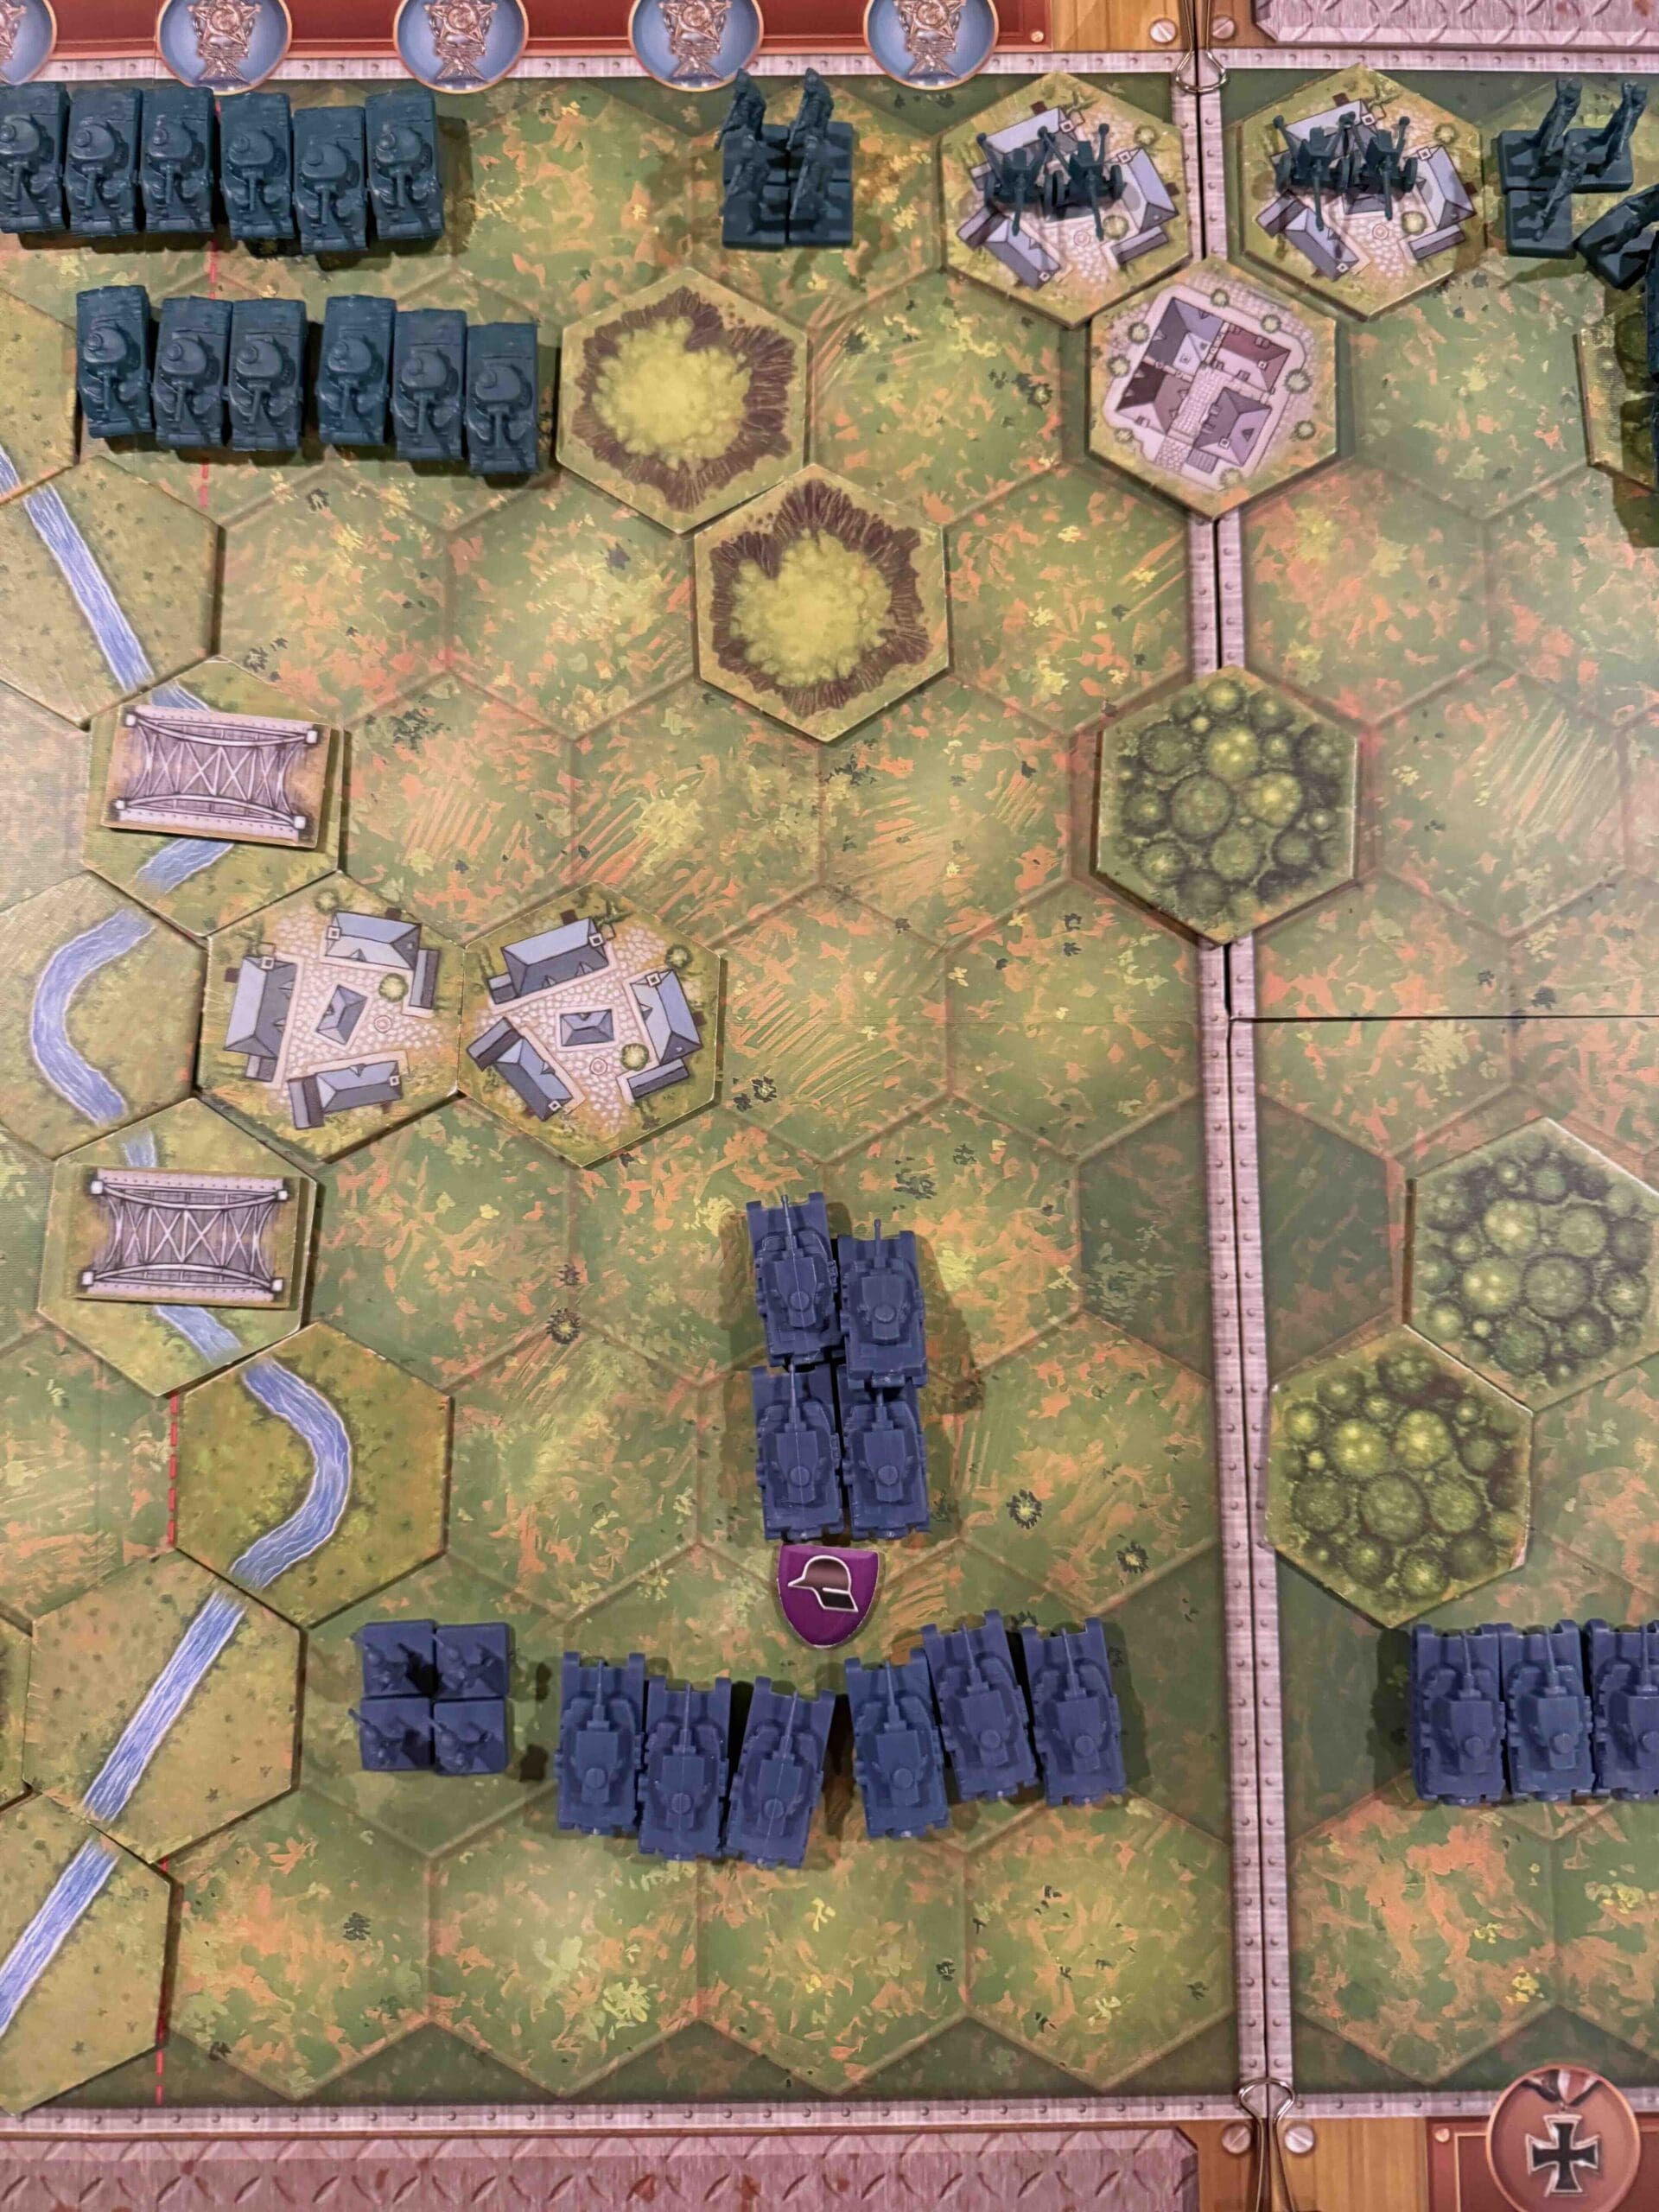
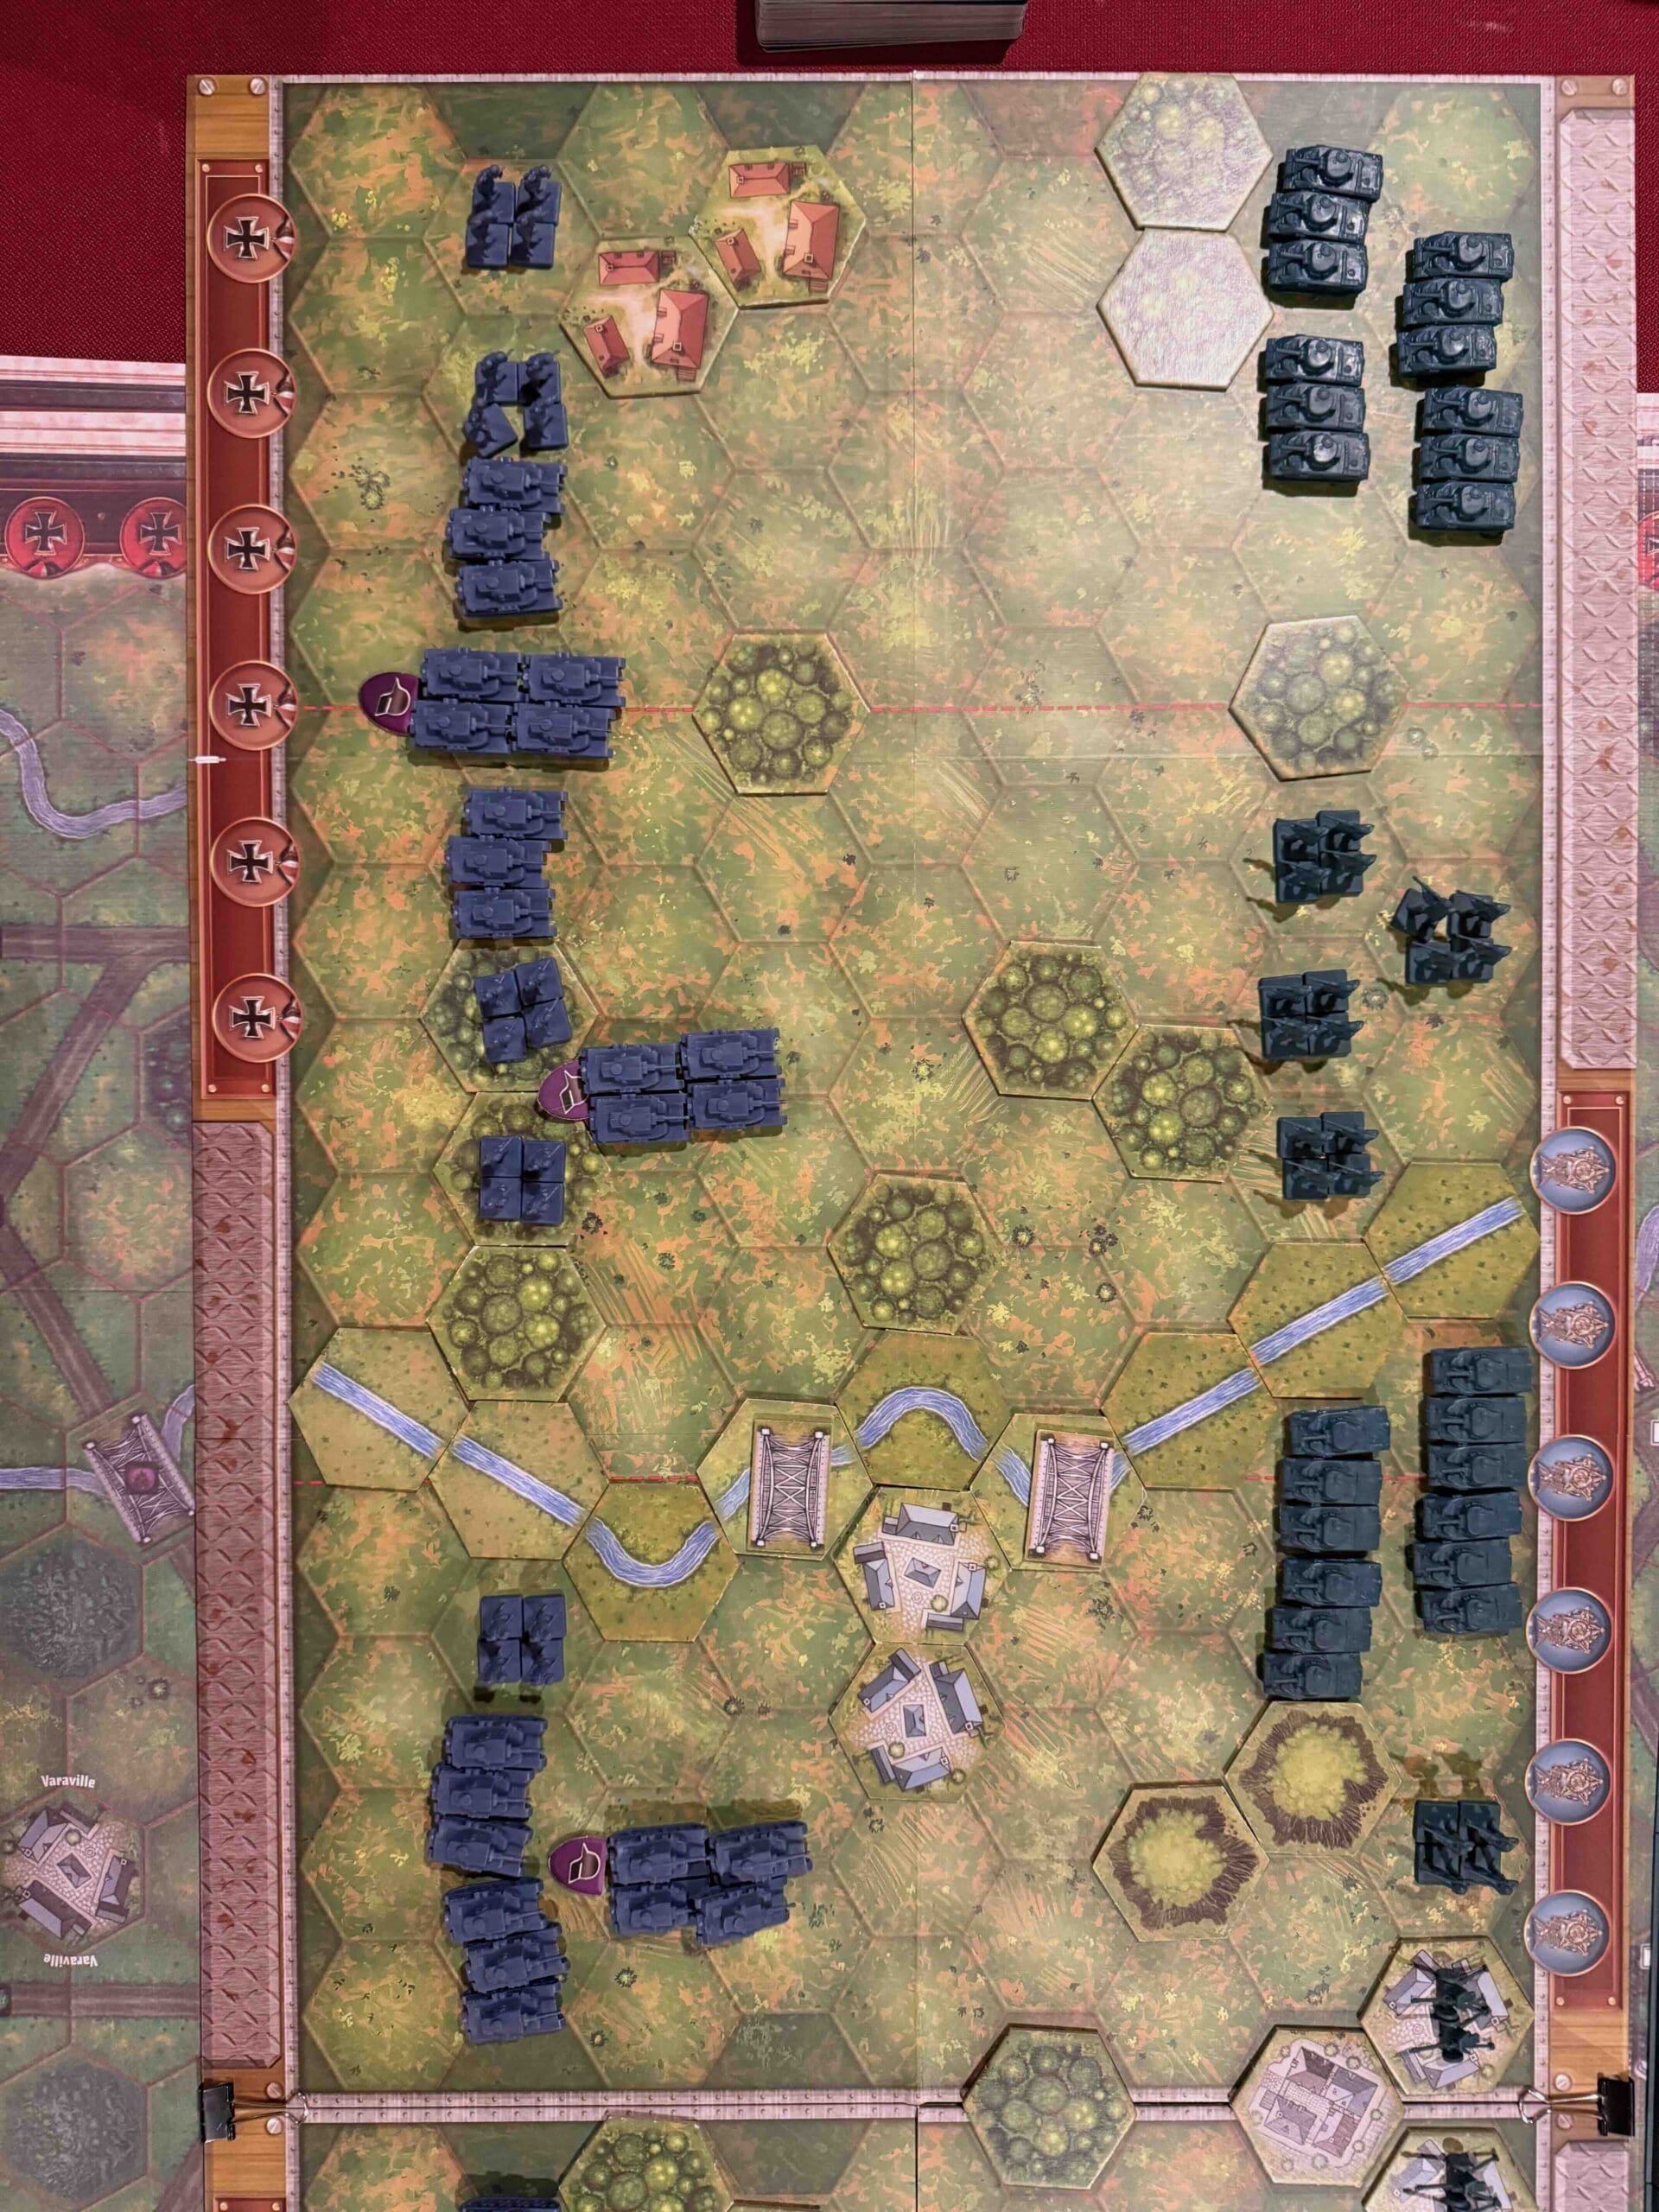
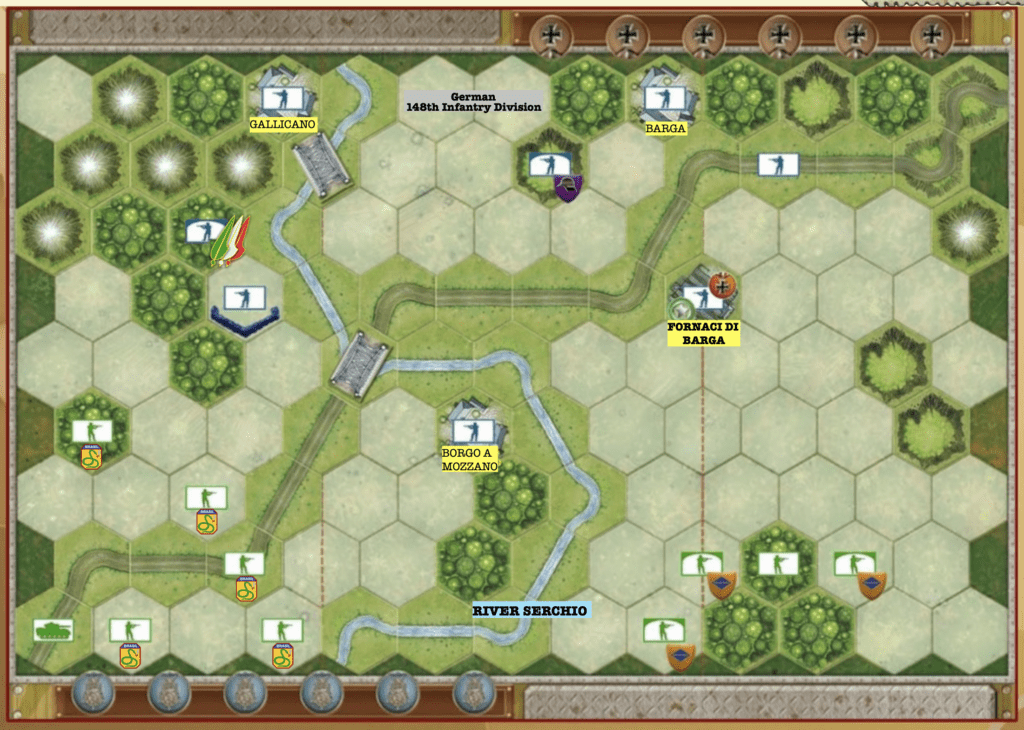
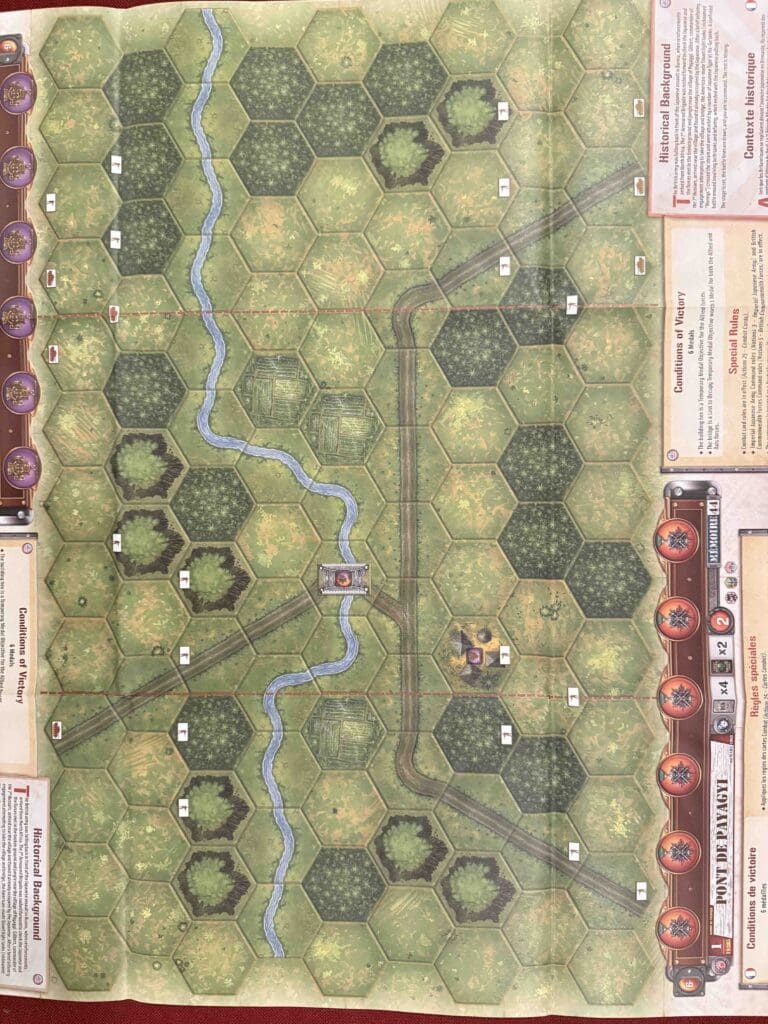
6 VP’s, plus the building hex as a  Temporary Medal objective for the Allied forces, and the bridge hex is a Last to Occupy Temporary Medal Objective for both sides.
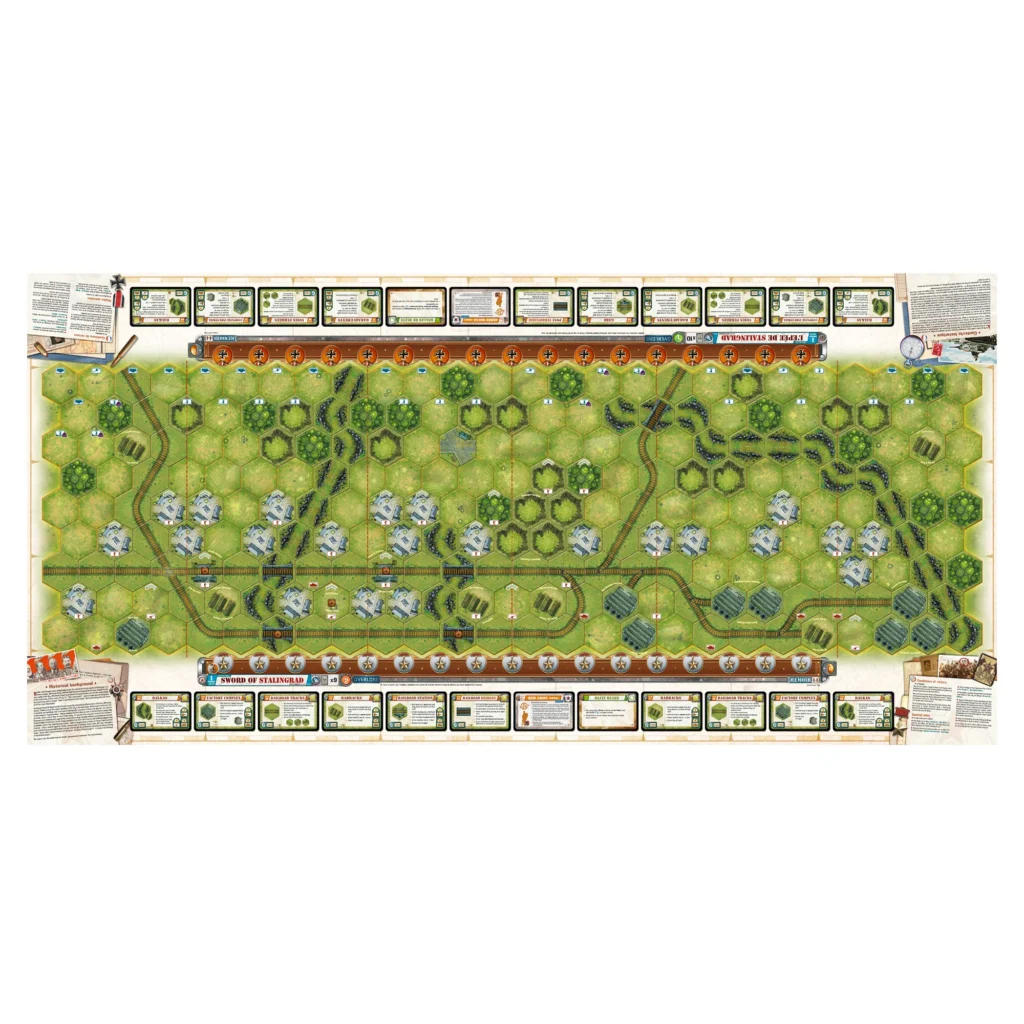
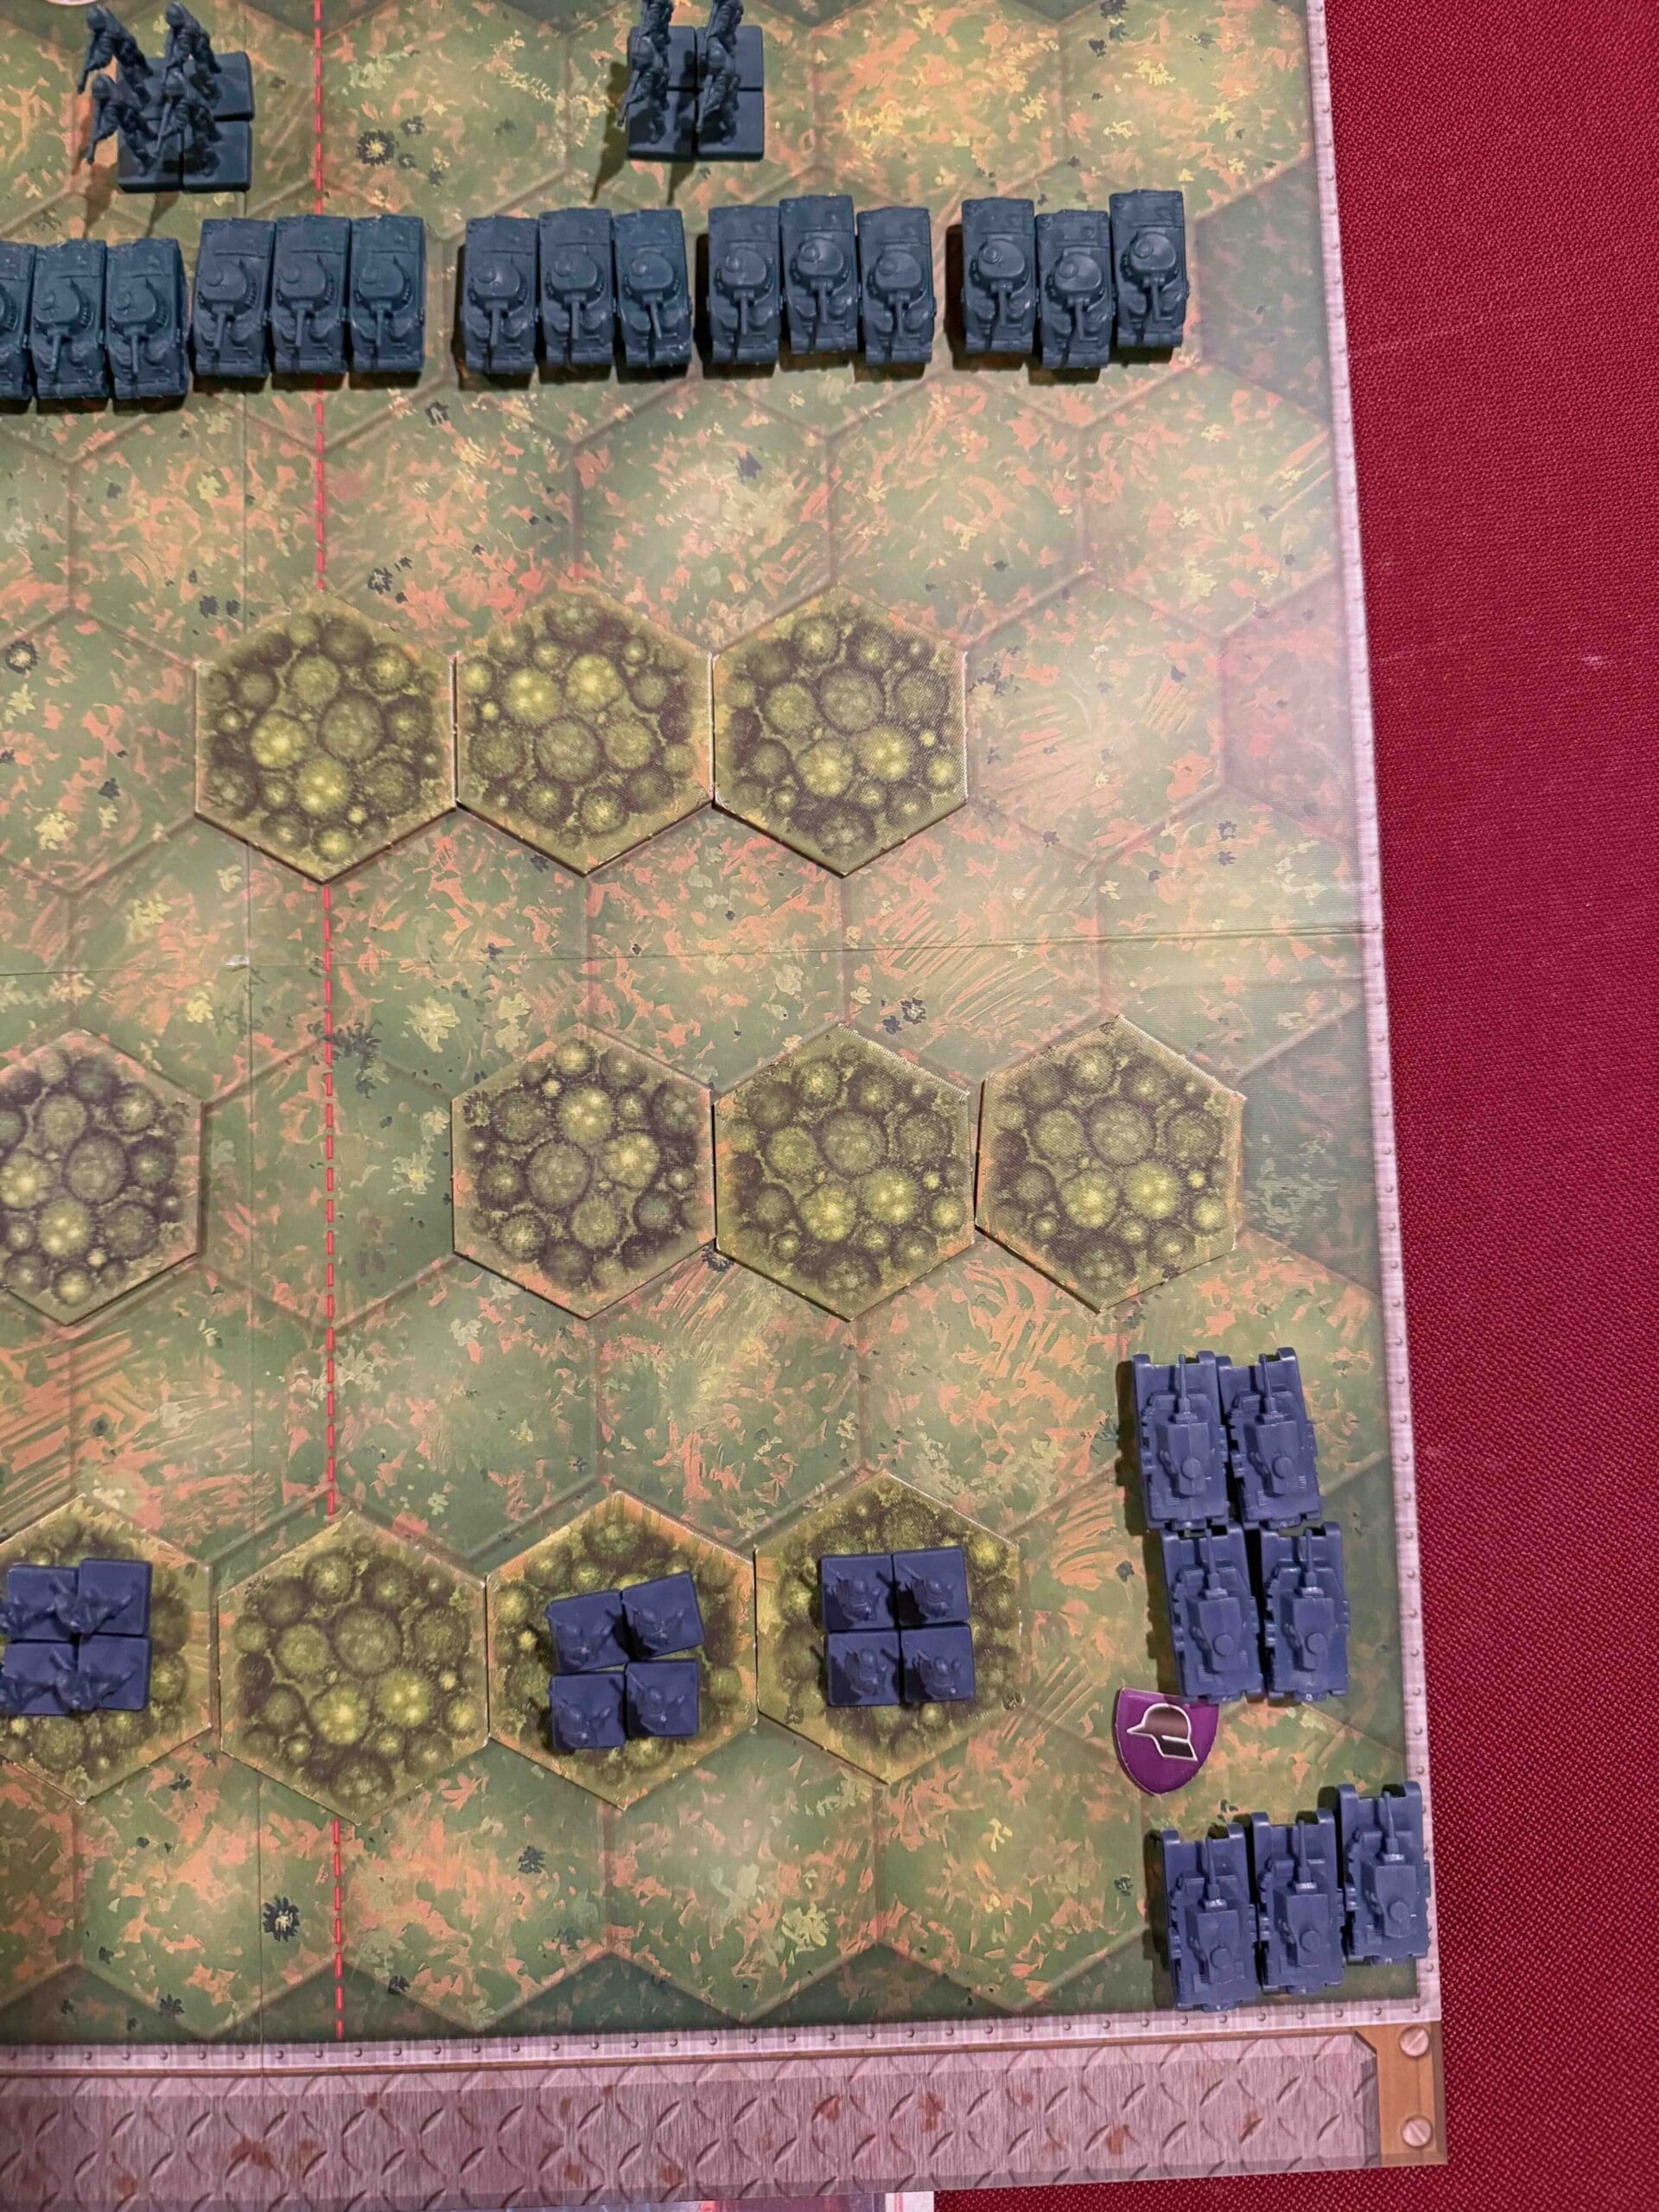
Battlefield:

A jungle map with jungle, rice paddies, hills, and a river cutting across the entire map, and intersecting roads which come together at the bridge hex.

Troops:

Allies – 8 Infantry, 4 Armor

Axis – 9 Infantry, 3 Armore


medal allies

🔥 Winning as Allies

1.  The key objective for the Allies is to capture the bridge hex, and then as a bonus the building hex. 

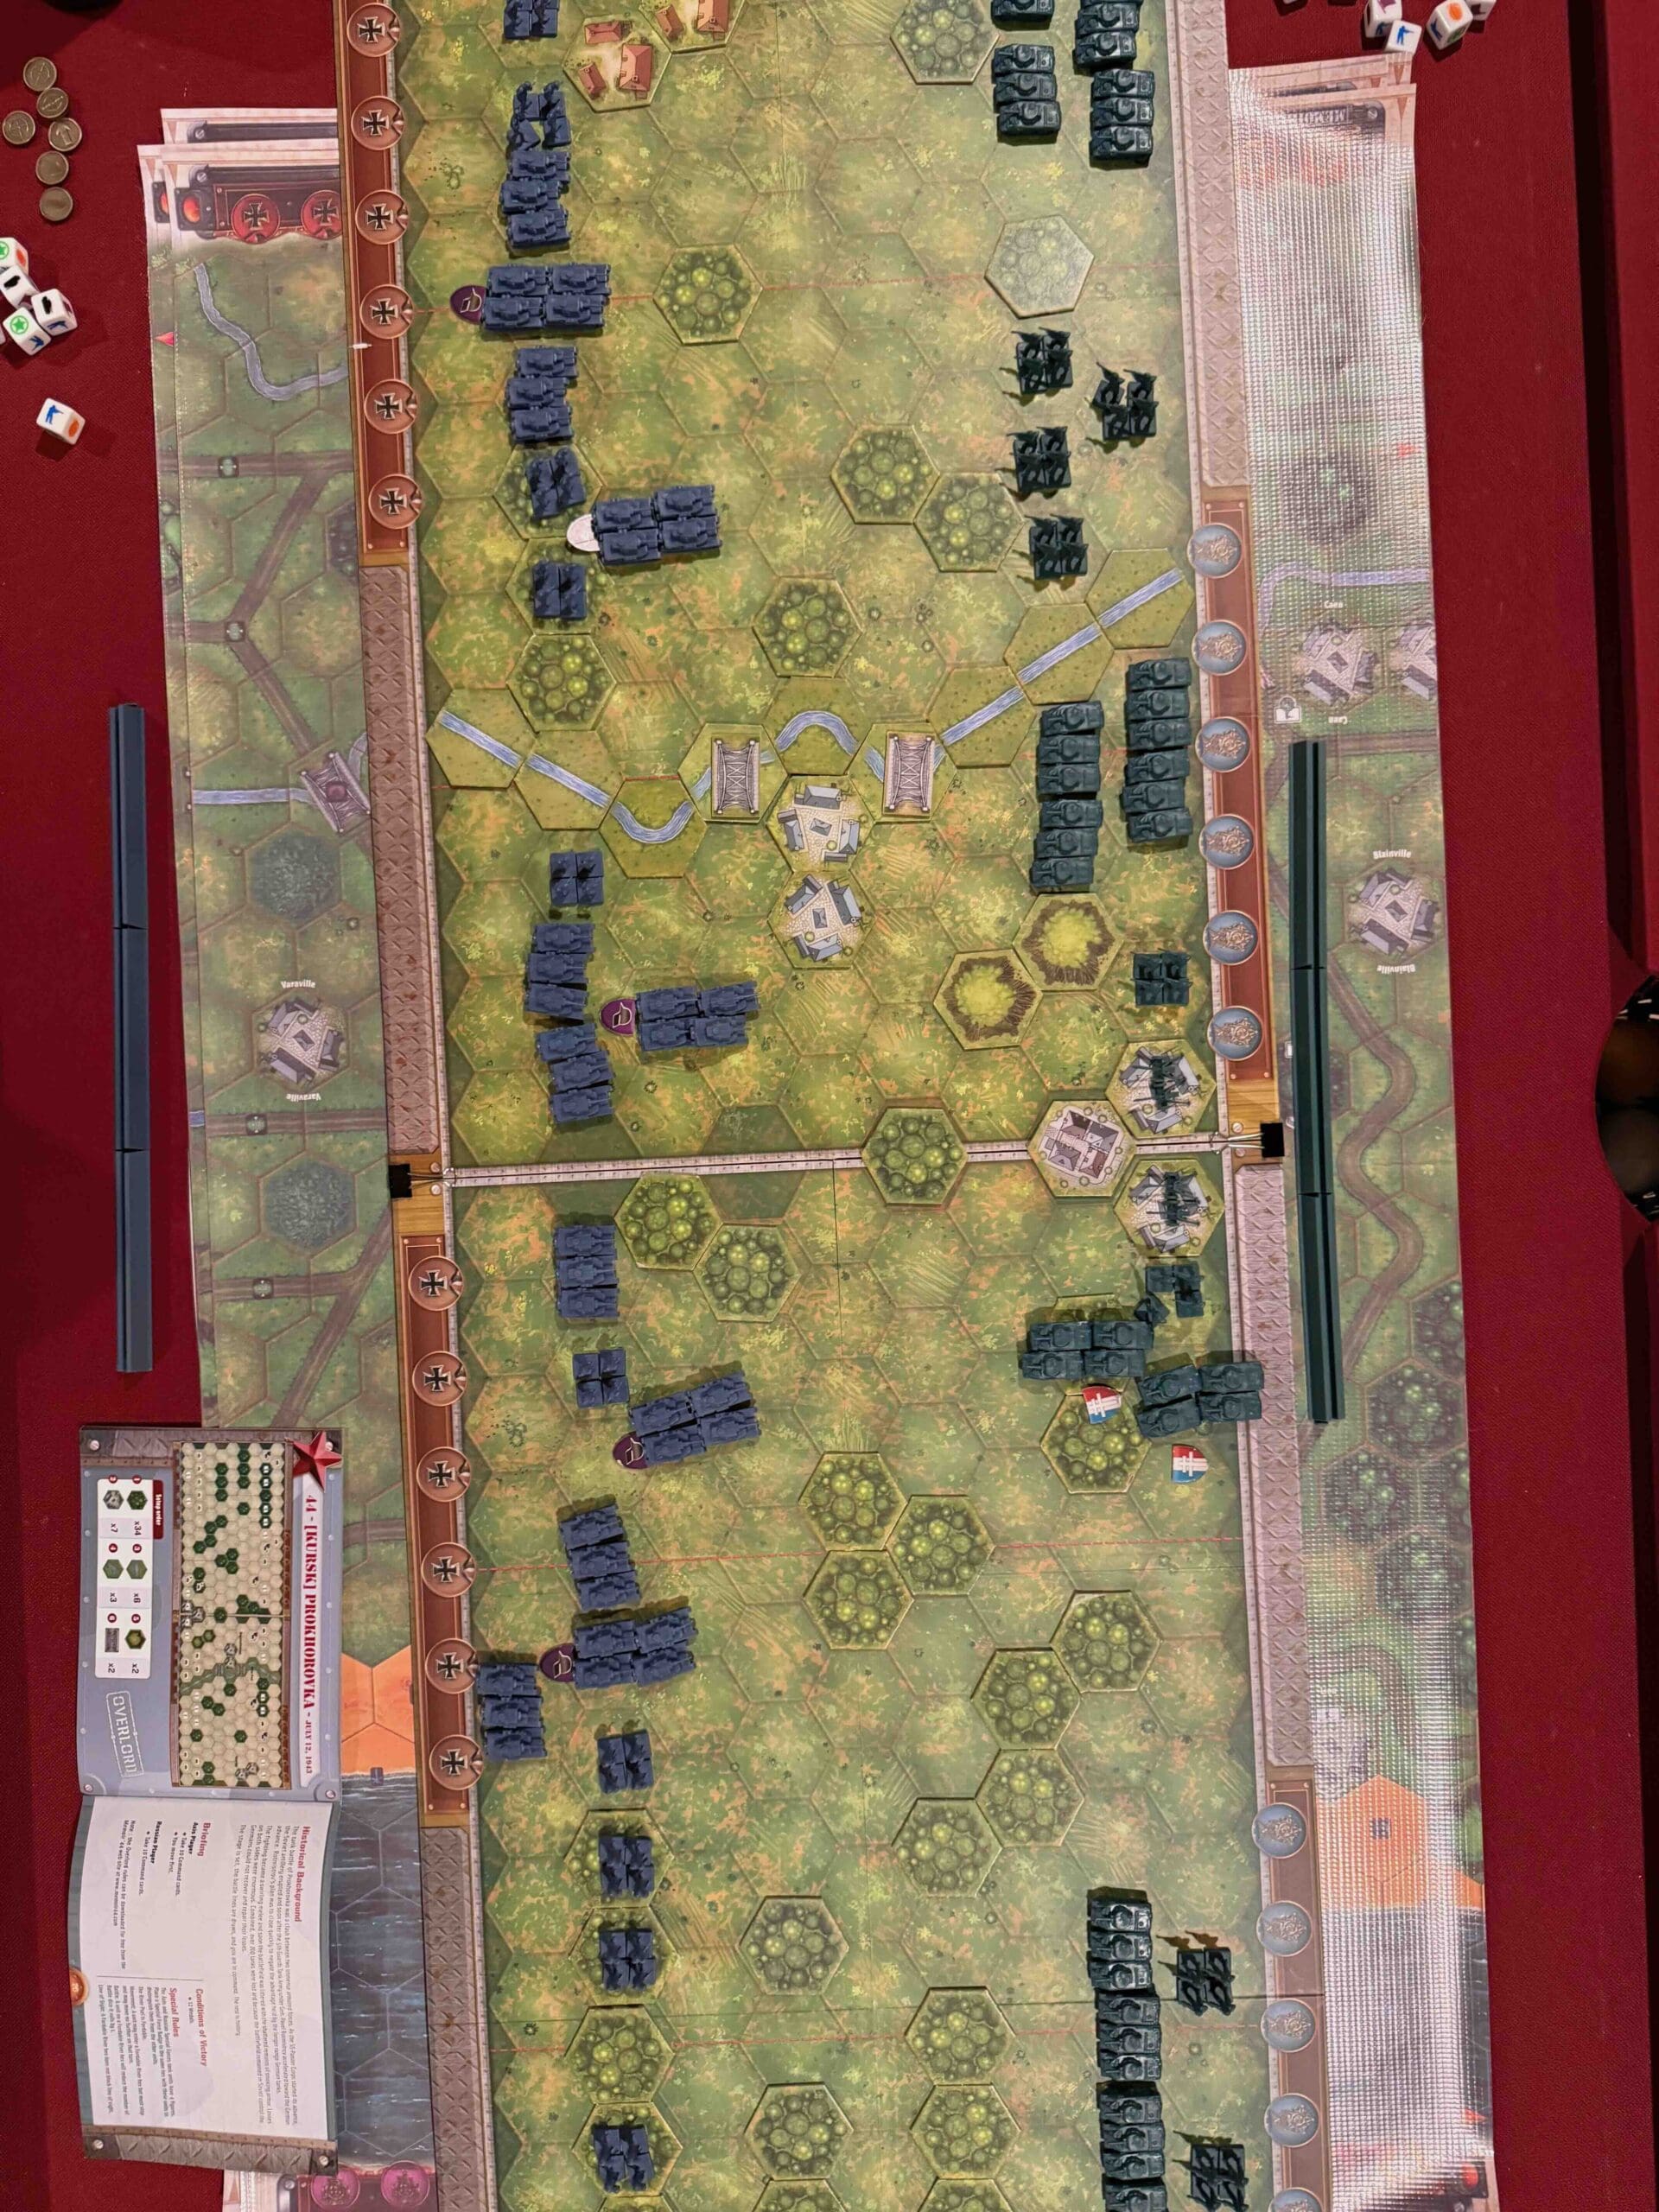
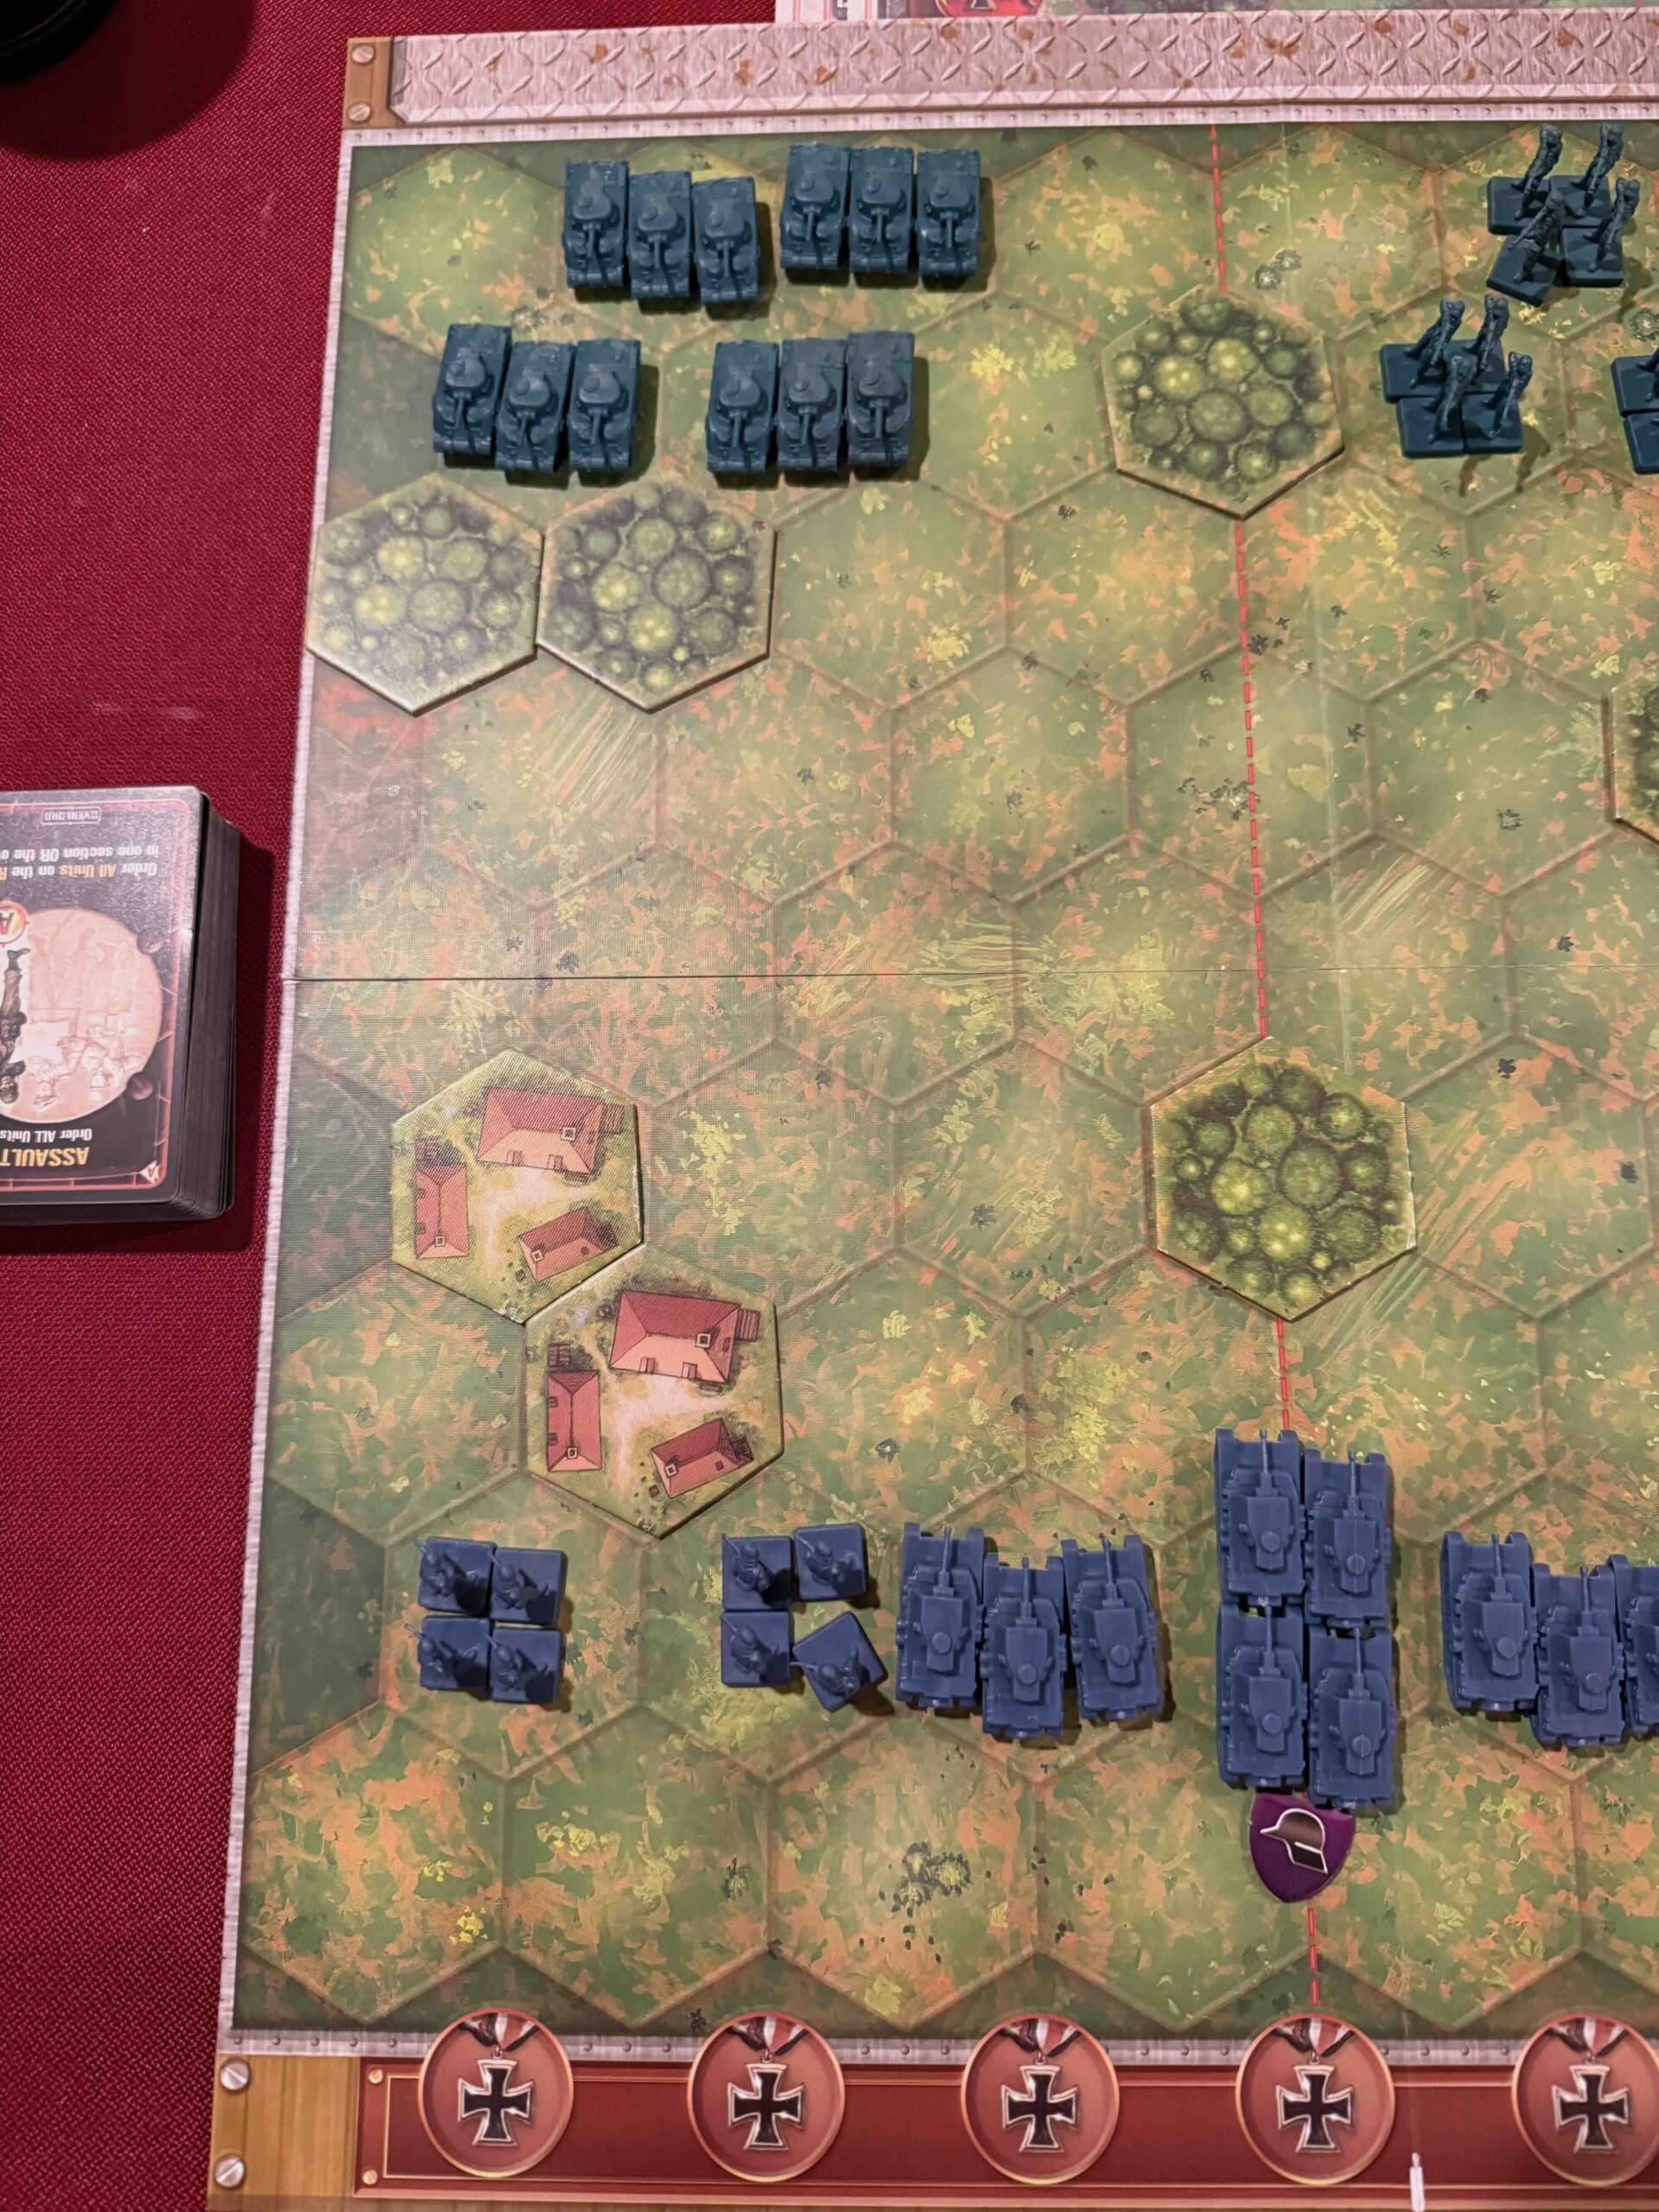
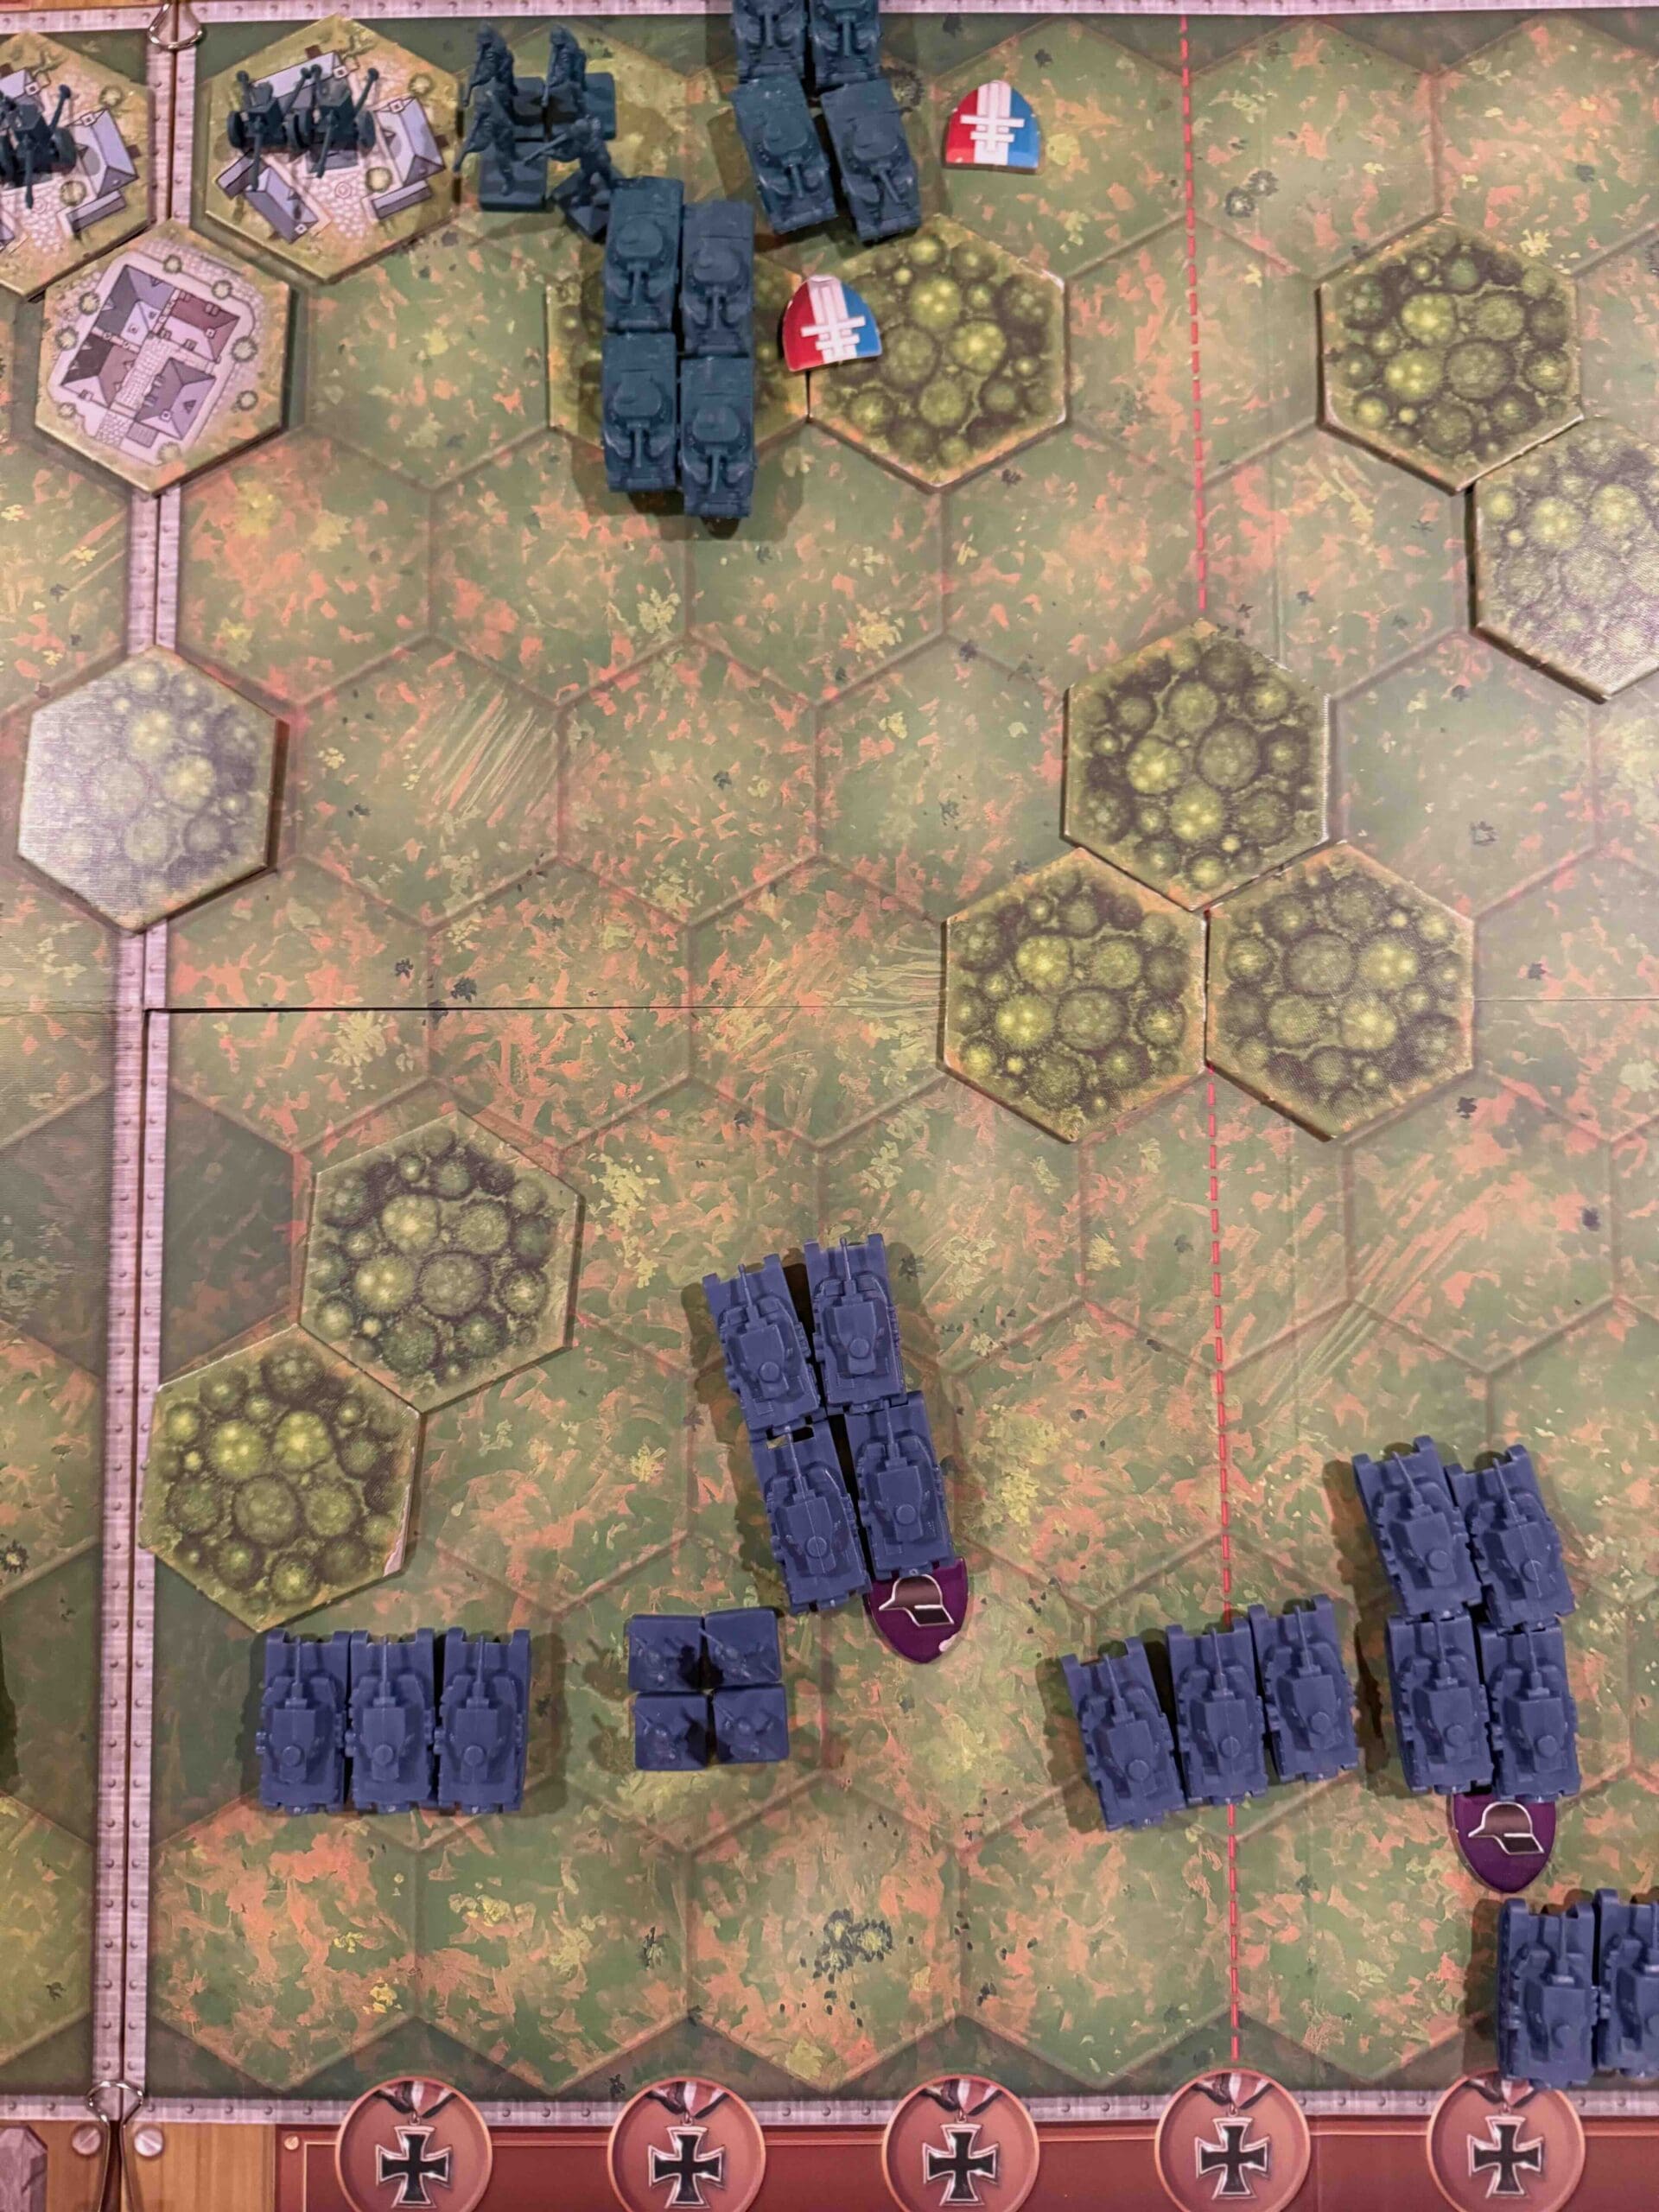
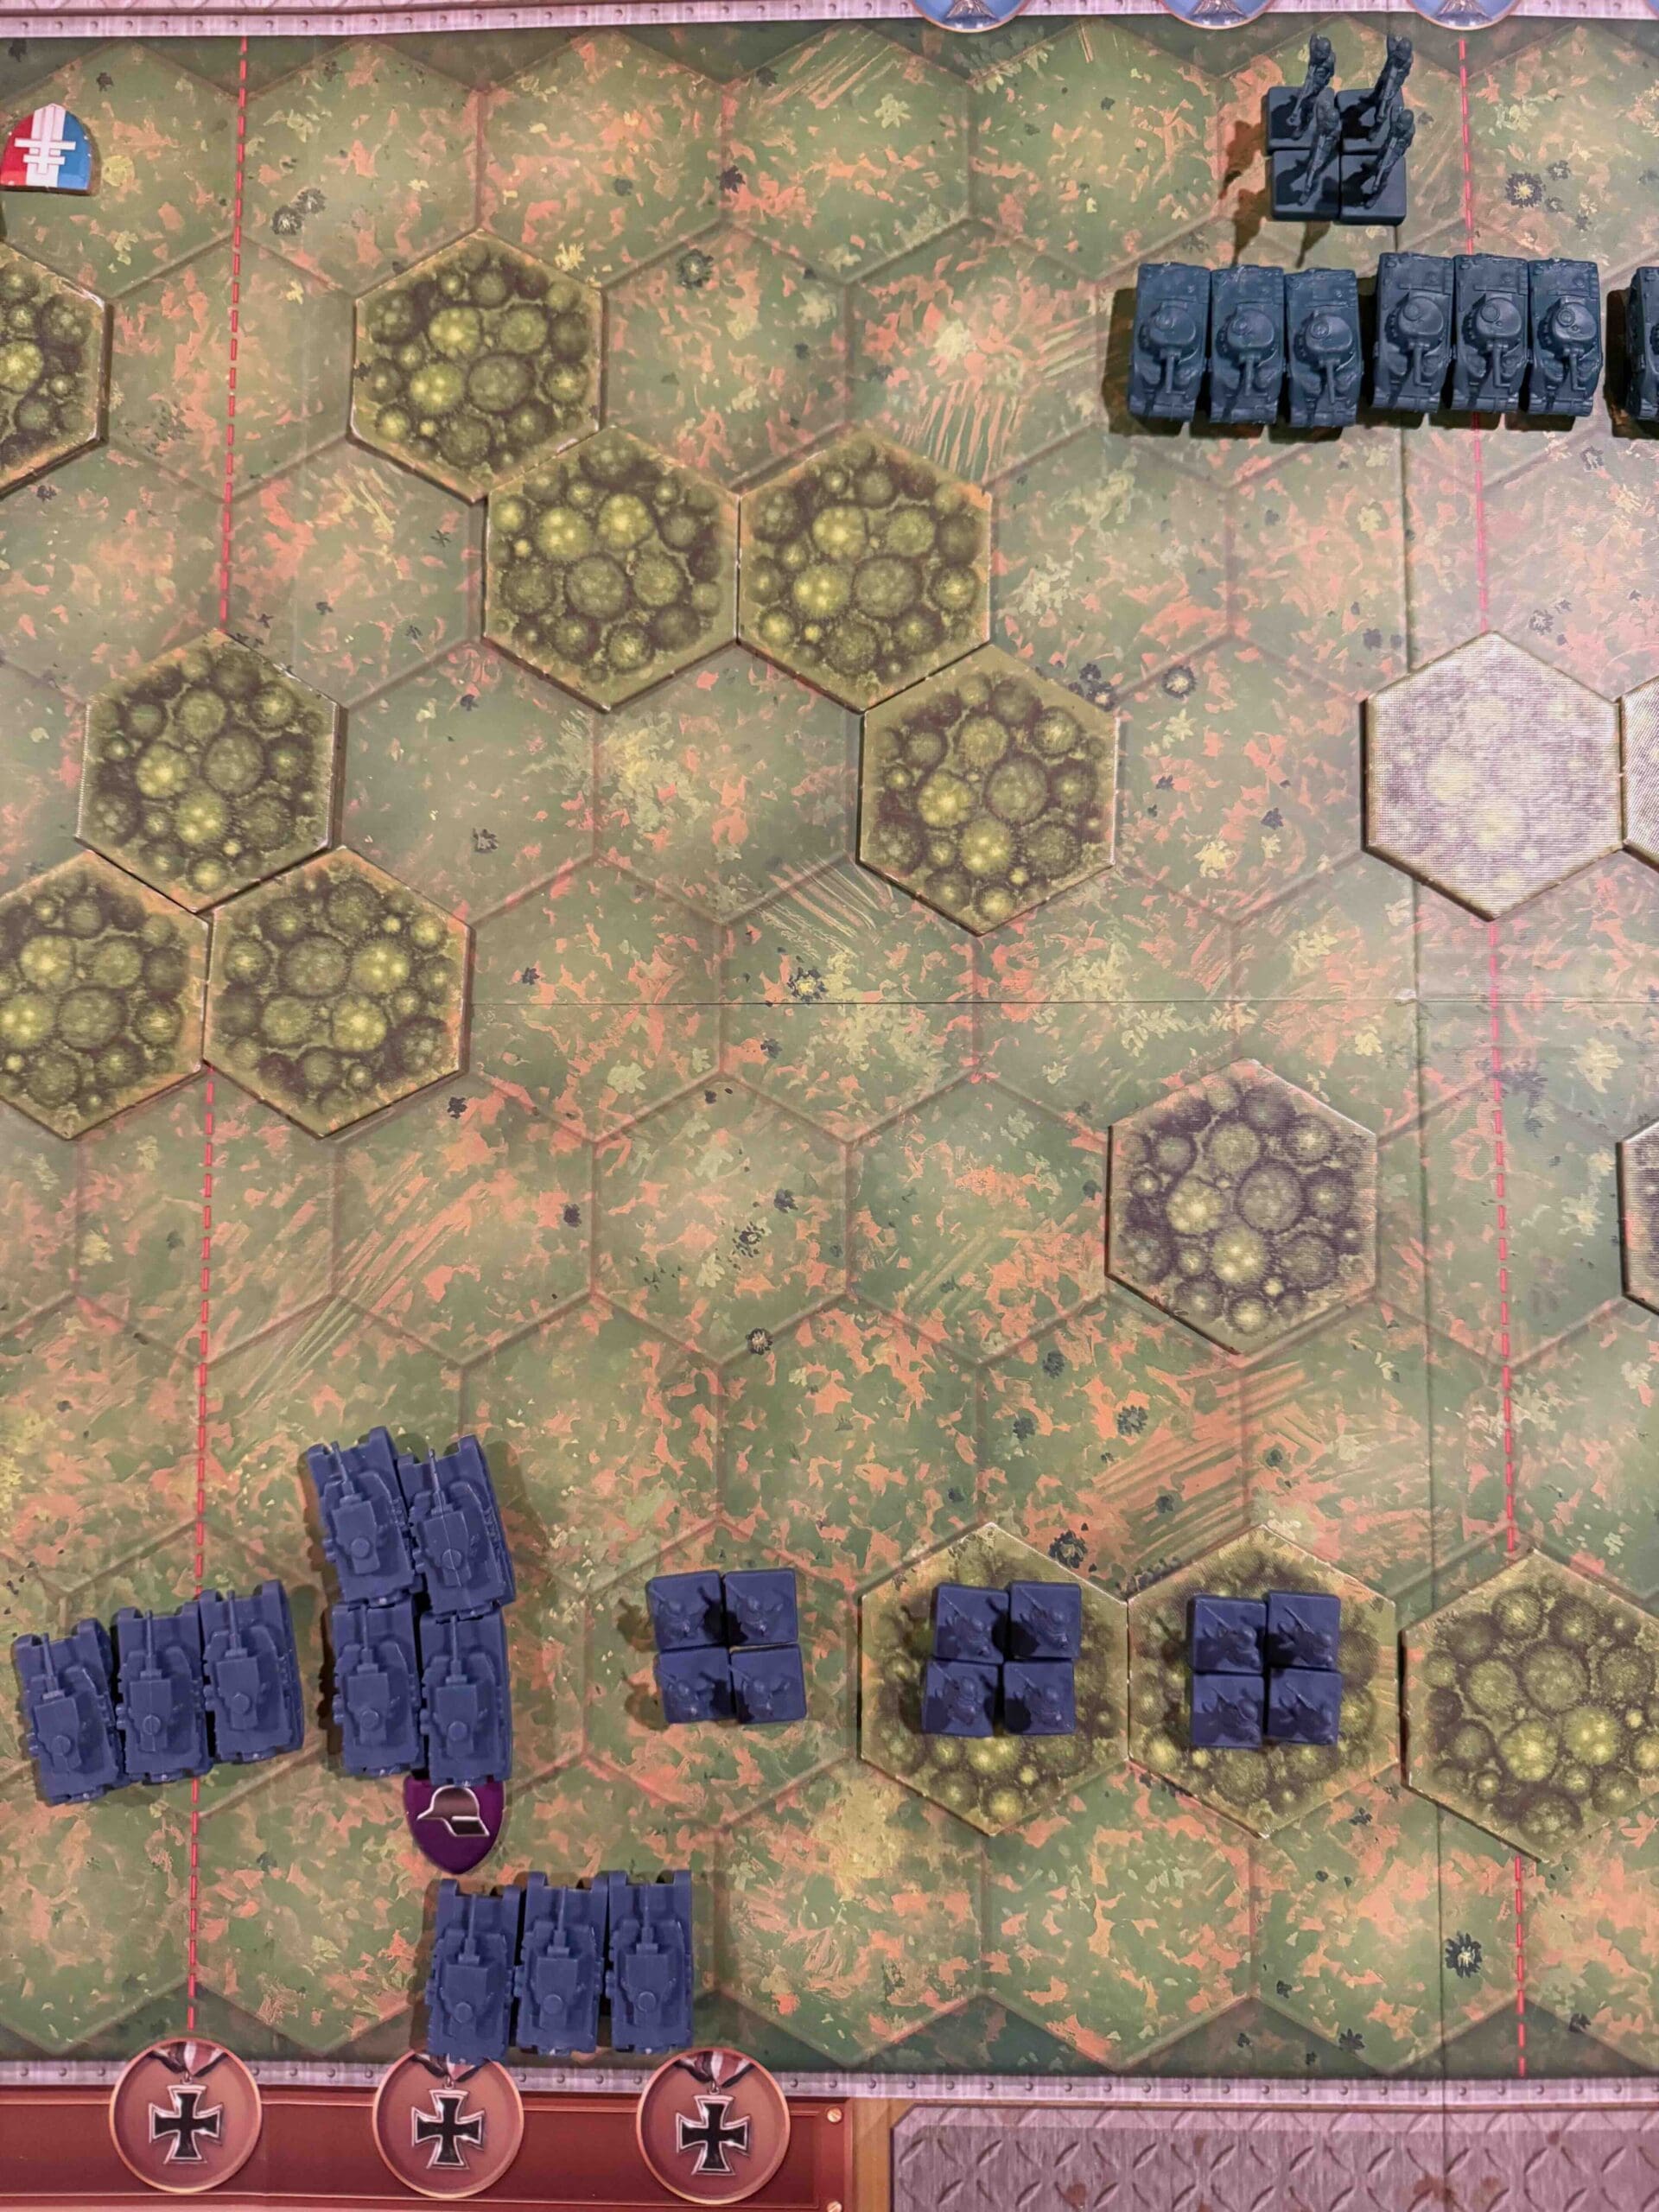
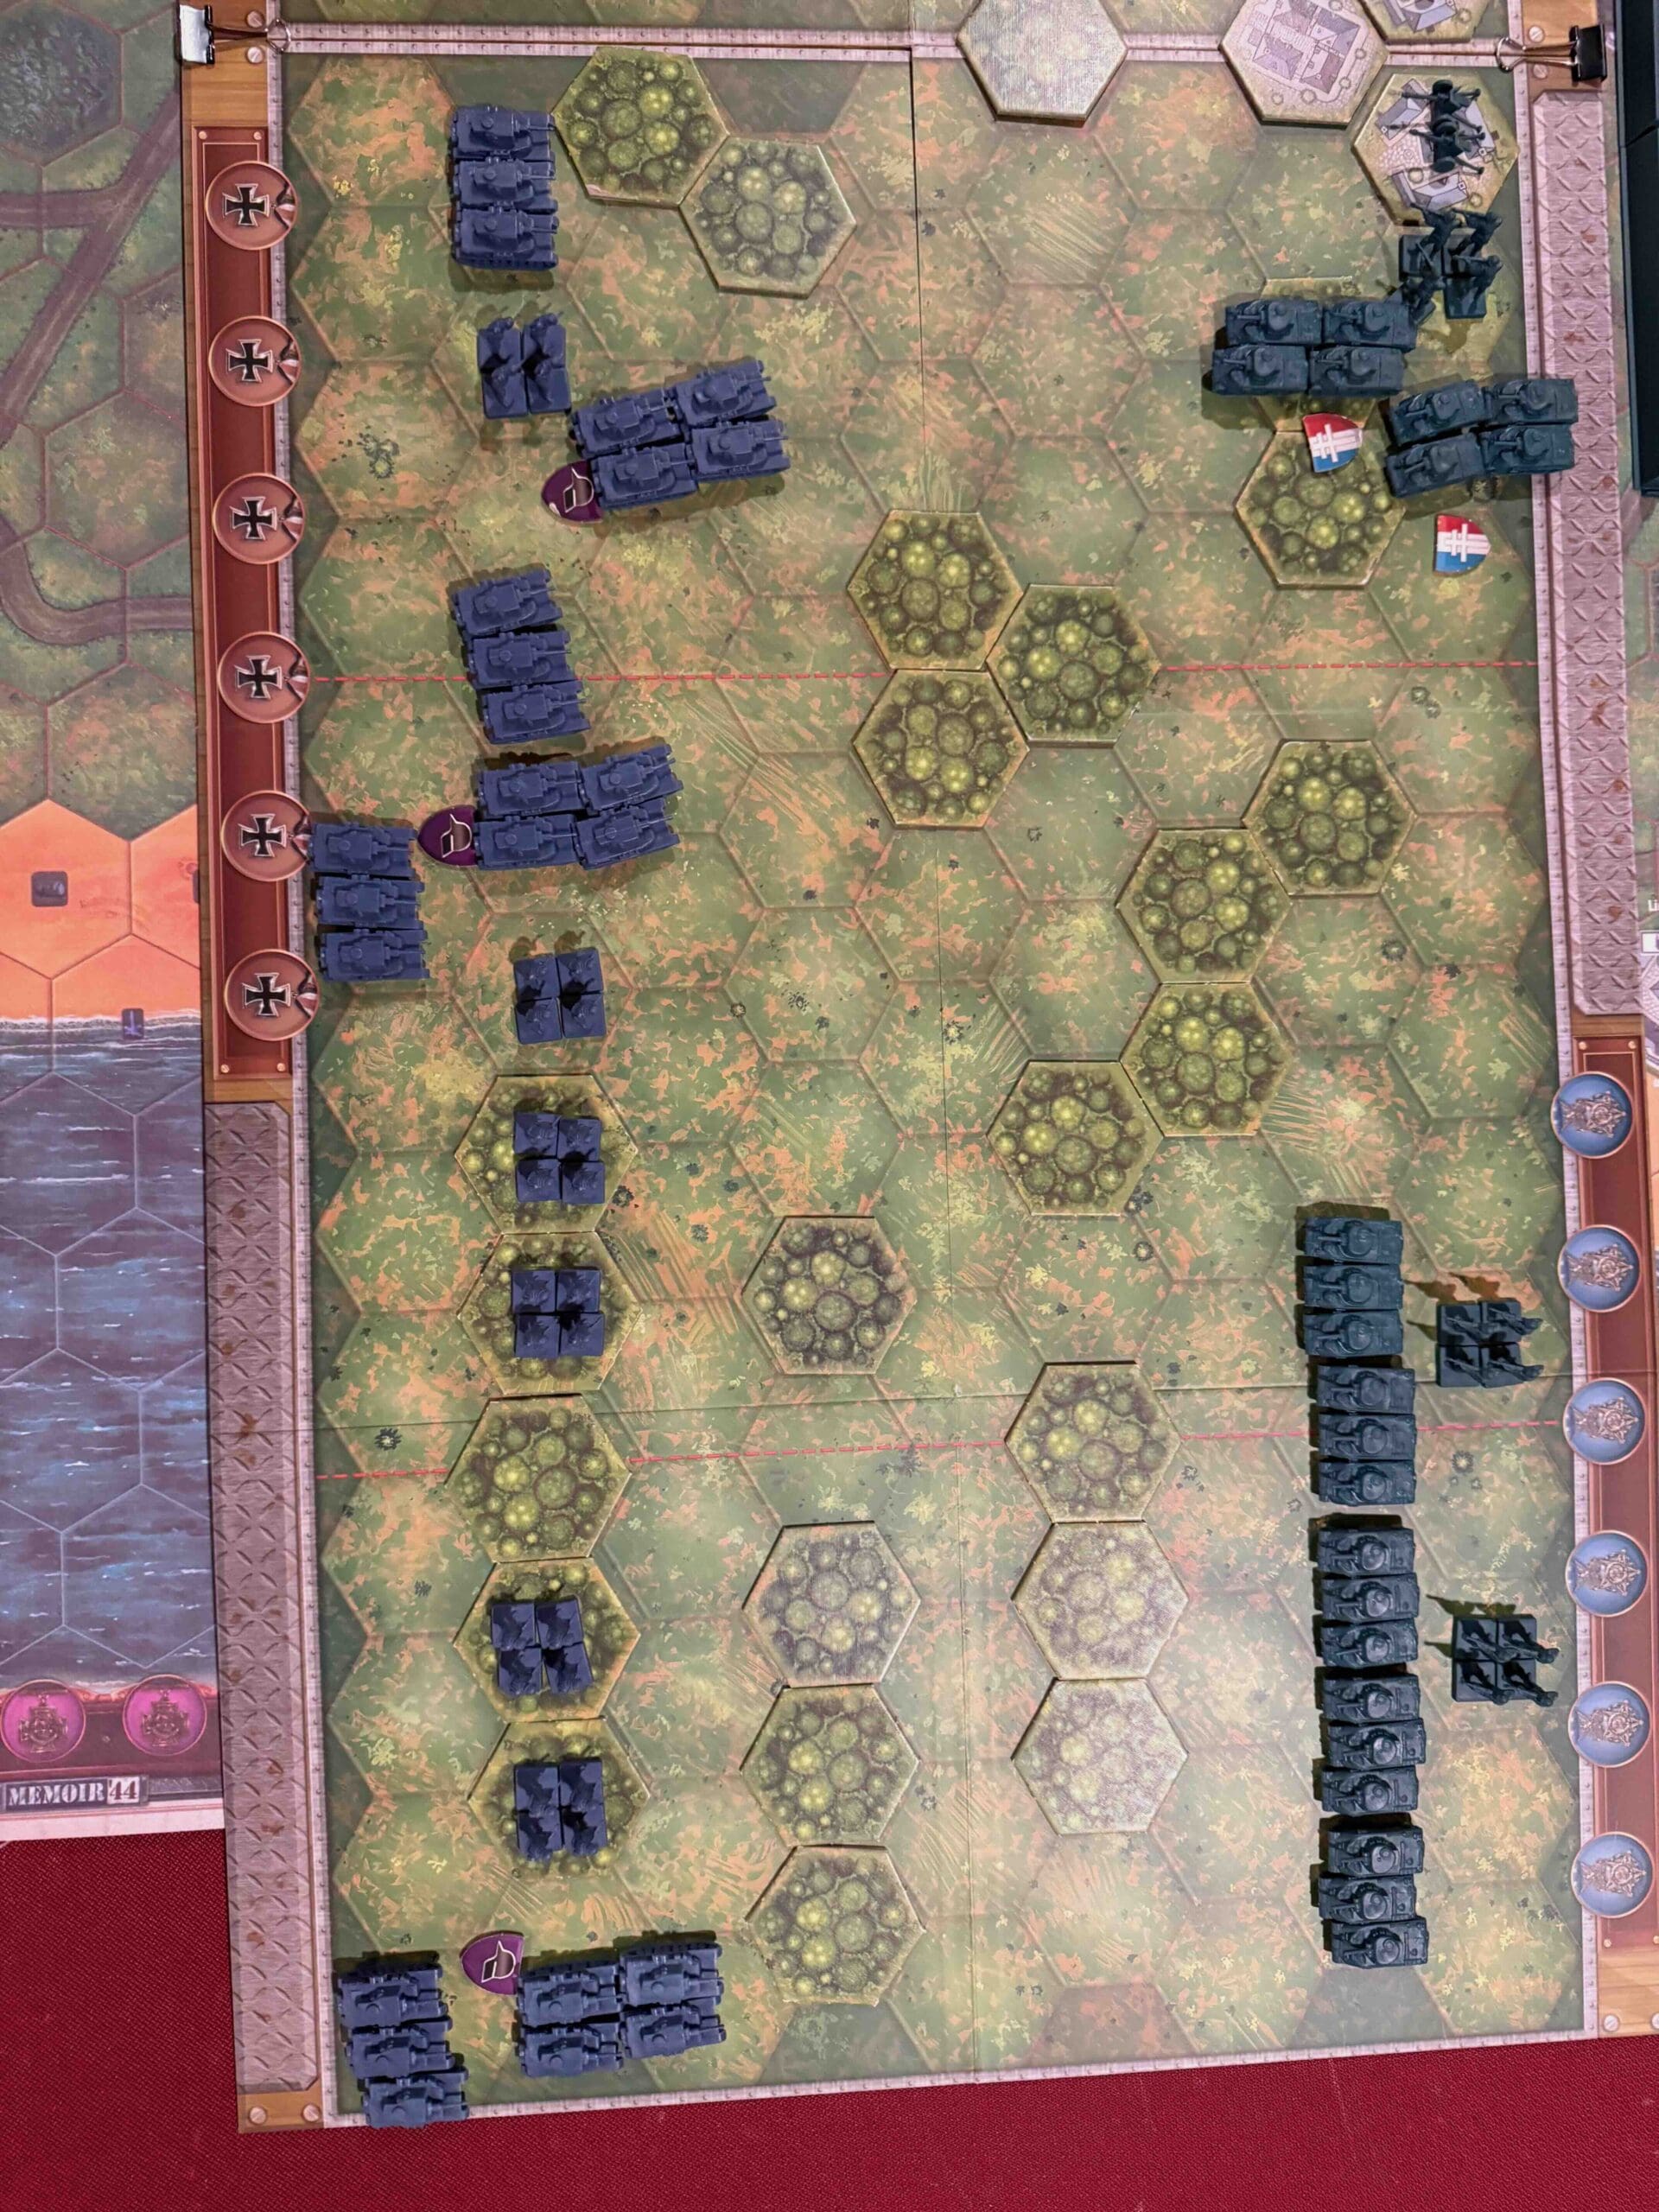
2.  Your Armor is back on the left flank. You will need to get it into action as soon as you can. This will be hampered by the river,so while some may breach the river, some other Armor units will need to head toward the road in the center to support the approach and capture of the bridge hex, and its accompanying Medal.

medal axis

🔥 Winning as Axis

1.  The Axis begin the scenario with control of the building hex and its Last to Occupy Temporary Objective Medal.  Maintain this territory, and push to the Bridge Hex Medal Objective when you are ready. But do not do so prematurely, or your forces will be destroyed by the British counter-attack.

2.  Your Armor is stuck in the corner on the right flank. You will need to get them and the nearby Infantry up into the action right away.

Battle Reports

0
BR - Payagyi Burma

Author:

Days of Wonder

Link:

Indian-Troops-17th-Division-Payagyi-1945

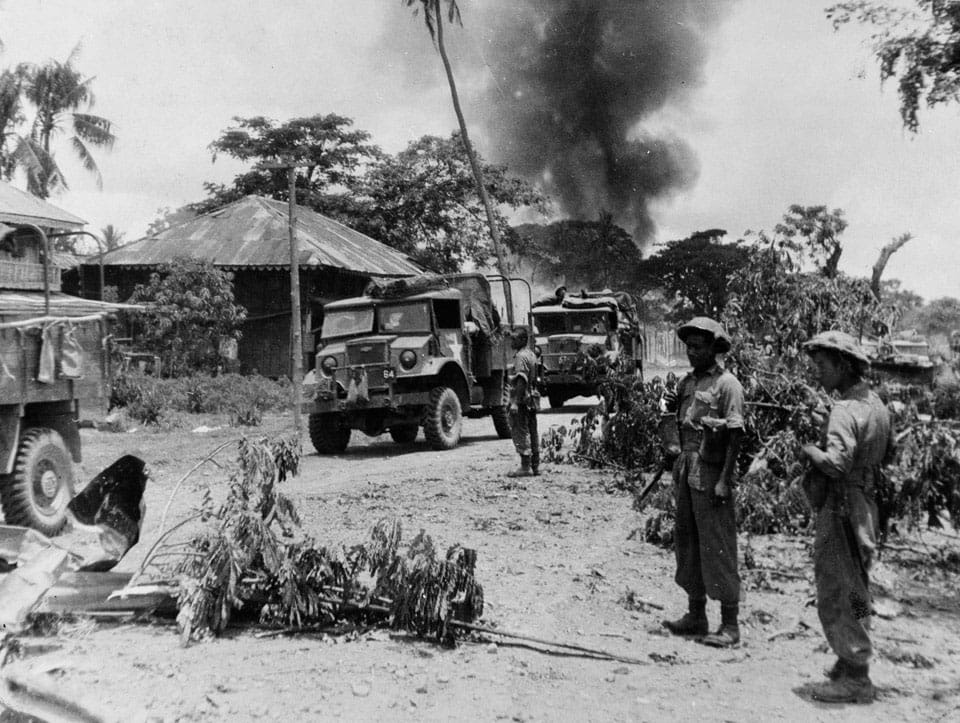
Courtesy of National Army Museum

Withdrawal from Hill 112 – The True Score

When it comes to Victory Points, the score you see is not always the “true” score.

Look at this scene from Withdrawal from Hill 112. Who’s ahead?


smackdown_Withdrawal_112_TrueScore

Score says Axis is ahead by one.  

But let’s look at the situation and the cards.

While I do not know what the Axis are holding, I can see that the Allies have a Barrage.  Since the Axis have two weak infantry units, that Barrage is almost another point. 69% chance of destruction of a two-figure Infantry with four dice (https://generalhowitzer.com/strategy-dice-percentages/).  Then the Axis have several weak units in the open, while the Allies have mostly complete units, all in secure locations. 

So I would say the conservatively, the score is at least tied, and perhaps the Allies are very close to the lead.

Agree or Disagree? 

Sword of Stalingrad

Sword of Stalingrad

Sword-Stalingrad

Stalingrad. July ’42 to February ’43. One of the bloodiest, ugliest slugfests in the history of war—and the place where Hitler’s dreams started bleeding out in the snow.

The Germans charged in hard, aiming to take the city and crack open the Soviet underbelly on their way to the Caucasus oil fields. They bombed Stalingrad to rubble, thinking they could steamroll the Soviets in the ashes.

But rubble favors the defender—and the Soviets fought like wild dogs in every street, every cellar, every damn staircase. House-to-house, room-by-room, tooth-and-nail. The Germans took ground, lost it, and bled for every inch.

And then came the real punch: a Soviet counterattack that closed the trap, surrounded the German 6th Army, and squeezed until there was nothing left but cold, hunger, and surrender.

Stalingrad wasn’t just a Soviet victory—it was the beginning of the end for the Nazi war machine. From that frozen hellhole, the Red Army started marching west—and they didn’t stop till they hit Berlin.

You want to talk grit? Talk Stalingrad. That’s what happens when an enemy pushes too far and meets a defender with nothing left to lose.

~~ General Howitzer

17  VP’s

Card Balance:

Allies – 9

Axis – 10

plus Combat Cards

Complexity:

5

Conditions:

Urban

Location:

Russia

Year:

1942

Theater:

Eastern Front

Campaign:

Context:

Historical

Summary:

This is a massive and complex scenario with many strategic elements that makes for an exciting and challenging game.

Objectives:

17 VP’s (!), including numerous territorial medals

Battlefield:

This battlefield has countryside on the Axis side, and urban factories, towns, and other buildings on the Allied side. It is a quite complex battlefield.

Troops:

Allies – Infantry, Armor, Artillery

Axis – Infantry, Armor, Artillery 

Allied Strategy

1.  Historically, the Russians were defending themselves from the Nazi’s, so much of this scenario is spent behind sandbags, attacking the enemy where you can, to degrade their offensive capabilities.

2.  You need to protect the territorial medals which are available to the Axis, should they gain control of various railroad stations, the central hills, or the factory complexes.  At the start of the game, you will be granted control of these and the three medals that go with them. But as the game proceeds it will be increasingly difficult to defend and keep this territory and its medals. 

3.  Your left flank is the most medal-rich area for the Axis to target.  So be prepared for an attack there. Manage your cards so that you can respond to aggression.

Axis Strategy

1. This game is won by making your forces mobile.  Invade the city hexes with your infantry, and get your armor onto the Allied back row to start snatching those territorial medals. 

2. There is a large hill and woods complex in the center section which is worth two VP territorial medals. Control it with both infantry and armor.

1
BR - Sword of Stalingrad

Author:

Days of Wonder

Battle Maps, Vol. 3

Link:

Prokhorovka (Kursk)

La Prokhorovka ( Kursk ) [Overlord]

The Battle of Prokhorovka on July 12, 1943, was one of the largest tank clashes of World War II, fought between Soviet forces and Germany’s II SS Panzer Corps during the Battle of Kursk. The Soviets launched a massive counterattack to halt the German advance, resulting in brutal close-quarters fighting.

General Howitzer summarizes the results:

Prokhorovka was the kind of fight that strips war down to raw courage and cold steel. On July 12, 1943, the Germans drove forward with their elite SS Panzer divisions, thinking they’d punch a clean hole through the Soviet lines and finish the Kursk offensive on their terms. Instead, they ran headfirst into a Soviet counterattack that came on like a tidal wave of T-34s.

This wasn’t long-range dueling — this was knife-fight range, tank against tank, guns blazing at fifty yards, machines ramming each other like charging bulls. The battlefield turned into a cauldron of smoke, fire, and shattered armor. And in that chaos, the Russians did what mattered most: they stopped the Germans cold.

The Panzers never got their breakthrough. Kursk slipped from Hitler’s grasp. And Prokhorovka proved once again that in war, the side that holds its ground with grit and fury — not just fancy equipment — is the side that turns the tide.

12 VP’s

Card Balance:

Allies – 10

Axis – 10

Complexity:

4

Conditions:

Countryside

Context:

Historical

Location:

Russia

Year:

1943

Theater:

Eastern

Campaign:

Battle of Kursk

Codename:

Operation Citadel

Summary:

Objectives:

12 VP’s

Battlefield:

A countryside with the River Pesl cutting vertically through the left section. 

Troops:

Allies – 8 Infantry, 15 Armor, 2 Artillery

Axis – 11 Infantry, 14 Armor

Special Rules:

1.  The River Psel is fordable.


medal allies

🔥 Winning as Allies

1.  You have two Artillery placed right in the center of the battlefield hidden in the town hexes.  They will be much more useful to you, if you can move them forward a hex or two.

2.  Move your Armor unit which is in the forest hex just to the left of the city of Prokhorovka up into the forest hex which is exactly in the center of the battlefield. It will give you a magnificent view of the battlefield in all directions.

3.  Your Armor units stuck in the right corner, need to come forward to be prepared for attack in that section.

STRATEGIC OVERVIEW

1.  This is a 12 medal game so there is a lot of strategic placement which will pay dividends for you to win later on in the game.  

2.  So grab the forest and town hexes as quickly as possible, so that you can attack the enemy forces from a safe location.  There are so many tanks in this scenario that if you leave any of your forces out in the open, they will get wiped out.

3.  There are so many tank figures in this game that as many as 50 armor figures could get wiped out before the game is over.  

medal axis

🔥 Winning as Axis

1.  The Axis have an attack vector on the right section. They can move their Infantry two hexes forward and capture the woods in the very center of the battlefield.  Also, your Armor in the right need to be move forward quickly and placed into the forest hexes to be prepared to attack the enemy.

2.  Get all of your Armor which is sitting out in the open in the center section into defensive positions, or they will be wiped out.

Battle Reports

1
BR - Prokhorovka

Author:

Days of Wonder

Link:

FROM BORGO A MAZZANO TO BARGA

From Borgo a Mazzano to Barga (BrEF)

After victories in the Massarosa, Camaiore and Monte Prana, the Brazilian troops were directed towards the village of Borgo a Mozzano. Aware in advance of the location and capabilities of the Germans in this stretch of the Gothic Line, the US command ordered the Brazilians to follow a course parallel to the Serchio River. While US troops proceeded on the opposite side of the river. By entering the Serchio River valley the FEB could avoid the expected German defences of the Gothic Line. It was discovered however that much of the line in that area had already been abandoned by the Axis, who had retreated about 9 miles to the north.

Further on, crossing the river, the FEB came across a factory of ammunition and aeronautical materials in Fornaci, which the Germans abandoned intact (but tried to recover in a counterattack.) The FEB then headed north to liberate Gallicano and Barga. In the process of doing this they clashed with the battle hardened veterans of the 148th German Division.

5 VP’s

Card Balance:
Allies – 5
Axis – 4

Complexity:

4

Conditions:  

Countryside

Context:

Historical

Location:

Italy

Date:

Sept. – Oct. 1944

Theater:

Western

Campaign:

Brazilian Expeditionary Force

Code Name

Context:

Historical

Summary:

Objectives:

5 VP’s

Battlefield:

Battlefield has a road and a river cutting across each other in an x-shape, with a couple of bridges.

Troops:

Allies – 9 Infantry, 1 Armor

Axis – 8 Infantry

Allied Strategy

Axis Strategy:

This scenario is something a little different. It’s an Axis tactical withdrawal across a bridge and then a regroup in a factory. A well deployed Behind Enemy Lines Card for the Axis can deliver a crushing blow on the Smoking Snakes on the Axis right flank. This can then be followed up with a dash across the bridge. [ Marcus Wallis ]

Battle Reports:

0
BR - BORGO

Author:

Icles Rodriquez & Memoir 44 Japan

Breakthrough to Gembloux

Breakthrough to Gembloux

Historical Background

The Breakthrough to Gembloux was part of the early German invasion of Belgium during May 1940, in the larger Battle of France. German Panzer divisions advanced through central Belgium aiming to break Allied lines near Gembloux, where French forces had fortified positions in the so-called Gembloux Gap—one of the few tank-suitable areas in the region.

Fierce fighting erupted between German armored units and French mechanized divisions, resulting in one of the few early confrontations where French forces held their ground and inflicted significant tank losses. However, the battle was ultimately bypassed when German forces broke through further south in the Ardennes, rendering the defense of Gembloux strategically moot.

General Howitzer summarizes:

At Gembloux, the French finally stood their ground and gave the German Panzers a bloody nose—one of the rare times early in the war they didn’t fold. But while they were trading blows up north, the real storm came through the Ardennes. The fight was solid, but it ended up guarding the wrong damn door.

VP’s

12 VPs

Card Balance:

Allies – 5

Axis – 6

Complexity:

4

Conditions:

Countryside

countryside

Context:

Historical

Location:

France 

Date:

May 13, 1940


Theater:

Western

Campaign:

The Battle of France

Codename:

Summary:

Objectives:

12 Victory Points, plus one Exit by an Axis unit

Battlefield:

Deep breakthrough battlefield with countryside terrain

Troops:
Allies – 8 Infantry, 7 Armor, 1 Artillery

Axis –  10 Infantry, 8 Armor, 2 Artillery

Big Picture Strategy

The challenge for the Axis is escaping a unit out the Exit Hex at K1. 
Winning battle is easy; escaping the battlefield is not.

🔥 Winning as Allies

1.  If you want to have any hope of holding out against the Germans, as the French did for two days historically, you will need to hold the line right at the beginning with the three towns on row 13.  Get your armor up their to reinforce your infantry.  The Axis have overwhelming force, so if you retreat, they will be able to pick you off one by one. Make your stand immediately!

2.  Once you get pushed back, the final victory medal for the Axis has to come through escaping on the hex at K1.  Guard that with your armor and infantry, and you have some hope of gaining another medal.

3. While you may lose a lot of forces as the Axis pushes you back, be sure to have enough forces to make a good stand to guard the final exit hex at K1.  The Axis can be made to suffer much as they try to get one unit out that escape hex.  In fact, once Axis have achieved their 12 victory points,  you can sacrifice as many Allied forces as you need to in order to prevent them from escaping.

🔥 Winning as Axis

1.  Remember that no matter how many Allied units you destroy, you will have to get one of your units out the exit row at the end of the battlefield.

2.  The very best way to end the game well, and escape your final Axis unit off the board is to save up a Behind Enemy Lines. Then maneuver an infantry within six rows of the border, and make your move.

Battle Reports:
(percentage of Allied victories)


5
BR - Breakthrough to Gembeloux

Author:

jdrommel

Link: