Reichswald – The Siegried Line
Reichswald - The Siegried Line
February 9th, 1945. The Reichswald—five miles of hell standing between us and the Ruhr, the industrial heart of Hitler’s war machine. You want to break Germany? You punch through there.
We stacked the odds—brought in the numbers, massed near Groesbeek, and started pushing toward Kleve. The Krauts had about 11,000 defenders, and hell, some of ’em were barely fit to fight—one unit full of men with stomach problems, another made up of deaf troops. Sounds easy, right?
Wrong.
Because they were dug into the Siegfried Line—pillboxes, dragon’s teeth, minefields—you name it. They’d flooded the land to the north and south, squeezing us into a freezing, muddy kill zone. And just when you think it couldn’t get worse? The sky opens up with six days of cold, soaking rain. Floods everywhere. Roads turned to soup. Trucks bogged down. Men freezing.
But don’t forget this: they still had paratroopers in reserve. Hardened, mean, disciplined bastards with nothing to lose.
That was the hand we were dealt. The map was a mess, the weather was hell, and the Germans were desperate—but we were coming anyway.
You are in command now. The question ain’t whether it’s hard—the question is: do you have the guts to drive through it and break their damn line?**
Because history doesn’t wait. You either make it—or get buried under it.
~~ General Howitzer
6 VP’s
Card Balance:
Allies – 5
Axis – 5
Complexity:
4
Conditions:
Countryside
Context:
Historical
Location:
Netherlands
Year:
1945
Theater:
Western
Campaign:
Codename:
Summary:
Objectives:
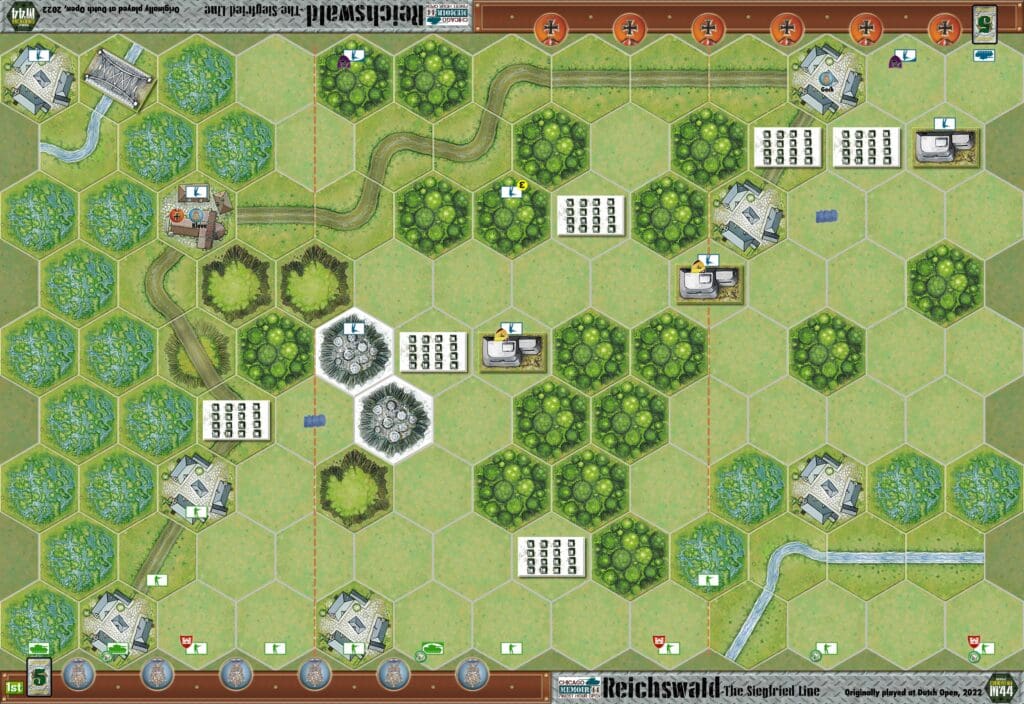
6 VP’s, plus two city temporary Objective Medals
Battlefield:
Countrsyide with marsh on one side, a road running through much of it, and numerous ‘dragon’s teeth’ roadblocks which can only be removed by use of the Allied Dozer tanks.
Troops:
Allies – 10 Infantry, 3 Armor
Axis – 9 Infantry, 1 Armor
Allied Strategy:
1.
Axis Strategy
1.
Battle Reports
Author:
Originally played in the Dutch Open, 2022; and in The Finest Hour Open, Chicago 2025.
Link: