Pegasus Bridge
Pegasus Bridge
4 VP’s
![]()
Card Balance:
Allies – 6
Axis – 2, 3, 4
Complexity:
1
Conditions:
Countryside

Location:
Normandy
Year:
1944
Theater:
Western Front
Campaign
Codename
Briefing:
This intro scenario to M44 has only infantry, so managing their movements and ability to attack will determine victory and success. It is heavily favored for the Allies, to represent history, so the Axis need to have a great combination of card management, lucky dice and good strategy to win.
Objectives:
Four VP’s, and two bridge Objective Medals.
Battlefield:
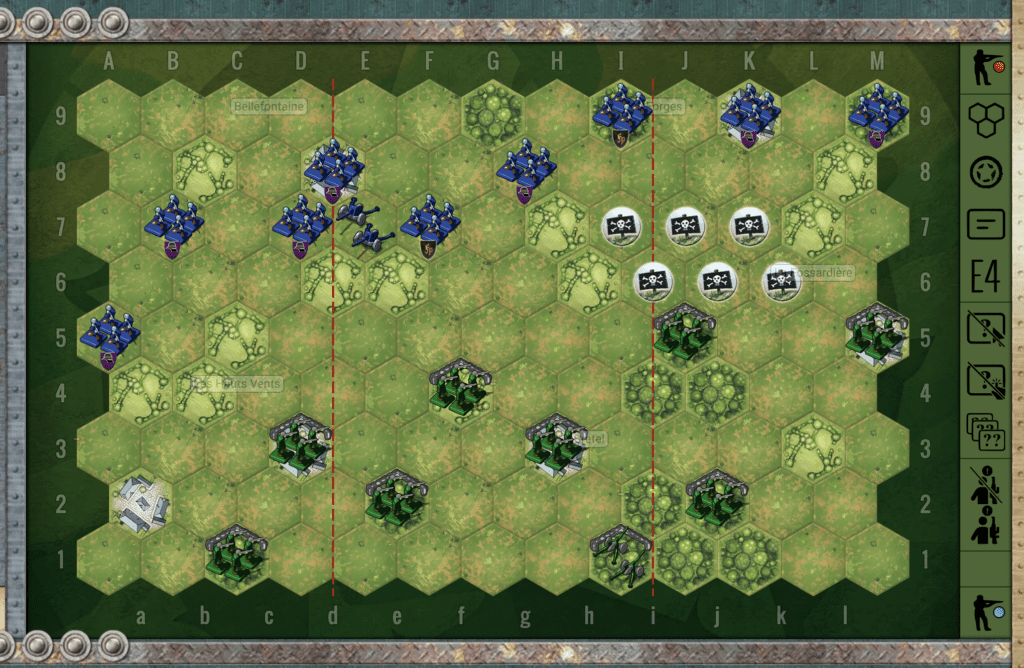
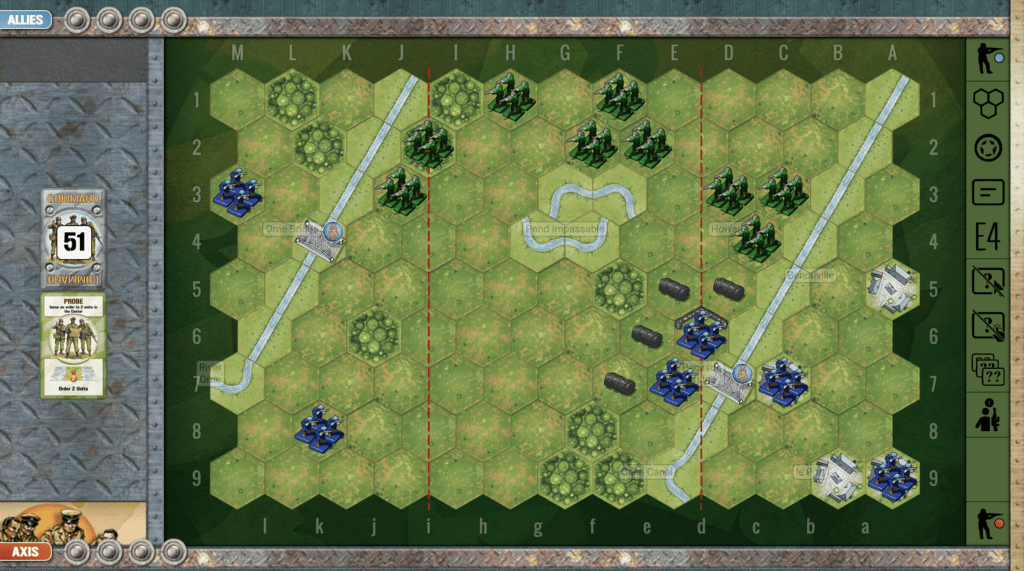
Countryside, slashed by two rivers – the Orne and the Caen Canal, whose bridges are the focus of the Objective Medals.
Troops:
Allies – 9 Infantry
Axis – 6 Infantry

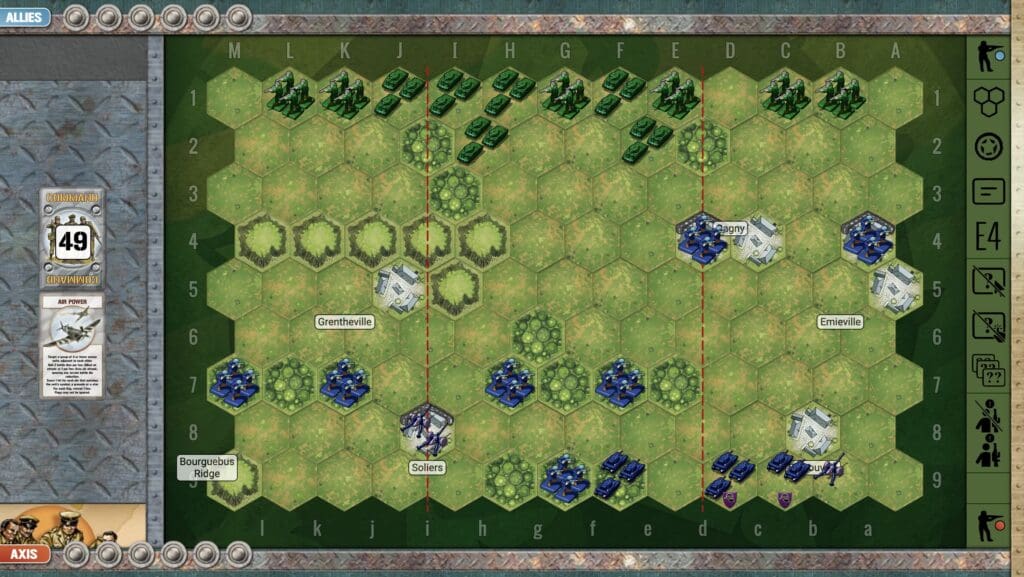
🔥 Winning as Allies:
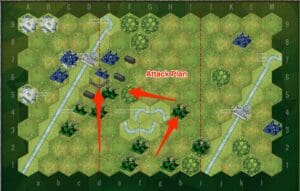
1. The Allies are faced with the need to literally ‘divide and conquer’ on two fronts. One strategy to address this is to focus your energies first on your right flank and take out the units defending the bridge. Once they are gone, and the bridge is gained you will already have three of your needed four points. You will of course have to manage your forces on your left flank so that the enemy is not picking them off one by one from acrosss the sandbags and from across the river.
2. The other attack option is to encircle the enemy by going around the lake with your excess Infantry forces. The Allies have more Infantry than can effectively attack in the narrow range between the river and the lake. So you can send some around the lake on a long-range mission to attack the enemy from the other side as well.

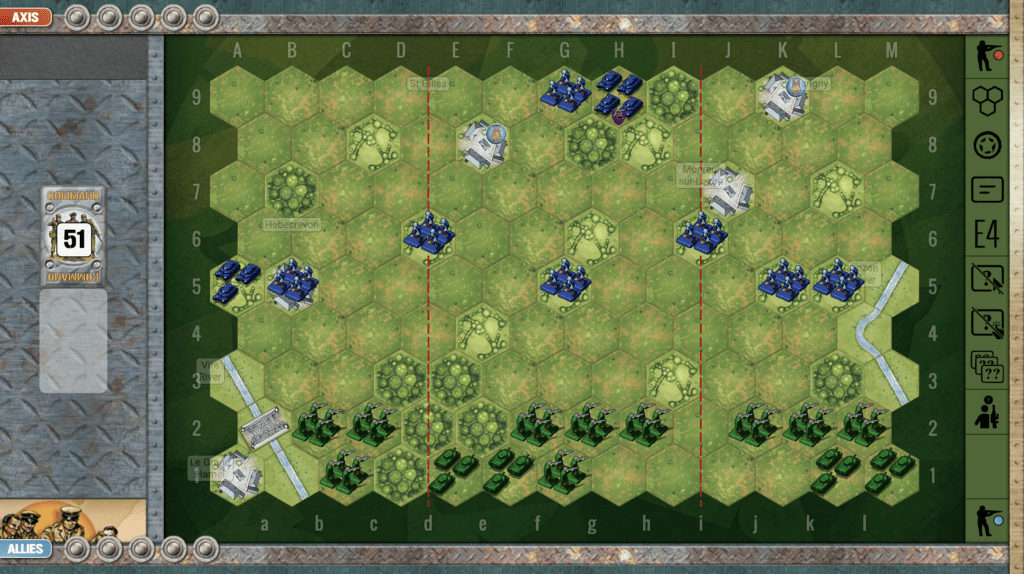
🔥 Winning as Axis:
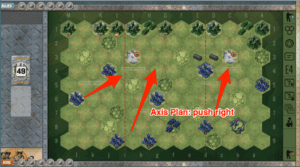
1, Because Allies are heavily favored with a 9-6 infantry count, and a 69% success rate, the Axis must get all of their infantry into the fight as soon as possible. Early moves to activate the infantry in the corner of the right flank should be implemented. They can bring a good flanking maneuver to slow down the Allied attack on their sandbagged comrades by firing across the Benouville river.
2. An alternative attack strategy, if you have the movement cards for it is to get at least one of your infantry units across the bridge and into the fight in the center section.
3. Although the Objective Medal of Orne Bridge is within easy reach of the Allies, there is no need to sit on it and wait to be attacked out in the open (As a bridge provides no defensive value). A better strategy would be to have the two infantry units on the left flank to secure protection in the grove of trees above and below near the bridge. Each unit would be within two hexes of the bridge and able to send a withering attack against any Allied units who prematurely try to grab the bridge without first clearing the Axis defenders.
DoW Battle Reports
( percentage of Allied victories):
69%

Author:
Days of Wonder
Link