Medeera Pocket
Medeera Pocket
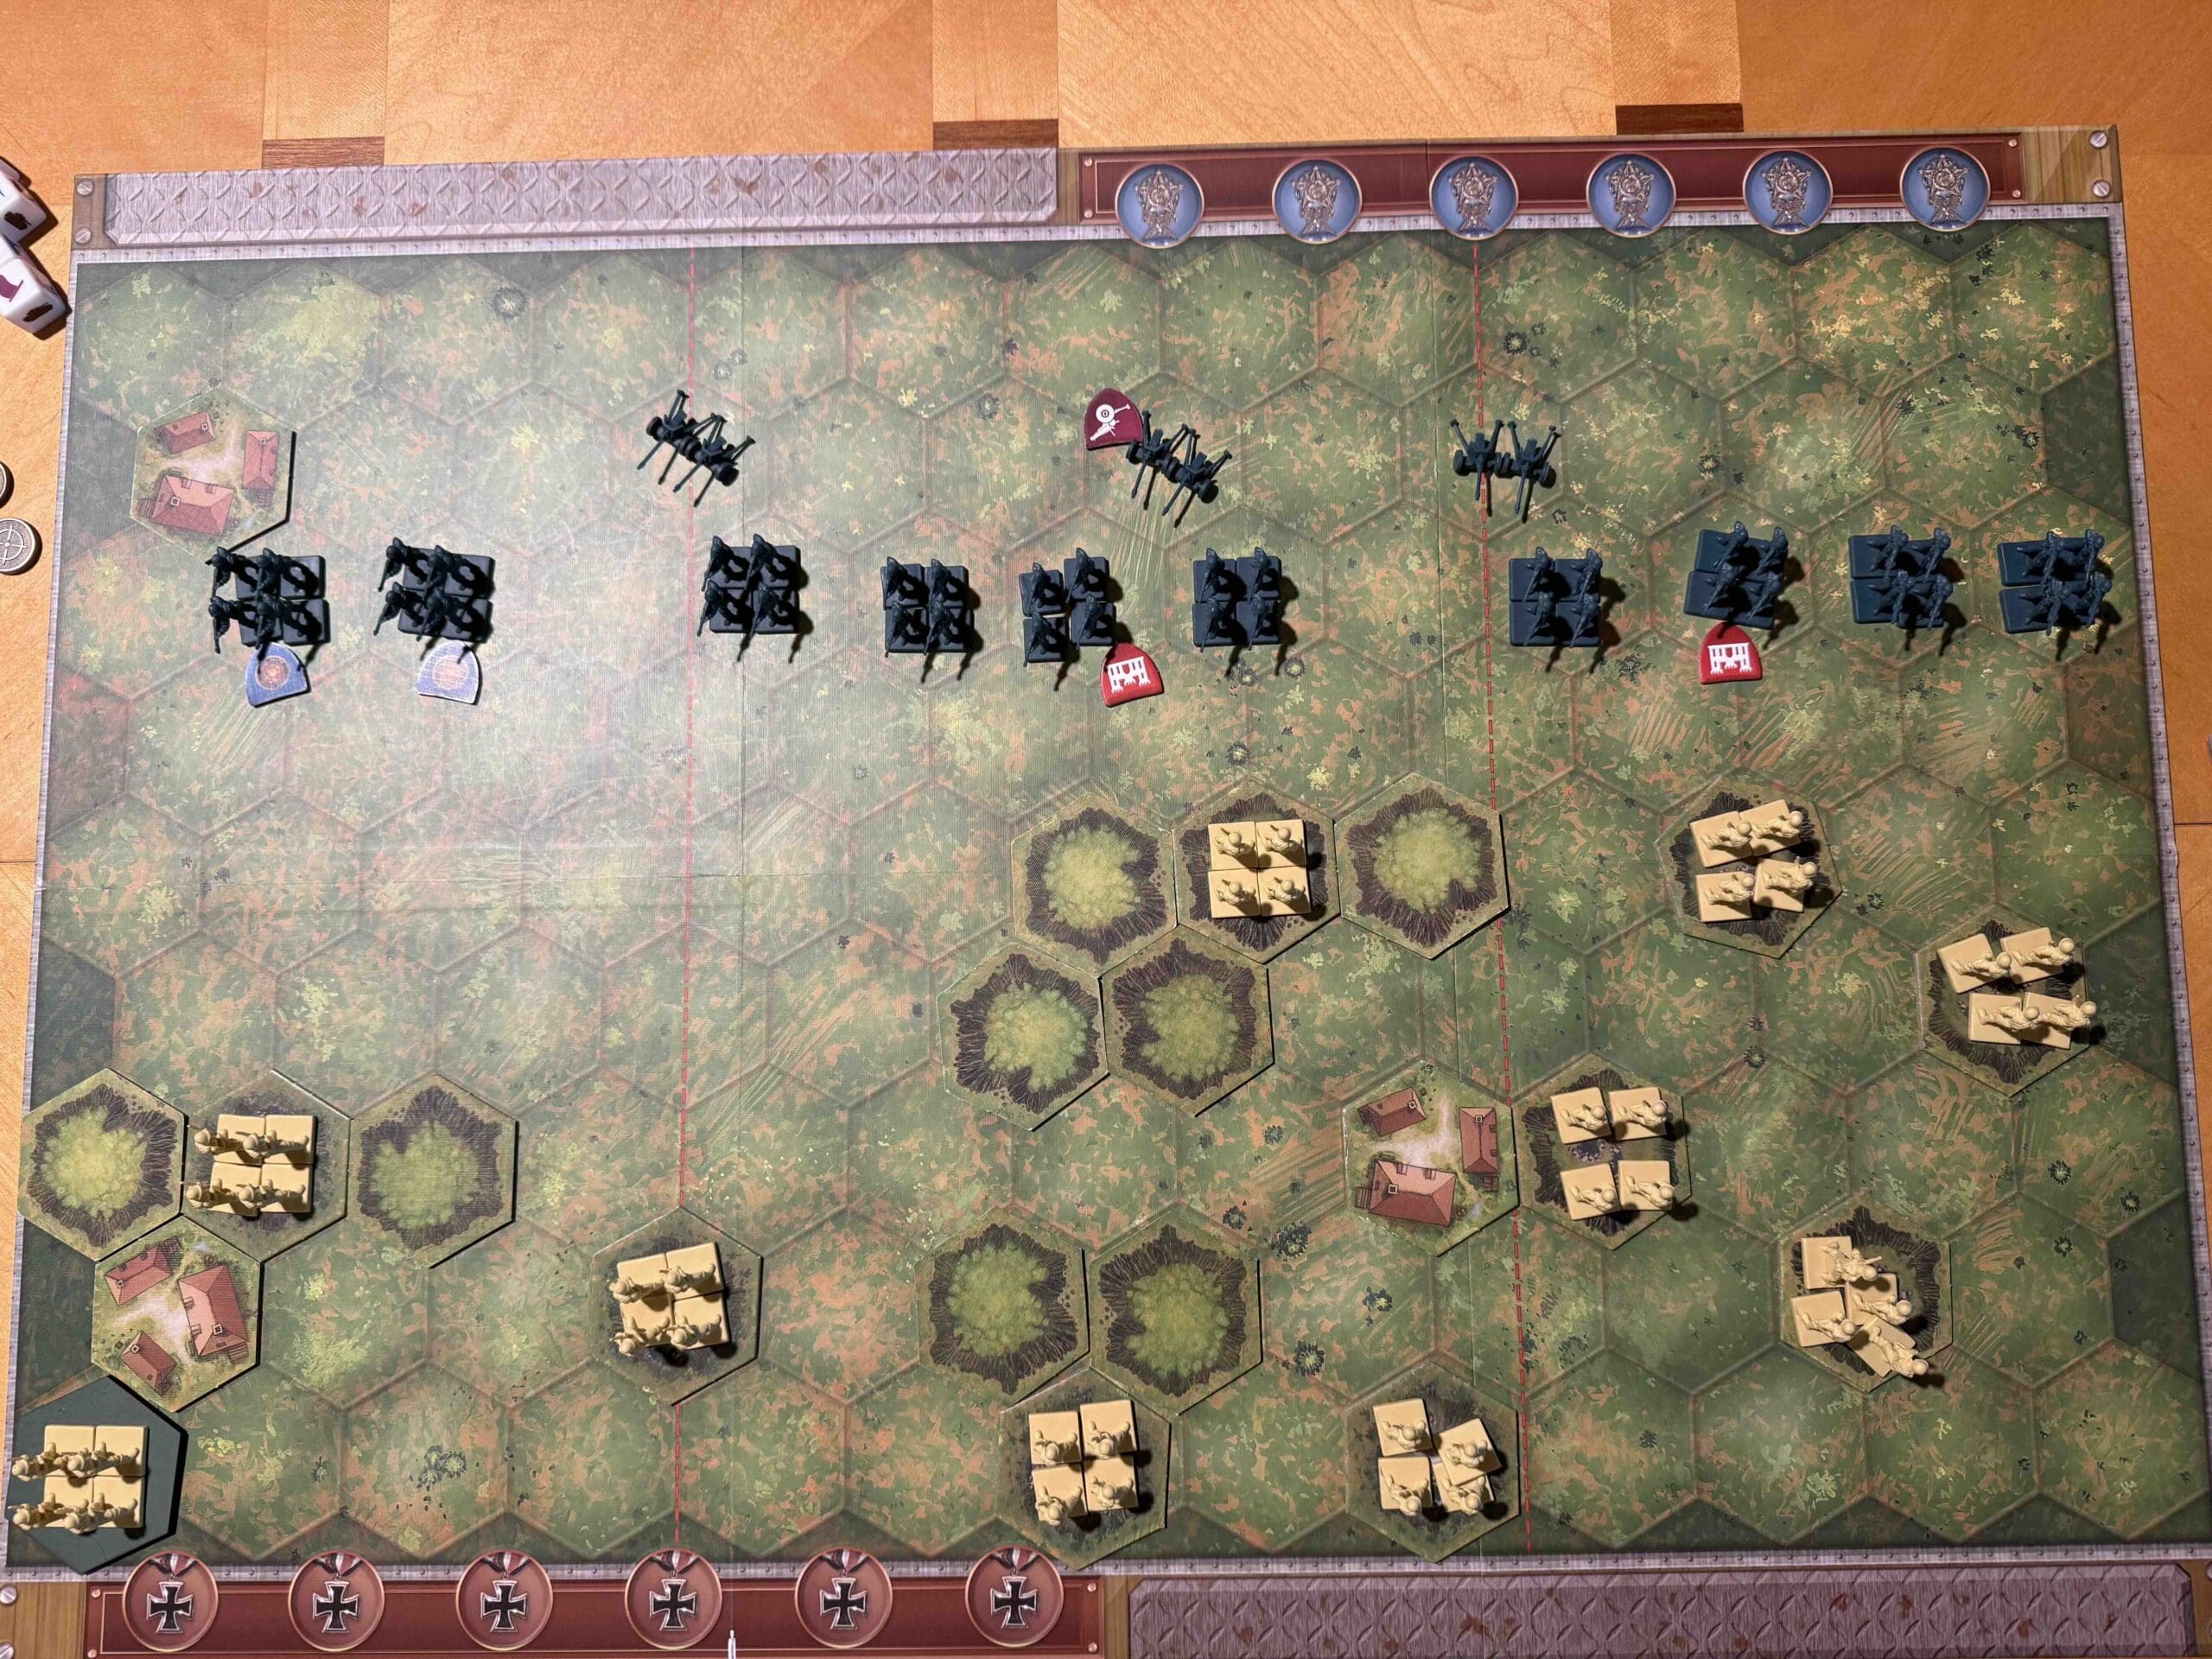
IMG_0782
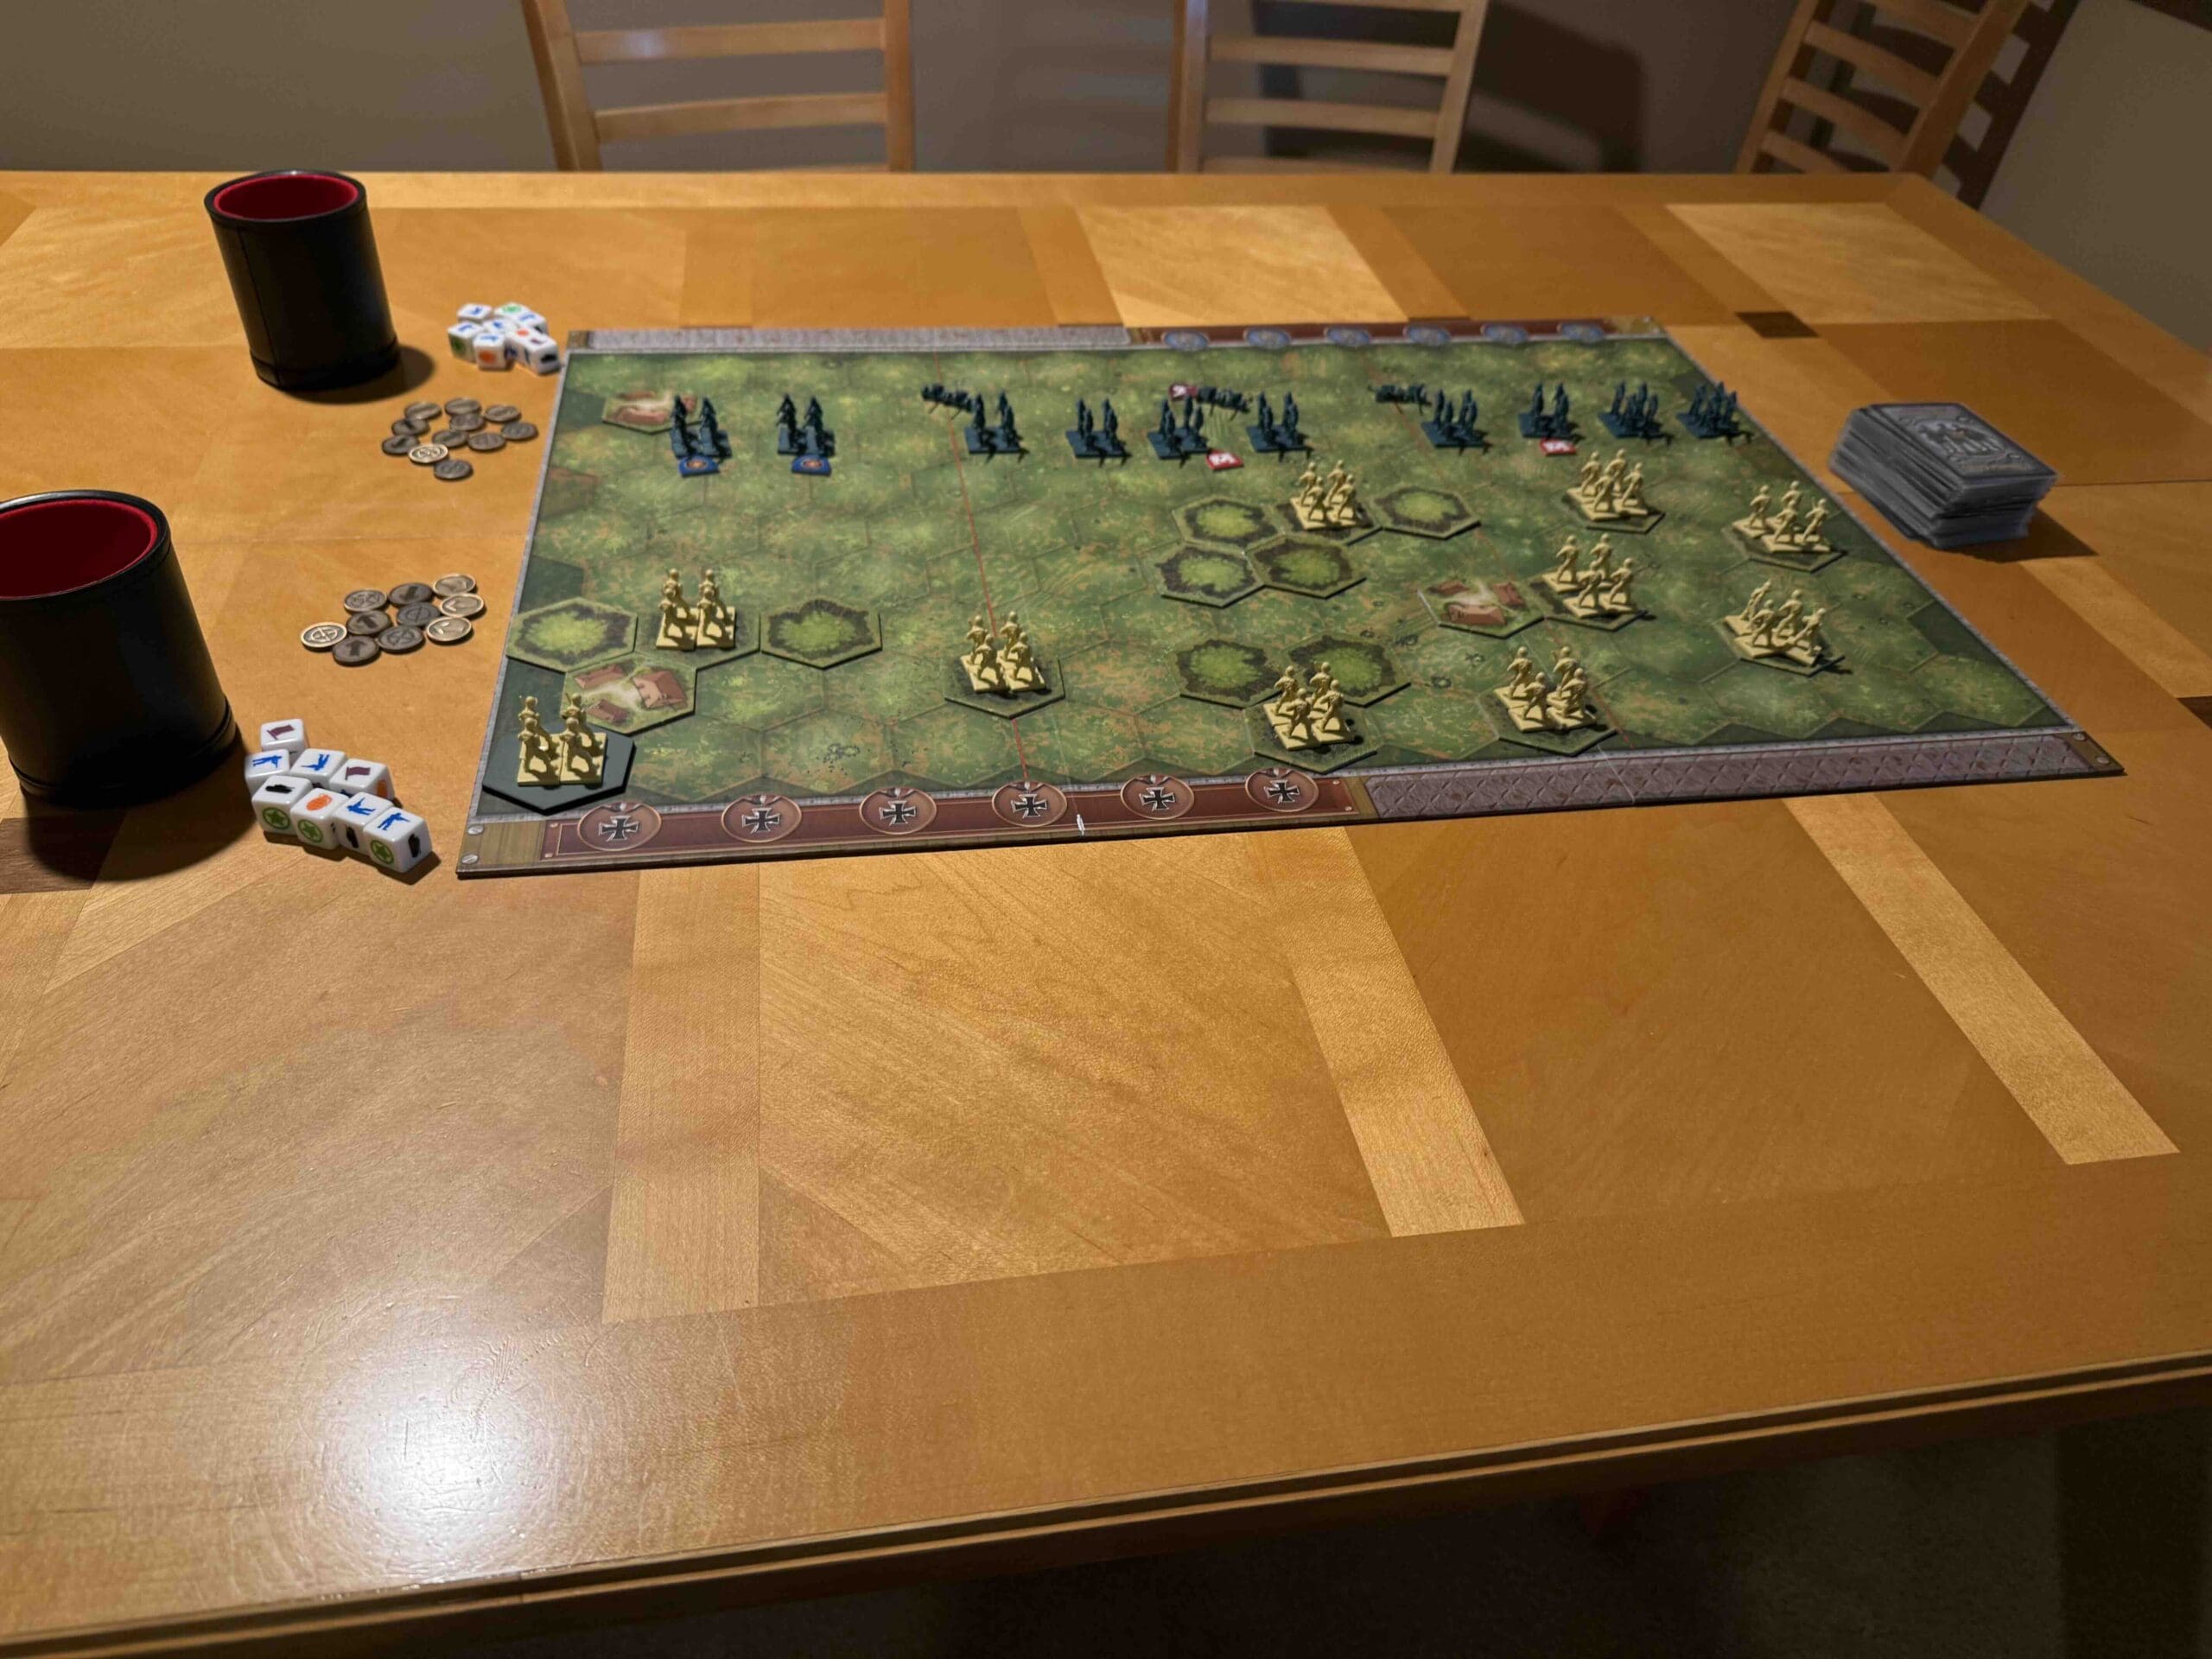
IMG_0784
IMG_0785
Background
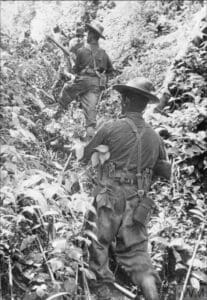
The Battle of the Medeera Pocket in June 1945 was a late-stage engagement during the Marianas and Palau Islands campaign of World War II.
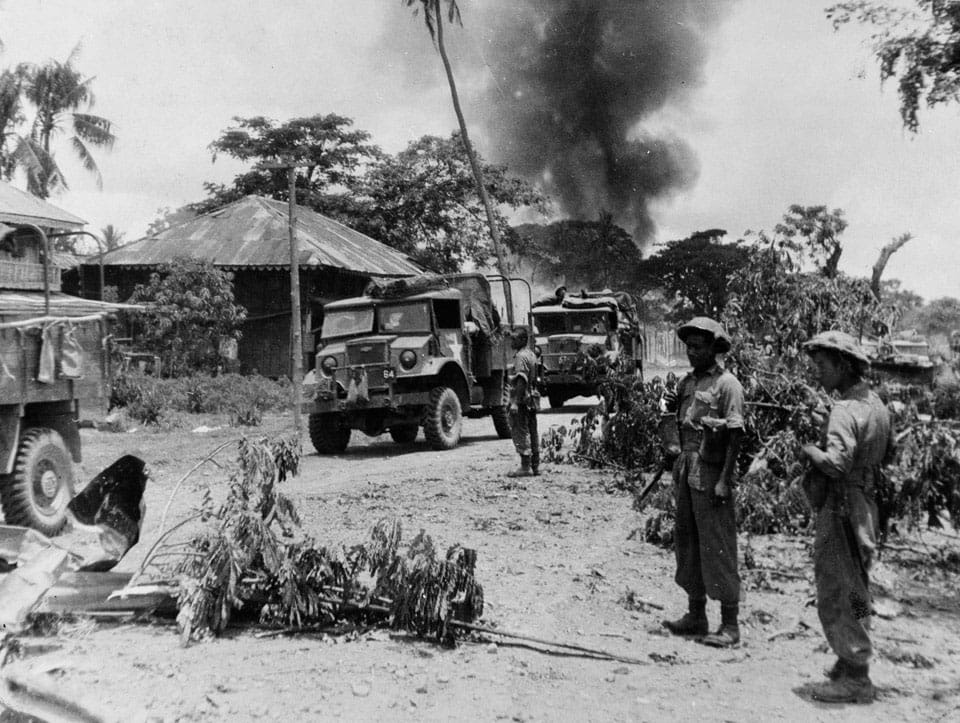
Located on northern Peleliu, the Medeera Pocket was one of the last strongholds of Japanese resistance. U.S. Marines and Army forces faced fierce, dug-in Japanese defenders who refused to surrender, fighting from caves and fortified positions. The battle involved intense close-quarters combat, flamethrowers, explosives, and coordinated assaults to clear the terrain.
Despite being outnumbered and cut off, Japanese troops fought to the death, inflicting significant U.S. casualties before being wiped out.
The elimination of the Medeera Pocket marked the final clearing of organized resistance on Peleliu, securing the island for Allied operations and reinforcing the brutal nature of Pacific island warfare.
General Howitzer summarizes:
The Medeera Pocket was one hell of a last stand—the Japanese were holed up in caves, dug in deep, and determined to die where they stood. They fought like fanatics, even when they were cut off and outgunned, but our Army and Marines finished the job. Clearing that pocket sealed Peleliu for good and reminded everyone that in the Pacific, every inch costs blood.
5 VP’s
![]()
Card Balance:
Allies – 6
Axis – 4
Complexity:
3
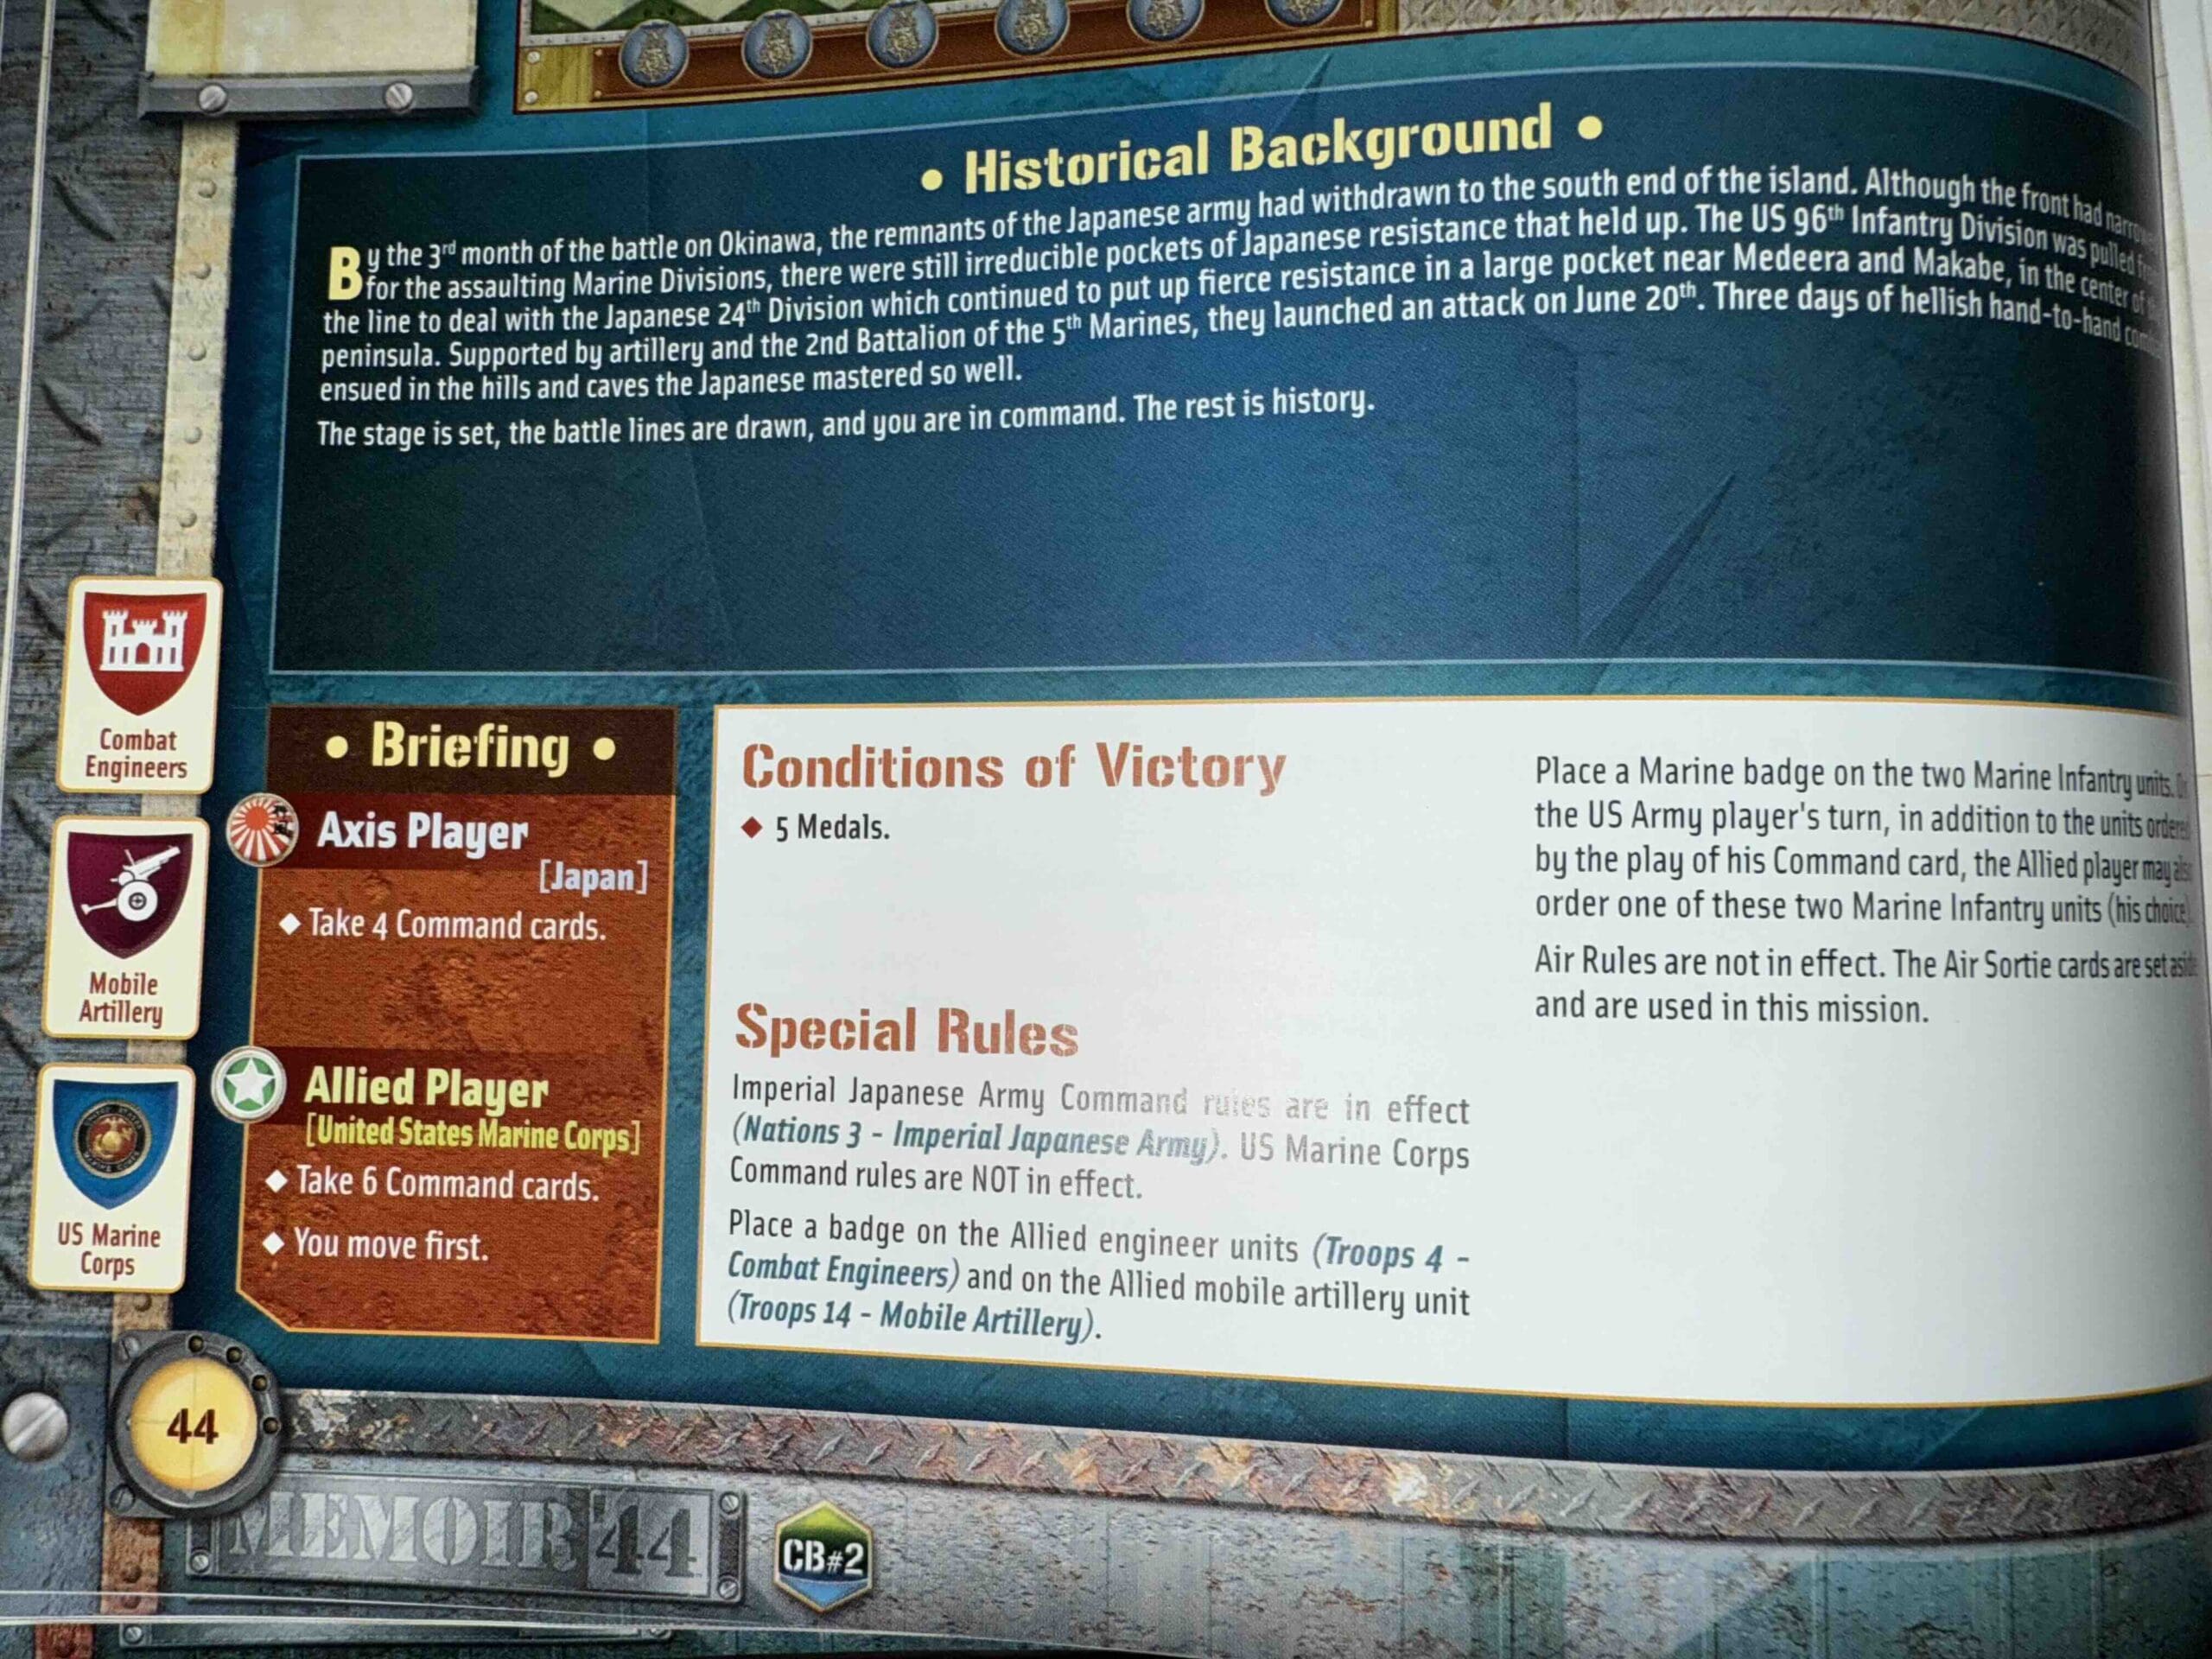
Conditions:
Jungle
Context:
Historical
Location:
Palau Islands
Year:
1945
Theater:
Pacific
Campaign:
Codename:
Operation Iceberg
Summary:
Objectives:
5 VP’s
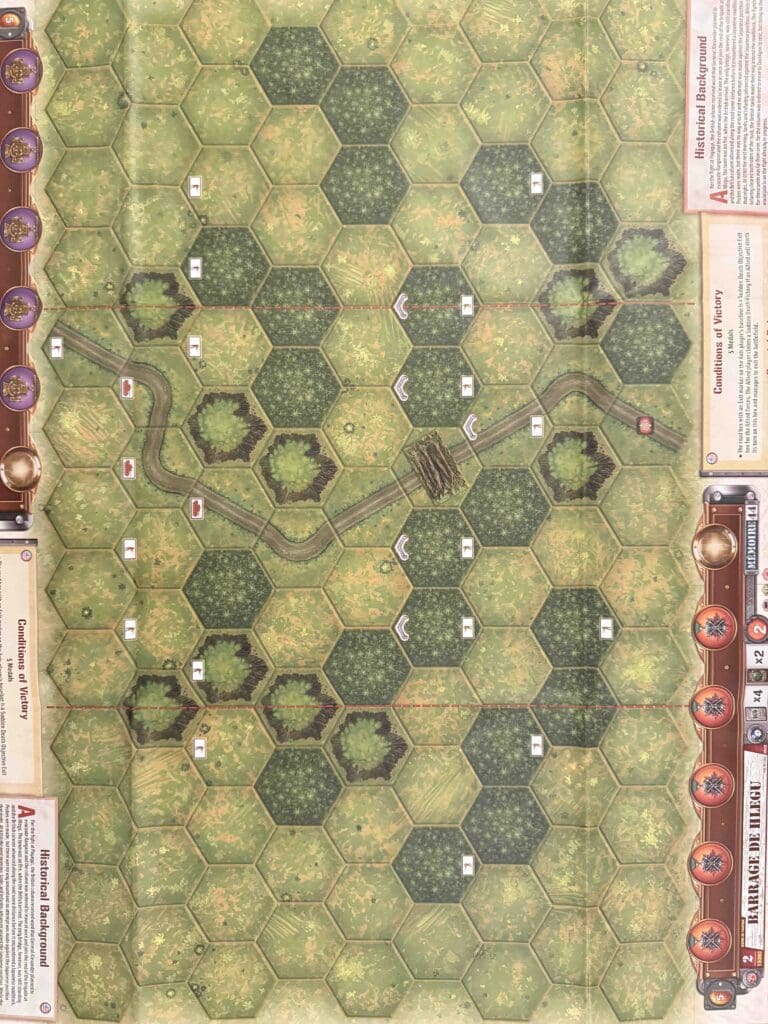
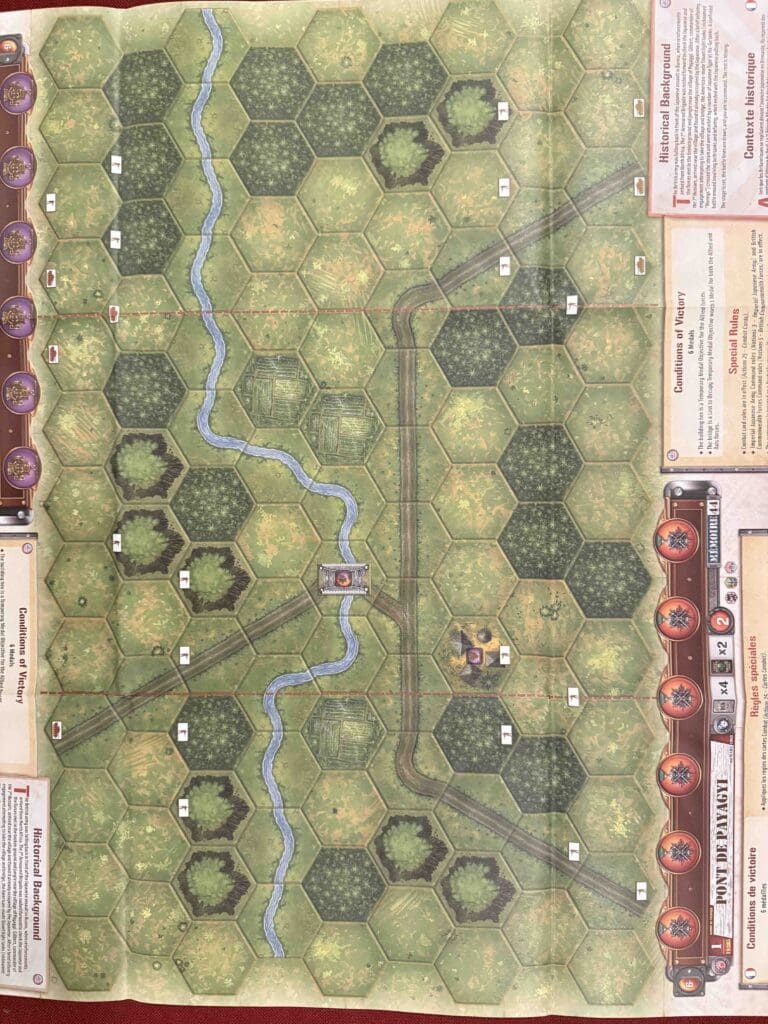
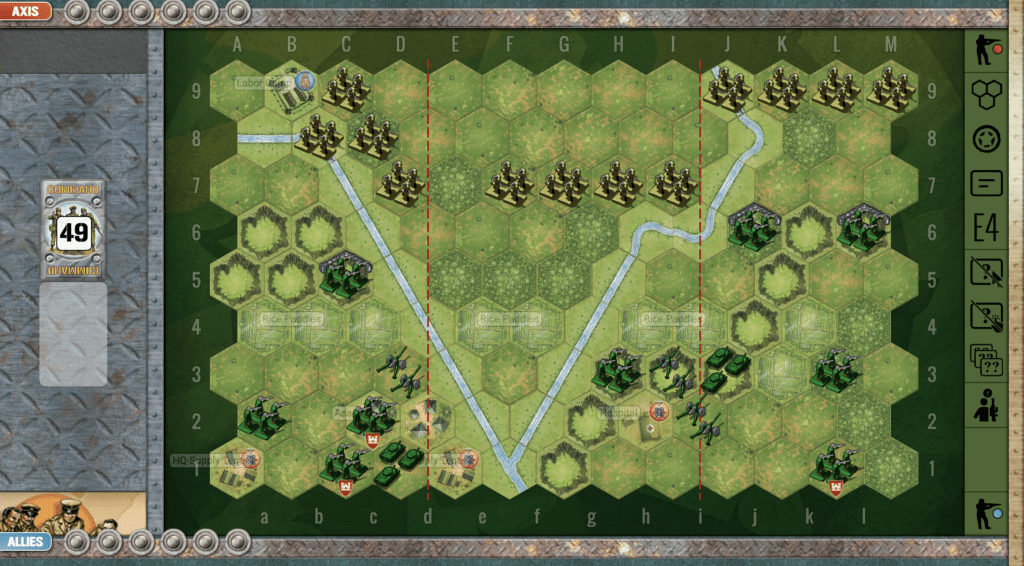
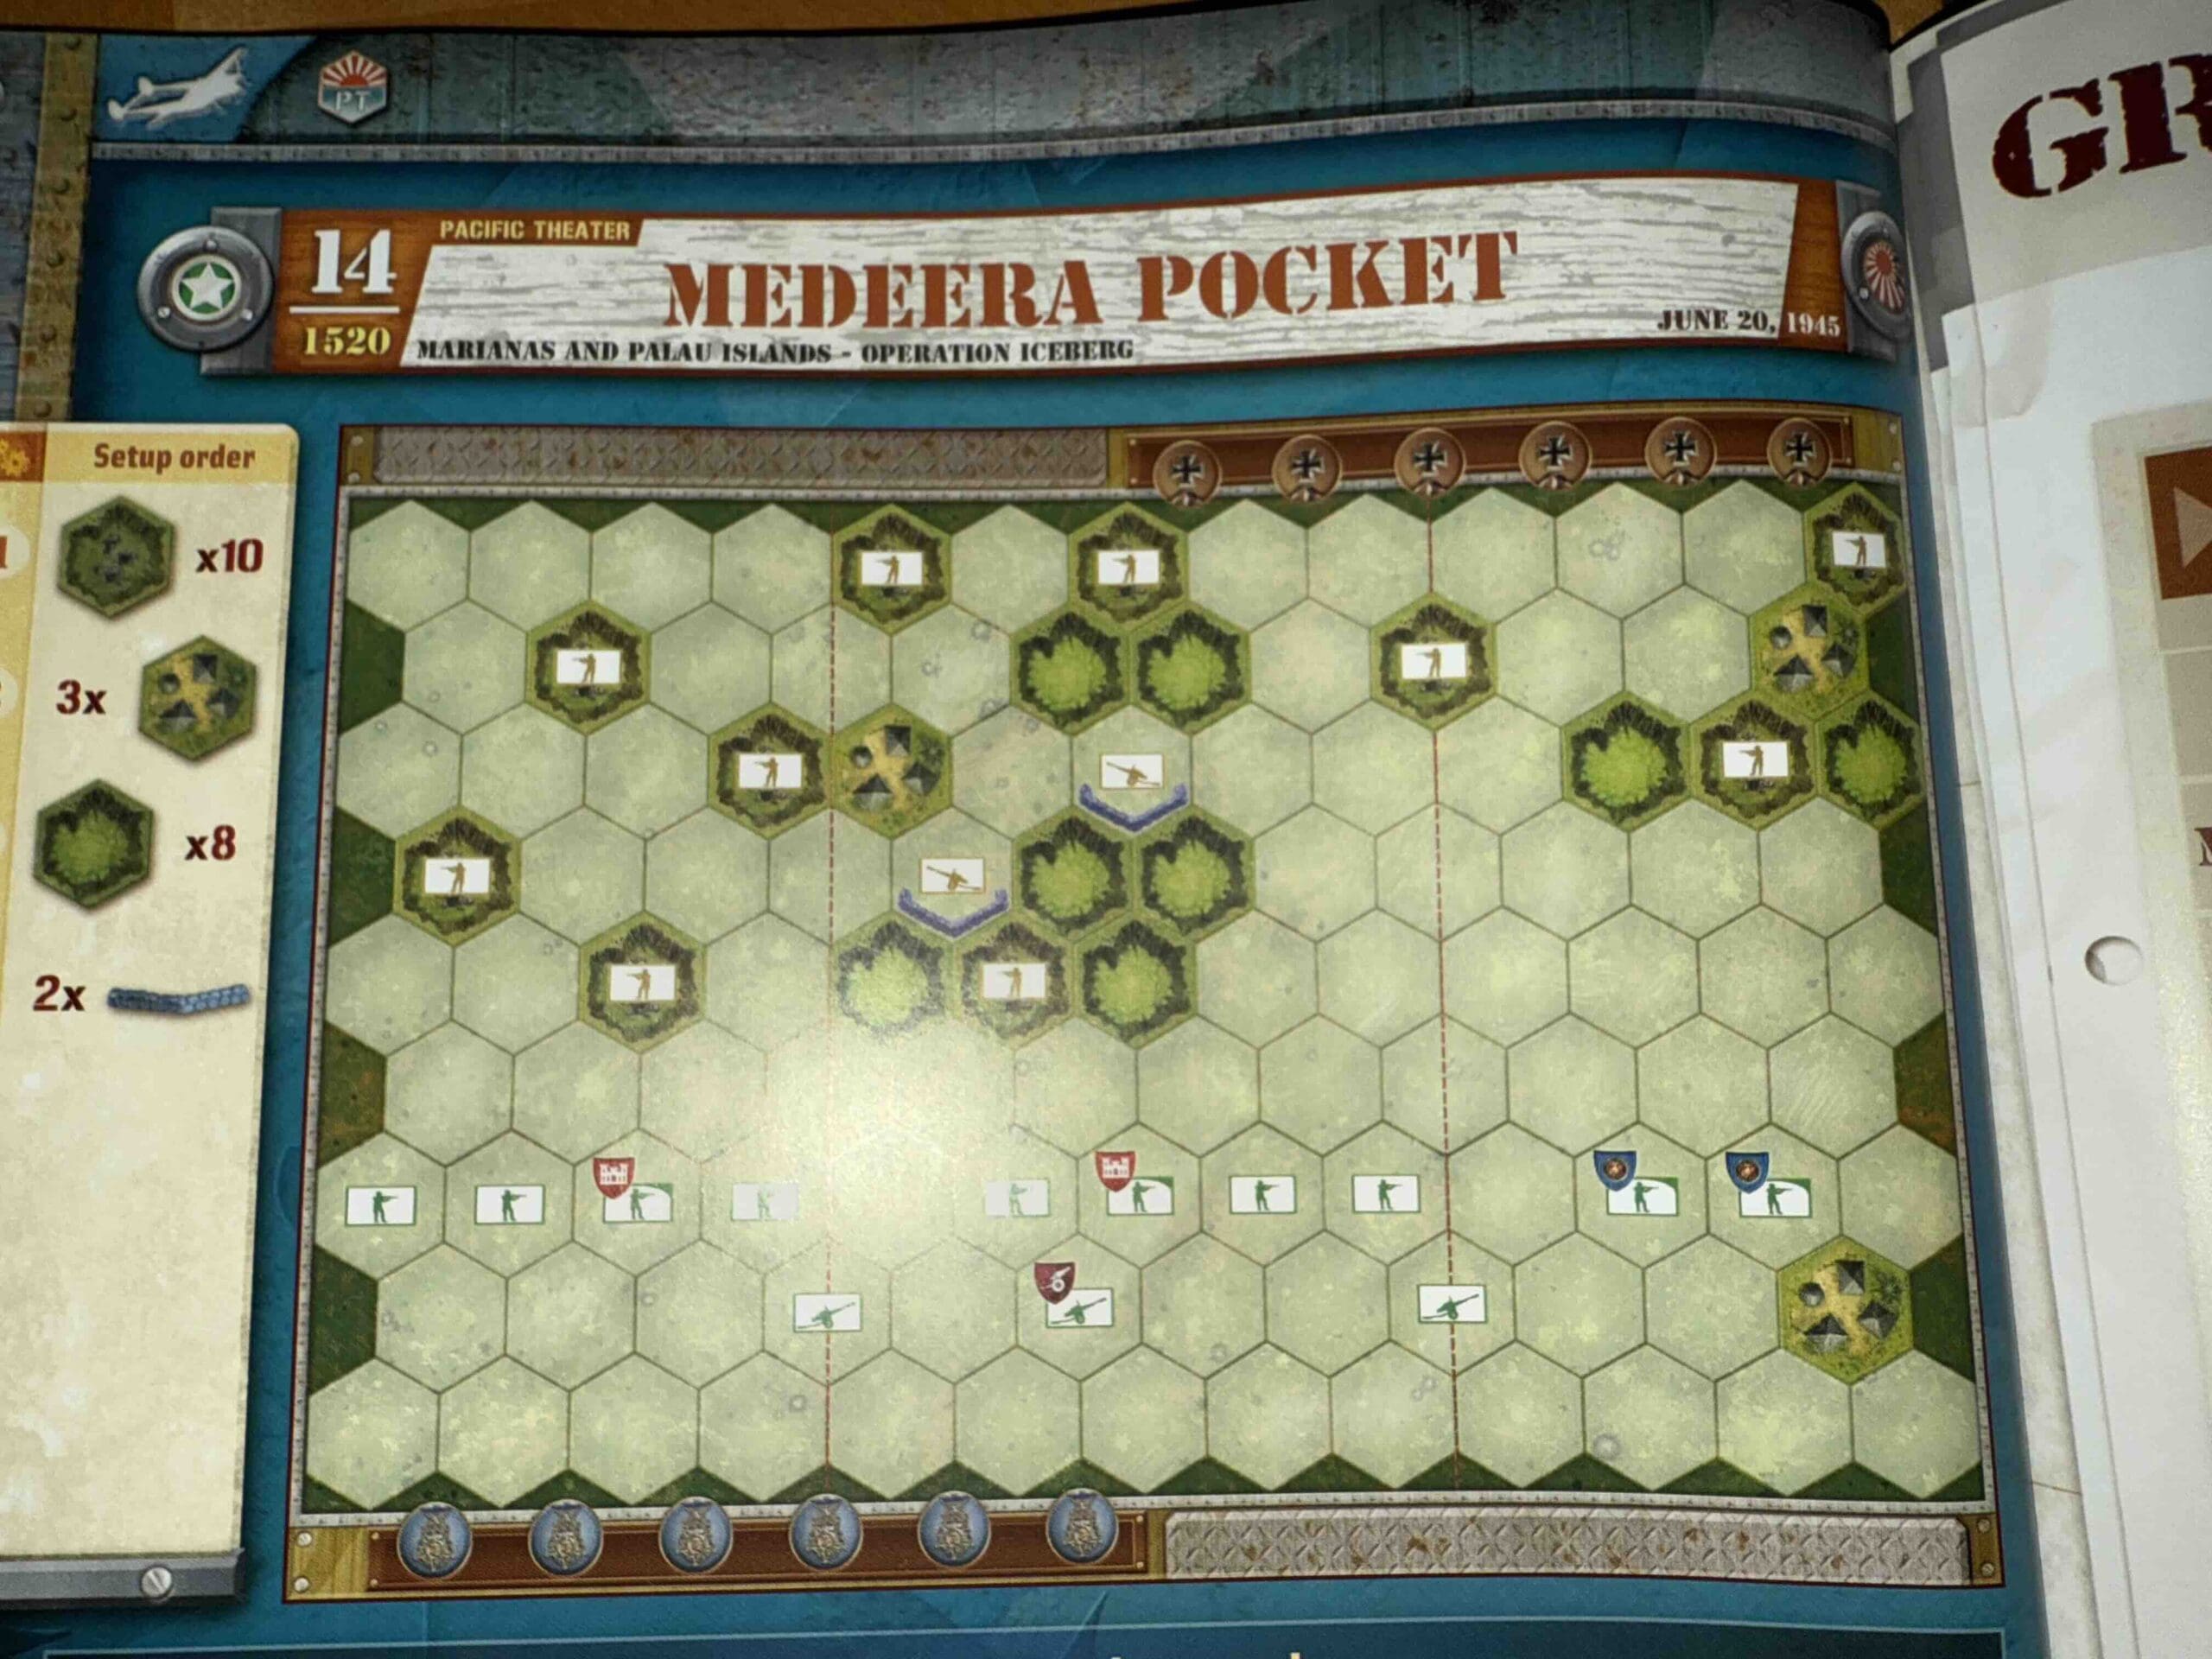
Battlefield:
Jungle terrain , hills with caves and some small villages.
Troops:
Allies – 8 Army Infantry, 2 Marine Infantry, 3 Artillery including a Mobile Artillery
Axis – 10 Infantry

Allied Strategy:
1. The center section is the key to victory. You have a Mobile Artillery, plus two other Artillery units which can all focus their firepower upon the center.
2. You have two Engineer units which can overcome the terrain disadvantages of caves on hills. Use them to clear out the entrenched enemy.
3. You have two Marine units which can be commanded every single turn, so they can conduct their own operation on your right flank, if they are supported by the Artillery unit on that side.

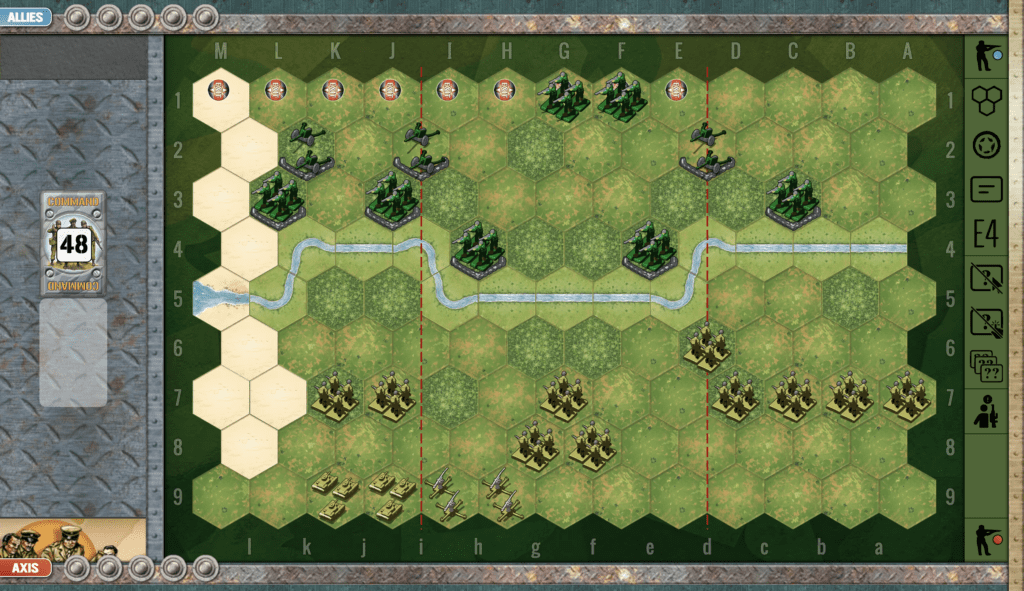
Axis Strategy
1. Remember the three special abilities of your Japanese forces (Seishin Kyoiku Doctrine, Yamato Dashi Concept, and the Banzai War Cry). You will need these to stand up against the enemy.
2. There are many Caves on Hills which give you both a defensive and mobile advantage. Infantry units can quickly move from one Cave on a Hill to another one, so that you can rapidly replenish your forces when they are destroyed.
3. You have two Artillery units well-protected in the center of the battlefield. Use them at every opportunity to push back the attacking Infantry, and when it comes into range, to also destroy the Mobile Artillery.
Battle Reports
Author:
Days of Wonder
Resource:
Campaign Book, Volume 2