Escape via the Coastal Road
Escape via the Coastal Road

In May of ’40, the Germans came roaring into France, and the Allies—Brits, French, and Commonwealth alike—were staring down the barrel of encirclement. So they fell back, fighting tooth and nail toward Dunkirk. One lifeline was that damned coastal road, hugging the Channel, choked with men, guns, and danger at every turn. It was no pleasure cruise—enemy fire, chaos, and desperation were the order of the day. But by God, they held on long enough for Operation Dynamo to haul over 330,000 soldiers out of the trap and back to Britain, ready to fight another day.
~~ General Howitzer
6 VP’s
![]()
Card Balance:
5 – 5
Complexity:
2
Conditions:
Desert

Location:
North Africa
Year:
1942
Theater:
Mediterranean Theater
Campaign:
Dunkirk Evacuation
Codename:
Operation Dynamo
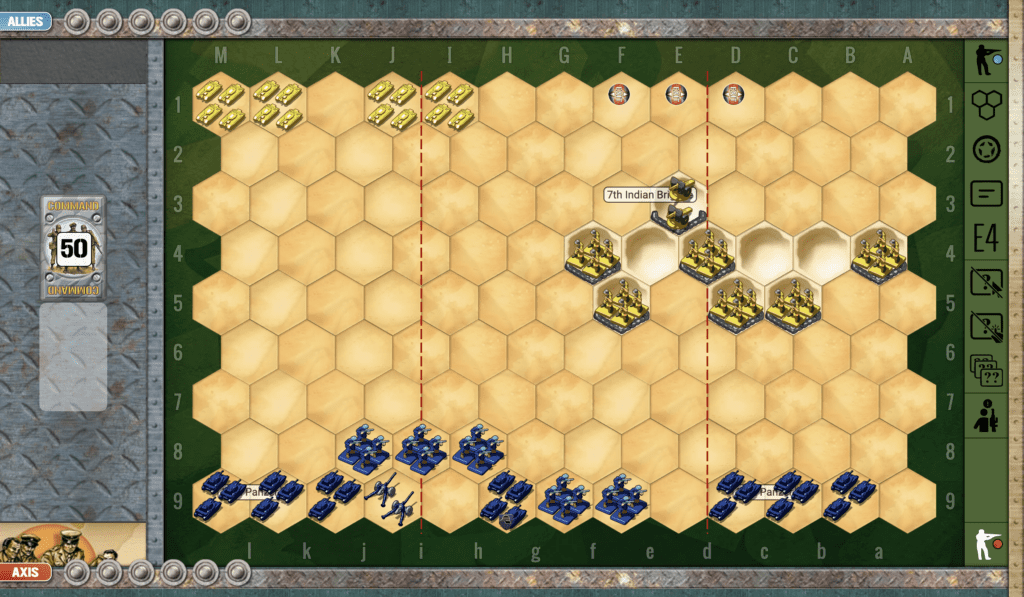
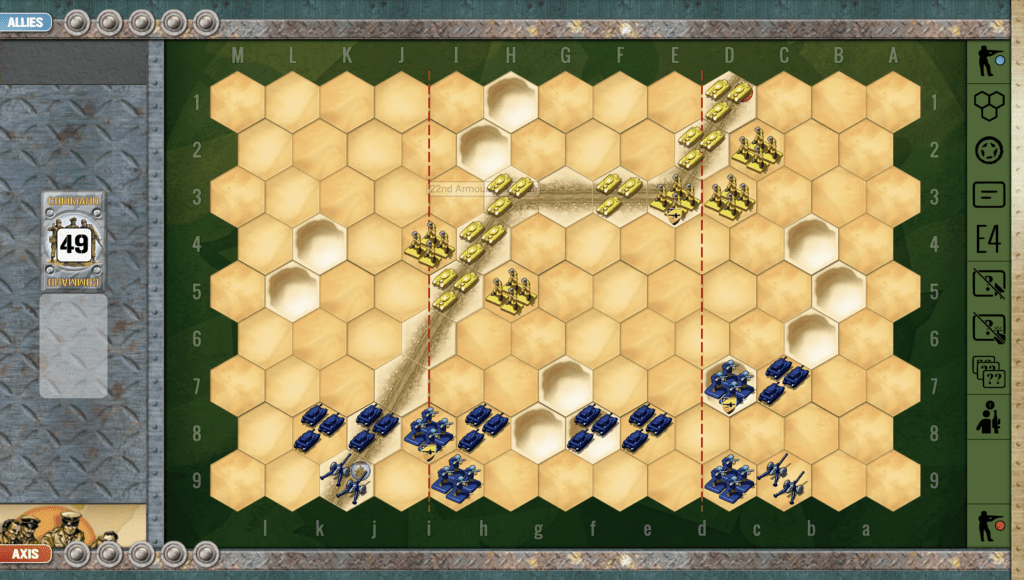
Summary:
The Escape scenario is a race to the edge, to either escape or prevent escape. If the Allies can prevent the Axis from getting through the gaps in the escarpment, they can win easily. But if the Axis can move fast enough, and get in front of the Allied troops, they will have the time they need to bring in the rest of the armor and pound the enemy into the dust before they can escape via the Coastal Road.
Objectives:
Six VP’s, combined with the escape hexes on the edge for the Axis.
Battlefield:
Desert, divided in half by an escarpment with three gaps in it.
Troops:
Allies – 10 Infantry, 1 Armor, 1 Artillery
Axis – 6 infantry, 5 Amor

🔥 Winning as Allies
1. For Allies, it is all about providing a protected retreat. Take advantage of the easy VP’s gained by escaping out of the exit markers. The unprotected left exit will be the easiest course of action. Use your tanks to protect your escape, by holding off the Axis long enough to go. Fortunately, the Axis armor has to make it way through the escarpments. This slows down their advance and their ability to mass against the Allies. If you can block entrance through an escarpment with a combination of infantry and armor, it may provide enough tie for the rest of the troops to escape to the left.
2. The right exit is heavily defended by sandbagged infantry, so don’t attack that unless you have overwhelming force.

🔥 Winning as Axis
1. The goal is to get through the escarpments with your armor as quickly as possible and begin attacking the escaping troops.
2. If you can get an armor unit to sit on the unguarded exit marker to block the exit to your right, you will be in a position to pound the Allied infantry into dust with the rest of your armor.
Classic Battle Reports:
(percentage of Allied victories)
52%
Author:
Days of Wonder
Link: