Mount Pincon
Mount Pinçon
“Listen up! In July ‘44, our British allies climbed that Mount Pinçon, the highest ground in Normandy, and they weren’t going to let anything stop them.
That hill was a fortress—machine guns, mortars, and some of the toughest terrain you could imagine. The 43rd Wessex Infantry Division took it step by step, pushing through hedgerows and driving the enemy out of their defenses.
This wasn’t just about one hill—it was about the whole campaign. Taking Mount Pinçon meant commanding the area, opening the door to Falaise and Paris. That’s how you win a fight—you secure the high ground and keep the enemy on the move!”
~~ General Howitzer
6 VP’s
![]()
Card Balance:
Allies – 5
Axis – 5
Complexity:
4
Conditions:
Countryside

Context:
Historical
Location:
France
Year:
1944
Theater:
Mediterranean
Campaign:
Normandy
Codename:
Operation Bluecoat
Summary:
Objectives:
6 VP’s, plus the Mount Pincon
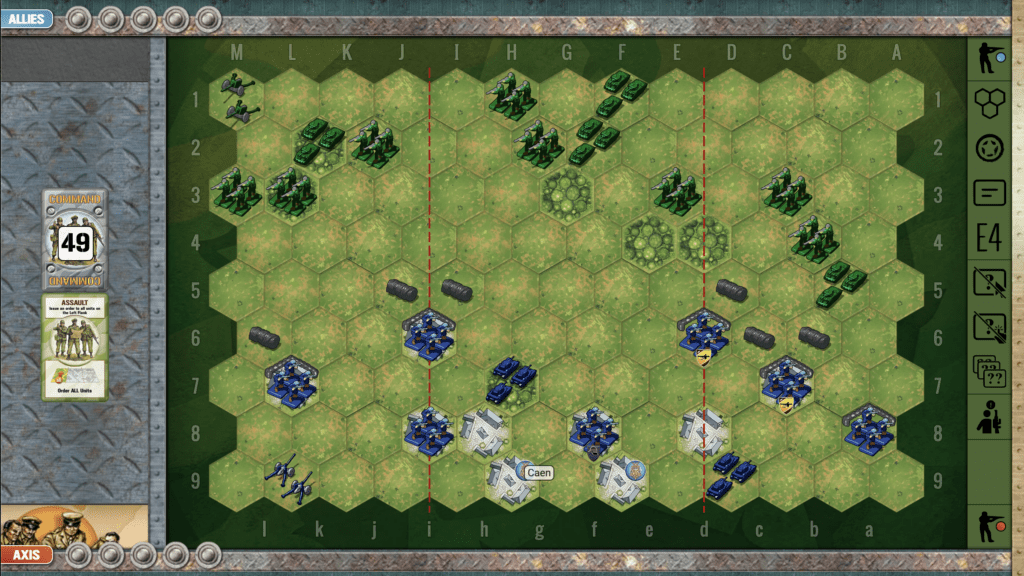
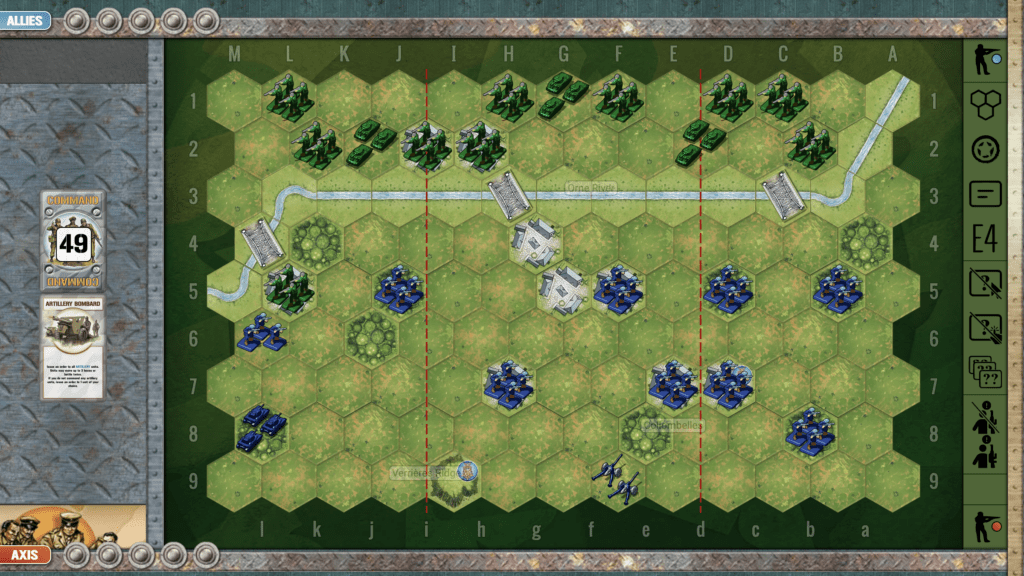
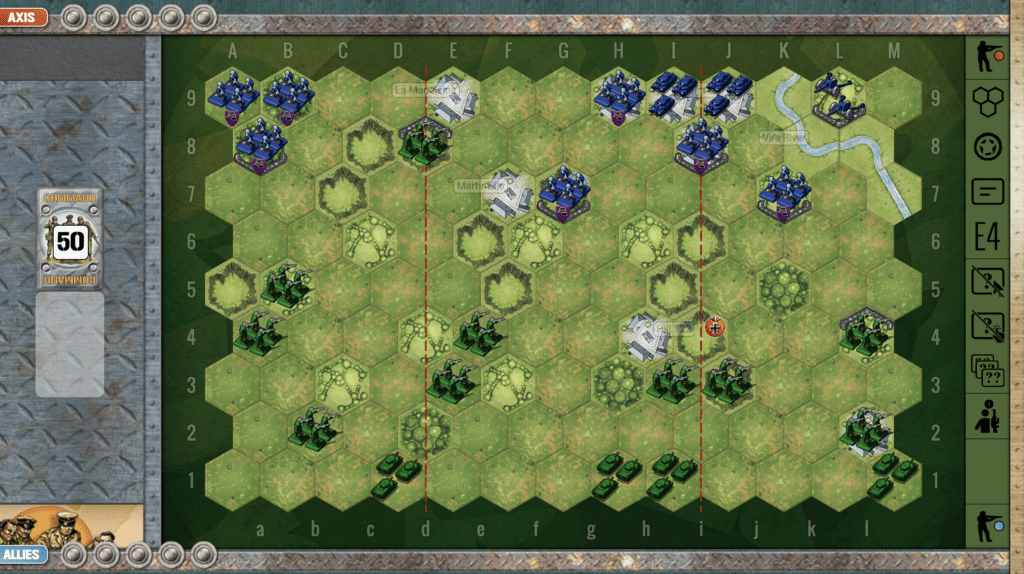
Battlefield:
The terrain is covered with trees scattered across field, with the six hexes of Mount Pincon hugging one border.
Troops:
Allies – 8 Infantry, 4 Armor
Axis – 7 Infantry, 3 Armor

🔥 Winning as Allies
1. Historically, the Allies are on the advance and won this battle. So in this scenario, the Allies have one extra armor, and one more Infantry than the Axis. Use your additional strength to push against the enemy forces and put them under extreme pressure.
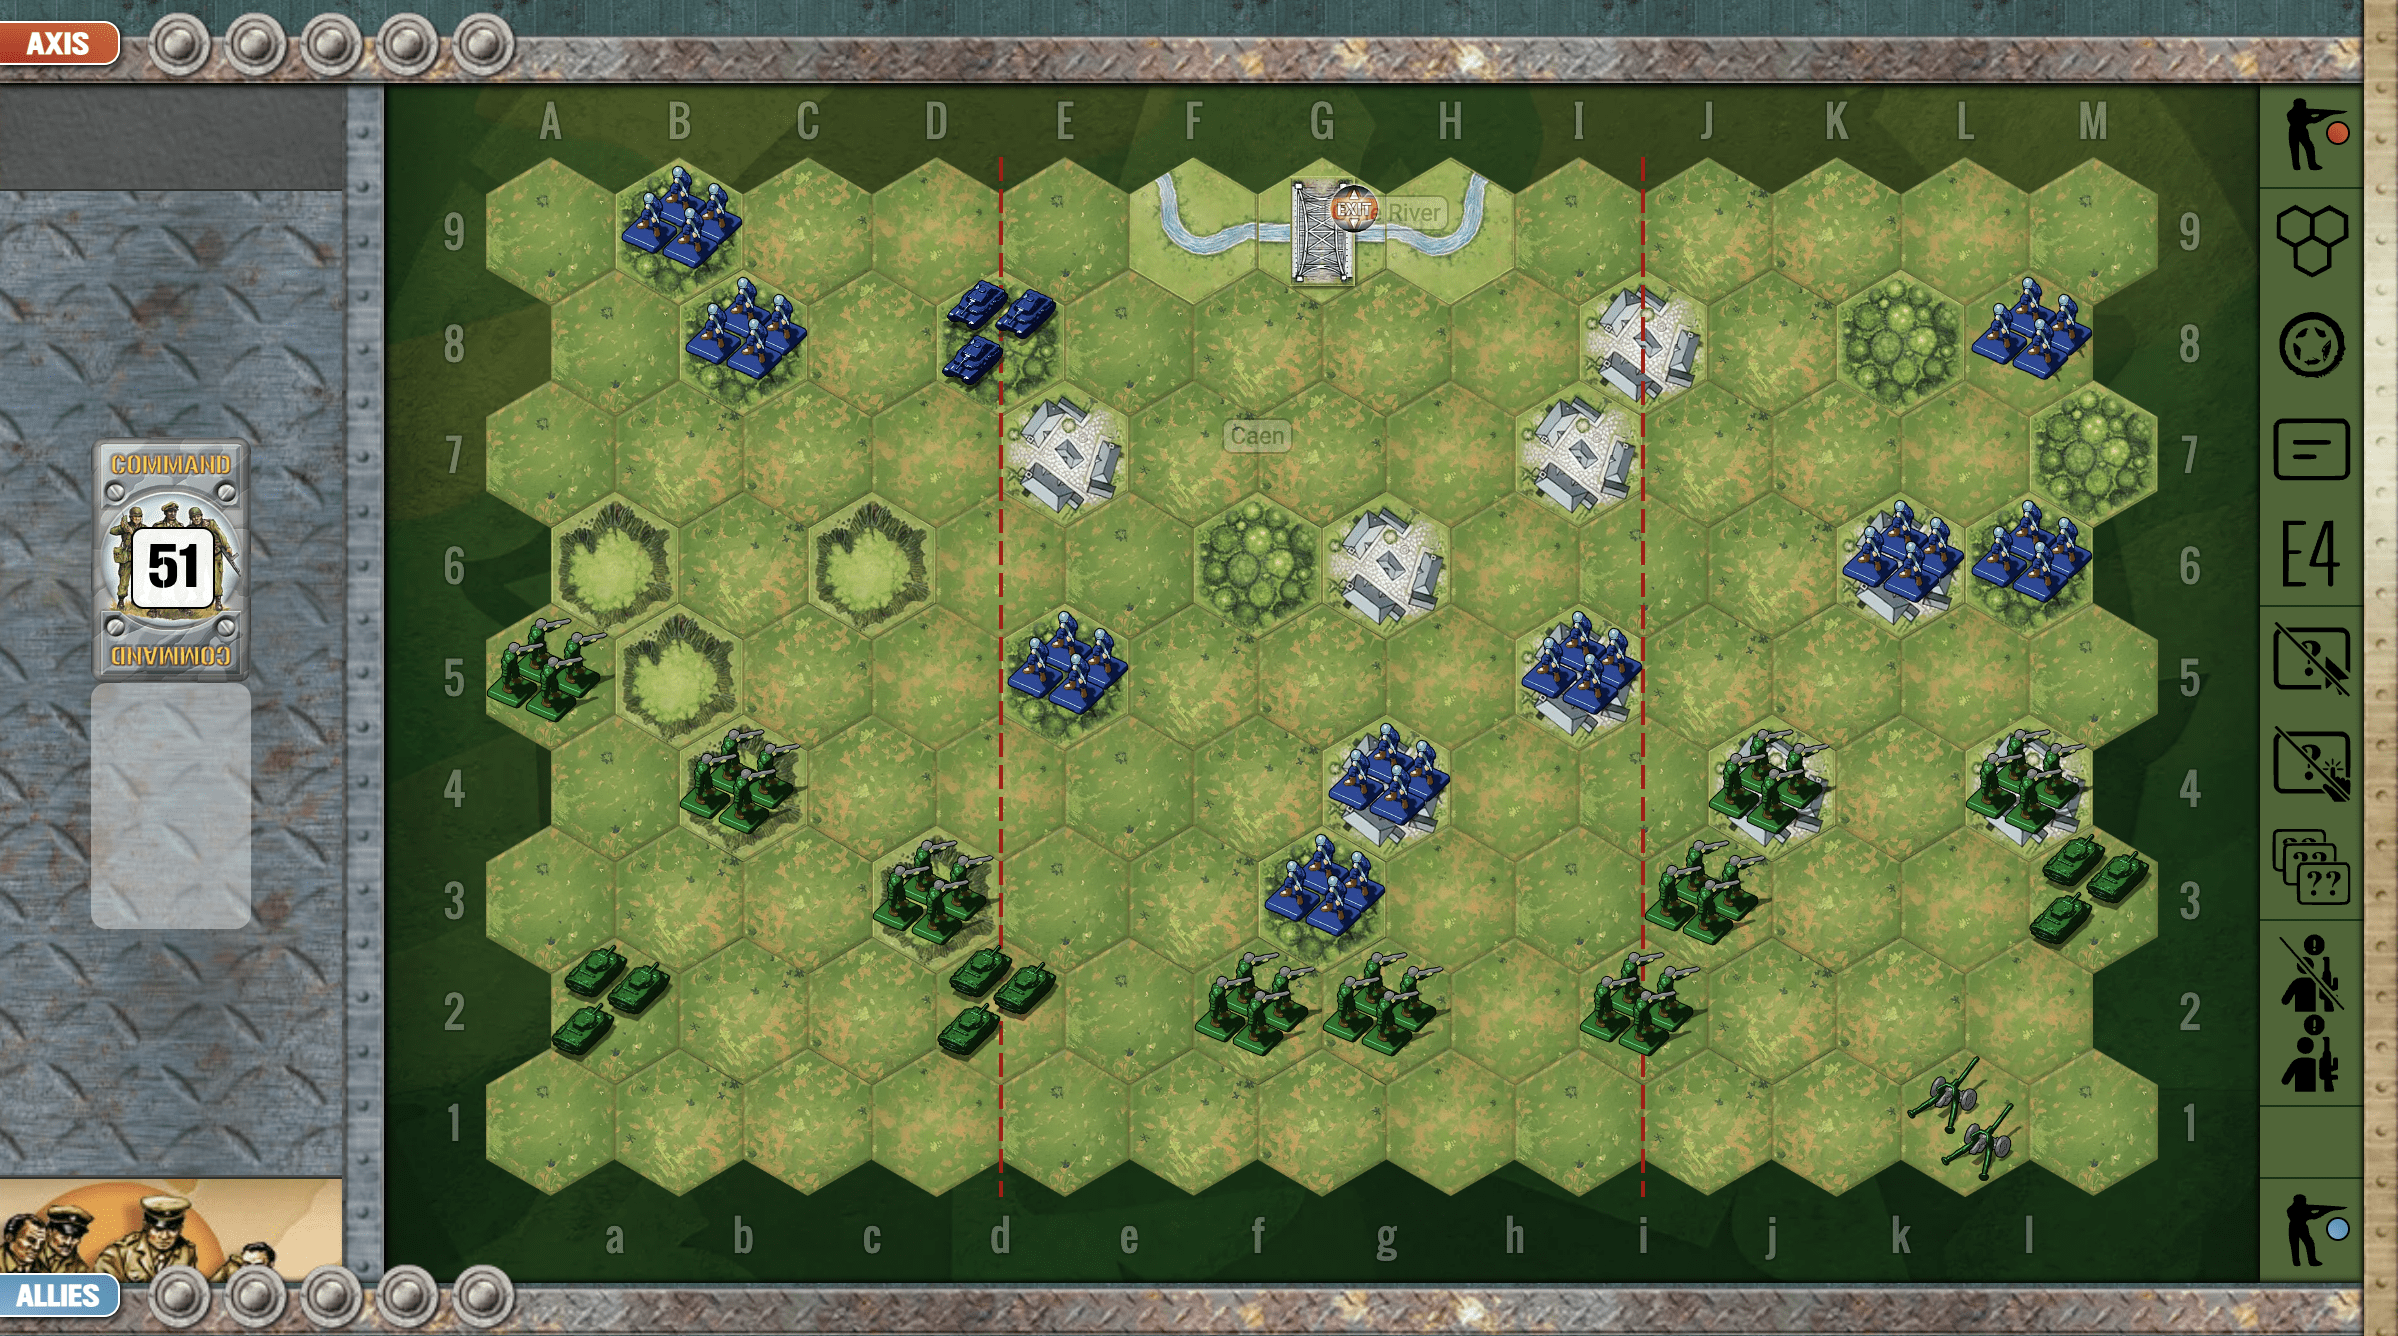
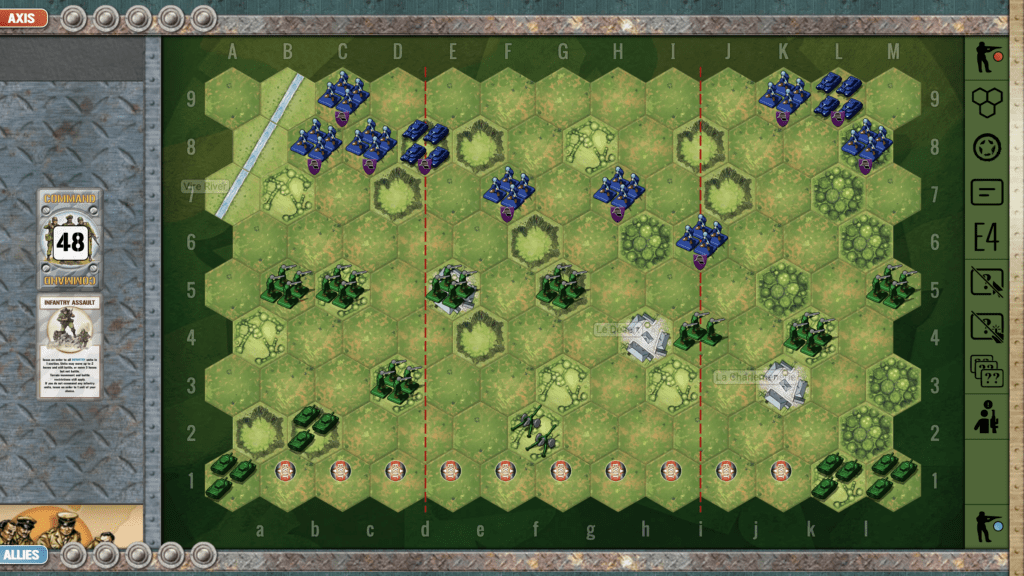
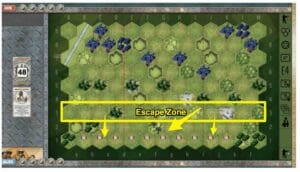
2. Watch the corridor on your right flank. The enemy has three armor in that section, and you need to get into the forest next to it to defend. If they make it past that corridor, they will decimate your infantry forces in the rear.

🔥 Winning as Axis
1. Historically, this is a defensive scenario for the Axis, which is why you begin with one territorial medal already secured, which you must defend. But you can do great damage to the enemy on your left flank with your armor.
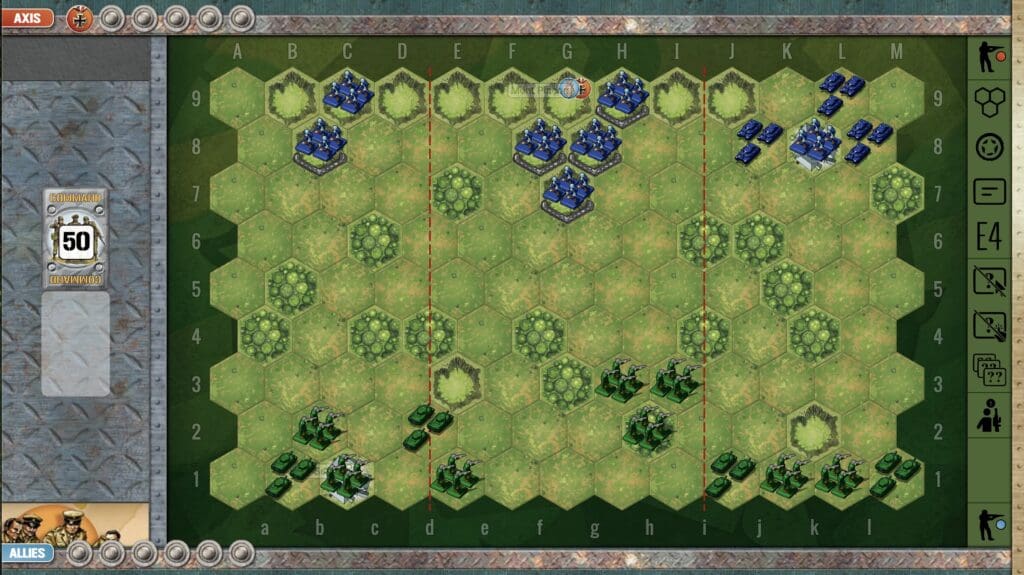
2. Be wary of moving your defensive Infantry in the center section, unless you have a tremendous set of attack cards. You must keep at least two units on the hilltop. If the enemy gets a Behind Enemy Lines card, they could destroy an infantry unit, and then lodge on the hill to get an additional medal, so be careful!
Author:
Days of Wonder
Link: