Martinville Ridge
Martinville Ridge
5 VP’s
![]()
Card Balance:
Allies – 5
Axis – 5
Complexity:
3
Conditions:
Countryside

Context:
Historical
Location:
France
Year:
1944
Theater:
Western Front
Campaign:
Normandy Campaign
Summary:
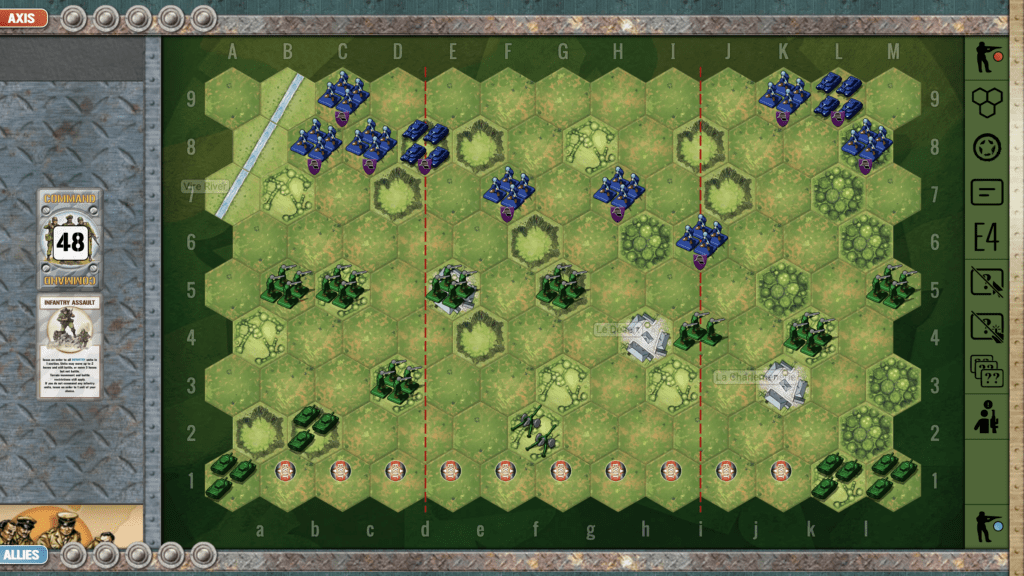
Objectives:
5 VP’s, plus territorial objectives for each side.
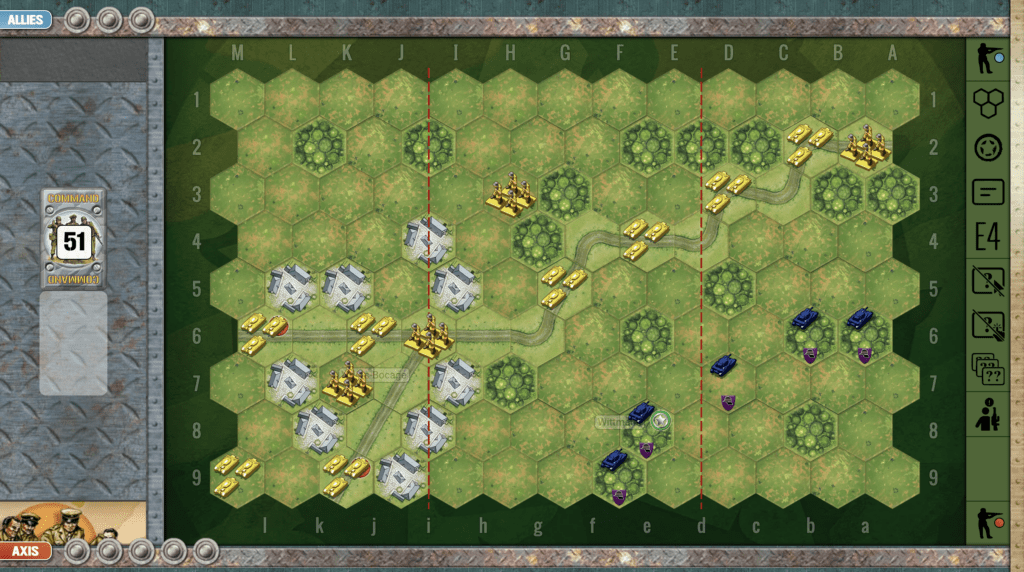
Allies can target St. Lo and the ridge by Martinville. Axis targets Hill 122.
Terrain:
The battlefield is scattered with hills, towns, hedgerows, and forests.
Troops:
Allies – 10 Infantry, 4 Armor
Axis – 7 Infantry, 2 Armor, 1 Artillery

🔥 Winning as Allies
1. Your forces are scattered and in disarray. You need to coordinate them into a cohesive attack force.
2. Be aware that the enemy will quickly mass their forces for an attack against your forward infantry unit at d8. If you can move your left flank Armor up to support it, you may be able to hold the position for a while and inflict some damage on the Axis.
3. Beware the enemy Artillery in the corner of your right flank. Although he is locked in there, he can still roll powerful attacks on that flank. Stay away and nullify any firepower from there.
4. Your strategy should include plans for a continual push up the center in order to bring pressure to bear upon the two Medal Objectives on the hill and in the city of St. Lo.
5. Possible Attack Vector: One attack plan you can pursue is on the left flank. You only need five medals to win, and there are three enemy units up in the corner. If you get a good set of attack cards, such as Infantry Assault you can quickly surround them and take them out.

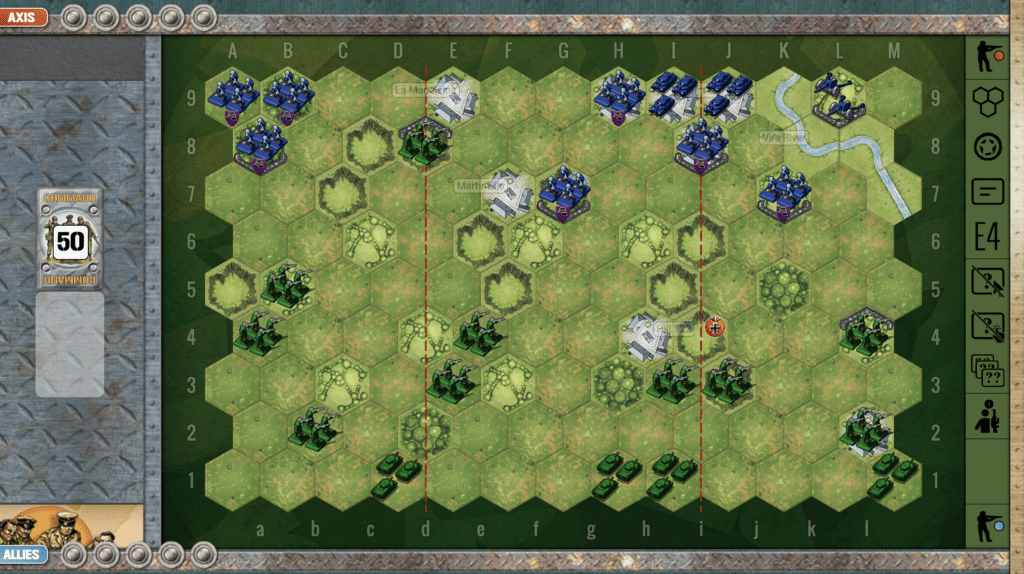
🔥 Winning as Axis
1. Your forces are outnumbered, so you will need to get your armor out of the town into attack positions. You also need to move your infantry from the corner on your right flank and into a more centralized position. An early win for you can be the forward Allied Infantry unit at d8.
2. You have two Territorial Medals to protect. Be aware of the mobility range of their Armor should they push up the center. If you move your units off of those hexes, be certain the enemy cannot sneak in at the end and grab a final medal.
3. The Allies have a Medal Objective waiting for you at ‘i4’ (Hill 122); just go get it! Your Armor, Artillery, and the two Infantry on the left section may be able to provide you with the means to reach it, with the right set of cards.
Author:
Days of Wonder
Link: