Panzer Lehr Counter Attacks
Panzer Lehr Counter-Attacks
5 VP’s
![]()
Card Balance:
Allies – 6
Axis – 5
Complexity:
2
Conditions:
Countryside
Context:
Historical
Location:
France
Year:
1944
Theater:
Western Front
Campaign:
Normandy Campaign
Summary:
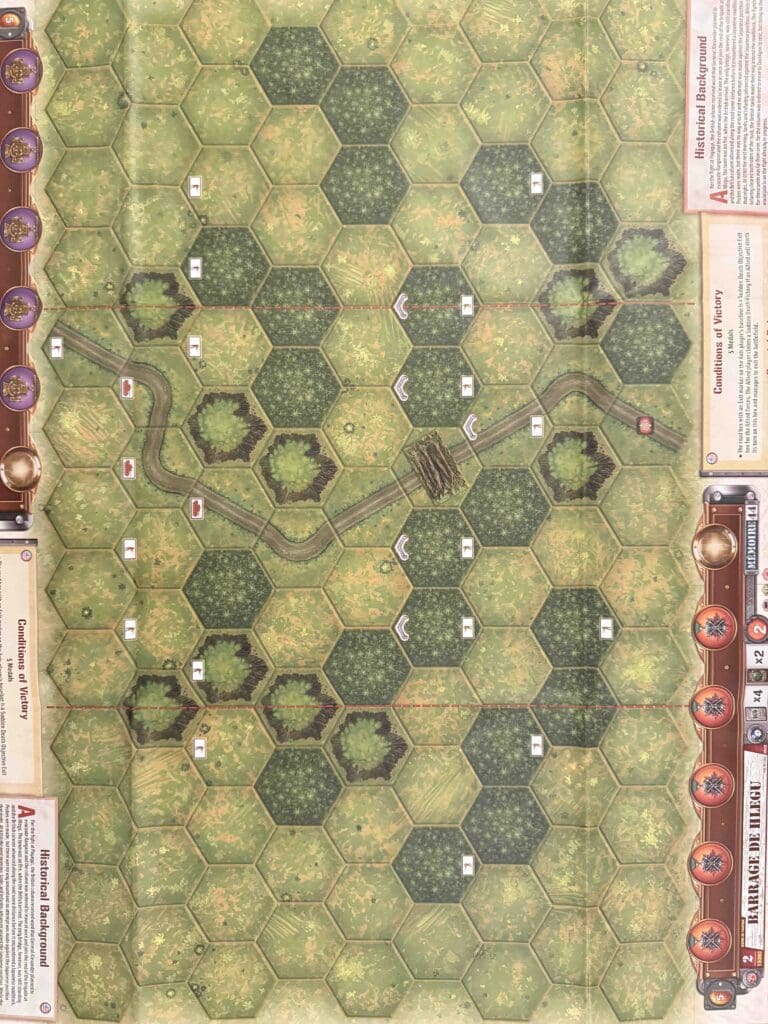
Objectives:
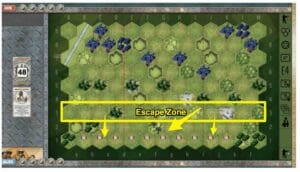
5 VP’s, plus the a exit row medals for the Axis
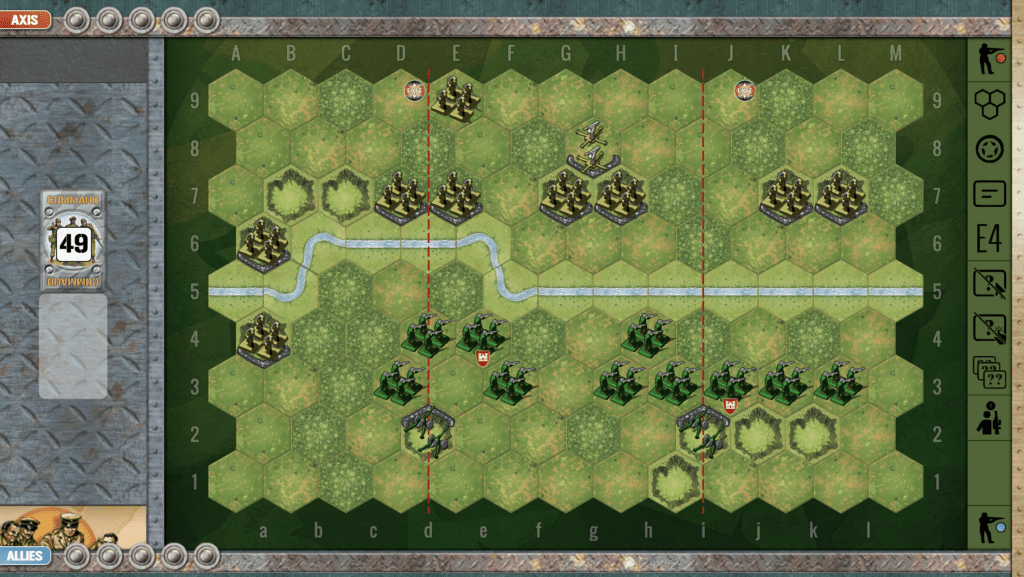
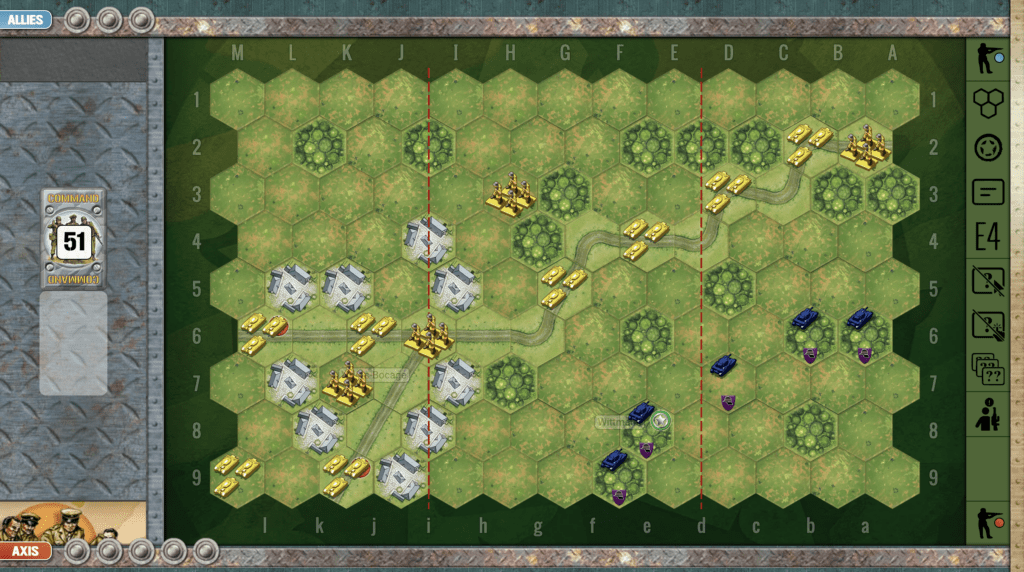
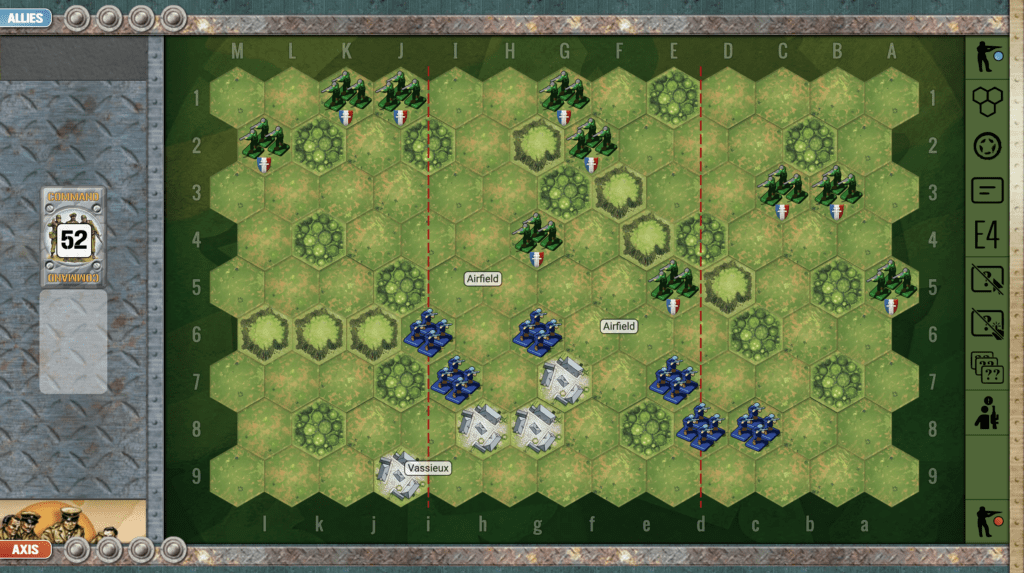
Terrain:
The battlefield is scattered with hills, towns, hedgerows, and forests.
Troops:
Allies – 8 Infantry, 4 Armor, 1 Artillery
Axis – 8 Infantry, 2 Armor

Allied Strategy:
1. You have an Armor superiority, but only if you get your armor that are stuck in the right corner, out into the action. It will take two turns to get them out and mobile.
2. You have an Artillery in the center, protect it, and use it.
3. The Axis forces have a massive row of Exit Hexes, which you need to defend. Do not allow their forces to get an incursion deep into your territory in any section. If any Armor makes it to row three, they can escape the next turn.
4. Make use of your defensive cover hexes, and defend against enemy advancements.

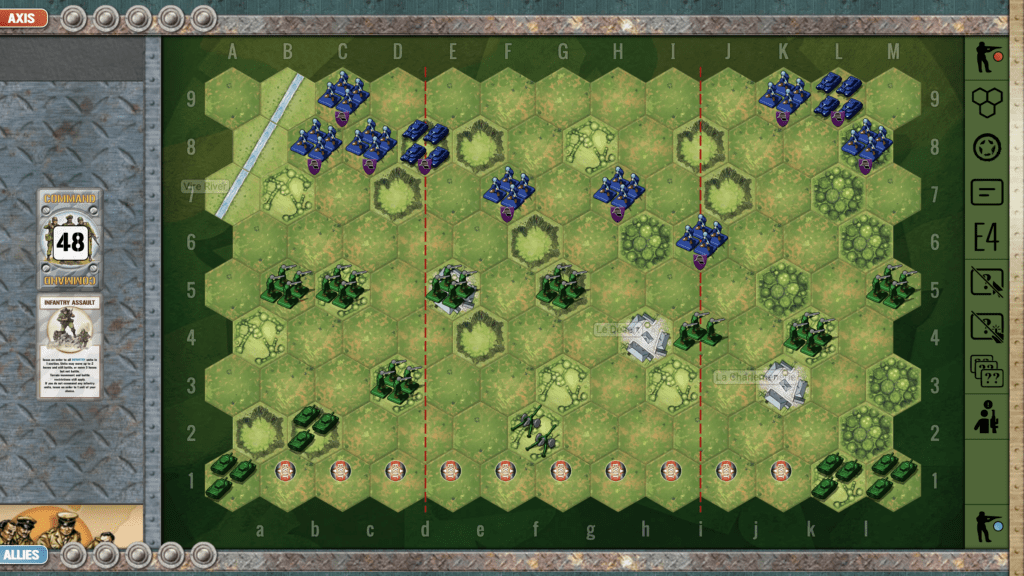
Axis Strategy:
1. Big Picture strategy is that your forces begin in disarray. You need to consolidate your forces, and coordinate your efforts. The Allies begin with control of two-thirds of the battlefield. They are protected by hedgerows, towns, and hills. You will need to develop a strategy to attack those units one by one with concentrated firepower until each one is eliminated.
2. Because there are a row of exit hexes which can provide additional medals for you, you should continue a relentless push deep into the enemy territory. If you can bring in your flank forces toward the center, it will make your forces unstoppable.
Author:
Days of Wonder
Link: