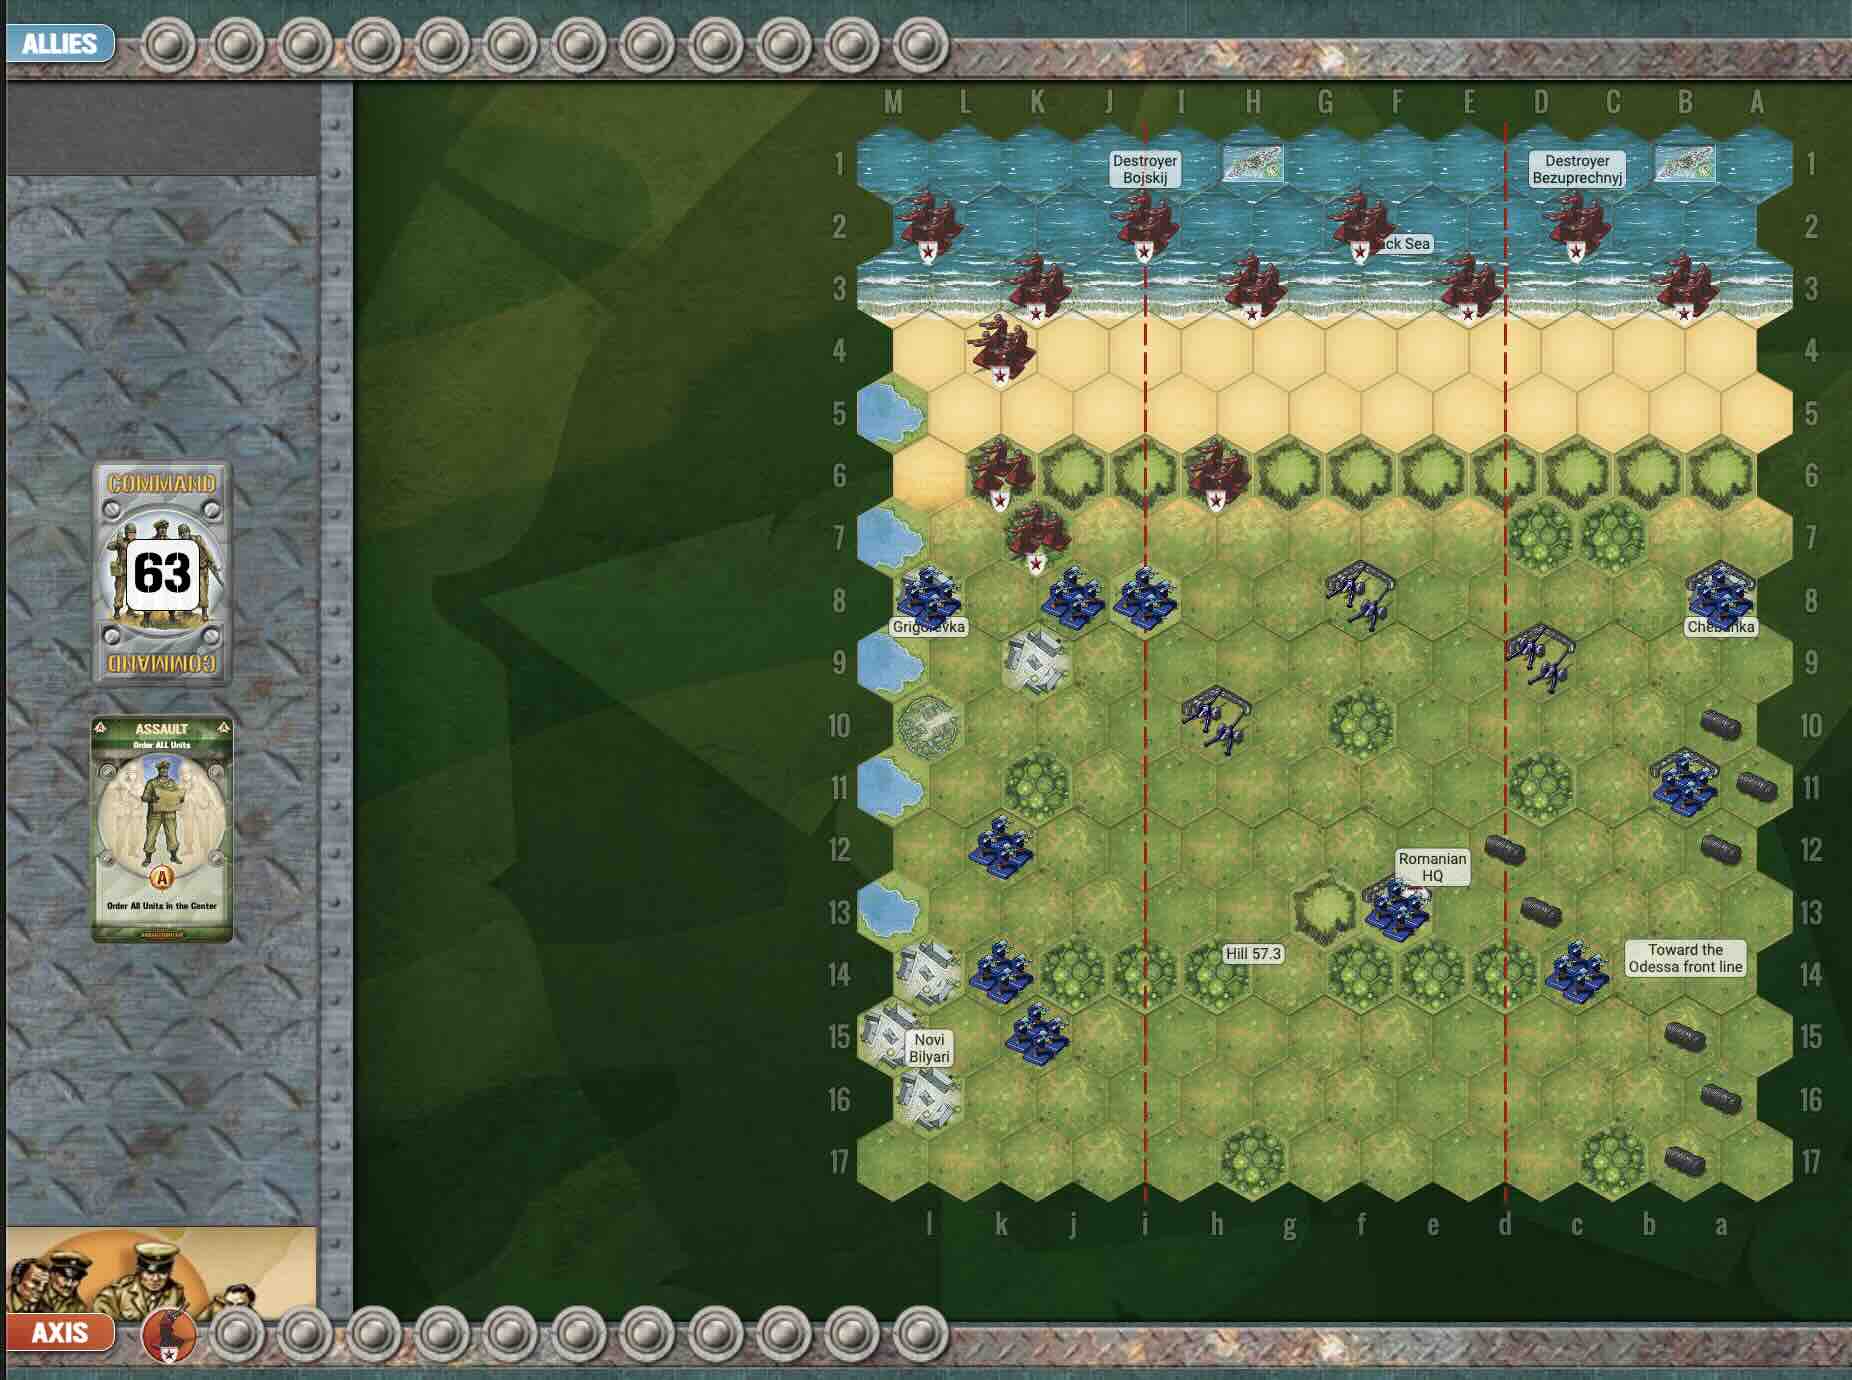
Soviet Raid on Grigorevka


September 1941—Odessa’s under siege, and the Soviets are getting hammered by Romanian artillery. So what do they do? They go on the offensive—hard.
Captain Koren takes the lead at sea with the 3rd Naval Infantry Regiment, nearly 2,000 marines, while a small team of 23 paratroopers drops inland. The plan? Hit ’em from the front and the rear—paralyze their command, cut their lines, and blow those damned guns to hell.
Night of September 21st, the paratroopers jump near Hill 57.3—not clean, not pretty, but they get the job done. Took out a whole Romanian regimental HQ—with two dozen men. Meanwhile, Koren’s marines land at Grigorevka under a curtain of naval fire from the destroyers Bojkij and Bezuprechnyj, and they take those artillery batteries by storm.
By sunrise, they’re linking up with the 421st Rifle Division, and the Romanians? They’re pulling back—the 13th and 15th Divisions, thrown into reverse. That’s pressure off Odessa, and a big black eye for the Axis.
This wasn’t some massive Soviet steamroller. This was initiative, coordination, and guts. A rare joint strike—air, land, and sea—and it worked. Captain Koren didn’t wait to be hit—he hit first.
That’s how you win a war. Not by sitting in the trenches—but by getting out, striking hard, and making the enemy bleed where they thought they were safe.
~~ General Howitzer
12 VP’s
Card Balance:
Allies – 5
Axis – 4
Complexity:
4.5
Conditions:
Countryside

Context:
Historical
Location:
Ukraine
Year:
1941
Theater:
Eastern
Campaign:
Codename:
Summary:
Objectives:
12 VP’s, plus Objective Medals for Allies for the Romanian HQ, and each Artillery battery destroyed.
Battlefield:
Countrsyide and beach in a deep breakthrough battlemap
Troops:
Allies (Soviet Union) – 14 Infantry, 2 Destroyers!
Axis (Romania ) – 10 Infantry, 3 Artillery

🔥 Winning as Allies
1. Soviets, as Allies, do a six unit paradrop. Drop them where you have the best set of cards to assist your attack.
Also, note that the paratroopers will not battle the first turn they are dropped, so they have to endure one round of enemy fire before they can attack.
2. The Axis outnumber you on your right flank at the start of the game, and the three forward units are in strong defensive positions, which suggests attacking elsewhere.
3. As Allies, you have two Destroyers at the start of the game. Two factors affecting their performance are visibility and location.
Visibility: Because of the night visibility rules, the Axis units may have time to move out of range of the ship guns before daylight arrives.
Location: This concerns the ability to get the Destroyers onto the border line so they have more flexibility on which section cards can activate them.
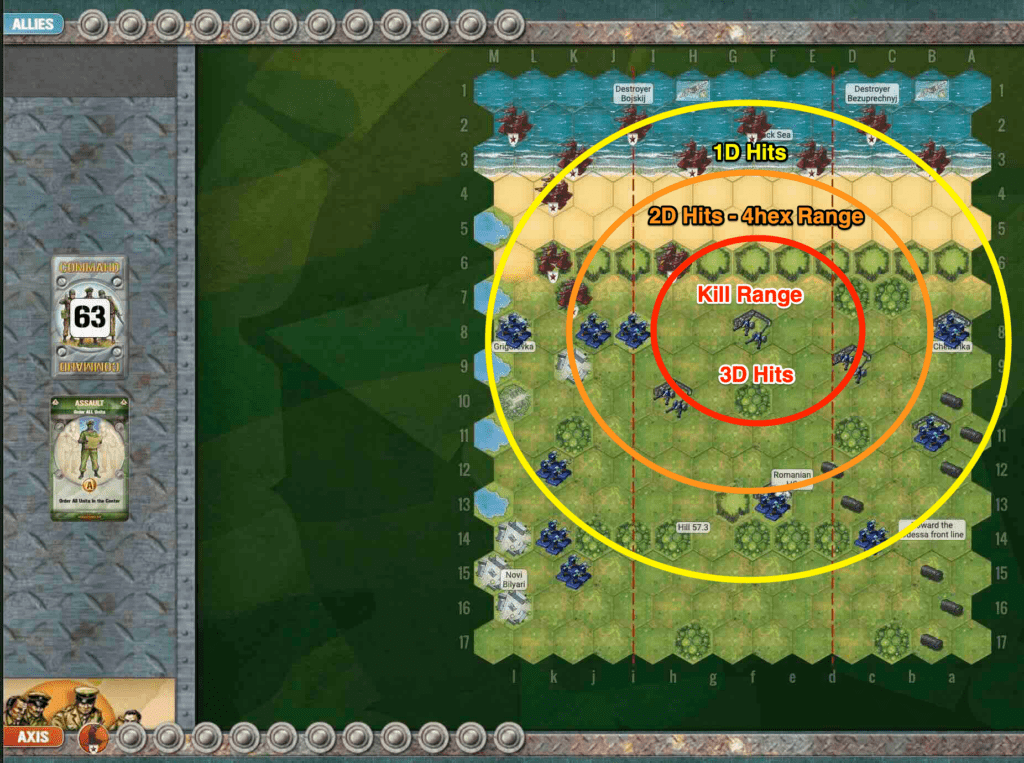
Once daylight arrives the Destroyers have a range of eight hexes, so their maximum firing range is row ten. Of course, that is their maximum range, but their effective firing range (of 2D attacks), is actually row six.
4. There is a Temporary Medal Objective at the Romanian HQ on row 13. If you keep pushing in that direction to keep pressure on the enemy, it should afford you some success.
5. Each of the enemy Artillery is worth two! victory points, so target them when you can.
6. Because the enemy has three very powerfully placed artillery, and you have a lot of artillery, your plan will have to be to so overwhelm the artillery that you are able to take them out with your superior numbers before they take you out with with their superior firepower.
7. Possible Attack Vector: completely by-pass the territory controlled by the enemy Artillery when you do your para-drop. Aim for the back of the battlefield around the Romanian HQ, and the town of Novi Bilvari. There are plenty of Infantry units to take out, while you wait for daylight to arrive, so that your Destroyers can engage with the Artillery batteries.
Big Picture Strategy:
1. This is a Breakthrough game.
The field of battle is very deep. It is more than likely your troops are not going to be placed where they need to be. Therefore, all the section cards which allow you to attack in one section and then move units anywhere, are your friend. In the beginning of the game it is actually as important to make use of cards that might have limited attack power (like 1 or 2), but allow you to move two units around. This will allow you to get them into play.
2. Nightime attack rules.
The game starts in complete darkness, where you can only attack units that are next to you. We know that daylight is definitely an advantage for the Allies, because once you reach full daylight, the power of the Destroyers begins to be felt, as they can reach out to row 10, and pummel you from above. But what about Nightime settings from 2-5? These are actually better for the Axis, as it allows them to use their Artillery and attack at a distance any of the Allied Infantry coming for them. Because the Allied Infantry can move two hexes and still battle, they can very quickly get to the Artillery an overwhelm them. So allowing some range attacks up to 3 hexes away is good for the Axis Artillery forces. (See pic2 above)

🔥 Winning as Axis
1. Your first defensive objective is to respond to wherever the Allied paratroopers happen to land. Respond immediately with available Infantry and Artillery to address the threat.
2. Bring your reserve units into play as soon as you can by moving the rear units forward on the map.
3. Because each Artillery unit is worth two! Medals, you will need to protect them in some way. Either move them back from the Destroyers’ range, or protect them from Infantry attacks by bringing your own Infantry into play.
4. The enemy forces are elite, so they can move two hexes and still attack. So be aware of this so that a single Infantry unit doesn’t get surrounded and destroyed.
5. It is going to take an average of six turns before the daylight arrives and the Destroyers are fully activated to row 10. This will give you time, if you want to, to move your Artillery further back on the battlefield out of their range.
Battle Reports
Author:
Days of Wonder
Link:

