|
|
|
|
|
|
Play Smarter. Strike Harder.
|
|
|
|
|
|
|
|
Memoir '44 News
The GeneralHowitzer.com website has several pages of strategy tips. Here are the sections you can review on the Strategy page:
|
|
|
|
|
Strategy Tips
|
|
Overlapping Fields of Fire
|
Don't you hate it when you have a bunch of units ready to attack, and on the very first roll, you roll a Flag and the unit withdraws out of range of your units, and you have wasted a bunch of potential great dice rolls?!
|
|
There is a way to avoid that.
|
Here are two principles to apply so that you can have a better chance of maximizing your dice.
|
1st - Attack with your units with the lowest dice rolls first.
|
|
Why? Every time you roll a die, there is a one in six chance of rolling a flag.
|
|
If you roll more dice on your first roll the odds of rolling a flag are multiplied by two, three, or four.
|
So rolling one die, while not guaranteeing it, does increase the likelihood that the enemy forces will not retreat, and will have to withstand the additional withering attack of your other unit's dice rolls.
|
2nd - Overlap your fields of fire
|
This is to make sure that if one unit gets either destroyed, or retreat, that there is a secondary target for most of your units.
|
|
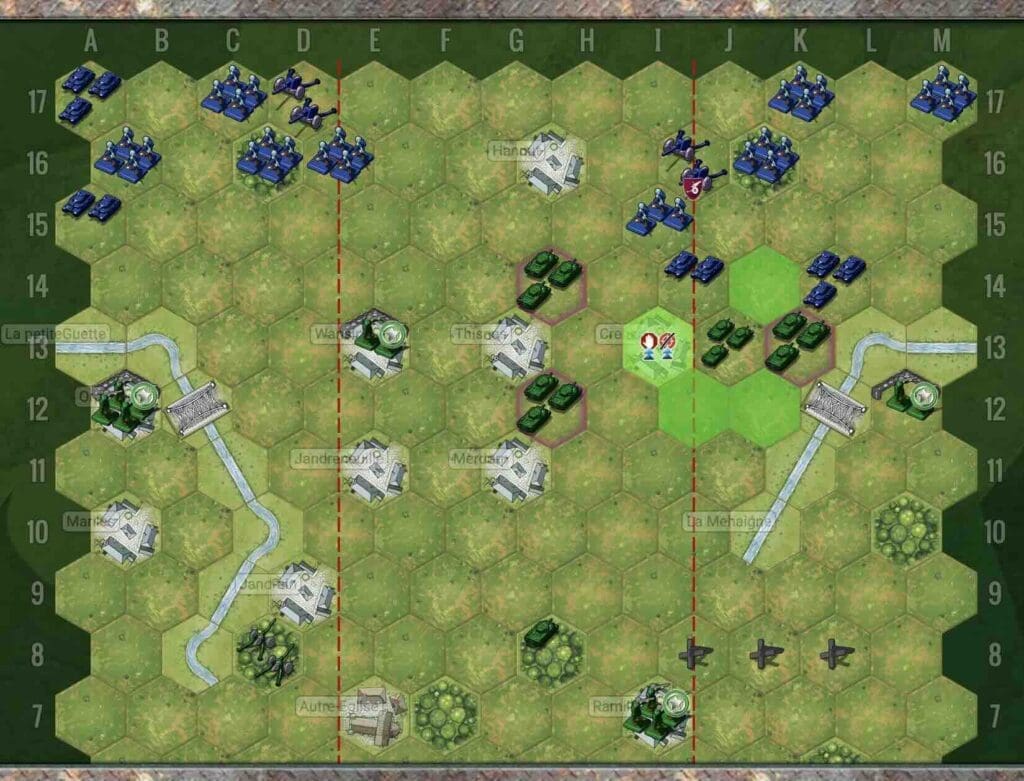
In the example below, you will see that with the Armor Assault card, the Allies have moved three of their four Armor close enough to have multiple targets for each.
|
|
|
|
|
The Axis have made some successful attacks and have pushed their Armor deep into the Allied territory. They are on rows 3 and 4 in their attempt to gain the Territorial Medal prize at L1. But they have over-extended their welcome, and their forces.
|
|
The Allies respond with a devastating General Advance card, and are able to mobilize six units to repel the Axis attack. The first two Infantry units are able to deal revenge to the armor, with successful rolls against each. The next two Artillery rolls, are able to take out one more Armor figure in the unit at F7.
|
|
Finally, two Allied Armor units are able to move to positions f4 and D5, preparing for a final death blow to the now single Armor figure at F7 on the next turn.
|
|
|
|
|
|
|
Lessons from General Howitzer
|
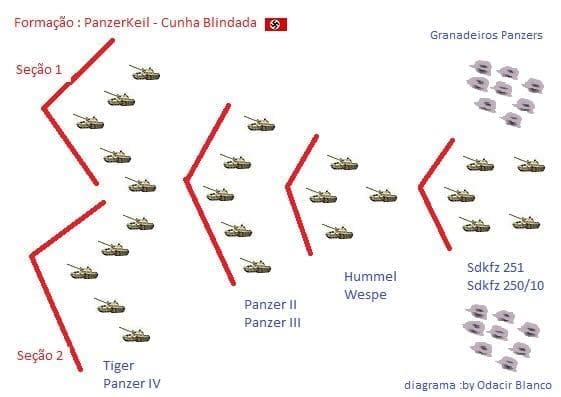
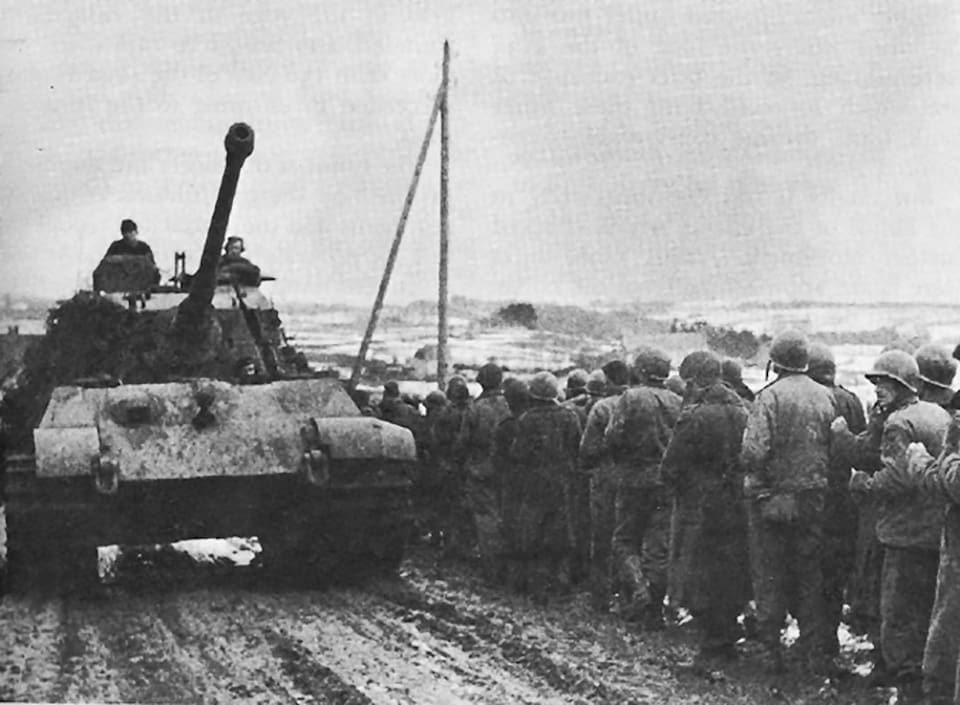
The Panzerkeil Attack Formation
|
The Panzerkeil was a wedge-shaped tank formation used in WW2 with Tigers at the point and lighter Panzer 4's at the sides. Because it used a combination of tank types in its attacks, it was able to take advantage of each unit's powerful features, while mitigating their weaknesses.
|
Most Memoir 44 scenarios make very little distinction between the tank types. After all, when you roll the dice, they still have one grenade and one armor on each one. However, at least one of the scenarios, Villers-Bocage, does pit just 5 German Tigers against 24 Allied tanks and some Infantry.
|
To distinguish the advanced firepower, and defensive strength of the Tigers, it requires two successful dice rolls to destroy them. The first requirement is the standard Tank or Grenade symbol. Once that is achieved, the second roll requires a grenade to eliminate the tank.
|
While the Panzerkeil tactic is not acknowledged in Memoir 44 gameplay, Villers-Bocage does offer the excitement of pitting one tank's strength against another's in unique ways. If you haven't tried it, check out the scenario as described in GeneralHowtzer.com / Scenarios / Villers-Bocage.
|
|
See the picture. (Wikipedia; Odacir Blanco - Own work; The Panzerkeil (Armoured Wedge)´- Ofensive Tatics )
|
|
|
|
|
|
|
|
Recent Updates to the General Howitzer Community
|
|
|
Battle at Ak Monai
|
|
6 VP'sCard Balance: Allies (Soviet Union) - 6 Axis (Germany) - 4Complexity: 2Conditions: Countryside Context: HistoricalLocation: CrimeaYear: 1941Theater: EasternCampaign: Codename: Summary: Objectives: 6 VP's Battlefield: Open countryside with trees Troops: Allies - Axis - Special Rules: Allied Strategy: Axis Strategy: Author: Link:
|
|
|
|
|
|
|
|
Capture of Foy
|
|
By January 1945, the Germans were battered but still fighting. Holding Foy was their last attempt to cling to the Ardennes. The men of the 101st Airborne, hardened by weeks of cold, shellfire, and misery in the woods of Bois Jacques, were ready to finish the job. On January 13th, those paratroopers charged across open snow under enemy fire and …
|
|
|
|
|
|
|
|
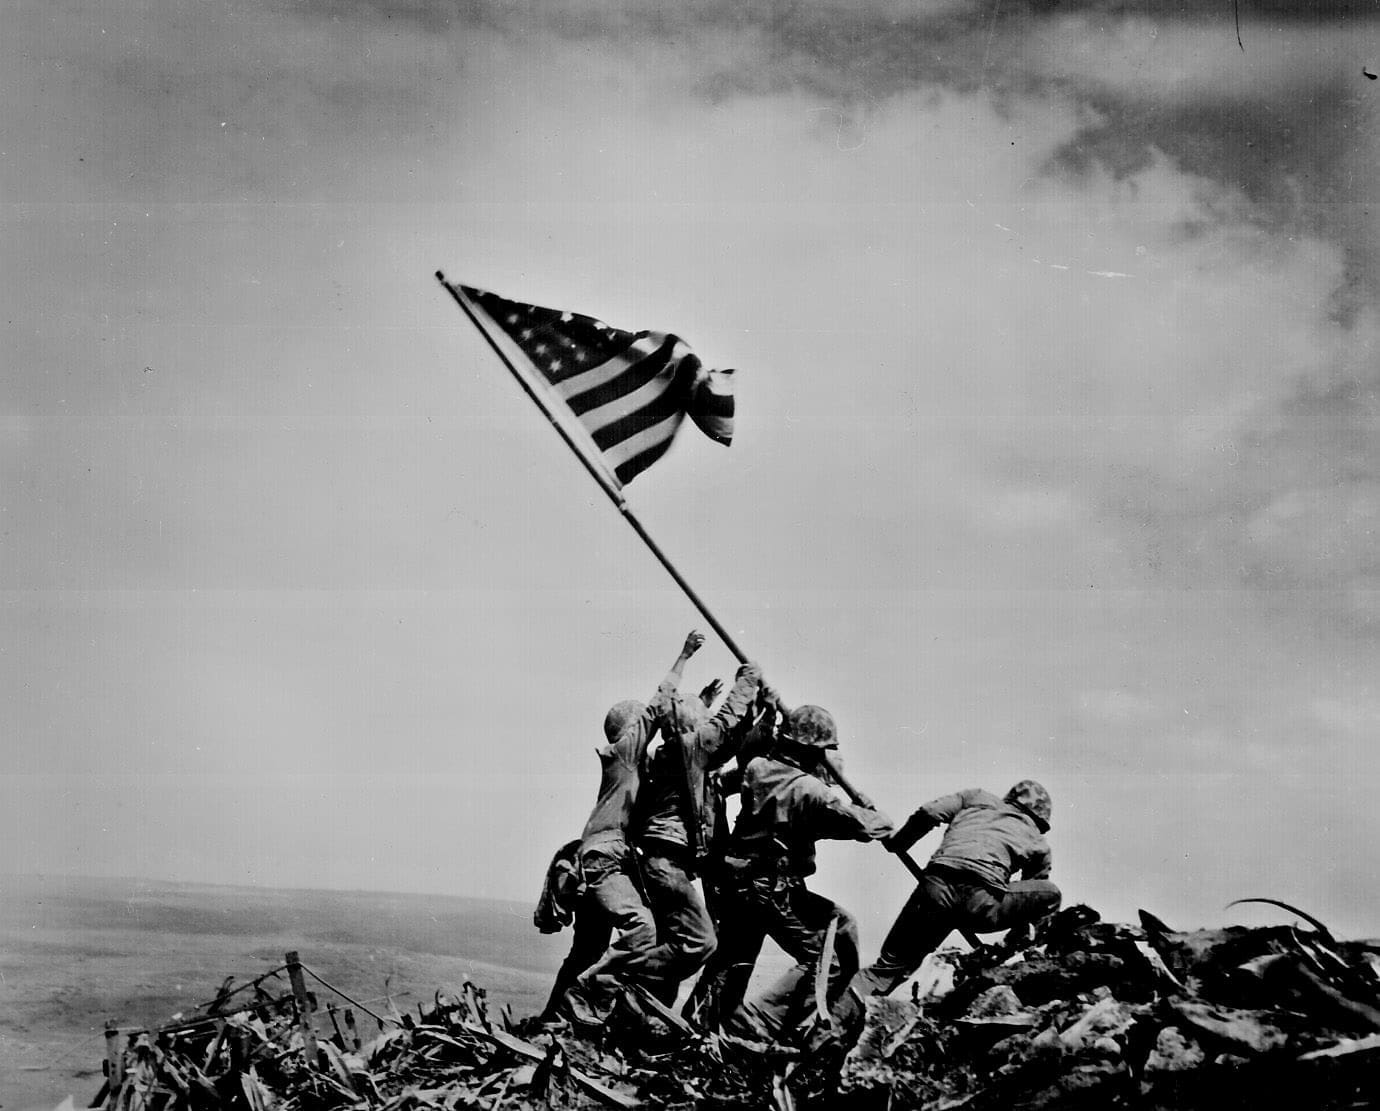
Okinawa Hacksaw Ridge
|
|
7 VP'sCard Balance: Allies - 6 Axis - 4Complexity: 4Conditions: Jungle Context: Location: OkinawaYear: Theater: PacificSummary: Objectives: 7 VP's There is one Medal Objective for the Allies, the Axis HQ. There is also an Exit Hex for the Allies which will result in one VP for every Allied unit that escapes. Battlefield: Jungle with a severe ridge and hills with …
|
|
|
|
|
|
|
|
Keep track of wins & losses for Axis vs. Allies in each scenario!
|
|
|
|
|
Battlefield & Strategy Tips
|
|
|
|
|
Events, Sitelinks, & Resources
|
|
|
|
|
|
|
Upcoming Memoir 44 EVENTS!
|
UK Open
October 4-5, 2025, London
|
|
|
|
|
|
|
|
|
|
|
|