|
|
|
|
The Command Card
December 3, 2025
|
|
|
Play Smarter. Strike Harder.
|
|
|
|
|
|
|
|
Memoir '44 News
Track those Win-Loss Percentages!
|
Reminder that we are tracking Win-Loss Percentages for lots of scenarios, especially those available through Board Game Arena.
|
So you will be able to look at any scenario and get a good idea of what kind of a fight it is going to be for either side.
|
|
When you finish a game, win or lose, head over to the Scenarios at General Howitzer, and record whether the Allies or Axis won it.
|
Even if you lost, record who won it.
|
Location is here: https://generalhowitzer.com/scenarios-post-tables/
|
|
|
|
|
|
STRATEGY & TACTICS
|
Scenario Study: Arnhem Bridge
|
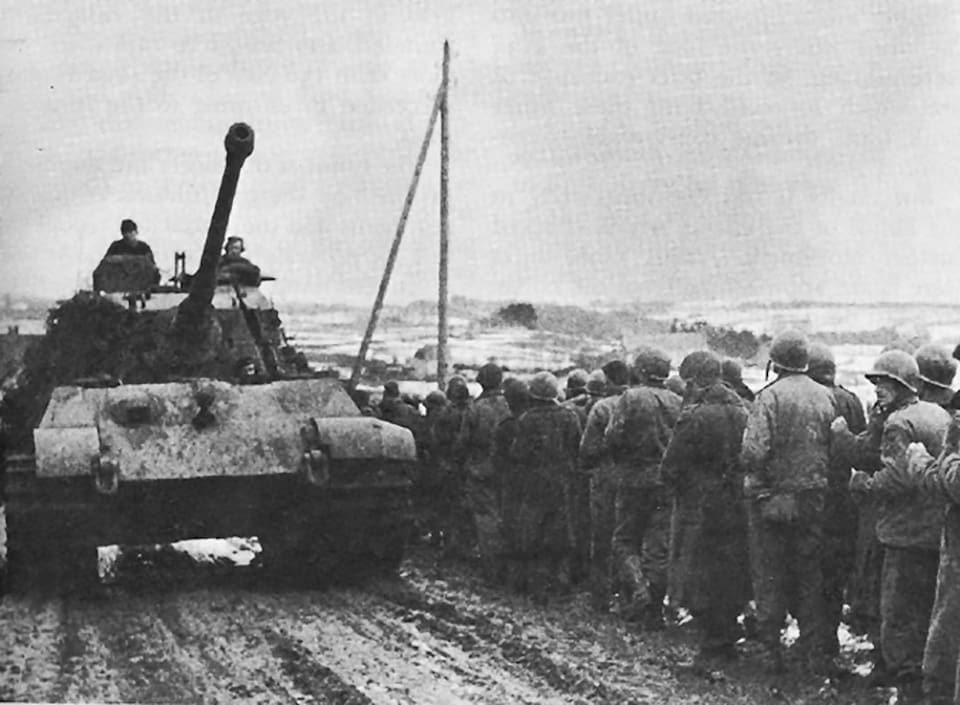
Arnhem Bridge was no Sunday stroll — it was a fight for the throat of Germany. Market Garden was a bold gamble, a thrust straight through Holland to end the war by Christmas. The plan was simple: grab those bridges, roll our armor across, and cut into the Reich’s belly.
|
But Arnhem was the lynchpin, the prize. The British Red Devils dropped in with guts and steel, holding that bridge like bulldogs against tanks, artillery, and everything the Germans could throw at them. For days they fought, house to house, street to street, under constant fire. Outnumbered, outgunned, and cut off, they refused to quit.
|
In the end, the bridge could not be held, and the operation fell short of its lofty goal. But don’t mistake it for failure — Arnhem showed the world the courage of men who held their ground against impossible odds. They didn’t just fight for a bridge; they fought for honor, and you know what? They earned it.
|
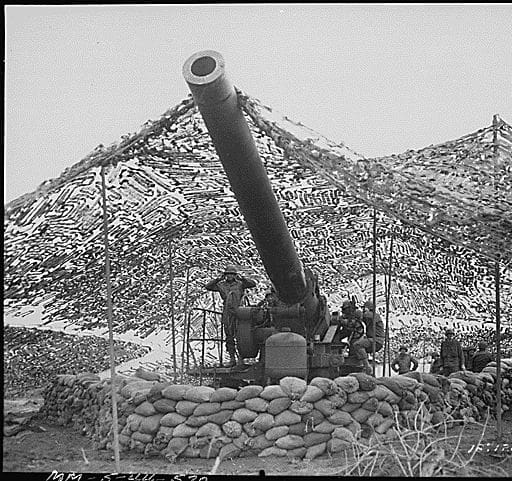
1. Your artillery will be your most powerful defensive protection in this scenario. Use your center Section cards to keep pounding the enemy. Make sure that you always keep at least one central section card in reserve, should the enemy try to make a run across the bridge.
|
2. When you are not defending against a bridge run in the center, use your long-range artillery to slowly degrade the forces on each wing. Because if they come at you with full force, you will have a difficult time holding them off.
|
3. Do your best to keep your infantry safely behind the sandbags until you are totally ready to come out for an attack. Although your most forward infantry can become easy prey to the enemy still behind the river, so if you can move that infantry back towards your side of the battlefield, do so. That will provide you with one extra infantry force to attack the enemy in the flanks.
|
1. The main problem: Axis must get out from behind the river blockade, by crossing the Arnhem bridge without being destroyed, once across.
|
2. Flank Attacks: The extra infantry in each corner can be used to maximum advantage to clear out the enemy, or at least distract them, while you cross the bridge. But you will need to wait until you have the right combination of cards to be able to launch an attack from one of the flanks.
|
3. Do not rush it: while you remain on the far side of Arnhem Bridge you are generally safe from enemy attacks unless they get an extraordinary collection of Combat cards. The principle mistake made by Axis is to rush out too quickly across the bridge and then to get slaughtered in the kill box which awaits you across the Arnhem Bridge. So take your time to assemble your forces, and move extra troops into the central section, ready to cross the bridge.
|
4. With the right combination of cards, you can begin an attack on one (or both!) flanks, while you attempt to cross the bridge. The goal is to distract the enemy, and force them to divide their defensive energies so that your forces can cross the bridge successfully.
|
|

|
|
|
|
|
|
From General Howitzer:
Arnhem Bridge: Lessons Learned
|
During World War 2, the bridge in question was the Rhine Bridge (also known as the Rijnbrug) in Arnhem, Netherlands. This bridge was the target of a major battle during Operation Market Garden in September 1944, when British paratroopers attempted to capture it. After the war, a new bridge at the same location was built and named the John Frost Bridge in honor of the British commander who fought at the bridge during the battle.
|
Arnhem was a thorough lesson in how not to fight a war. Here are the big mistakes, plain and simple:
|
Overreach – The whole plan depended on every step working like clockwork. Arnhem was too far, and we asked too much of lightly armed paratroopers.
|
Bad Intelligence – We ignored the reports of SS Panzer divisions in the area and assumed the Germans were beaten. That arrogance cost us.
|
Drop Zone Blunder – Instead of landing on top of the objective, we dropped miles away, wasting time and strength just to reach the bridge.
|
Slow Relief – XXX Corps crawled up a single road, bogged down by counterattacks and blown bridges. The airborne boys held out, but they were left high and dry.
|
Broken Communications – Radios failed, messages didn’t get through, and units fought blind. Without coordination, the whole thing unraveled.
|
|
Arnhem wasn’t just a setback—it was proof that boldness without preparation is suicide. You can’t gamble lives on hope and call it strategy.
|
|
|
|
|
|
|
|
|
Recent Updates to the General Howitzer Community
|
|
|
Battle at Ak Monai
|
|
6 VP'sCard Balance: Allies (Soviet Union) - 6 Axis (Germany) - 4Complexity: 2Conditions: Countryside Context: HistoricalLocation: CrimeaYear: 1941Theater: EasternCampaign: Codename: Summary: Objectives: 6 VP's Battlefield: Open countryside with trees Troops: Allies - Axis - Special Rules: Allied Strategy: Axis Strategy: Author: Link:
|
|
|
|
|
|
|
|
Capture of Foy
|
|
By January 1945, the Germans were battered but still fighting. Holding Foy was their last attempt to cling to the Ardennes. The men of the 101st Airborne, hardened by weeks of cold, shellfire, and misery in the woods of Bois Jacques, were ready to finish the job. On January 13th, those paratroopers charged across open snow under enemy fire and …
|
|
|
|
|
|
|
|
Okinawa Hacksaw Ridge
|
|
7 VP'sCard Balance: Allies - 6 Axis - 4Complexity: 4Conditions: Jungle Context: Location: OkinawaYear: Theater: PacificSummary: Objectives: 7 VP's There is one Medal Objective for the Allies, the Axis HQ. There is also an Exit Hex for the Allies which will result in one VP for every Allied unit that escapes. Battlefield: Jungle with a severe ridge and hills with …
|
|
|
|
|
|
Field Manual 4T: Terrain Pack Scenarios
|
|
|
Battlefield guides for all 8 Eastern Front Game Scenarios from Memoir 44.
|
$4.99
|
|
|
|
|
Scenario Field Guide: Schwammenauel Dam
|
|
|
|
|
|
|
Scenario Field Guide: Across the River Roer
|
|
|
|
|
|
|
Keep track of wins & losses for Axis vs. Allies in each scenario!
|
|
|
|
|
Battlefield & Strategy Tips
|
|
|
|
|
Events, Sitelinks, & Resources
|
|
|
|
|
|
|
Upcoming Memoir 44 EVENTS!
|
Dutch Open
February 21-22, 2026, Klundert, Netherlands
|
|
|
|
|
|
|
|
|
|
|
|